How to Apply I Tip Hair Extensions: Complete Step-by-Step Guide for Beginners and Professionals

I tip hair extensions have become one of the most popular semi-permanent hair extension methods in the beauty industry. Known for their natural appearance, flexibility, and reusable design, I tip extensions are widely used by salons, hairstylists, influencers, and everyday users who want longer, fuller, and more voluminous hair without glue or heat.

However, properly applying I tip hair extensions requires more than simply attaching strands to natural hair. Incorrect installation can lead to tangling, discomfort, visible bonds, poor blending, or even hair breakage. A professional-quality installation depends on understanding not only how to apply I tip extensions, but also why each step matters and what mistakes to avoid.

In this detailed guide, we will explain exactly how to apply I tip hair extensions step by step, including preparation, sectioning, bead placement, installation techniques, blending methods, maintenance tips, and common mistakes. Whether you are a beginner learning at home or a professional stylist improving your skills, this guide will help you achieve cleaner, safer, and more natural-looking results.

What Are I Tip Hair Extensions?

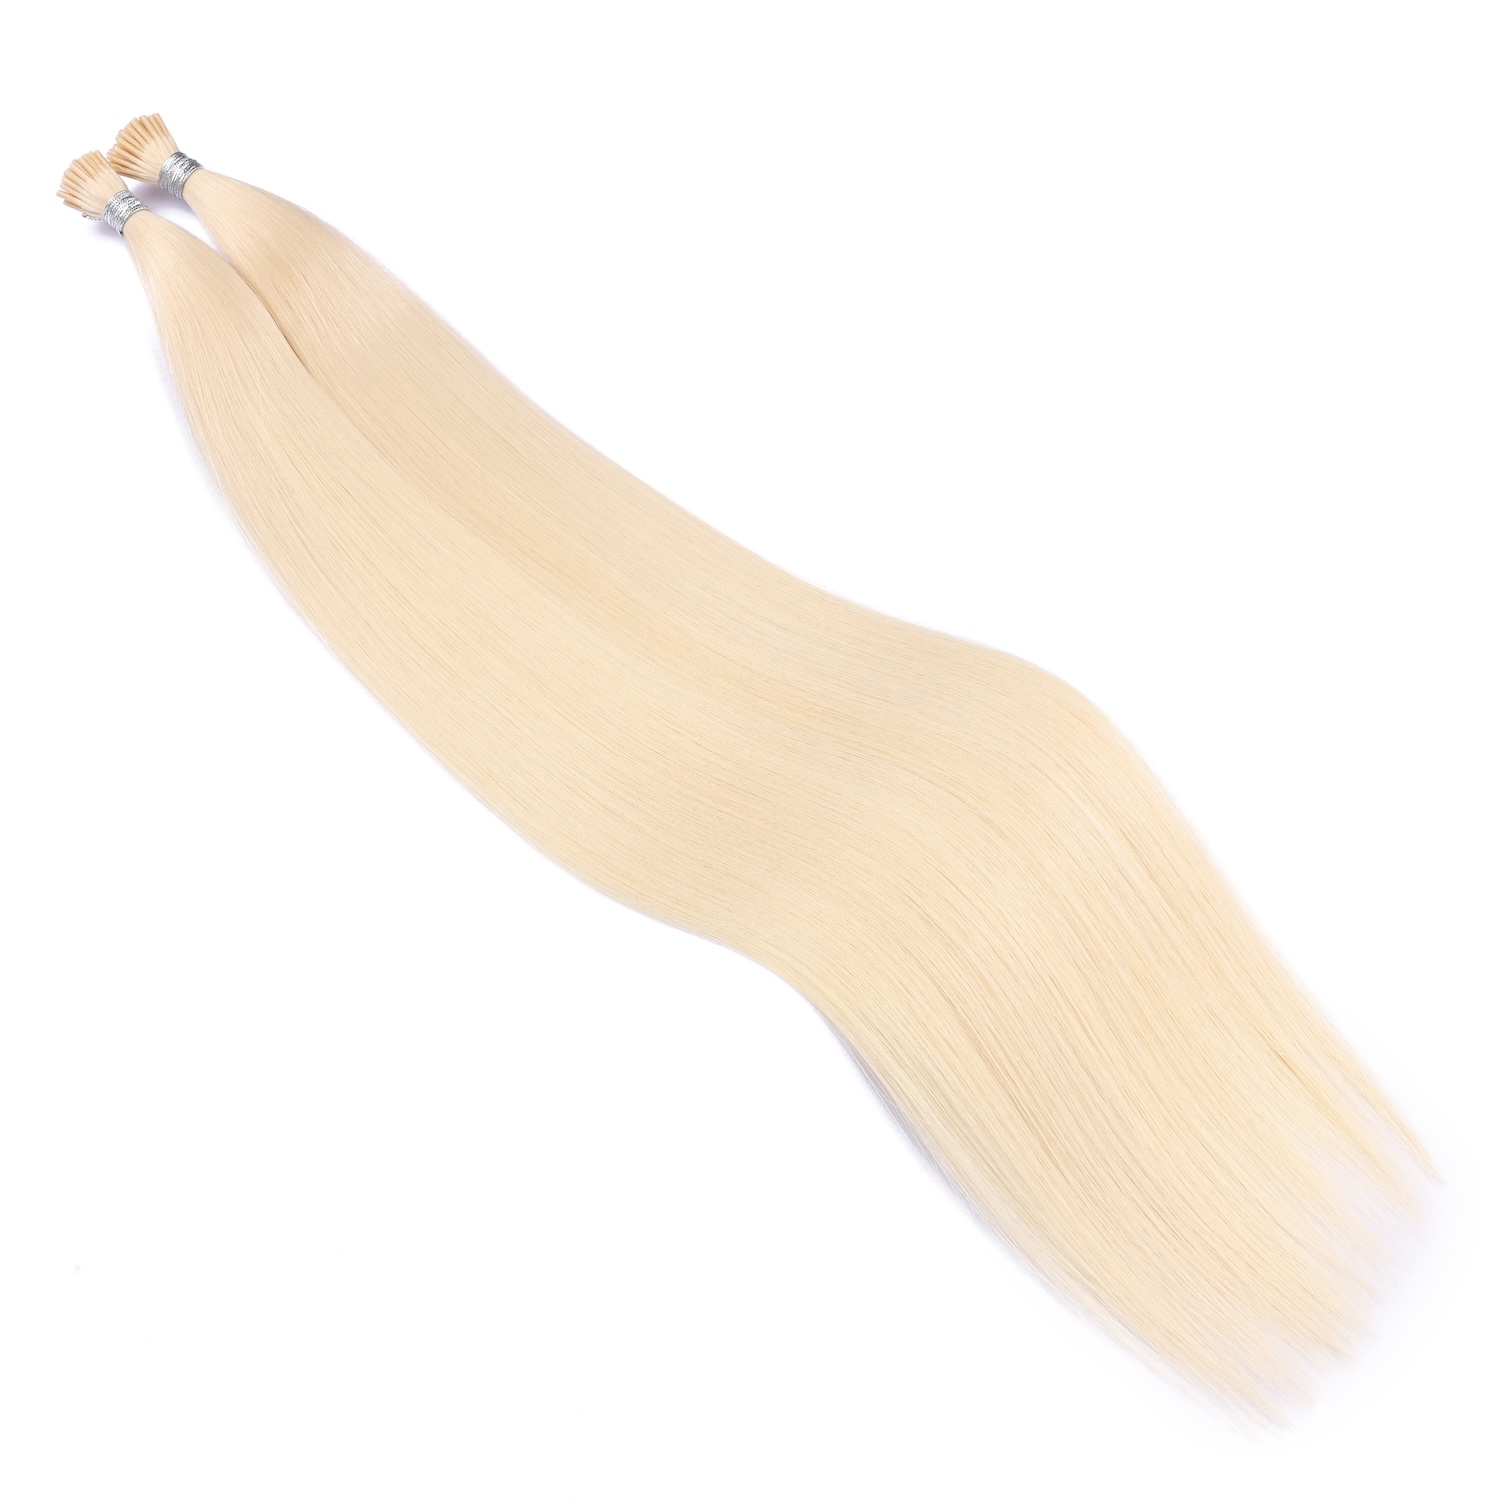
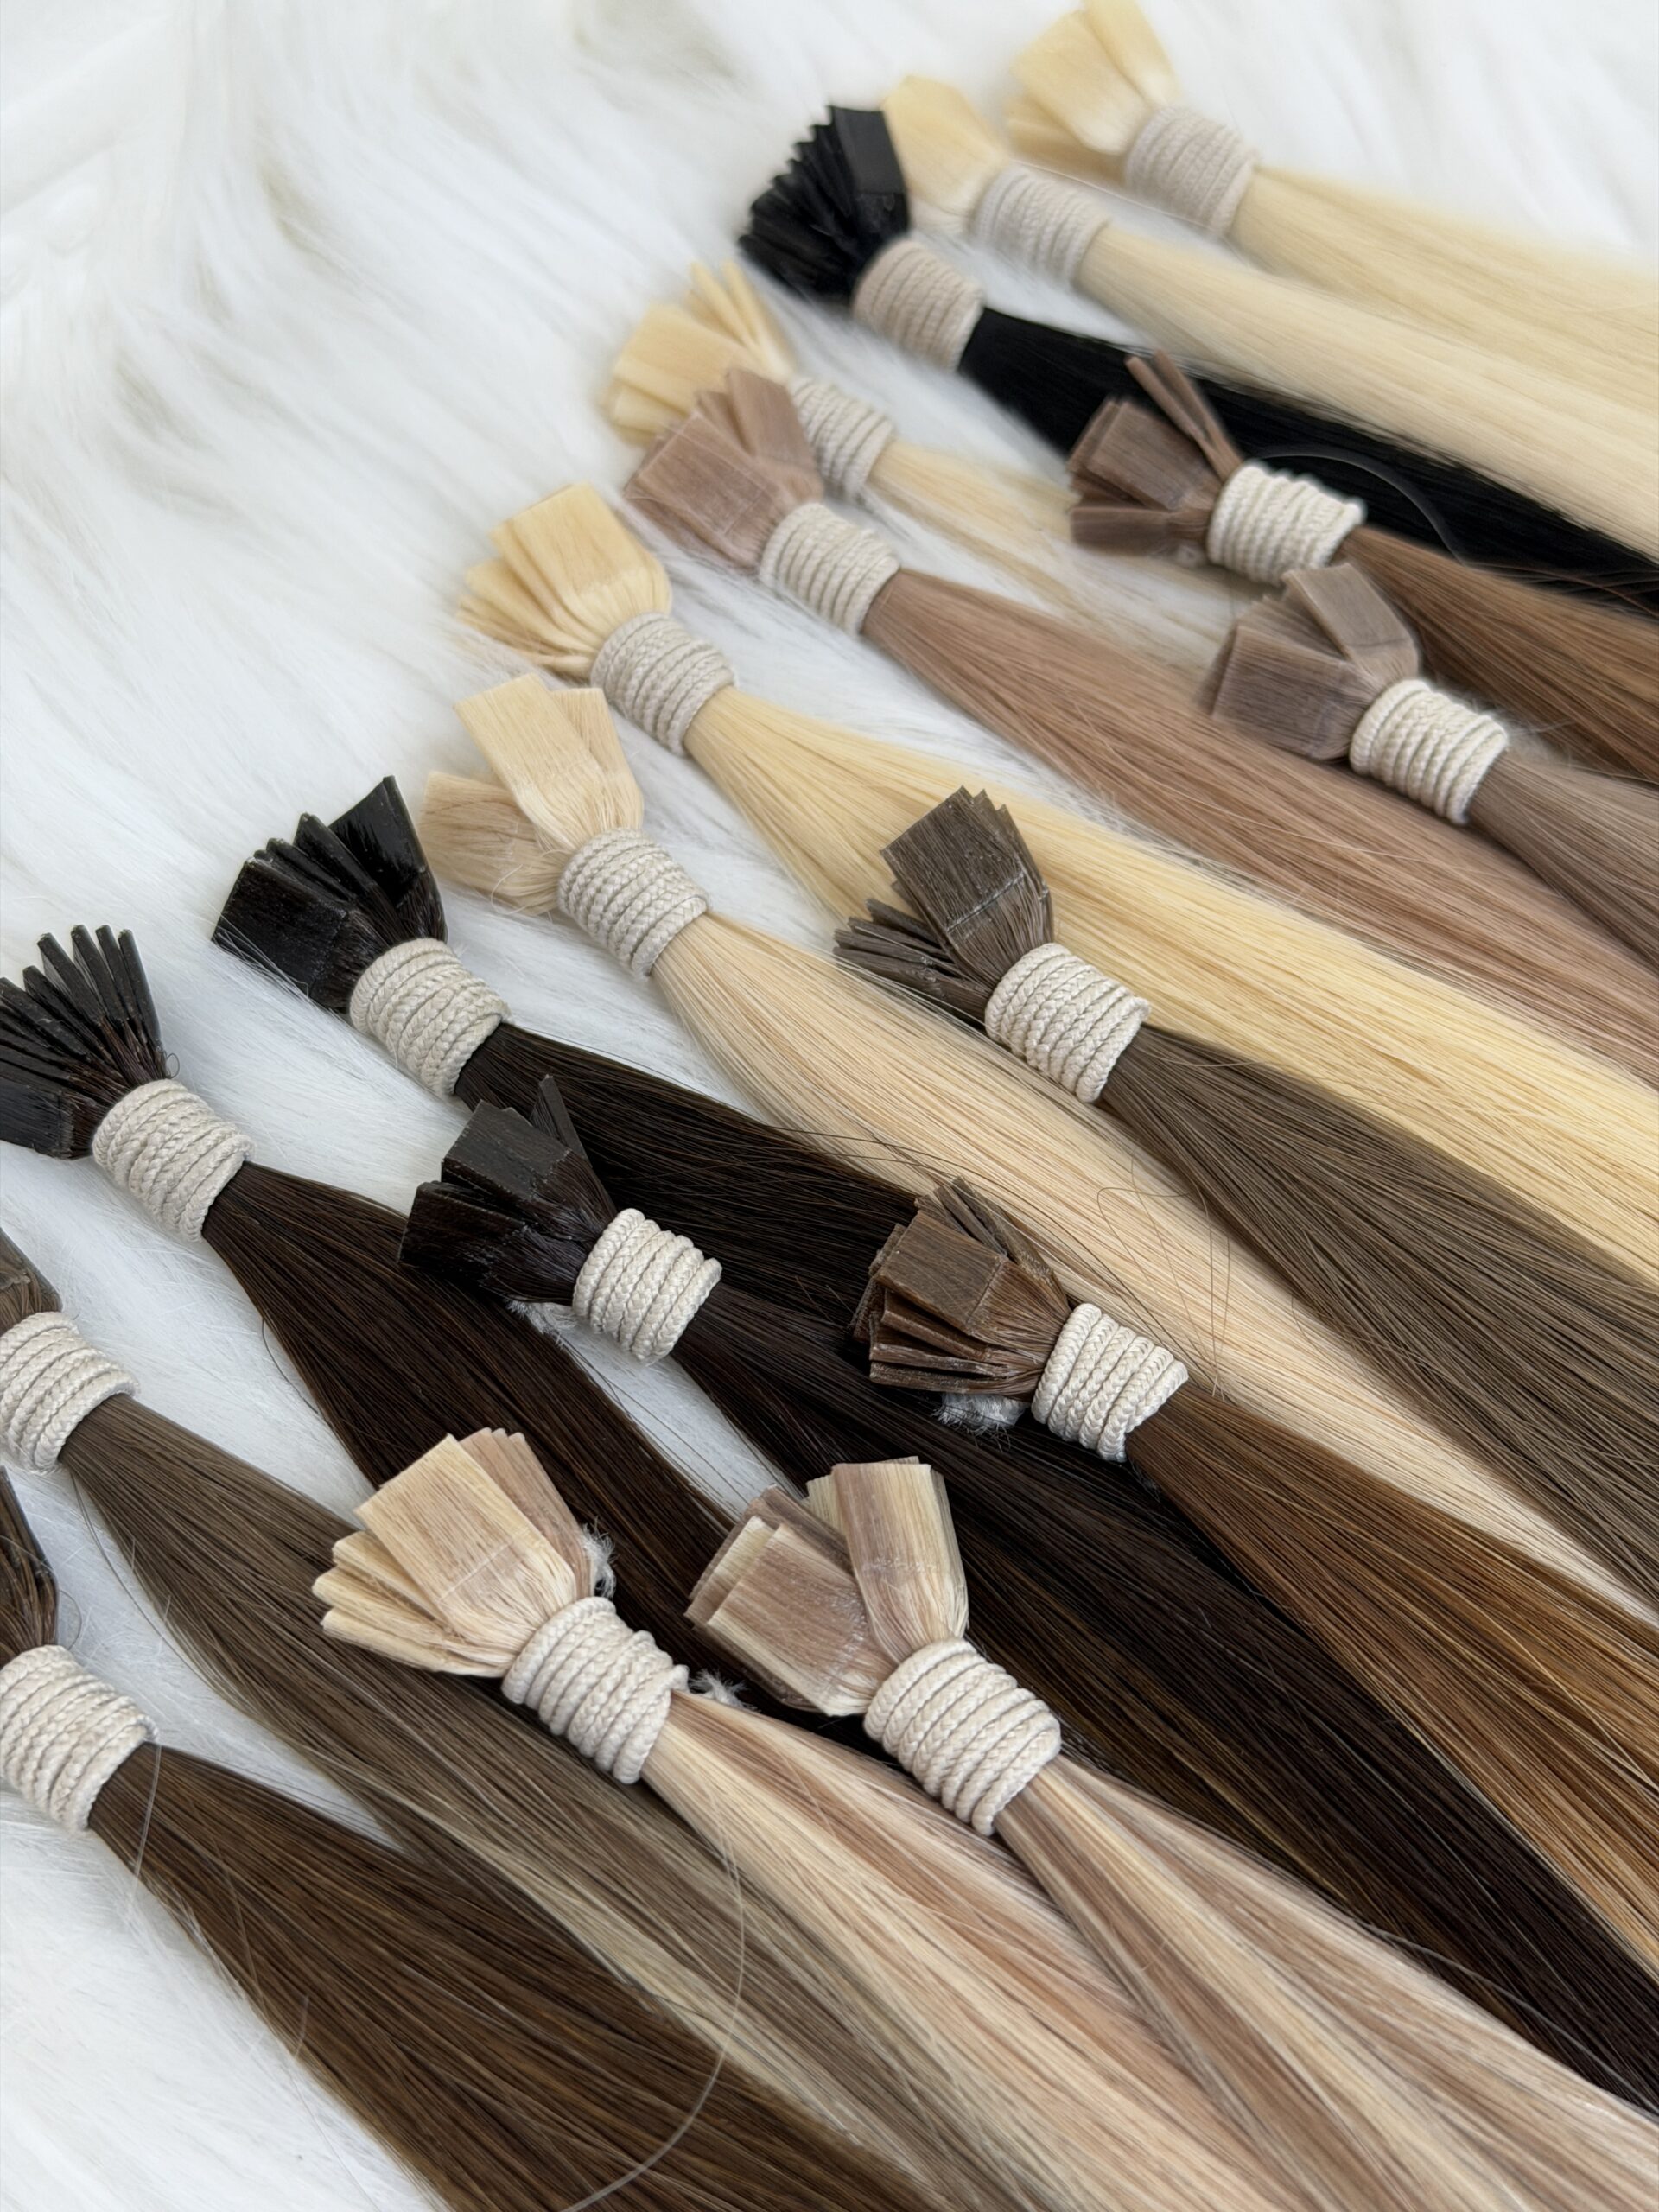
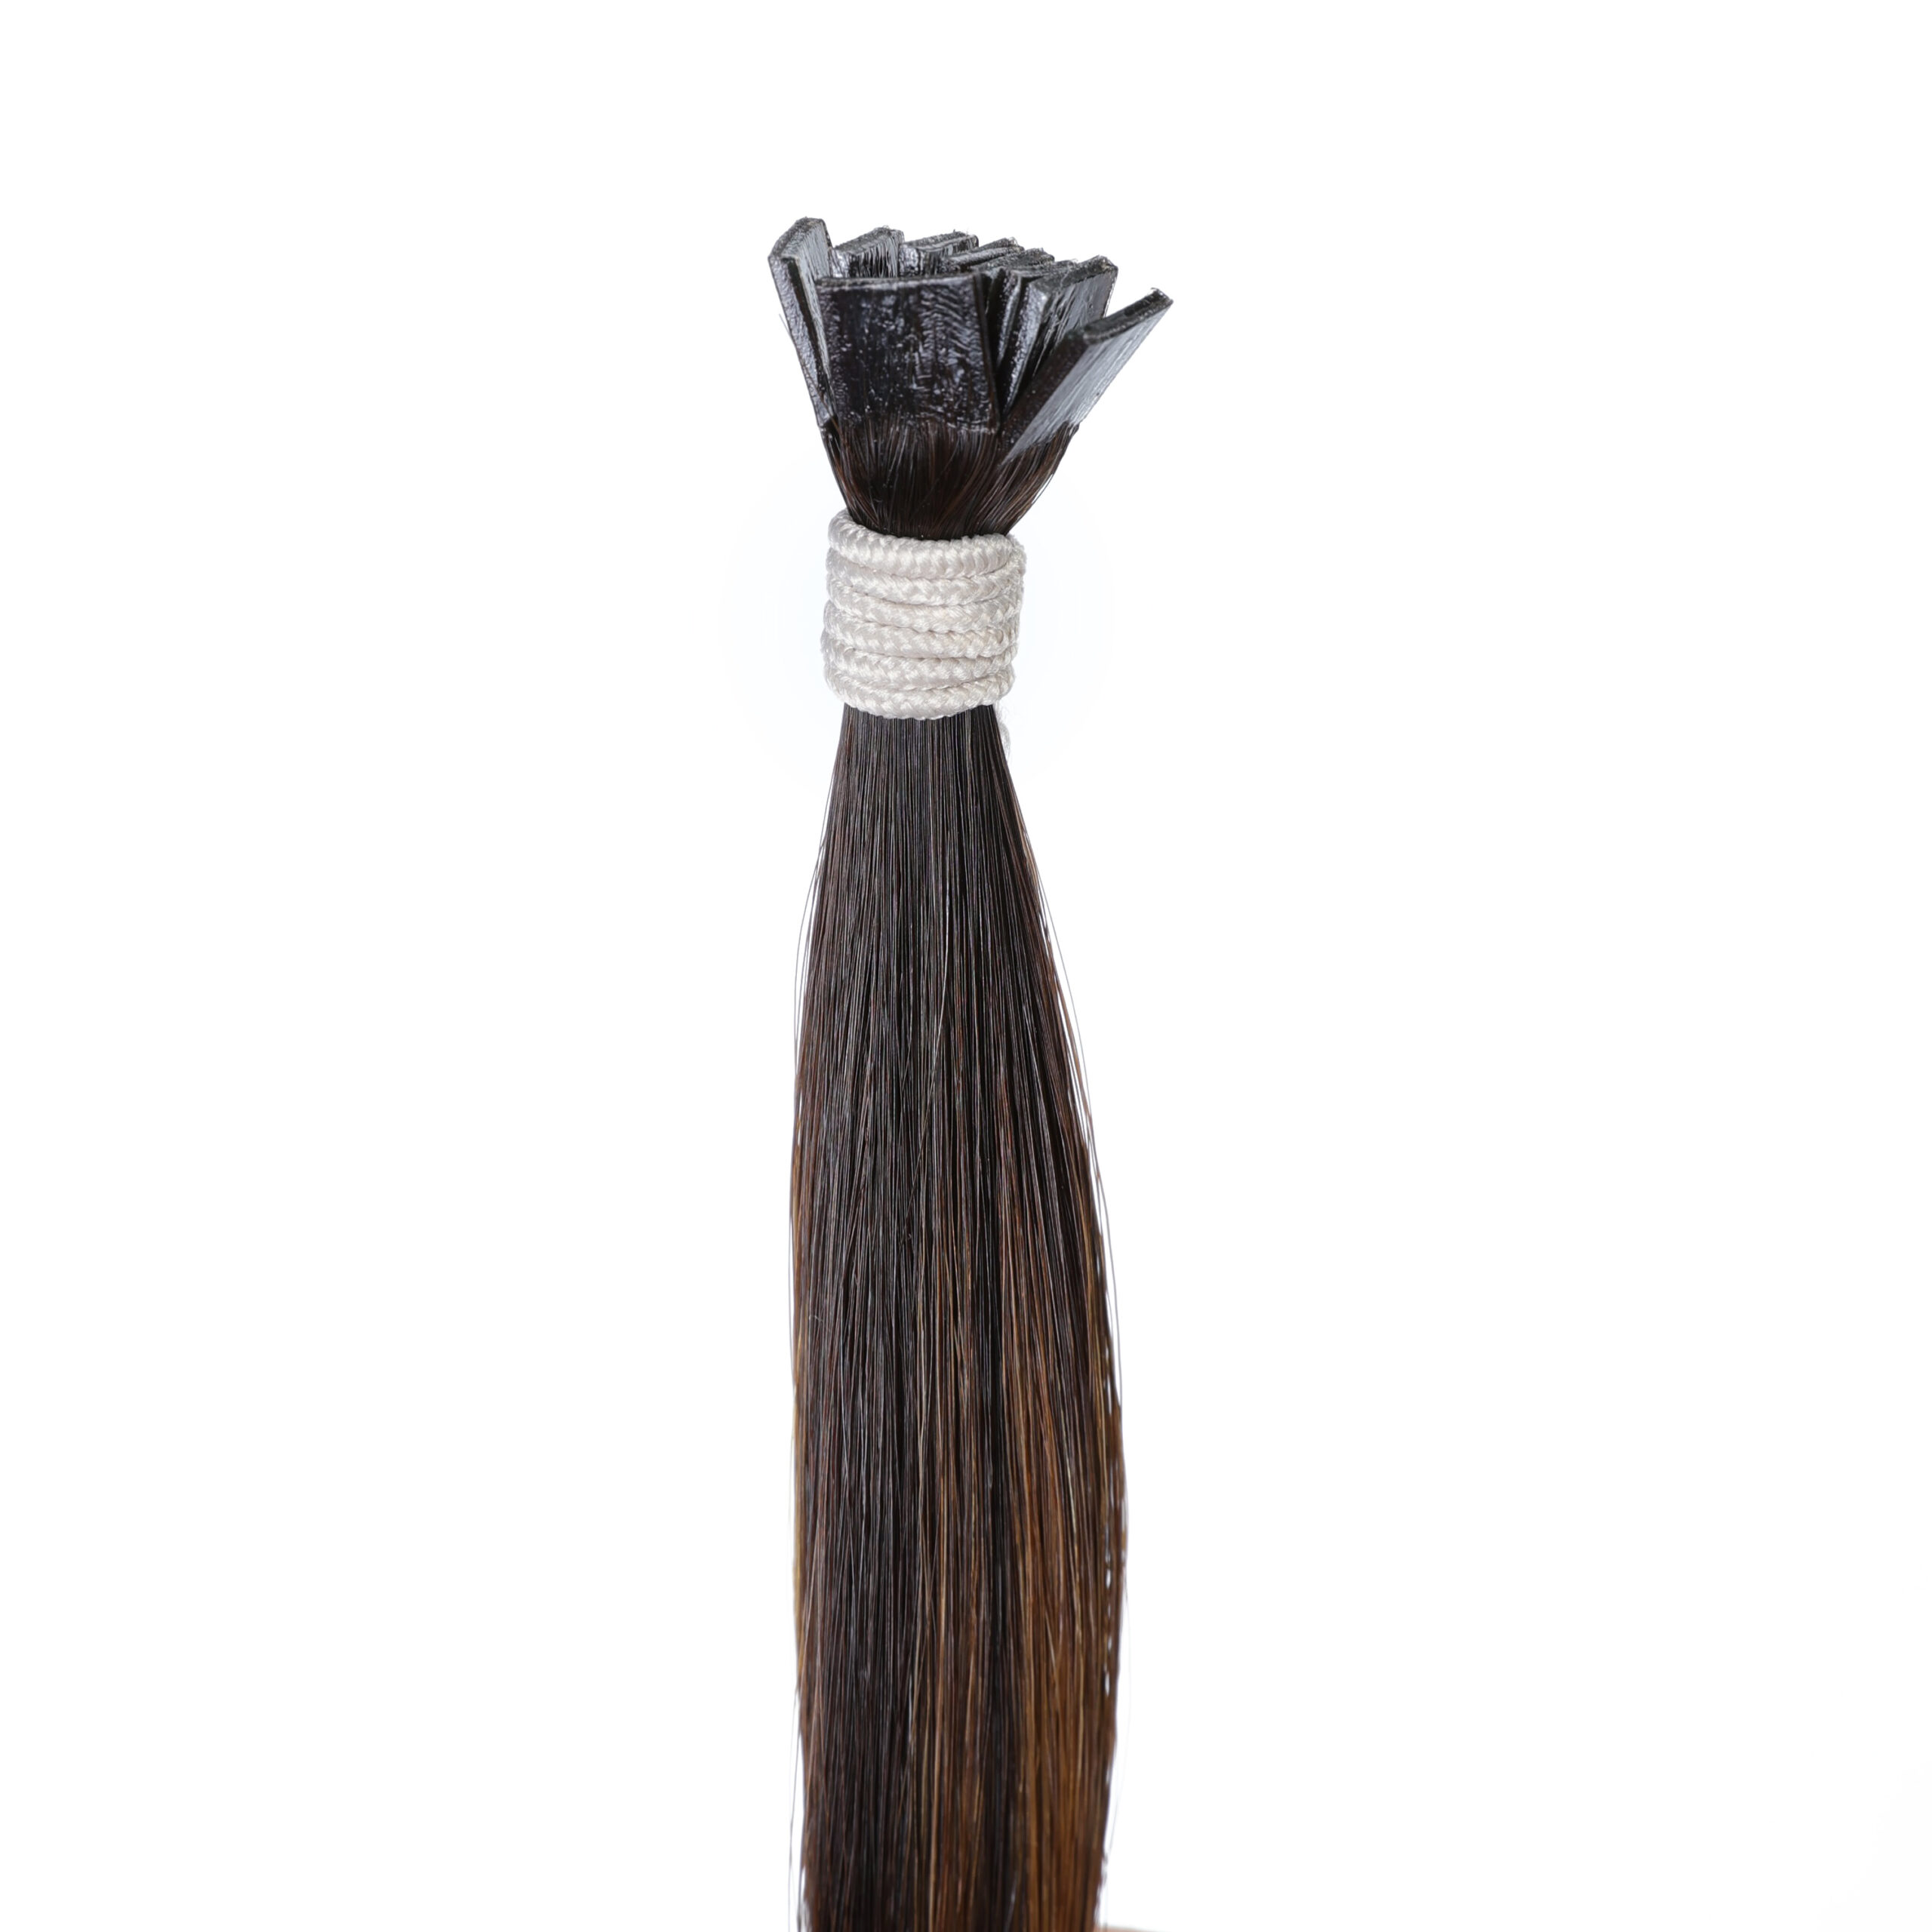
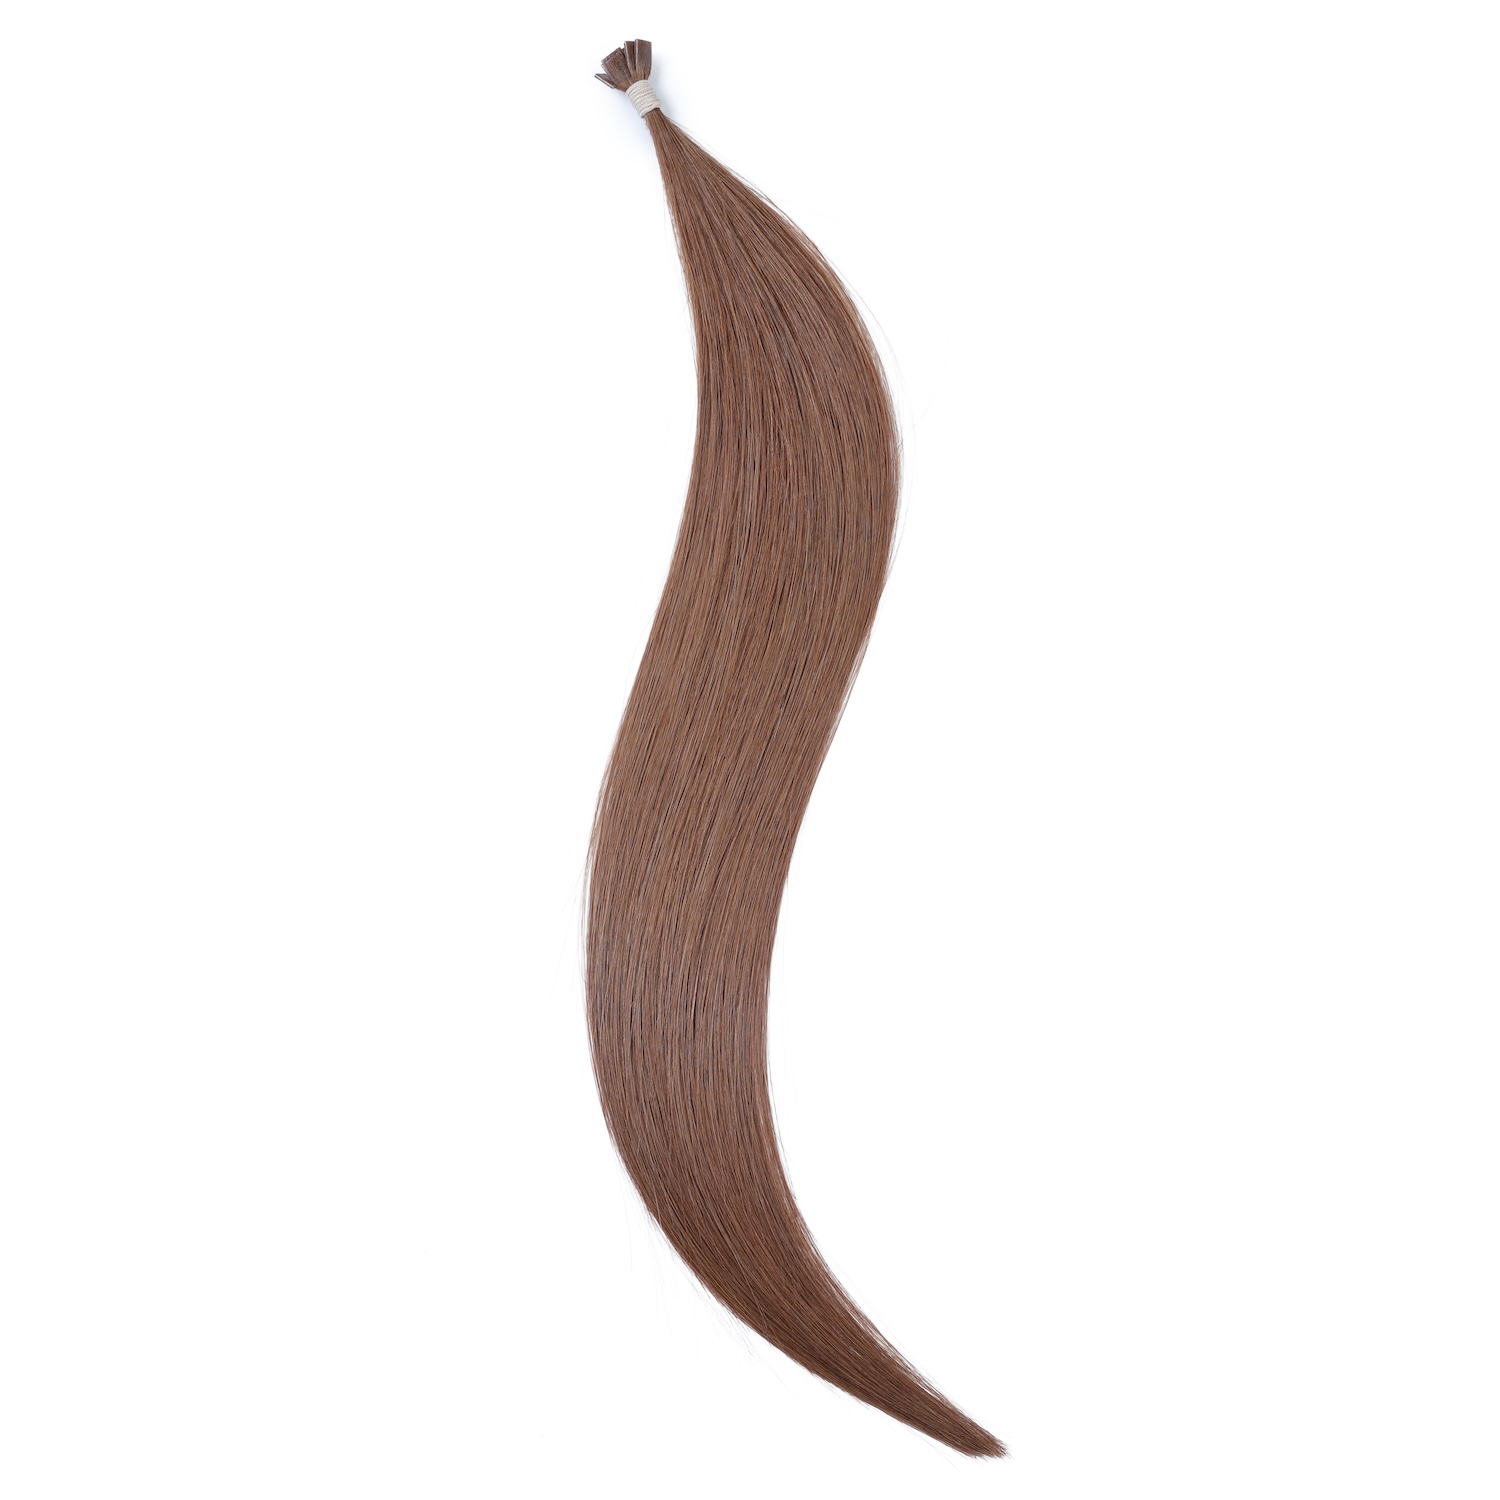
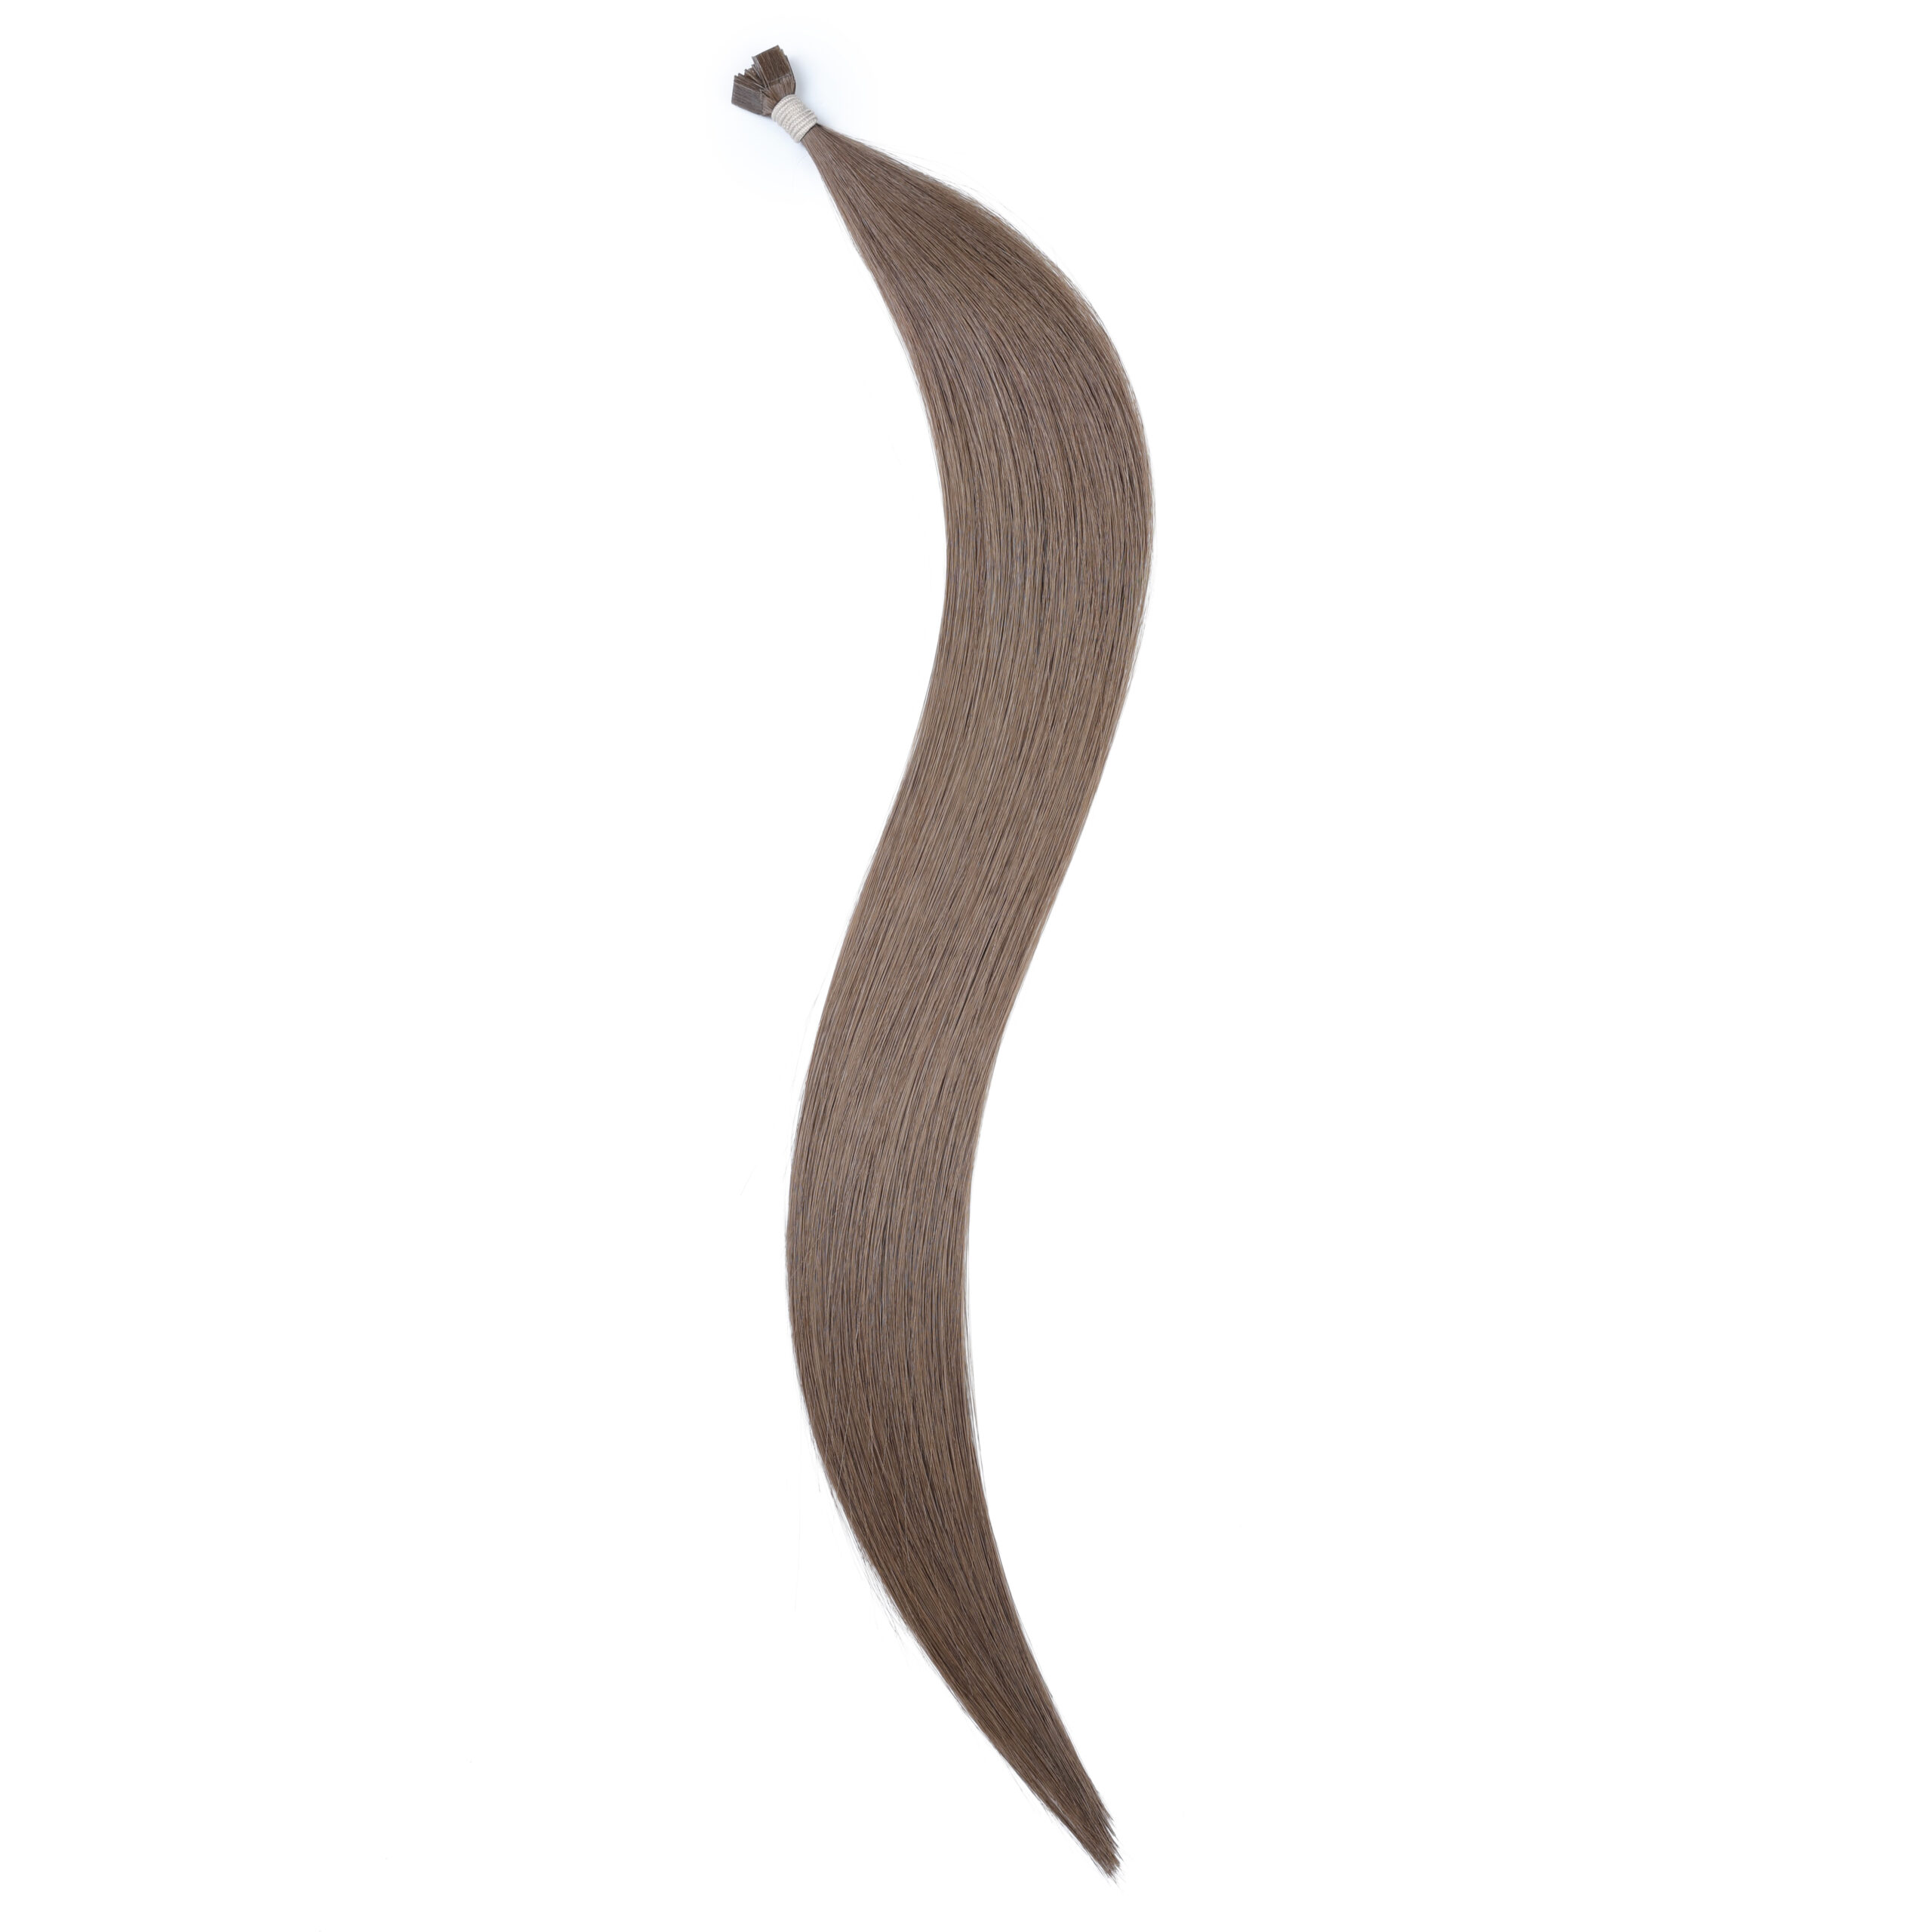
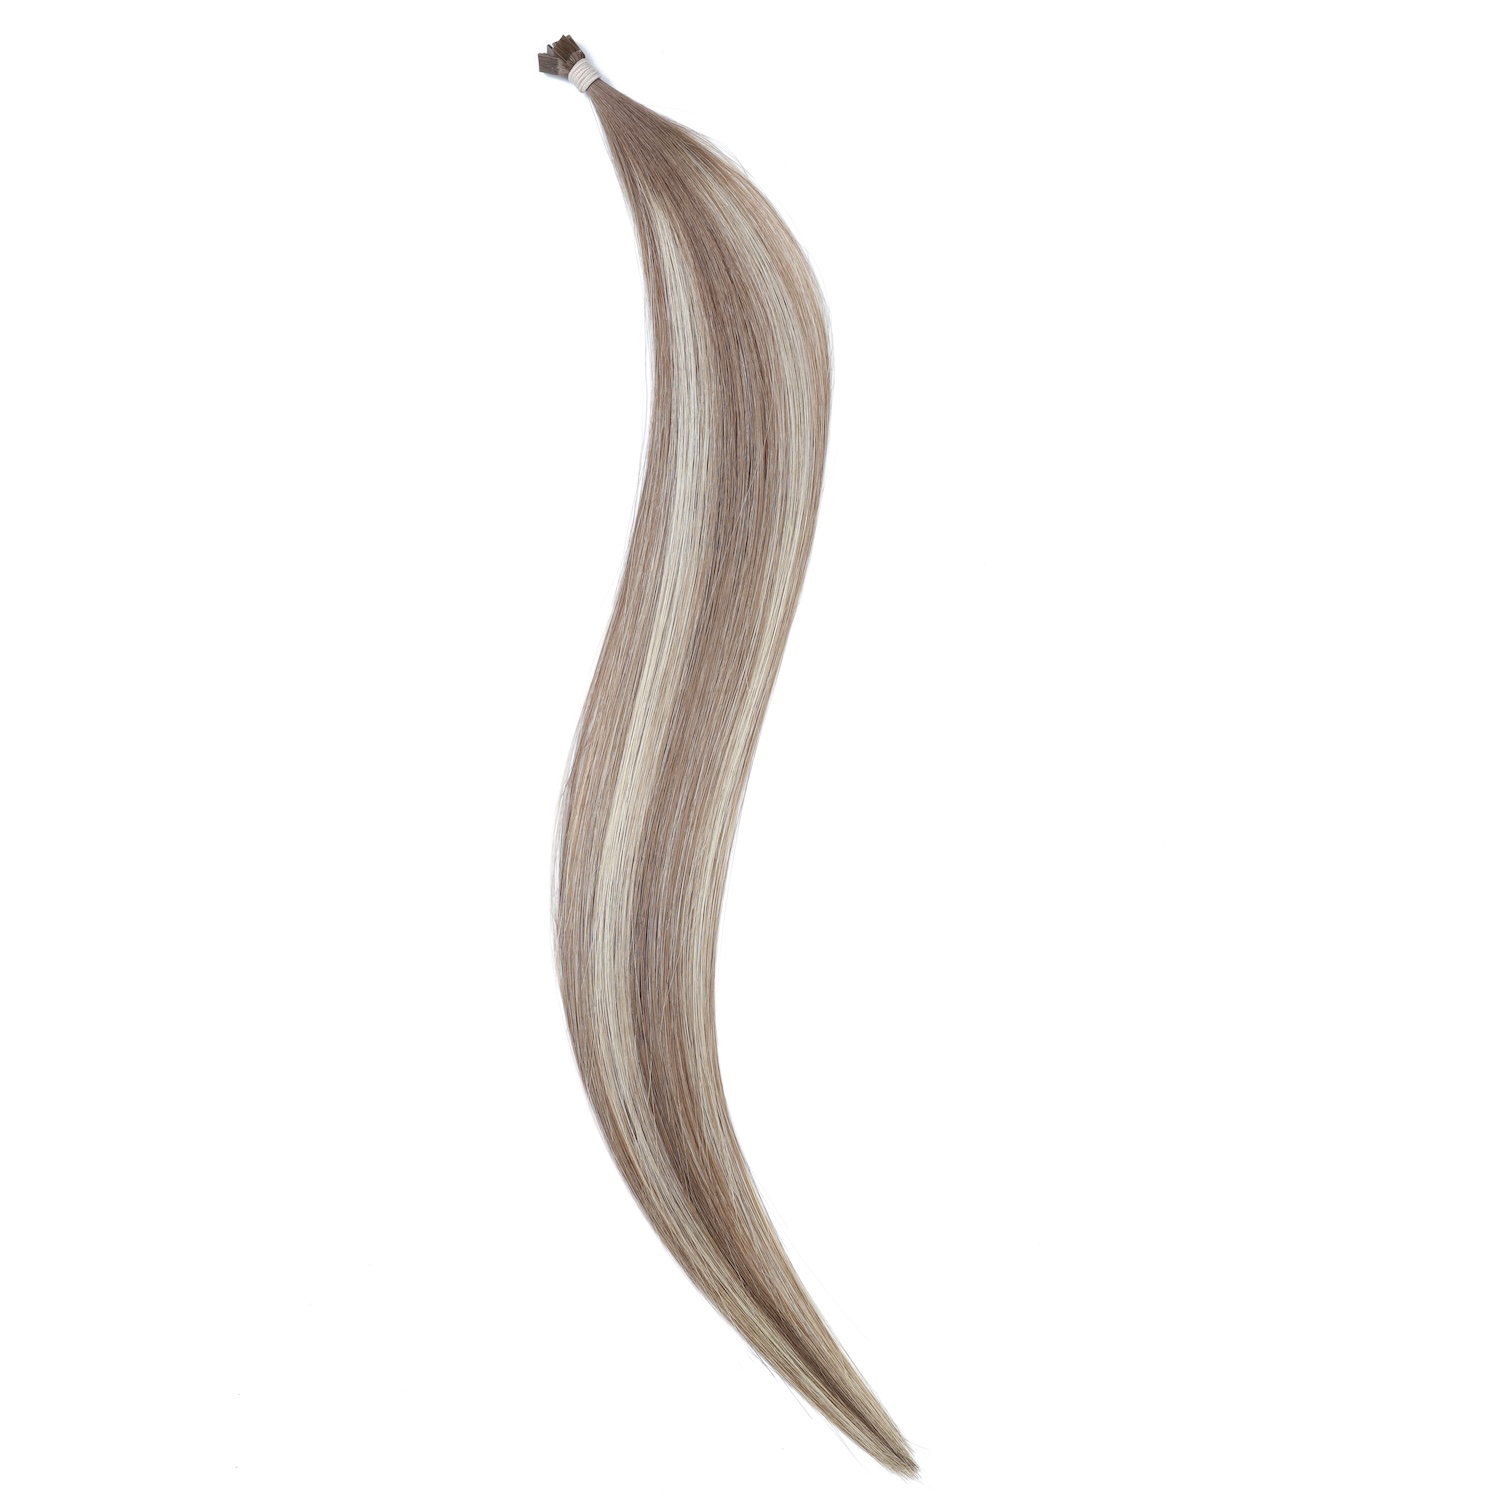
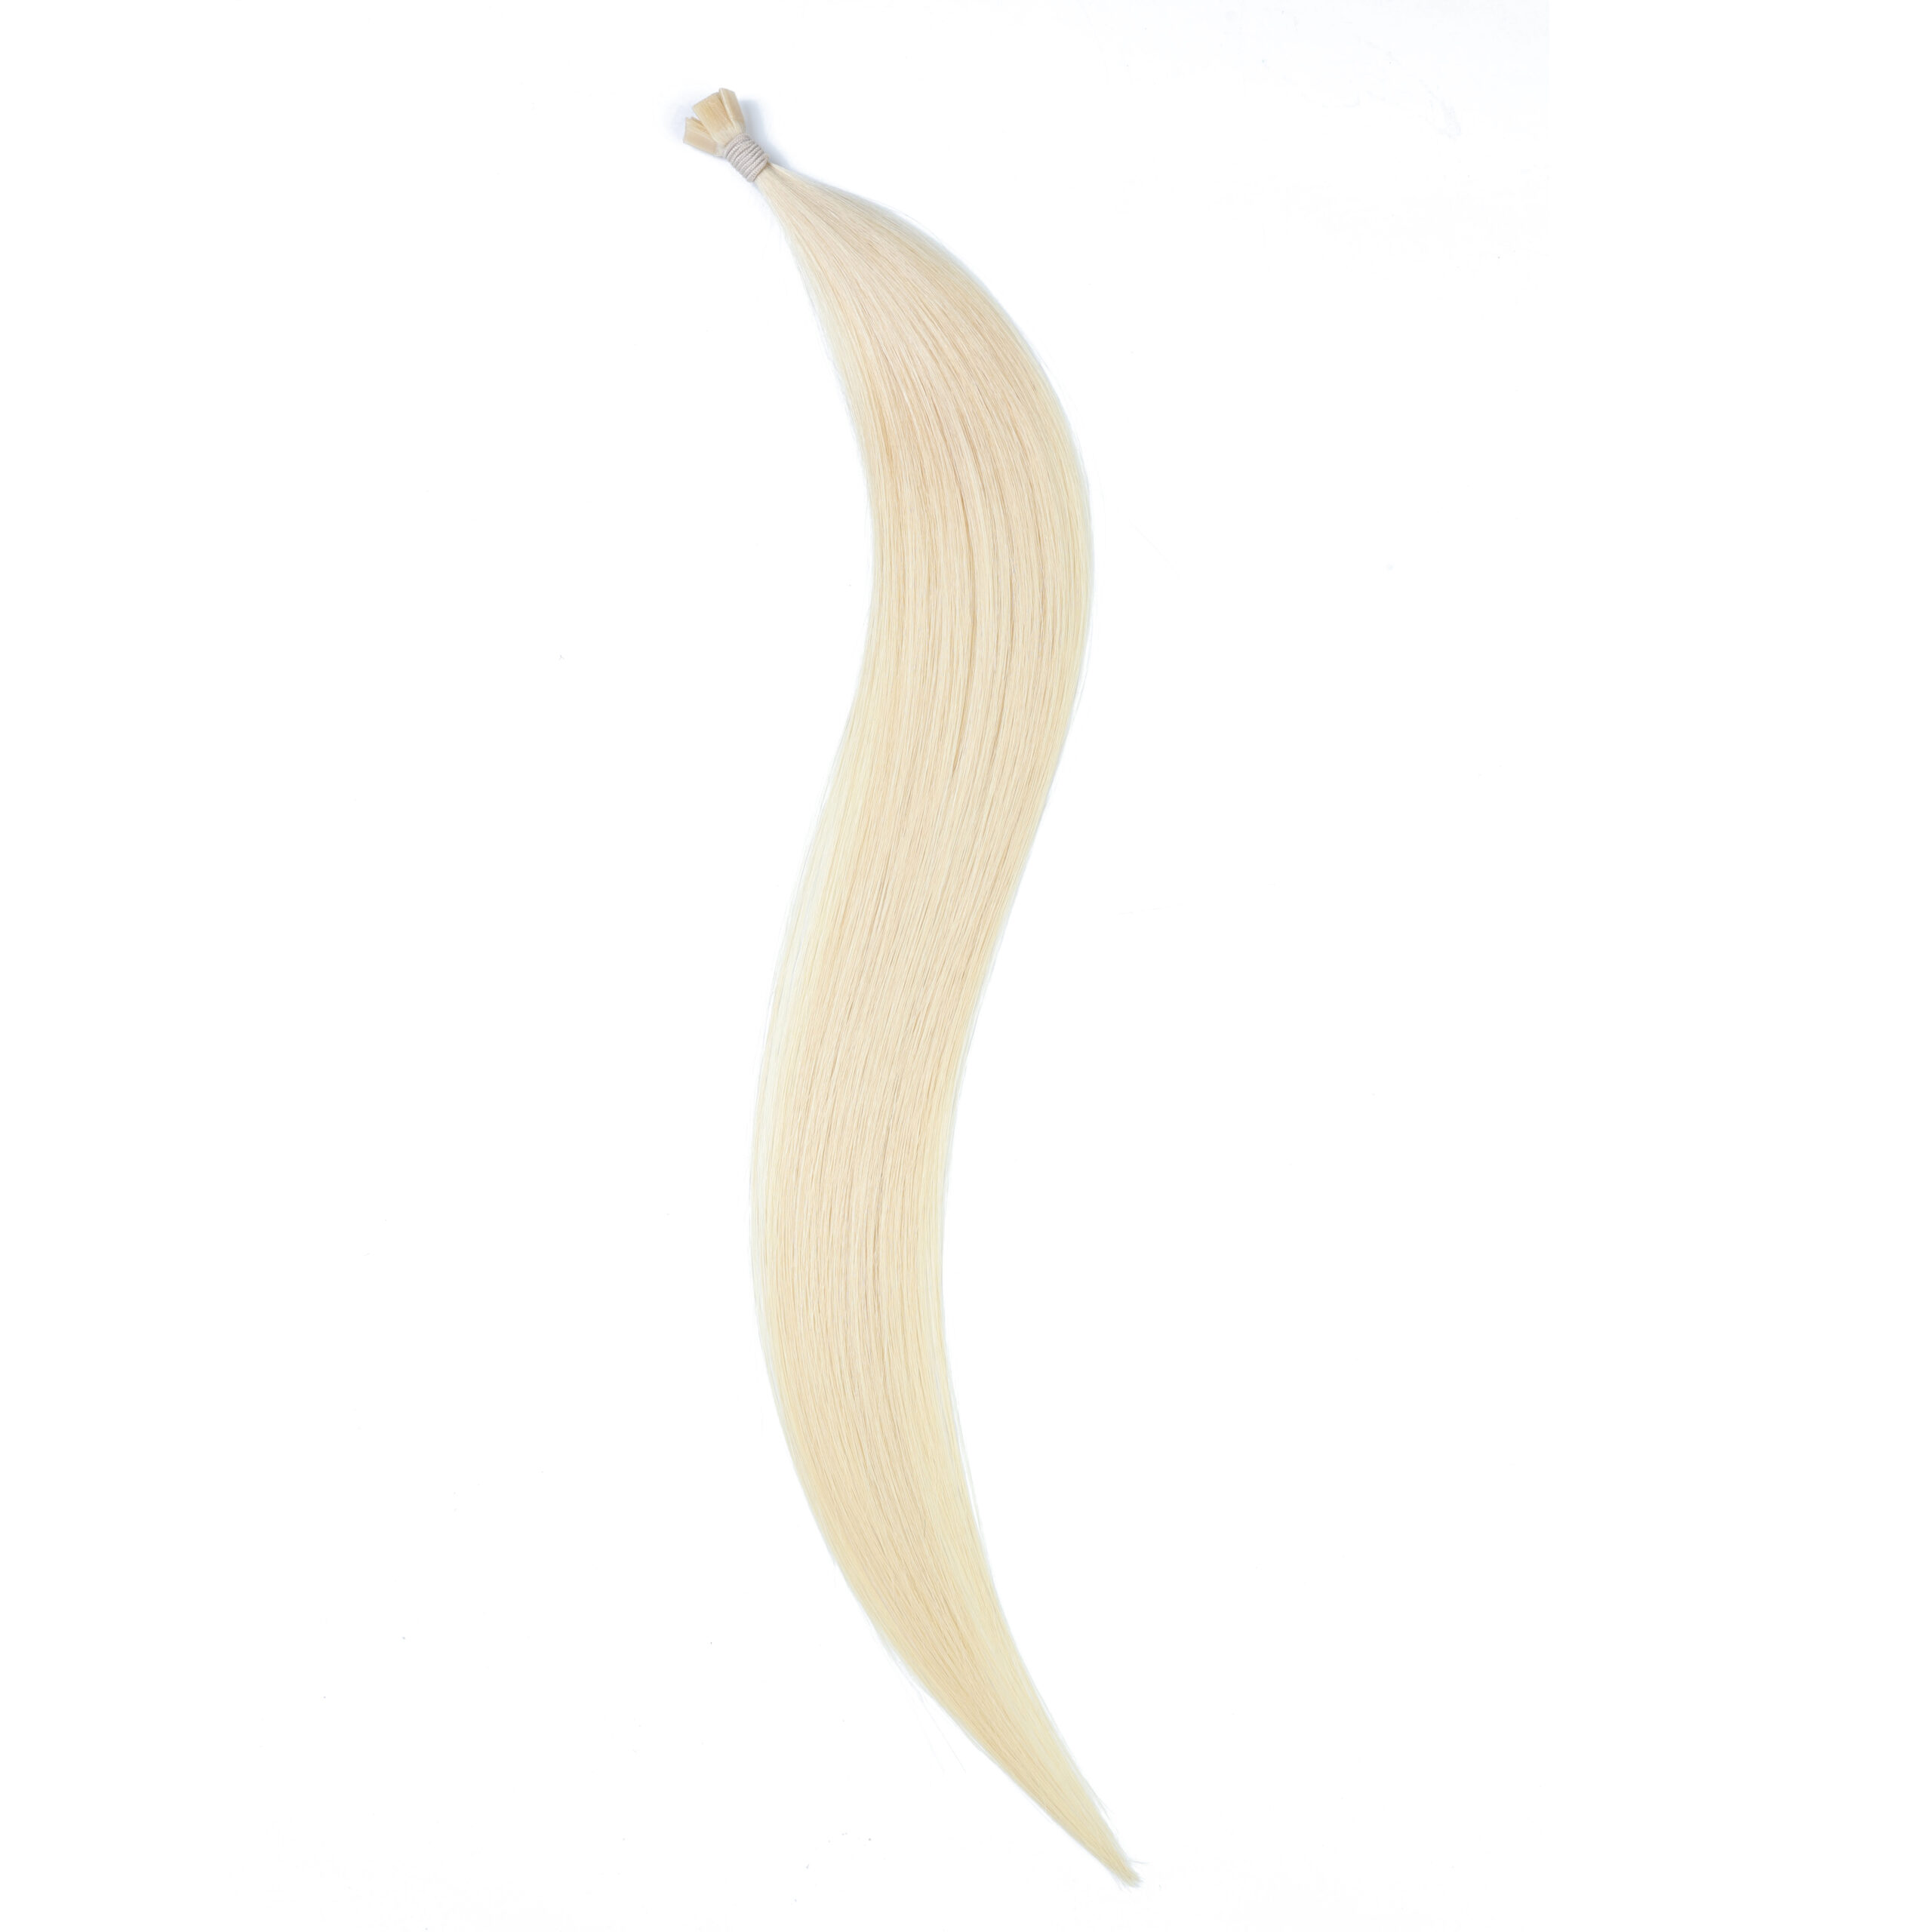
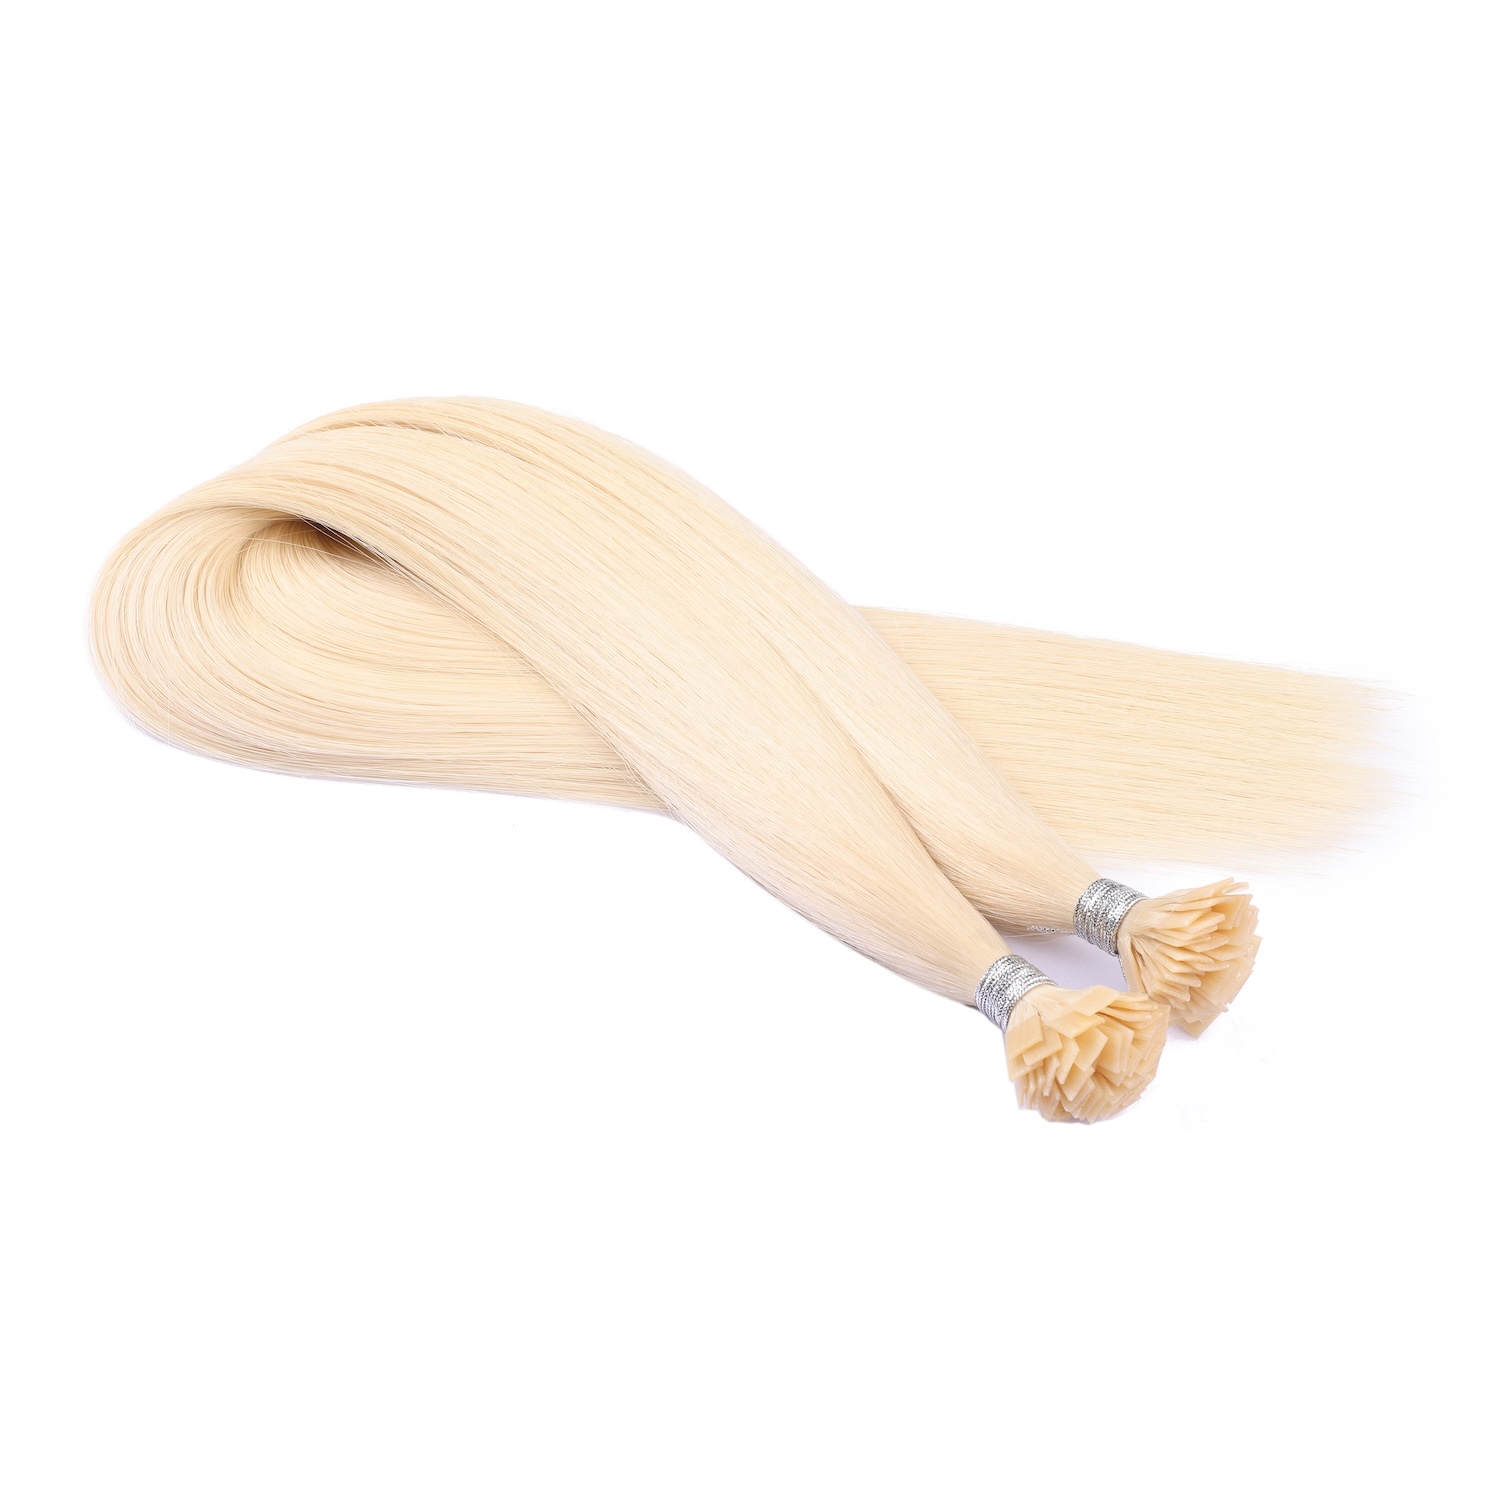
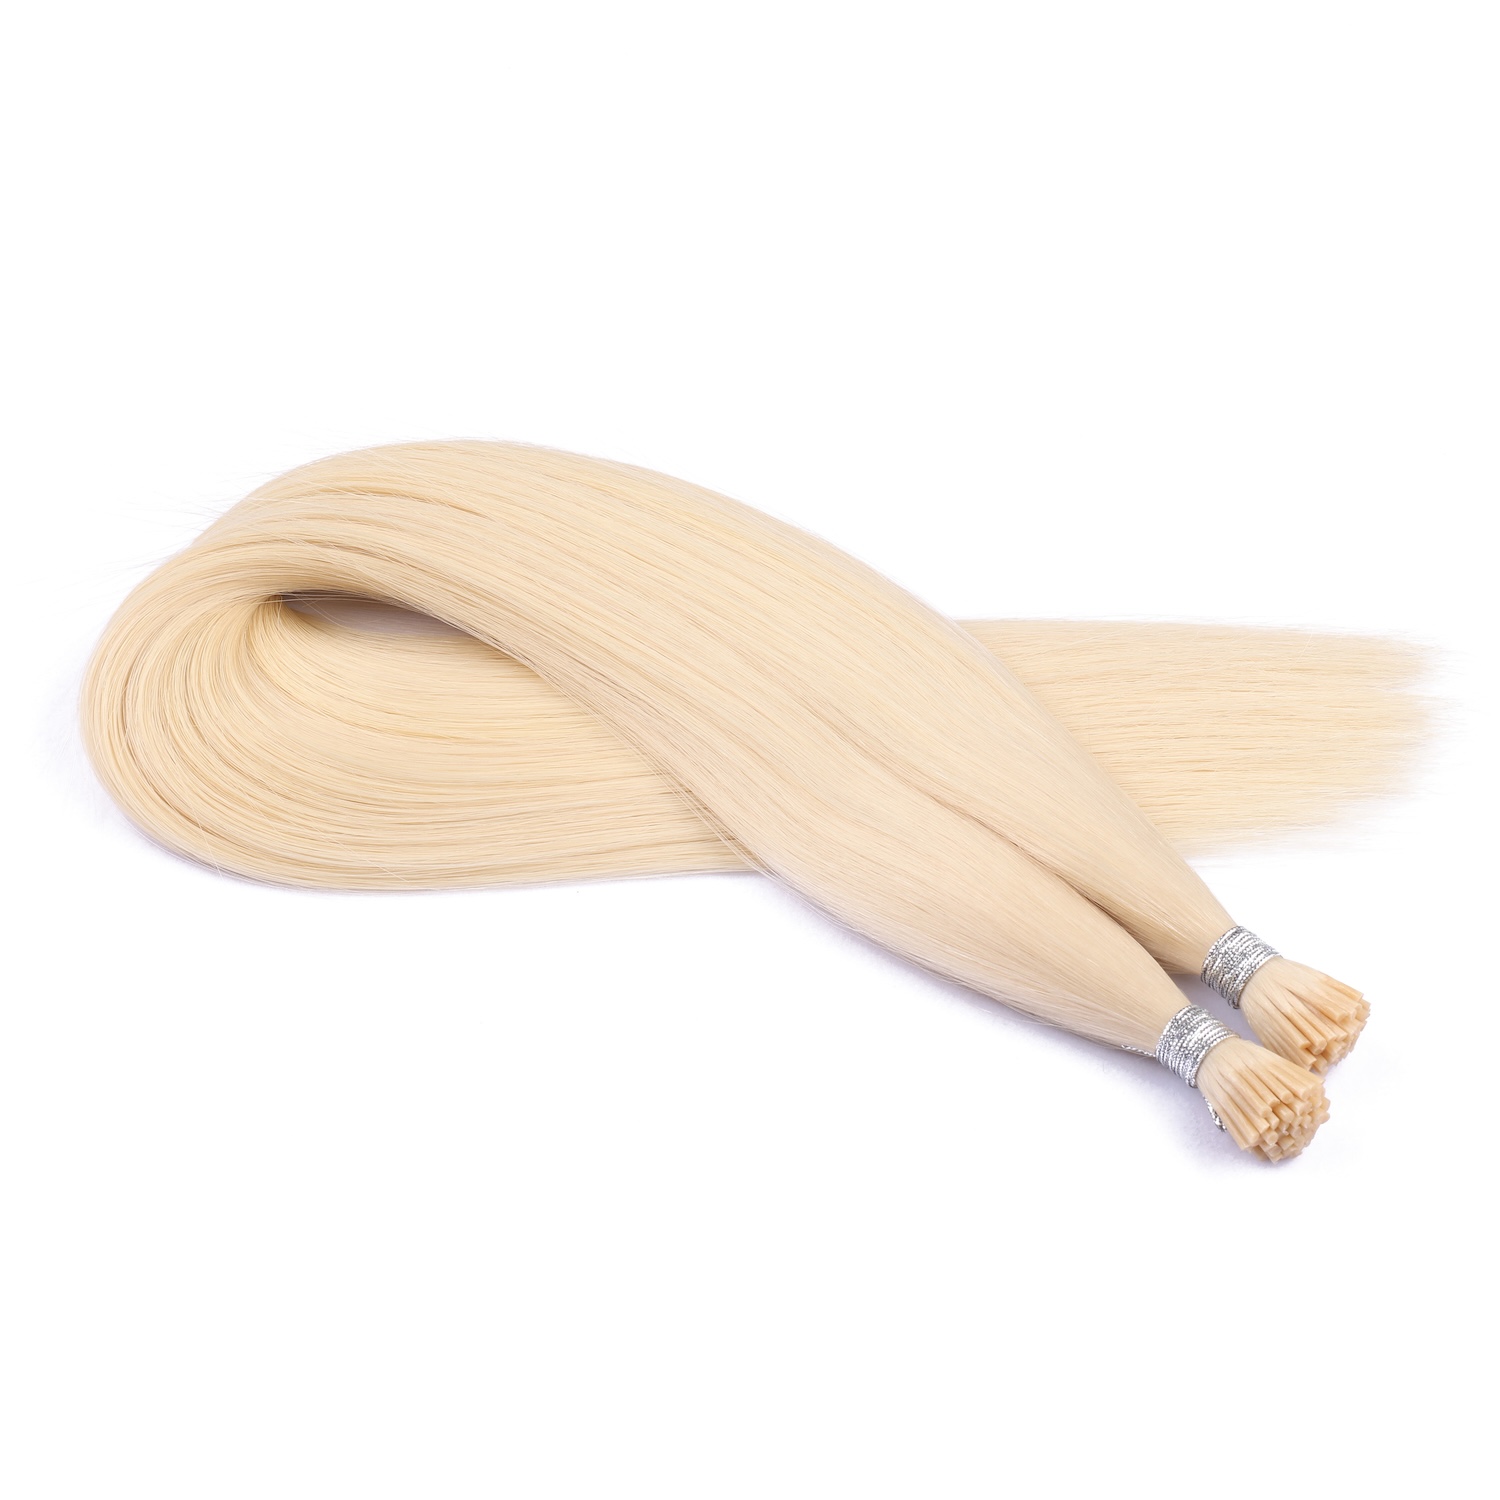
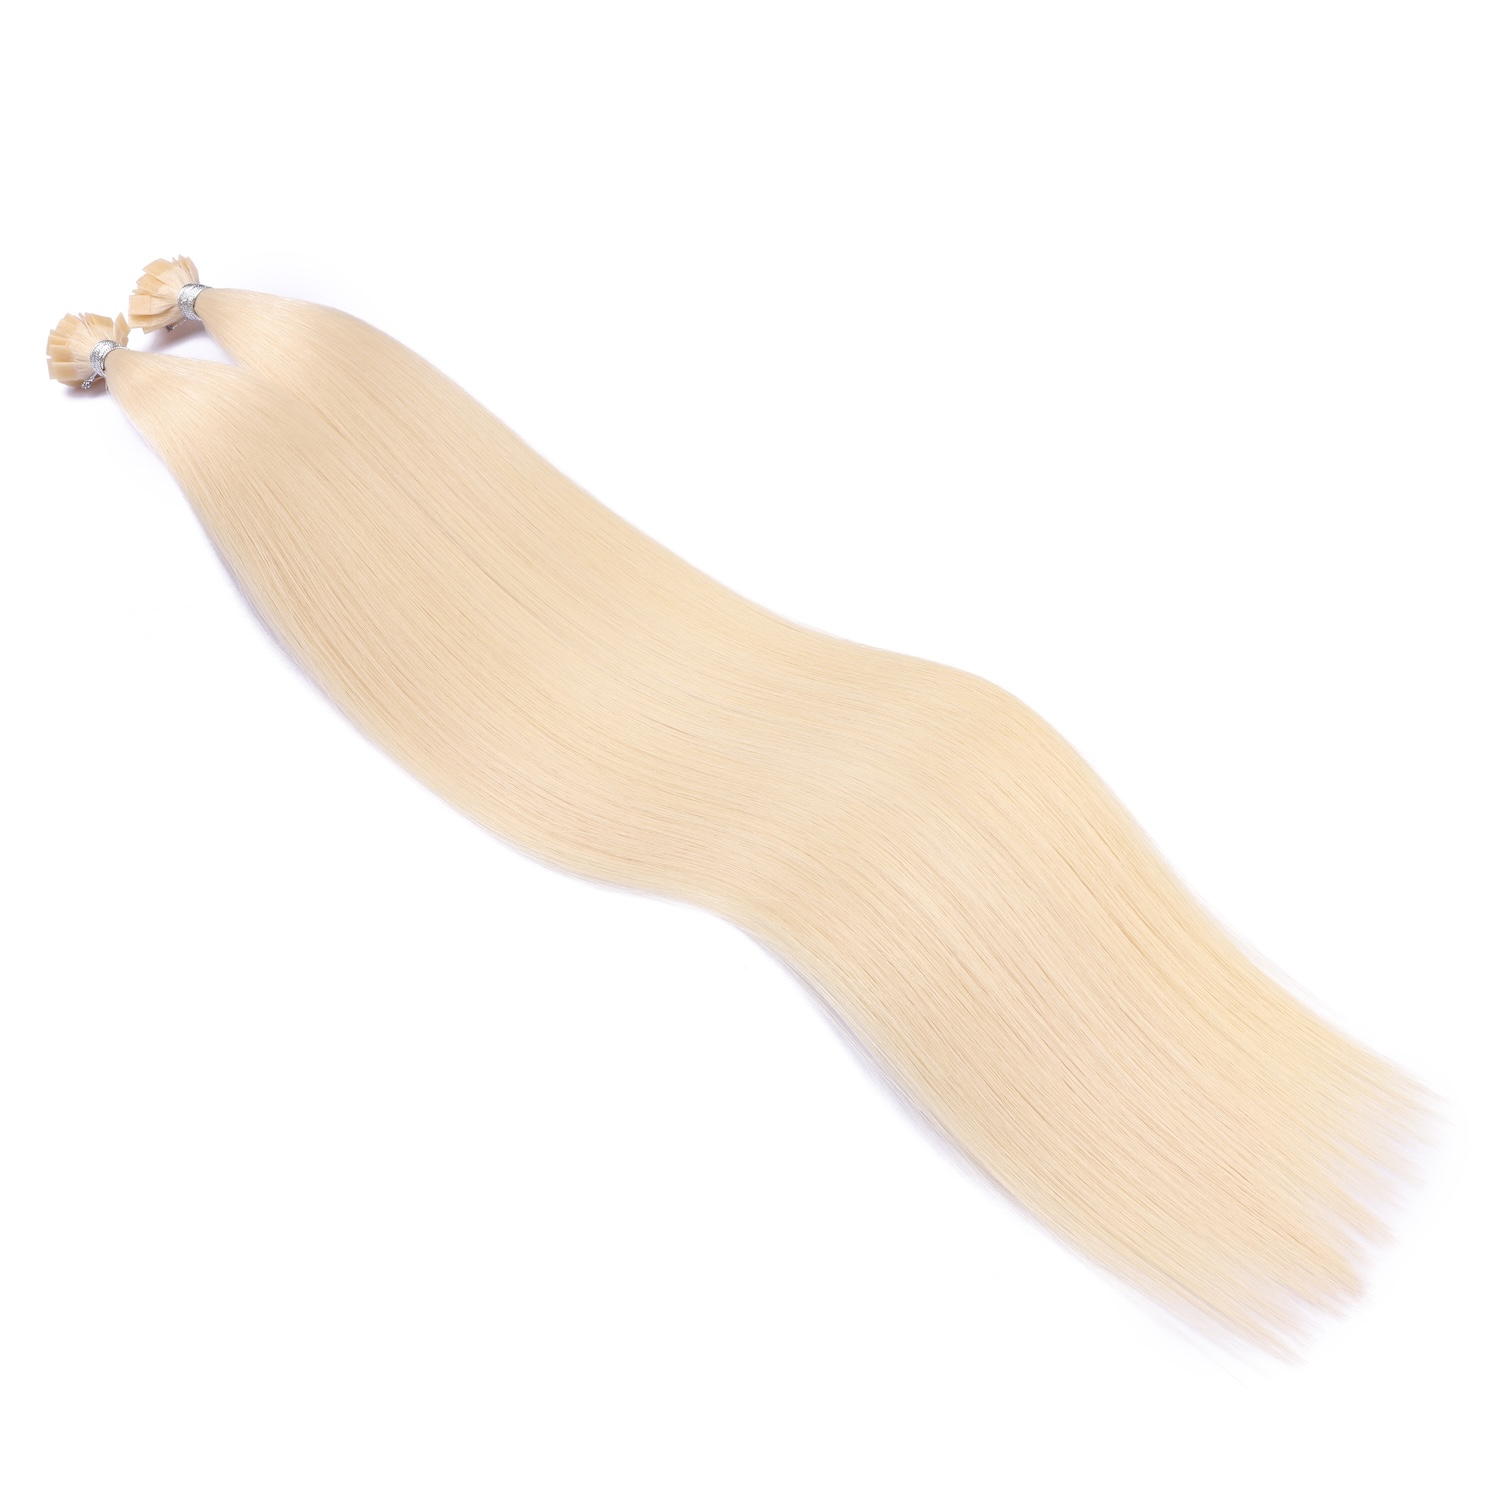
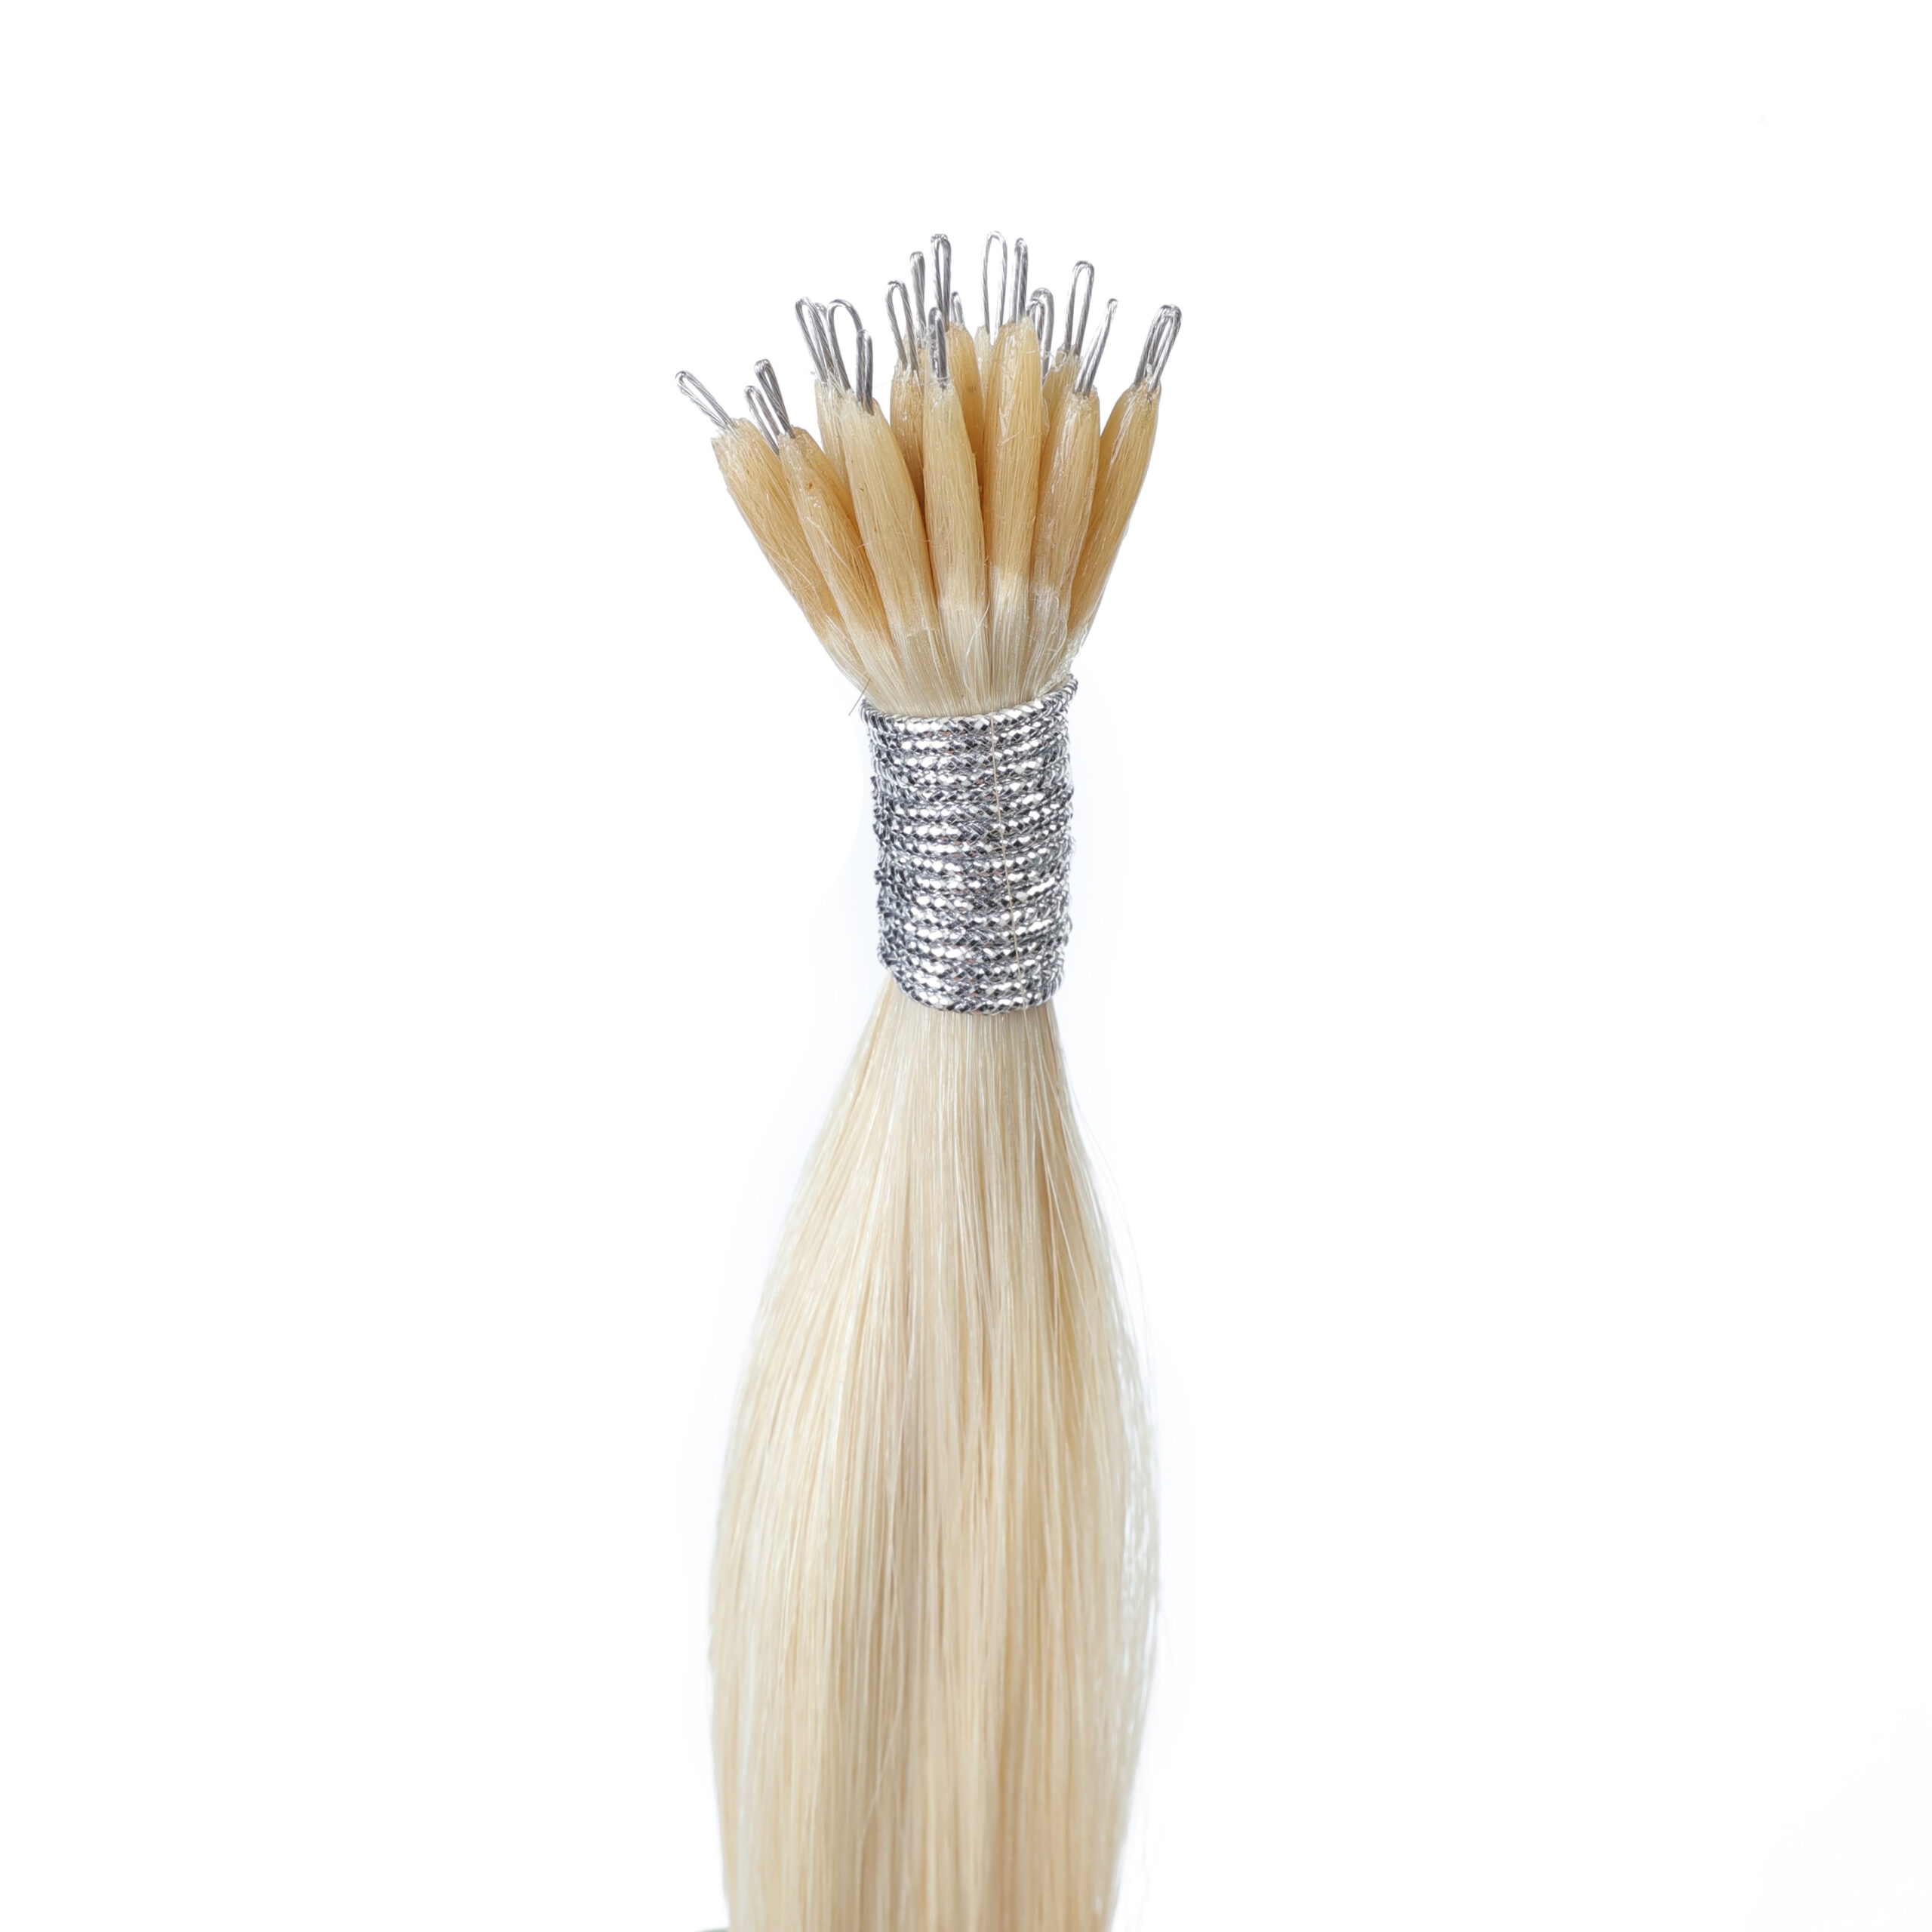
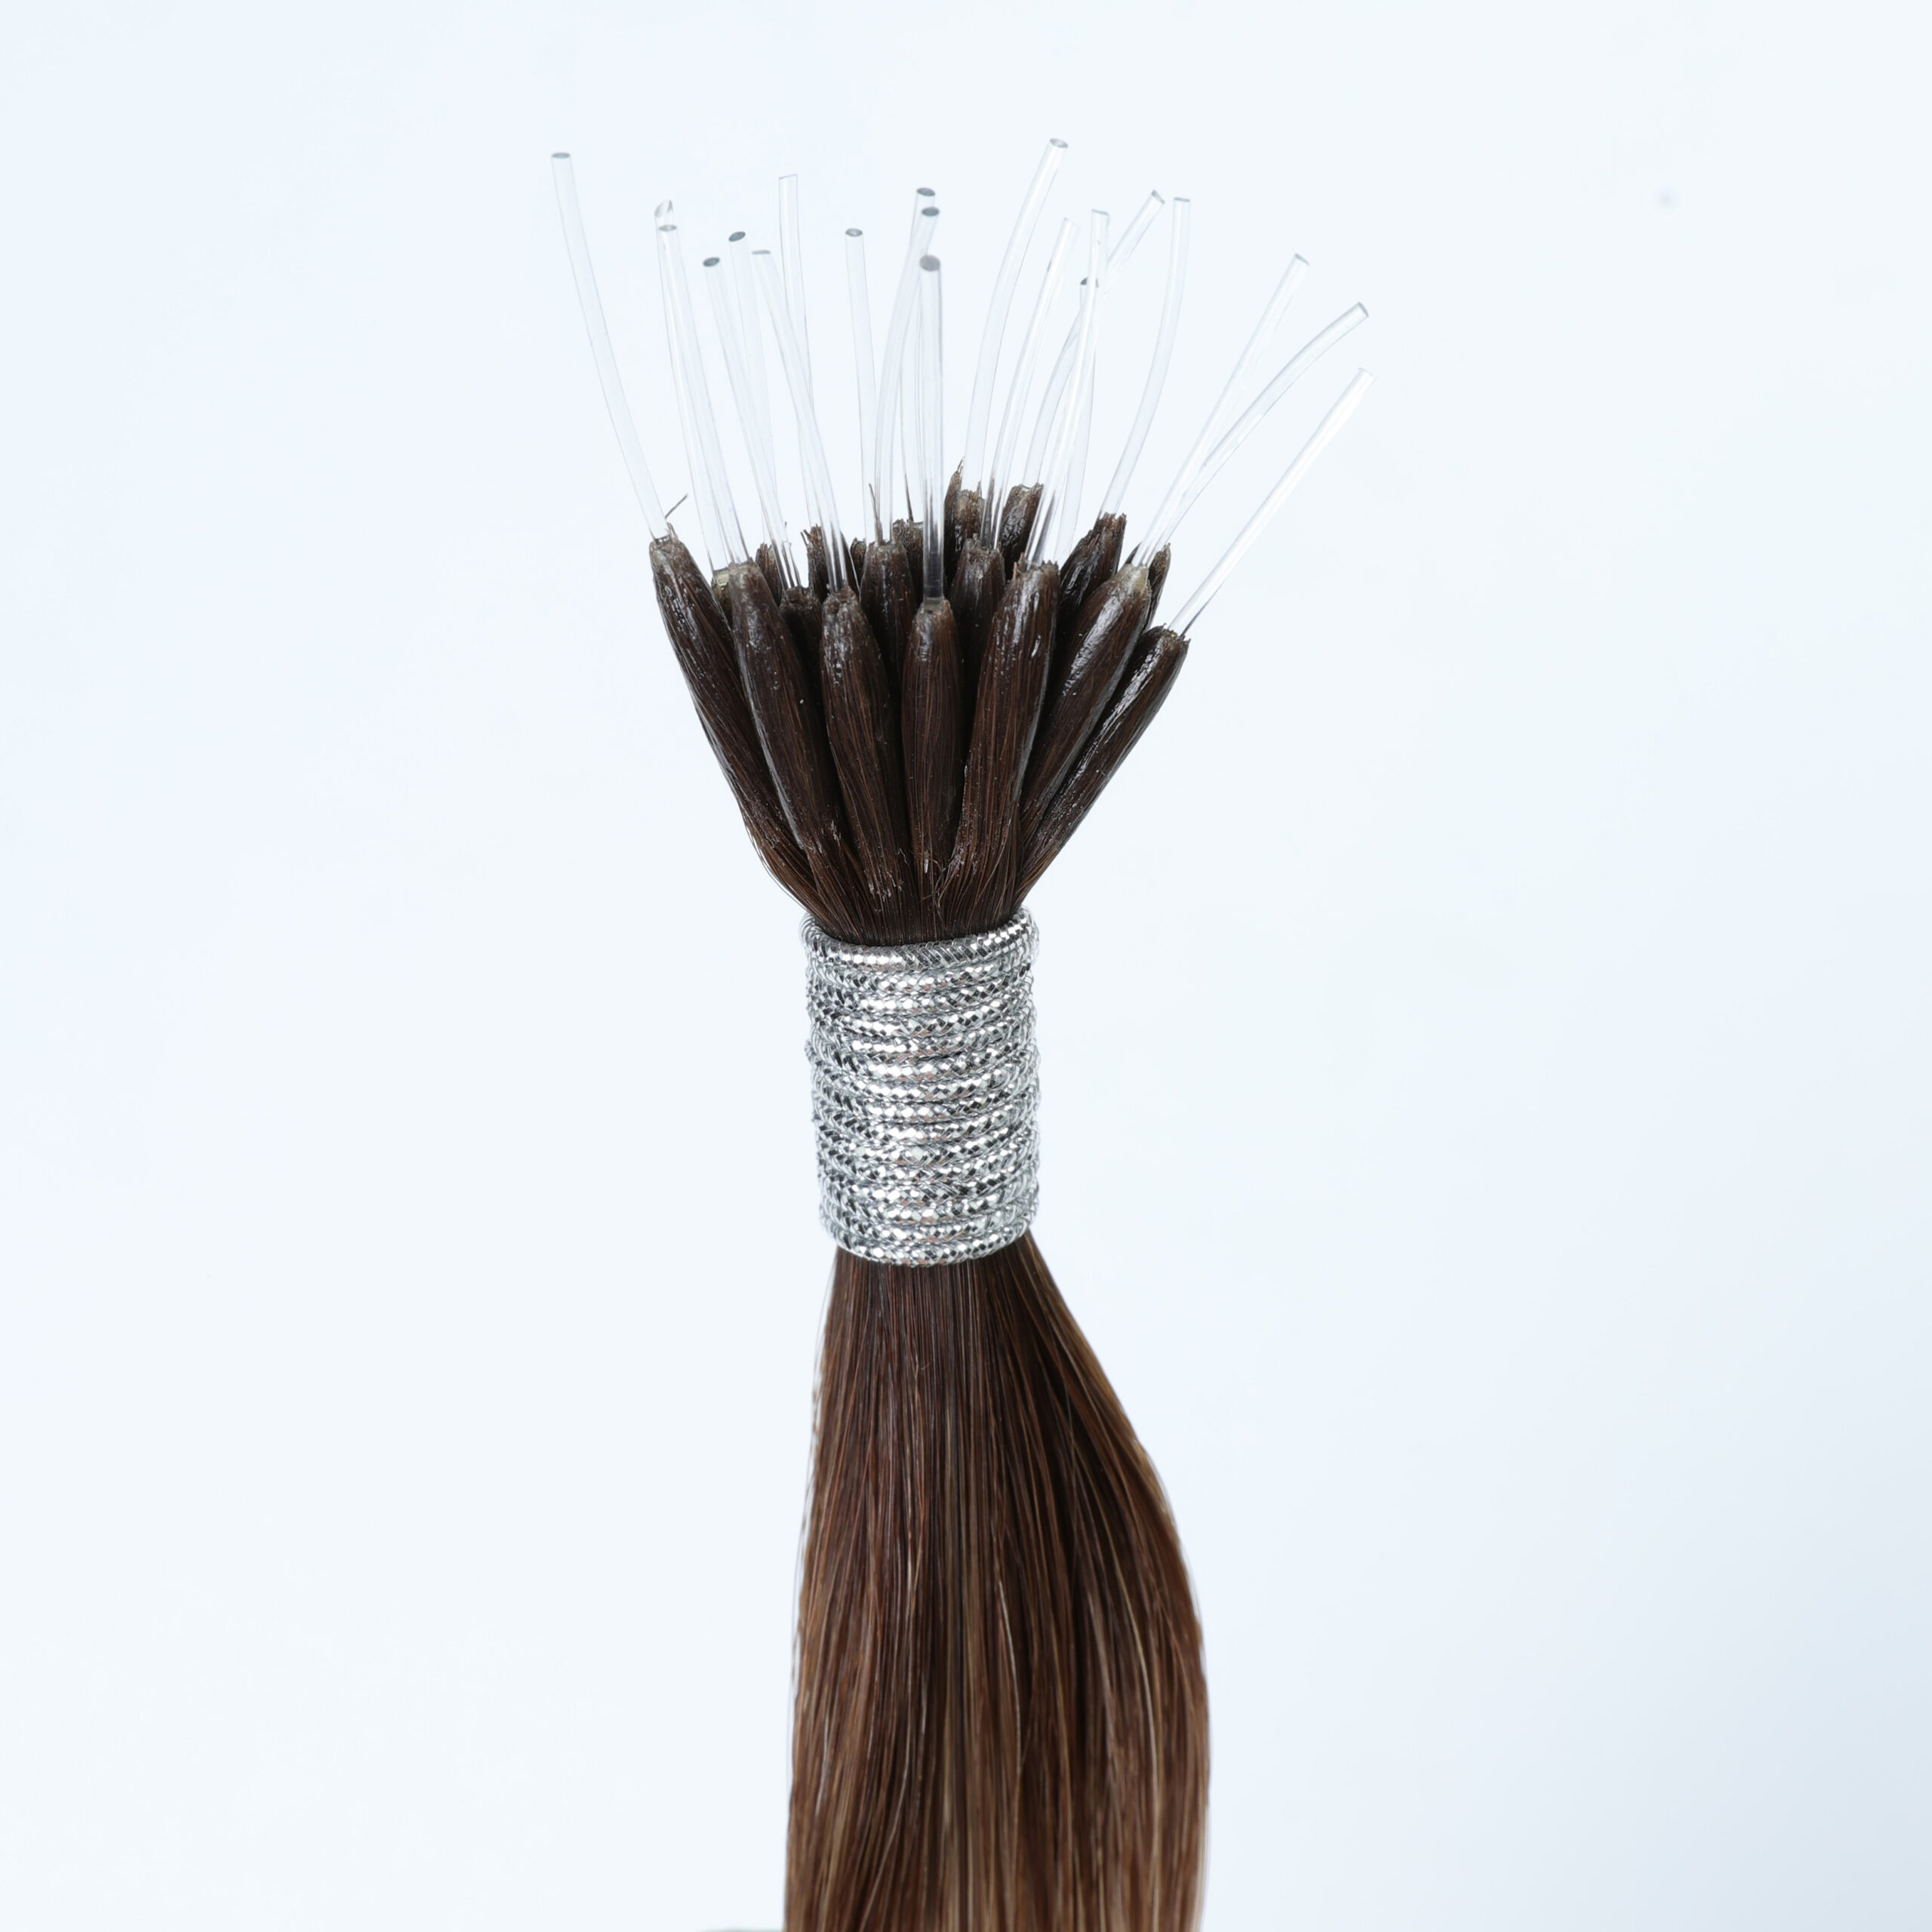
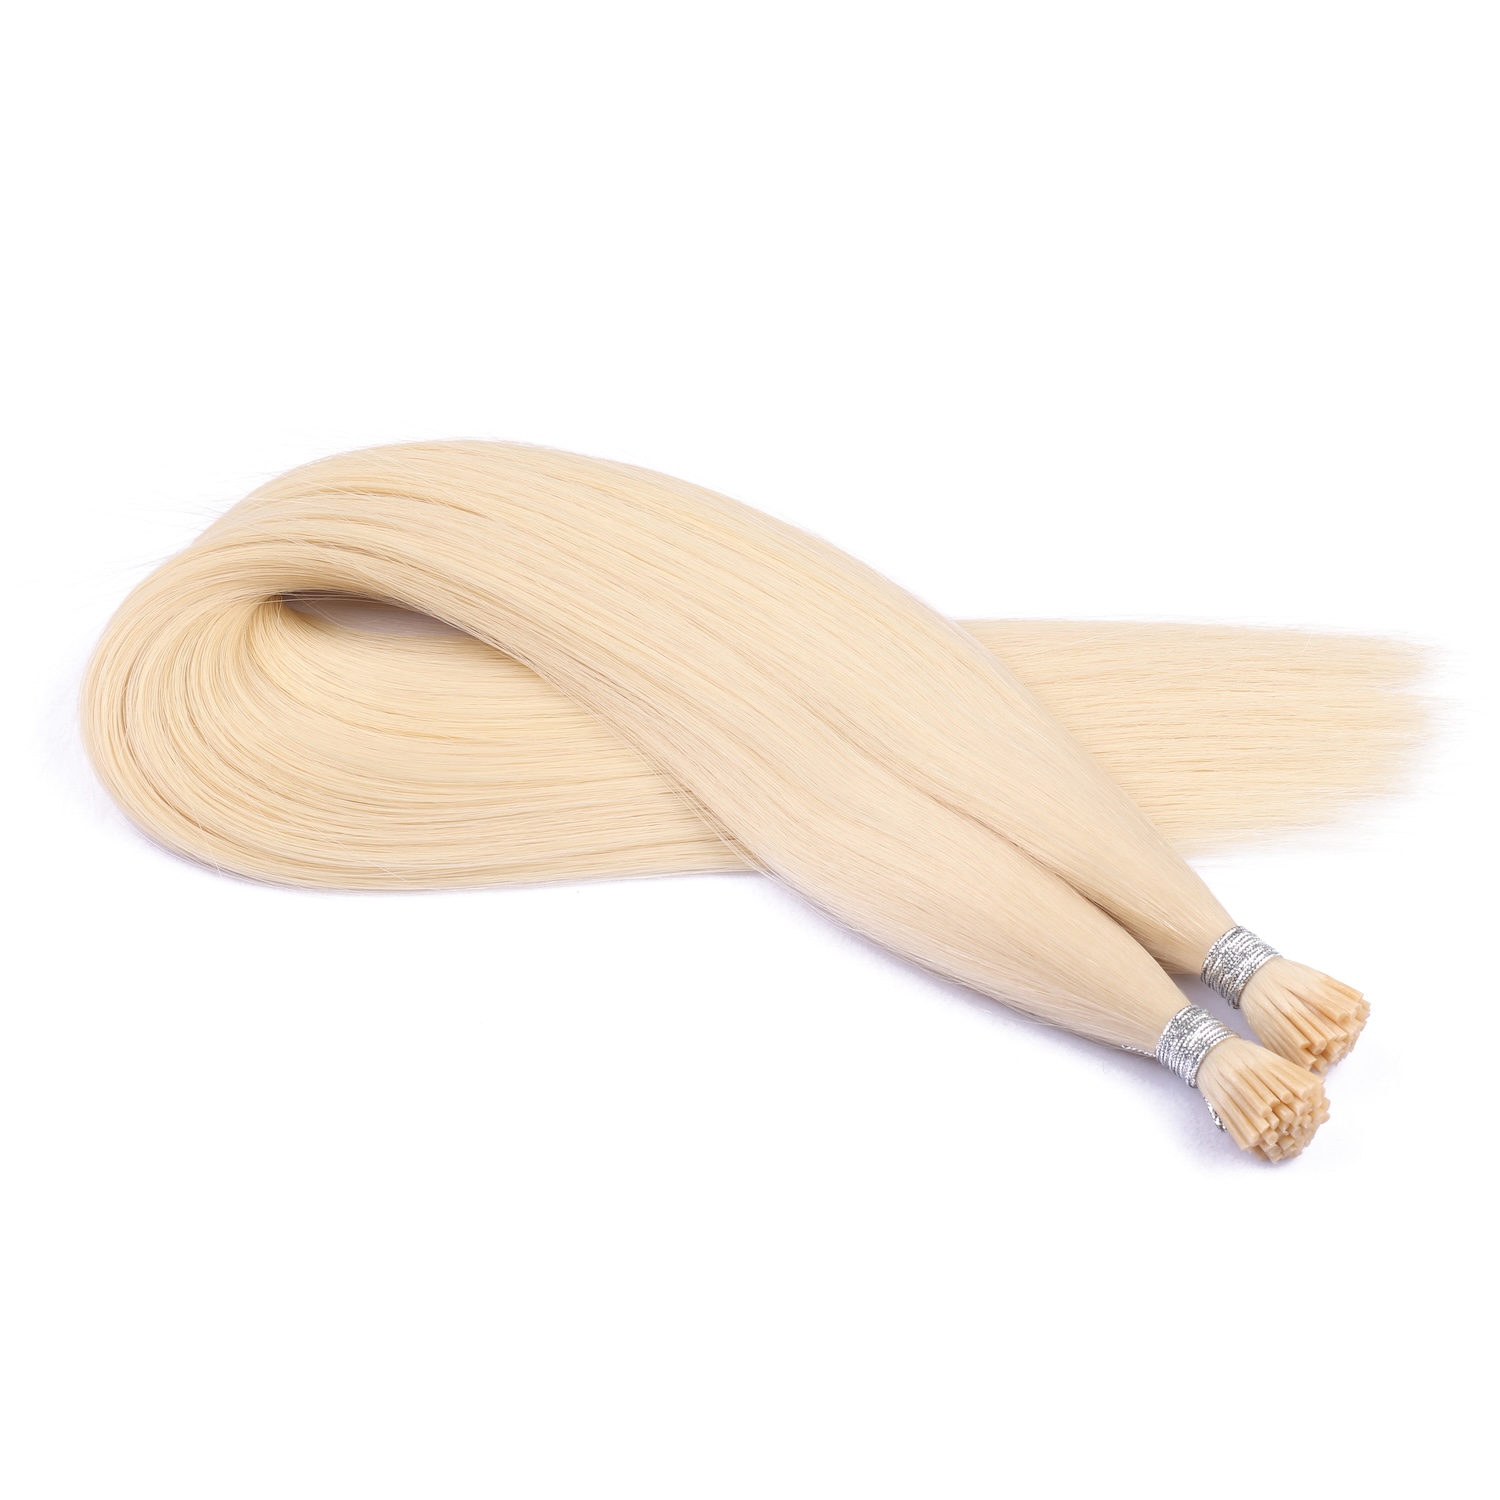
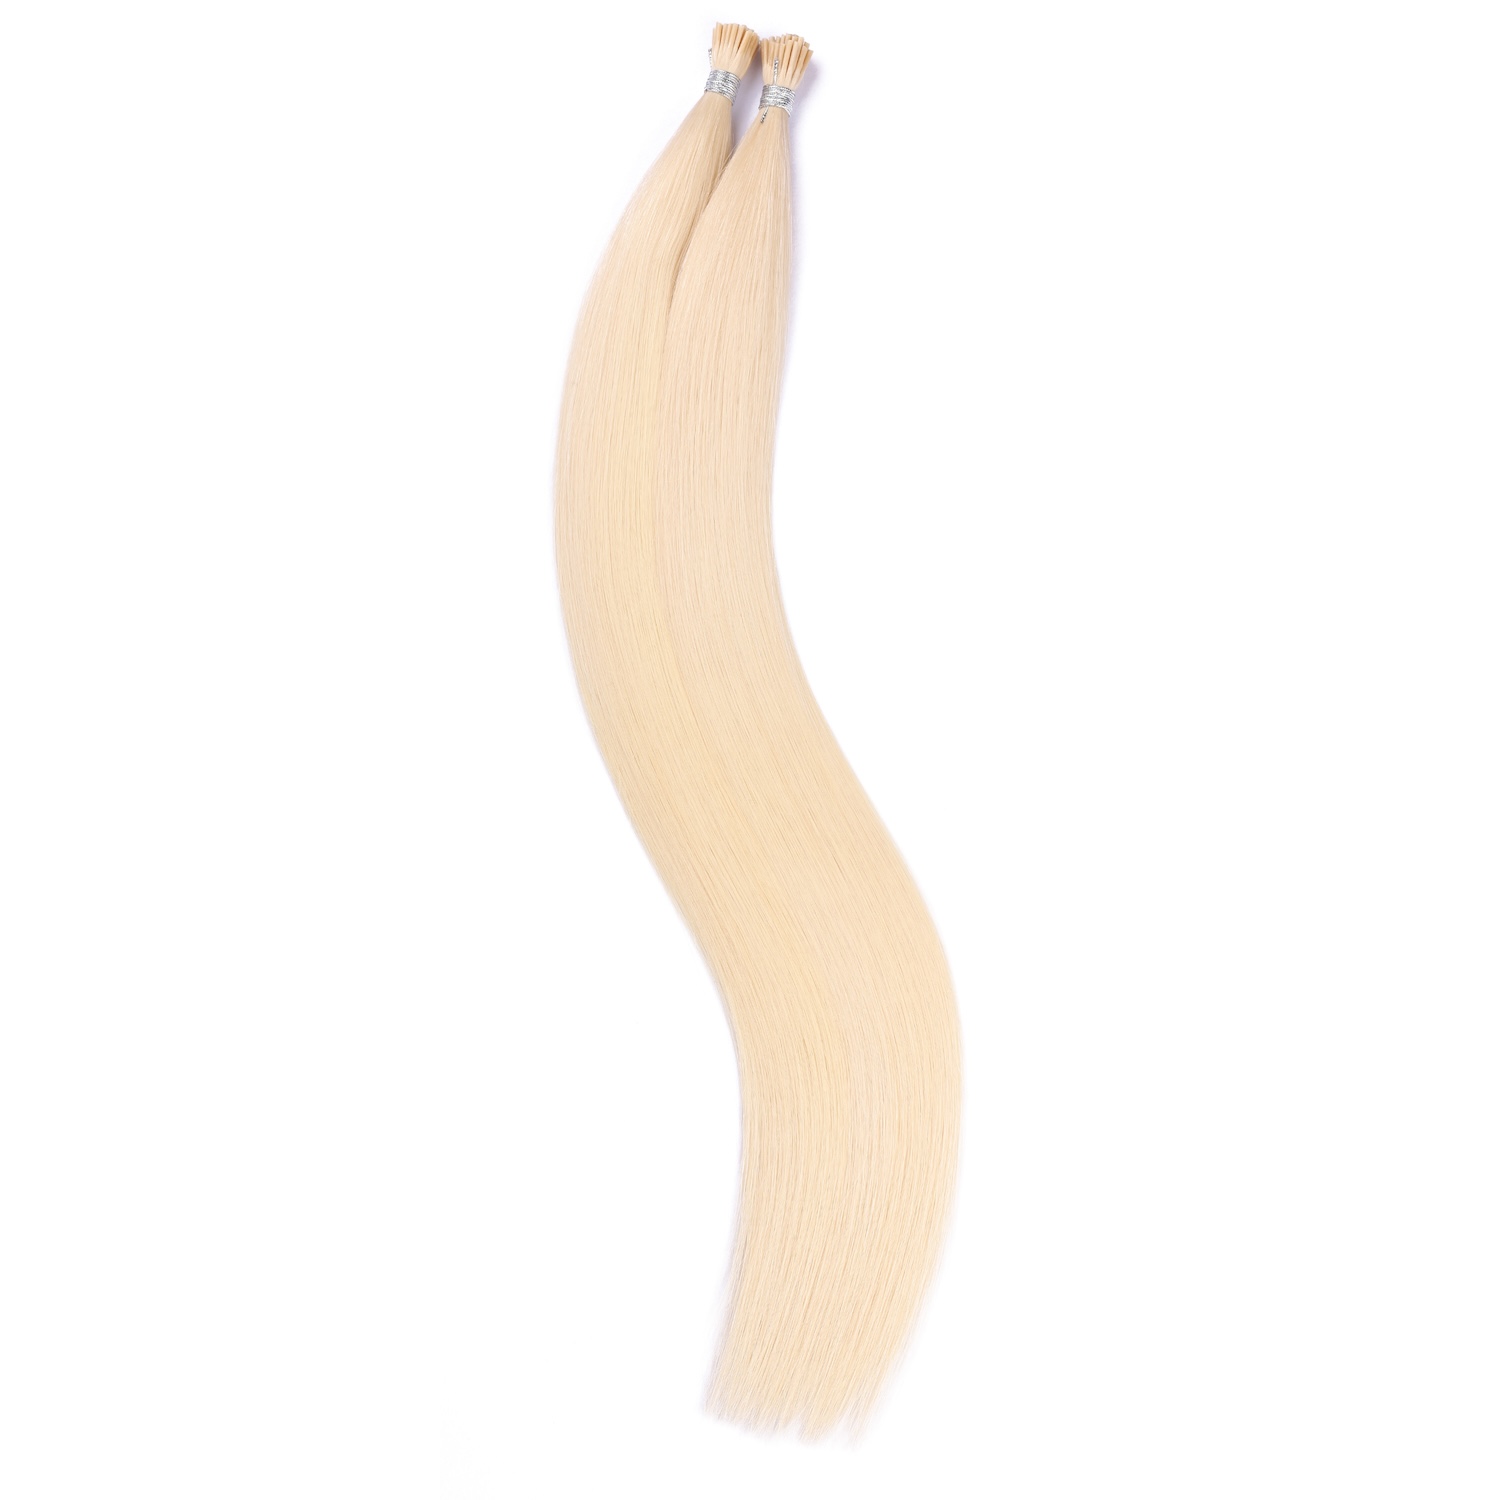
I tip hair extensions, also called micro bead extensions or stick tip extensions, are individual extension strands attached to natural hair using small beads or micro rings.

Unlike keratin fusion extensions:

  • No glue is used
  • No heat is required
  • No chemical adhesive is involved

Each extension strand has a small “I”-shaped tip made from keratin-coated or reinforced material. The extension and natural hair are inserted into a bead, then secured using pliers.

I tip extensions are popular because they offer:

  • Natural movement
  • Reusability
  • Minimal heat damage
  • Flexible styling
  • Long-term wear

They are commonly made from:

  • Remy human hair
  • Virgin human hair
  • Synthetic hair (less common)


Why Proper Application Matters

Correct installation affects:

  • Comfort
  • Hair health
  • Bond durability
  • Styling flexibility
  • Overall appearance

Poorly installed I tip extensions can cause:

  • Tension on the scalp
  • Hair breakage
  • Uneven blending
  • Bead slippage
  • Tangling
  • Visible attachment points

A professional installation distributes weight evenly and protects the natural hair.

Think of it like building a suspension bridge: the structure only works when the tension is balanced properly. Except here, the bridge occasionally needs conditioner and a silk pillowcase.


Tools Needed for I Tip Hair Extension Installation

I Tip Hair Extensions

Choose:

  • Correct color match
  • Desired length
  • Appropriate density

Human Remy hair is strongly recommended for the most natural result.

Micro Beads or Micro Rings

These small rings hold the extension and natural hair together.

Common types include:

  • Silicone-lined beads
  • Aluminum beads
  • Copper beads

Silicone-lined beads are popular because they:

  • Reduce slipping
  • Protect natural hair
  • Improve grip

Loop Tool or Pulling Needle

This tool helps thread natural hair through the micro bead.

Hair Extension Pliers

Special pliers flatten and secure the bead.

Do not use ordinary household pliers.

Sectioning Clips

Used to organize the hair during installation.

Rat Tail Comb

Helps create clean and precise sections.

Mirror and Proper Lighting

Good visibility is extremely important for even placement.

Step-by-Step Guide to Applying I Tip Hair Extensions

Step 1: Wash and Prepare the Hair

Before applying I tip extensions, the natural hair must be completely clean.

Use:

  • Clarifying shampoo
  • No conditioner
  • No oils
  • No leave-in products

Why This Step Matters

Clean hair improves:

  • Bead grip
  • Extension longevity
  • Installation precision

Oily or conditioned hair makes beads slide more easily.

What to Avoid

Do NOT:

  • Use heavy conditioner near roots
  • Apply serums
  • Use oily scalp products

These reduce bead security.


Step 2: Dry the Hair Completely

The hair must be fully dry before installation.

Why This Step Matters

Wet hair can:

  • Expand temporarily
  • Cause inaccurate tension
  • Increase slipping risk later

Dry hair ensures proper bead compression.

What to Avoid

Never install I tip extensions on damp hair.

Moisture trapped inside beads may contribute to:

  • Slippage
  • Scalp irritation
  • Weak attachment

Step 3: Section the Hair Properly

Sectioning is one of the most important steps.

Create horizontal rows beginning at the nape of the neck.

Use sectioning clips to separate layers neatly.

Why Sectioning Matters

Clean sections help:

  • Maintain symmetry
  • Create invisible installation
  • Improve blending
  • Prevent overcrowding

Poor sectioning often creates bulky or uneven results.

Recommended Spacing

Leave enough natural hair between rows to:

  • Hide beads
  • Allow natural movement
  • Prevent scalp stress

Most stylists leave:

  • 1–2 inches between rows

Step 4: Load the Micro Bead Onto the Loop Tool

Slide one bead onto the loop tool before pulling natural hair through.

Why This Step Matters

Preloading the bead speeds up installation and improves workflow efficiency.

Professional stylists often organize multiple beads in advance to save time.


Step 5: Take a Small Section of Natural Hair

Use the rat tail comb to isolate a small, clean section of hair.

The amount of natural hair should approximately match the extension strand thickness.

Why Proper Sizing Matters

If too much hair is used:

  • The bead may not close properly
  • Extensions may slip

If too little hair is used:

  • Excessive tension may occur
  • Breakage risk increases

Balanced weight distribution is critical.

What to Avoid

Avoid taking:

  • Uneven sections
  • Triangular sections
  • Large bulky sections

Clean square or rectangular sections work best.


Step 6: Pull Natural Hair Through the Bead

Insert the natural hair through the loop tool and slide the bead upward onto the hair strand.

Position the bead close to the scalp.

Correct Placement Distance

Leave approximately:

  • 2–5 millimeters from the scalp

Why This Distance Matters

If installed too tightly:

  • Scalp discomfort occurs
  • Tension increases
  • Hair breakage risk rises

If installed too loosely:

  • Extensions twist
  • Beads become visible
  • Slippage increases

The extension should move naturally without pulling.


Step 7: Insert the I Tip Extension Into the Bead

Insert the I tip extension strand upward into the bead alongside the natural hair.

Ensure the extension tip sits securely inside the bead.

Why Proper Insertion Matters

Correct insertion improves:

  • Bond strength
  • Weight balance
  • Longevity

Poor insertion can cause:

  • Uneven attachment
  • Extension shedding
  • Weak grip

Step 8: Clamp the Bead Securely

Use extension pliers to flatten the bead firmly.

Apply controlled pressure.

Why Controlled Pressure Matters

Too much pressure may:

  • Damage hair
  • Crack the bead
  • Create discomfort

Too little pressure may:

  • Cause slippage
  • Reduce durability

The bead should feel secure but not painful.

Proper Bead Direction

Many professionals flatten beads horizontally for:

  • Better comfort
  • Lower visibility
  • Improved flexibility

Step 9: Continue Row by Row

Repeat the process carefully across each row.

Maintain:

  • Even spacing
  • Consistent tension
  • Balanced distribution

Why Balanced Placement Matters

Balanced installation prevents:

  • Uneven weight distribution
  • Hair stress
  • Visible gaps
  • Awkward fullness patterns

Professional installations prioritize symmetry.


Step 10: Blend the Extensions

After completing installation, blend the extensions with the natural hair.

This may include:

  • Trimming
  • Layering
  • Texturizing
  • Curl blending

Why Blending Matters

Even expensive extensions look unnatural without proper blending.

Good blending creates:

  • Seamless transition
  • Natural movement
  • Invisible separation lines

What to Avoid

Avoid blunt cutting straight across the ends unless specifically requested.

Soft layering usually creates more natural results.

How Many I Tip Extensions Are Needed?

The number depends on:

  • Hair thickness
  • Desired volume
  • Length goals

Typical Quantities

Goal Recommended Strands
Volume Only 50–100
Standard Full Head 100–180
Extra Full Glam Look 200–250

Using too many extensions can overload the natural hair.


Best Placement Areas

I tip extensions are usually placed:

  • At the back of the head
  • Around the sides
  • Near the crown carefully

Avoid placing extensions too close to:

  • Hairline
  • Temples
  • Part line

These areas expose beads more easily.


Common Mistakes to Avoid

Installing Too Close to the Scalp

This causes:

  • Pain
  • Restricted movement
  • Hair stress

Extensions should move naturally.

Using Too Much Hair in One Bead

Overloading beads weakens grip and increases slipping.

Poor Color Matching

Incorrect color matching makes extensions obvious.

Professional stylists often blend multiple shades for realism.

Uneven Sectioning

Messy sectioning creates:

  • Visible rows
  • Uneven fullness
  • Difficult styling

Overcrowding the Hair

Too many extensions in one area create:

  • Tension
  • Tangling
  • Bulky appearance

Choosing Low-Quality Hair

Cheap hair often:

  • Tangles quickly
  • Sheds excessively
  • Looks unnatural

High-quality Remy hair produces significantly better results.


How Long Does Installation Take?

Typical installation times:

Experience Level Installation Time
Beginner 4–6 hours
Professional Stylist 2–4 hours

Longer hair and higher density require more time.


How Long Do I Tip Extensions Last?

With proper care, I tip extensions typically last:

  • 8–12 weeks before maintenance
  • 6–12 months for reusable hair

The hair itself can often be reused multiple times.


How to Care for I Tip Extensions

Use Sulfate-Free Shampoo

Harsh shampoos weaken hair quality and dry extensions.

Brush Carefully

Use a loop brush or extension-safe brush.

Always support the root area while brushing.

Avoid Oil Near Beads

Oil weakens bead grip and increases slippage.

Sleep with Braided Hair

Loose braids reduce:

  • Tangling
  • Friction
  • Knotting

Schedule Maintenance Appointments

Extensions should be adjusted as natural hair grows.


Are I Tip Extensions Damaging?

When installed correctly, I tip extensions are considered one of the safer semi-permanent methods.

Advantages include:

  • No glue
  • No heat
  • Reusable design
  • Flexible movement

However, poor installation or neglect can still cause damage.


Who Should Avoid I Tip Extensions?

I tips may not be ideal for:

  • Extremely fine hair
  • Severely damaged hair
  • Excessive hair shedding conditions

A professional consultation is recommended beforehand.


I Tip vs Other Extension Methods

I Tip vs K Tip Extensions

Feature I Tip K Tip
Heat Required No Yes
Reusable Yes Limited
Installation Time Moderate Long
Removal Process Easier More complex

I Tip vs Tape-In Extensions

Feature I Tip Tape-In
Styling Flexibility Excellent Good
Visibility Very low Moderate
Maintenance Frequency Moderate Higher
Reusability Excellent Good

Why Many Professionals Prefer I Tip Extensions

Professional stylists often recommend I tips because they offer:

  • Strong hold
  • Natural movement
  • Long-term reusability
  • Flexible placement
  • Minimal chemical exposure

They are especially popular for luxury salon services.


Future Trends in I Tip Hair Extensions

The extension industry continues evolving rapidly.

Emerging innovations include:

  • Nano I tips
  • Ultra-flat beads
  • Invisible bead technology
  • Lightweight extensions
  • Eco-friendly hair processing
  • Improved silicone bead designs

Manufacturers are focusing on improving:

  • Comfort
  • Durability
  • Faster installation
  • More natural appearance

Conclusion

Learning how to apply I tip hair extensions correctly requires patience, precision, and understanding of proper tension, sectioning, and placement techniques.

Every step matters — from washing the hair properly to spacing beads evenly and blending extensions naturally. Correct installation improves not only appearance, but also comfort, durability, and hair safety.

When applied properly, I tip extensions provide:

  • Natural movement
  • Long-lasting wear
  • Flexible styling
  • Minimal heat exposure
  • Reusable value

Whether you are a beginner practicing at home or a salon professional refining your technique, mastering proper I tip installation can help create beautiful, seamless, and professional-quality hair extension results that look natural and feel comfortable for weeks.

How much does a k tip hair extensions cost?

K tip hair extensions have become one of the most popular premium hair extension methods in the beauty industry. Loved by celebrities, hairstylists, influencers, and salon professionals, K tip extensions are known for their natural appearance, long-lasting results, and flexible styling options.

However, one of the most common questions buyers ask before investing in this hair extension method is: How much do K tip hair extensions cost?

The answer is not always simple because the total price depends on many factors, including hair quality, hair length, salon installation fees, maintenance costs, and the number of strands required.

In this complete guide, we will explain everything you need to know about K tip hair extension pricing, what affects the cost, how long they last, whether they are worth the investment, and how to choose the right K tip extensions for your needs.

By the end of this article, you will have a clear understanding of the real cost of K tip hair extensions and how to make a smart purchasing decision.


What Are K Tip Hair Extensions?

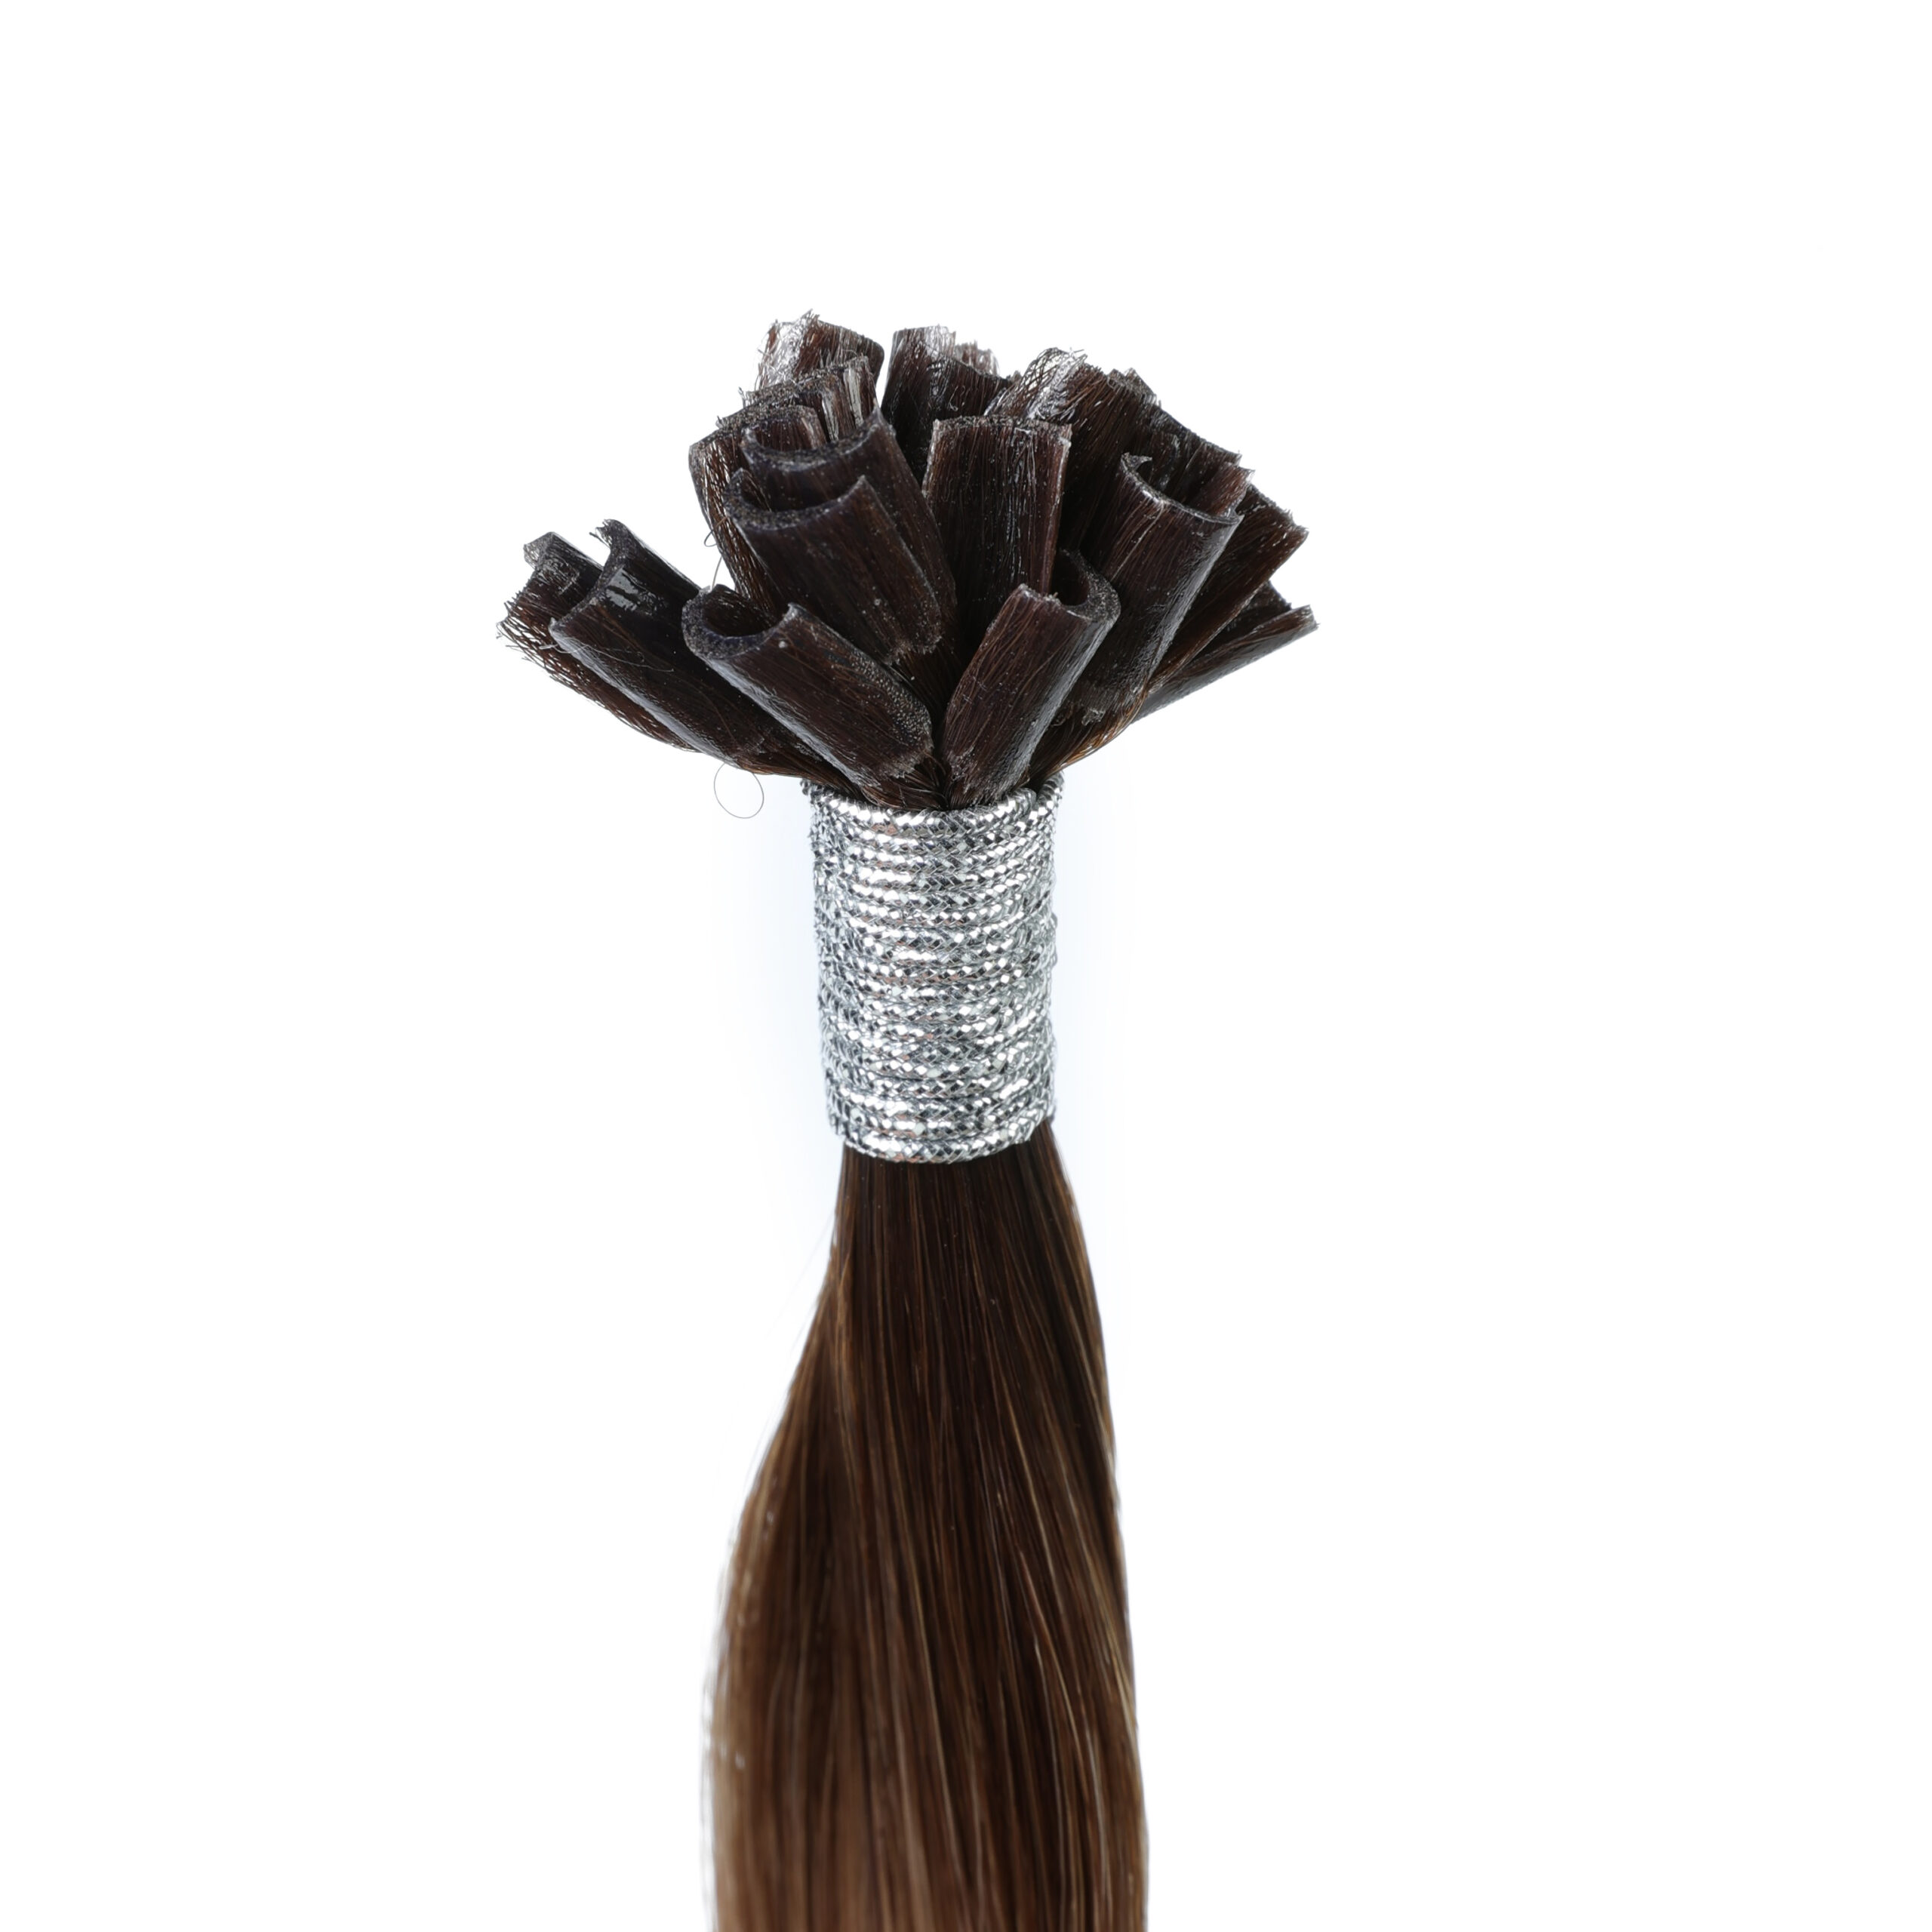
K tip hair extensions, also called keratin tip extensions or fusion hair extensions, are individual hair strands attached to natural hair using keratin-based adhesive bonds.

The “K” stands for keratin, a protein naturally found in human hair.

Each extension strand has a small keratin tip that is melted using a heat tool and fused to sections of natural hair.

Unlike clip-ins or tape-ins, K tip extensions are considered a semi-permanent hair extension method.

They are popular because they provide:

  • Natural movement
  • Long-lasting wear
  • Invisible bonds
  • 360-degree styling flexibility
  • Lightweight comfort

K tip extensions are widely used for:

  • Hair length enhancement
  • Volume improvement
  • Color blending
  • Thin hair transformation
  • Luxury hairstyling


Average Cost of K Tip Hair Extensions

The total cost of K tip hair extensions usually includes:

  1. Hair extension price
  2. Installation labor cost
  3. Maintenance expenses
  4. Removal and reinstallation fees

On average, professional K tip hair extensions cost between:

Service Type Average Price
Hair Only $150–$800
Installation Only $200–$1,000
Full Professional Service $400–$2,000+

Luxury salons in major cities may charge even higher prices.

Why Are K Tip Extensions Expensive?

K tip hair extensions are considered one of the most labor-intensive extension methods.

Several factors contribute to the higher price:

  • Individual strand installation
  • Long application time
  • Premium human hair quality
  • Skilled stylist requirements
  • Long-lasting results

A full-head K tip installation may require:

  • 100–250 strands
  • 3–6 hours of salon work

That level of detail and craftsmanship increases the overall cost significantly.


Factors That Affect K Tip Hair Extension Cost

Understanding pricing factors helps buyers avoid confusion and unrealistic expectations.


Hair Quality

Hair quality is one of the biggest pricing factors.

Synthetic Hair

Synthetic K tip extensions are cheaper but less common.

Price range:

  • $50–$150

Disadvantages:

  • Less natural appearance
  • Limited heat styling
  • Short lifespan
  • Tangling issues

Most professional salons do not recommend synthetic K tip extensions.


Human Hair

Human hair extensions are the industry standard.

Price range:

  • $150–$800+

Advantages:

  • Natural look
  • Heat styling capability
  • Better durability
  • Longer lifespan

Human hair is available in several grades.


Remy Hair vs Non-Remy Hair

Remy Hair

Remy hair keeps all cuticles aligned in the same direction.

Advantages:

  • Smooth texture
  • Less tangling
  • Longer lifespan
  • More natural shine

Premium Remy hair costs more but performs significantly better.


Non-Remy Hair

Non-Remy hair is cheaper but lower quality.

Problems may include:

  • Tangling
  • Dryness
  • Shorter lifespan

Many buyers regret choosing cheap non-Remy extensions after only a few weeks.


Hair Length

Longer hair extensions require more raw hair material and therefore cost more.

Typical pricing increases by length:

Hair Length Average Hair Cost
14 inch $120–$250
18 inch $180–$400
22 inch $300–$600
24–30 inch $500–$1,000+

Very long extensions are especially expensive because long healthy donor hair is rare.


Hair Density and Fullness

Thicker hairstyles require more extension strands.

Typical quantities:

  • Volume enhancement: 50–100 strands
  • Standard full head: 100–180 strands
  • Ultra-full glamour look: 200–300 strands

More strands mean:

  • More hair cost
  • More labor time
  • Higher installation fees

Hair Color

Certain hair colors cost more due to processing complexity.

Premium pricing often applies to:

  • Balayage colors
  • Platinum blonde
  • Custom mixed shades
  • Ombre styles
  • Fashion colors

Custom coloring increases production and salon costs.


Installation Cost

Installation fees vary dramatically depending on:

  • Stylist experience
  • Salon reputation
  • Geographic location
  • Installation complexity


Average Salon Installation Costs

Salon Level Installation Cost
Budget Salon $200–$400
Mid-Range Salon $400–$700
Luxury Salon $800–$1,500+

Highly experienced stylists charge more because proper installation affects:

  • Comfort
  • Bond durability
  • Natural appearance
  • Hair safety

Cheap installation often leads to expensive problems later. Bad K tip installations can look uneven, damage natural hair, or create visible bonds that resemble tiny rice grains hiding in your hairline like shy little villains.


Geographic Price Differences

Location strongly affects salon pricing.

United States

Major cities such as:

  • New York
  • Los Angeles
  • Miami
  • Chicago

often have premium salon pricing.

Full K tip services may exceed:

  • $1,500–$2,500

Europe

Luxury European salons also charge premium prices, especially in:

  • London
  • Paris
  • Milan

Asia

China and Southeast Asia may offer lower labor costs, but imported premium hair still increases pricing.


Maintenance Costs

K tip extensions require regular maintenance.

Common maintenance expenses include:

  • Professional brushing
  • Bond checks
  • Hair treatments
  • Styling products
  • Salon maintenance visits

Maintenance visits usually cost:

  • $50–$300 per appointment

Proper maintenance extends extension lifespan significantly.


Removal Costs

K tip extensions cannot simply be pulled out.

Professional removal uses:

  • Keratin bond remover
  • Pliers
  • Specialized tools

Removal fees typically range from:

  • $100–$400

Improper removal may damage natural hair.


Reinstallation Costs

Unlike tape-ins, K tips are usually not reused multiple times.

Most users purchase new hair after removal.

This makes K tips more expensive long term than some reusable extension systems.


How Long Do K Tip Extensions Last?

One reason people accept the higher price is longevity.

With proper care, K tip extensions typically last:

  • 3–6 months

Some premium installations last even longer.

Factors affecting lifespan include:

  • Hair quality
  • Installation quality
  • Daily maintenance
  • Heat exposure
  • Hair growth rate

Are K Tip Hair Extensions Worth the Cost?

For many users, yes.

K tip extensions offer:

  • Extremely natural appearance
  • Long-lasting wear
  • Strong bond security
  • Full styling flexibility
  • Lightweight feel

Unlike clip-ins, K tips become part of your daily hairstyle routine.

Many users consider them a luxury beauty investment similar to:

  • Designer handbags
  • Professional skincare
  • Premium salon coloring

K Tip Extensions vs Other Hair Extension Methods

To understand pricing better, it helps to compare K tips with other extension methods.


K Tip vs Tape-In Extensions

Feature K Tip Extensions Tape-In Extensions
Installation Time Long Faster
Cost Higher Moderate
Lifespan Longer Moderate
Reusability Limited High
Styling Flexibility Excellent Good
Bond Visibility Very low Slightly visible

Tape-ins are often cheaper but less durable.


K Tip vs Clip-In Extensions

Feature K Tip Clip-In
Permanence Semi-permanent Temporary
Daily Removal No Yes
Natural Appearance Excellent Moderate
Installation Cost High Low
Comfort Lightweight Heavier

Clip-ins are more budget-friendly but less seamless.


K Tip vs Sew-In Weaves

Feature K Tip Sew-In
Best For Fine to medium hair Thick hair
Weight Distribution Individual strands Braided tracks
Natural Movement Excellent Good
Scalp Tension Lower Higher

K tips are generally considered more discreet.


Who Should Choose K Tip Extensions?

K tip extensions are ideal for people who:

  • Want long-term wear
  • Prefer invisible bonds
  • Need maximum styling freedom
  • Want a luxury hair experience
  • Are willing to invest in maintenance

They work especially well for:

  • Fine hair
  • Medium-density hair
  • Professional styling
  • Bridal hair
  • Influencer and celebrity looks

Who May Not Be a Good Candidate?

K tip extensions may not be ideal for:

  • Extremely damaged hair
  • Very oily scalps
  • Tight budgets
  • People unwilling to maintain them

Because installation uses heat, severely weakened hair should be evaluated carefully.


How to Save Money on K Tip Hair Extensions

There are ways to reduce costs without sacrificing quality.


Buy High-Quality Hair Directly from Manufacturers

Many salons mark up extension hair significantly.

Buying from reputable manufacturers can reduce costs.

Chinese hair manufacturers are major global suppliers of:

  • Remy hair
  • Virgin hair
  • K tip extensions
  • Custom colors

Avoid Extremely Cheap Hair

Cheap extensions often lead to:

  • Tangling
  • Shedding
  • Dryness
  • Short lifespan

Replacing poor-quality hair repeatedly often costs more overall.


Choose the Right Length

Ultra-long hair dramatically increases costs.

Sometimes 18–22 inch extensions provide the best balance between beauty and affordability.


Maintain Extensions Properly

Good maintenance extends lifespan and reduces replacement frequency.


How to Care for K Tip Hair Extensions

Proper care is essential for protecting your investment.

Recommended care includes:

  • Sulfate-free shampoo
  • Gentle brushing
  • Avoiding oil near bonds
  • Sleeping with braided hair
  • Regular salon checkups

Never pull or tug on the keratin bonds.


Common Problems That Increase Costs

Poor maintenance may cause:

  • Bond slippage
  • Hair tangling
  • Shedding
  • Natural hair breakage

Repairing these issues often requires expensive salon corrections.


Future Trends in K Tip Hair Extensions

The industry continues evolving rapidly.

Popular trends include:

  • Nano keratin bonds
  • Invisible K tips
  • Lightweight bonds
  • Eco-friendly processing
  • Ultra-flat keratin tips
  • Customized color blending

Manufacturers are focusing on improving:

  • Comfort
  • Longevity
  • Installation speed
  • Hair sustainability

Conclusion

So, how much do K tip hair extensions cost?

The total cost typically ranges from $400 to over $2,000 depending on hair quality, length, installation expertise, salon location, and maintenance requirements.

Although K tip extensions are more expensive than many other hair extension methods, they are also considered one of the most natural-looking, durable, and luxurious options available.

For users seeking:

  • Long-lasting results
  • Invisible bonds
  • Full styling freedom
  • Premium hair appearance

K tip extensions are often worth the investment.

Understanding the differences in hair quality, salon pricing, maintenance costs, and installation methods allows buyers to make smarter decisions and avoid unnecessary expenses. With proper care and professional installation, high-quality K tip hair extensions can provide beautiful, confidence-boosting results for months.

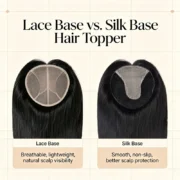
Lace Base vs. Silk Base Hair Topper

If you’re considering a hair topper to add volume, cover thinning, or simply change your look, you’ve probably come across two popular base types: lace base and silk base. At first glance, they might seem similar—both are designed to blend seamlessly with your scalp—but the differences in construction, appearance, comfort, and maintenance can significantly impact your experience. In this comprehensive guide, we’ll break down everything you need to know about lace base and silk base hair toppers in 2026, including their pros and cons, ideal use cases, top brand comparisons, and expert tips to help you make an informed decision.


What Is a Hair Topper?

A hair topper (also called a hair volumizer or partial wig) is a lightweight hairpiece that clips onto your existing hair to add fullness, cover bald spots, or enhance your natural style. Unlike full wigs, toppers are designed to integrate with your own hair, making them more comfortable and versatile for daily wear. The base material—the foundation where hair strands are attached—is crucial to how natural and secure the topper looks and feels.

Leading manufacturers like Qingdao ALOVE HAIR PRODUCTS Co., Ltd., a professional hair supplier since the 1980s, offer both lace and silk base toppers crafted from 100% cuticle-intact human hair. With decades of expertise in luxury hair production and a focus on innovation, ALOVE HAIR ensures high durability, natural movement, and tangle-free performance—key factors whether you choose lace or silk.

To learn more about toppers suitable for thinning hair, please read this article: Hair toppers for thinning hair


Lace Base Hair Topper: Lightweight & Breathable

How It’s Made

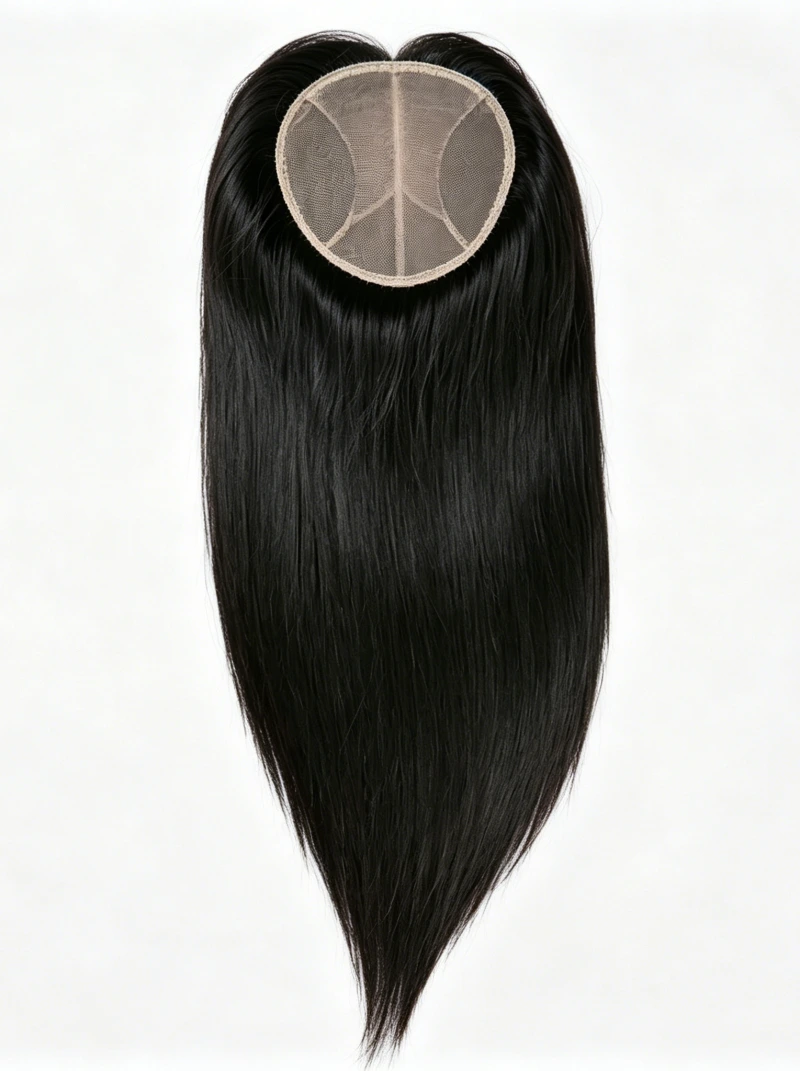
A lace base topper uses a fine, mesh-like fabric (often Swiss or French lace) as its foundation. Individual hair strands are hand-tied through tiny holes in the lace, creating the illusion that hair is growing directly from your scalp. The lace is typically transparent or skin-toned and can be trimmed to fit your hairline.

Products you might be interested in: Lace Base Hair Topper

Pros of Lace Base Toppers

  • Ultra-Thin & Lightweight: Feels almost weightless on your head.
  • Highly Breathable: Allows air circulation, reducing scalp sweat—ideal for hot climates or active lifestyles.
  • Natural Parting: You can part your hair anywhere since the entire base mimics scalp.
  • Customizable Fit: Lace edges can be carefully cut to match your exact hairline.
  • Affordable: Generally less expensive than silk base options.

Cons of Lace Base Toppers

  • Visible Knots: On lighter skin tones, the dark knots where hair is tied may show through unless bleached (a delicate process).
  • Less Durable: Lace can tear or stretch over time, especially with frequent handling.
  • Requires Adhesive for Full Security: While clips work for light hold, long-term wear often needs tape or glue at the front.
  • Not Ideal for High Ponytails: The lace base may become visible if pulled back tightly.

Best For:

  • First-time topper users
  • Those with sensitive or oily scalps
  • People seeking an affordable, everyday solution
  • Users who prefer loose, flowing styles

Brands like ALOVE HAIR use premium Swiss lace and double-drawn cuticle-intact hair to minimize shedding and tangling—common issues with lower-grade lace toppers.

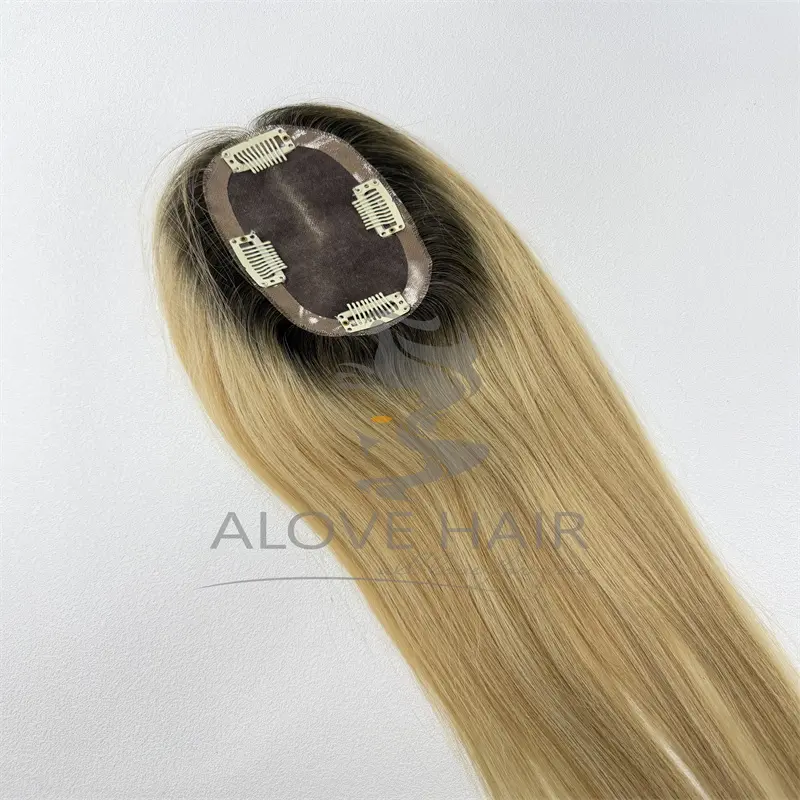
Features a seamless Swiss lace with hand-tied knots, allowing natural parting and a breathable, lightweight fit. Ideal for daily wear and sensitive scalps.


Silk Base Hair Topper: Premium Realism

How It’s Made

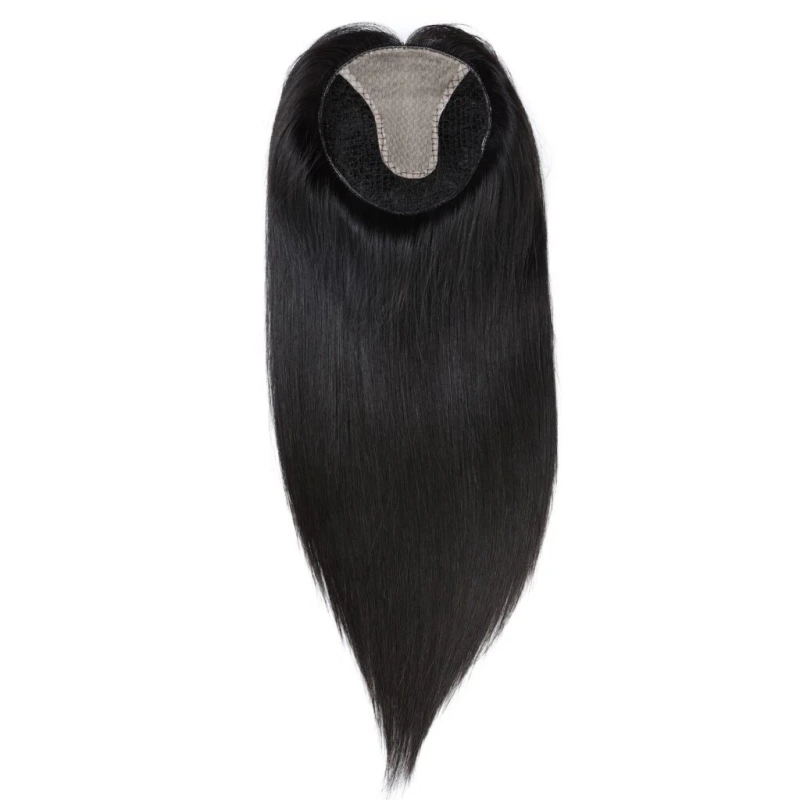
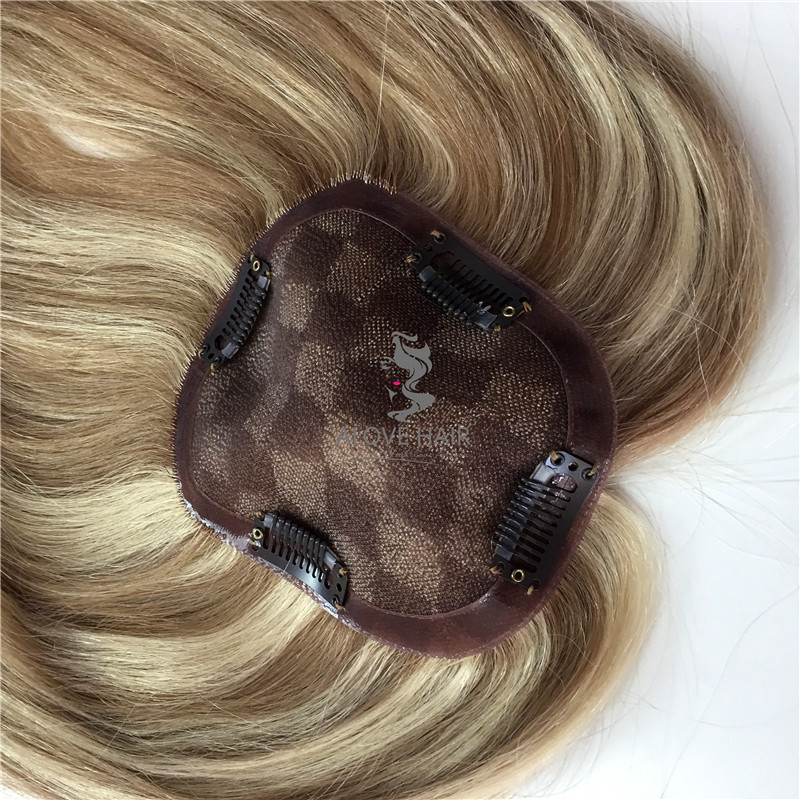
A silk base topper features a triple-layer construction: a soft silk top layer, a middle layer with hand-tied hair knots, and a breathable mesh bottom. The silk layer hides the knots completely, creating a flawless “scalp” effect that looks like real skin—even up close.

Products you might be interested in: Silk Base Hair Toppers

Pros of Silk Base Toppers

  • Most Natural Appearance: No visible knots; mimics actual scalp texture and color.
  • Knot-Free Illusion: Hair appears to grow naturally from the skin.
  • Durable & Long-Lasting: Silk is stronger than lace and resists tearing.
  • No Bleaching Needed: Ready to wear out of the box on all skin tones.
  • Great for Updos: Holds well in ponytails or buns without revealing the base.

Cons of Silk Base Toppers

  • Heavier & Less Breathable: The extra layers add slight weight and reduce airflow.
  • Higher Price Point: Typically costs 30–50% more than lace base toppers.
  • Limited Parting Area: Only the silk-covered section (usually 2×4 inches) allows free parting; outside that, hair direction is fixed.
  • Harder to Adjust: Cannot be trimmed like lace; sizing must be precise.

Best For:

  • Special occasions or professional settings where realism is critical
  • Users with fair or light skin tones (where lace knots show easily)
  • Those willing to invest in long-term quality
  • People who frequently wear hair up

ALOVE HAIR’s silk base toppers are crafted with meticulous attention to cuticle alignment and color consistency, ensuring a matte, ash-toned finish that avoids unnatural red or pink undertones—especially important for bleached or colored extensions.

Premium triple-layer construction: silk top hides knots completely, mesh underside ensures durability. Offers undetectable scalp realism—perfect for updos and fair skin tones.


Side-by-Side Comparison: Lace Base vs. Silk Base

Feature Lace Base Topper Silk Base Topper
Realism Good (knots may show on light skin) Excellent (knot-free scalp illusion)
Weight Very light Slightly heavier
Breathability High Moderate
Durability Moderate (lace can tear) High (silk resists damage)
Parting Flexibility Full base Limited to silk area (e.g., 2″x4″)
Updo Friendly No Yes
Price Range (2026) $80 – $250 $150 – $400+
Maintenance Easy (but avoid rough handling) Easy (more robust)
Best Skin Tone Match Medium to dark All, especially fair/light
Ideal For Daily wear, beginners Events, professionals, realism seekers

Both types benefit from 100% cuticle-intact human hair, a standard upheld by top-tier suppliers like ALOVE HAIR. Their cold-dye technology preserves hair health during coloring, ensuring extensions last 12–18 months with proper care—far longer than synthetic or low-grade Remy alternatives.


Top 5 Brands Compared (2026)

We analyzed customer reviews, expert ratings, and product specs from leading brands to compare their lace and silk base offerings:

1. Unice Hair

  • Lace Base: Ultra-thin Swiss lace, Remy human hair, $120–$190
  • Silk Base: 3-layer silk top, pre-bleached knots, $220–$320
  • Verdict: Best value for high-quality human hair. Silk base praised for undetectable realism.

2. Luvme Hair

  • Lace Base: Budget-friendly synthetic & human blends, $70–$150
  • Silk Base: Limited selection; mostly synthetic, $130–$200
  • Verdict: Great for trendy, short-term styles. Not ideal for long-term silk base investment.

3. Mayvenn

  • Lace Base: Custom-fit options, virgin human hair, $180–$260
  • Silk Base: Not currently offered
  • Verdict: Lace lovers rejoice—excellent customization and hair quality.

4. Arda Wigs (Synthetic Focus)

  • Lace Base: Heat-friendly synthetic, $90–$140
  • Silk Base: No true silk base; offers “illusion tops” with monofilament
  • Verdict: Top choice for synthetic wearers wanting affordability and style variety.

5. Qingdao ALOVE HAIR PRODUCTS Co., Ltd.

  • Lace Base: Premium Swiss lace, 100% cuticle-intact, hand-tied, $150–$280
  • Silk Base: Triple-layer silk top with hidden knots, ash-tone coloring, $220–$420
  • Product Range: Includes Genius Weft, hand-tied, tape-in, I-tip, and custom toppers
  • Global Reach: Supplies salons in USA, UK, Canada, Australia, and Europe
  • Why Choose Them?: Over 40 years in the industry, 90%+ client retention, OEM/ODM services, and full accessory support (pliers, tapes, removers, custom packaging)
  • Verdict: A trusted wholesale partner for stylists and businesses seeking luxury, durability, and end-to-end support. Their silk base toppers are particularly noted for seamless blending on fair skin, while lace bases offer exceptional breathability for daily wear.

Pro Tip: ALOVE HAIR’s specialty in colored hair extensions—achieved through cuticle-intact processing without harsh ash baths—makes them a top choice for clients wanting vibrant, long-lasting hues without damage.


How to Choose: Ask Yourself These Questions

  1. What’s my primary goal?
    • Daily volume & comfort → Lace base
    • Special event realism → Silk base
  2. What’s my budget?
    • Under $150 → Lace base
    • Over $200 → Consider silk base
  3. Do I wear my hair up often?
    • Yes → Silk base
    • Rarely → Lace base is fine
  4. Is my scalp sensitive or oily?
    • Yes → Lace base (better airflow)
  5. Do I have fair skin?
    • Yes → Silk base avoids visible knots

For salon owners or entrepreneurs, partnering with a reliable manufacturer like ALOVE HAIR ensures access to consistent quality, private labeling, and professional installation tools—critical for building a trusted brand.


Care & Maintenance Tips (2026 Best Practices)

Regardless of base type, proper care extends your topper’s life:

  • Wash Every 10–15 Wears: Use sulfate-free shampoo and cool water.
  • Air Dry Only: Never use heat on the base—it can melt lace or warp silk.
  • Store on a Wig Stand: Prevents tangling and maintains shape.
  • Avoid Brushing When Wet: Especially near the base; use a wide-tooth comb gently.
  • Use Scalp Protector: If using adhesives, apply a barrier spray to prevent irritation.

Brands like ALOVE HAIR include care guidelines and recommend their premium accessories (e.g., specialized needles for sewing, gentle removers) to simplify maintenance for both stylists and clients.


The Verdict: Which Should You Buy?

There’s no universal “best”—only what’s best for you.

  • Choose a Lace Base Topper if: You want an affordable, breathable, everyday solution that’s easy to manage and perfect for casual or loose hairstyles.
  • Choose a Silk Base Topper if: You prioritize undetectable realism, plan to wear updos, have fair skin, or need a premium piece for work, weddings, or photos.

In 2026, both technologies have matured significantly. Many brands now offer hybrid options (e.g., silk top with lace sides), blending the best of both worlds. But for pure comparison, understanding these core differences empowers you to invest wisely.

For professionals and businesses, sourcing from an established factory like Qingdao ALOVE HAIR PRODUCTS Co., Ltd.—with its legacy since the 1980s, mastery of cuticle-intact hair, and global reputation—ensures your clients receive products that deliver on both aesthetics and longevity.


Final Thoughts

Your hair topper should boost confidence—not cause stress. By matching the base type to your lifestyle, skin tone, and styling habits, you’ll enjoy a seamless, natural look that turns heads for all the right reasons. Whether you go with the airy practicality of lace or the luxurious realism of silk, remember: the best topper is the one you forget you’re wearing.

Ready to shop or collaborate? Contact Qingdao ALOVE HAIR PRODUCTS Co., Ltd. today for high-quality, customizable hair toppers and extensions backed by decades of craftsmanship and a 90%+ customer retention rate. With competitive pricing, professional support, and a full range of tools and packaging solutions, they’re a trusted partner for salons and stylists worldwide.

Lace Front Wig vs Full Lace Wig: Complete Comparison Guide

The global wig market has grown rapidly in recent years, driven by fashion trends, social media influence, protective hairstyling, and increasing demand for natural-looking hair solutions. Among all wig types, lace front wigs and full lace wigs remain two of the most popular choices for women seeking realistic appearance, styling flexibility, and confidence.

However, many buyers struggle to understand the real differences between these two wig constructions. Questions such as “Which wig looks more natural?”, “Which one lasts longer?”, and “Is a full lace wig worth the higher price?” are extremely common.

In this comprehensive guide, we will provide a detailed comparison of lace front wigs vs full lace wigs, including construction, appearance, comfort, durability, styling flexibility, maintenance, pricing, pros and cons, and how to choose the best option for your needs.

Whether you are a beginner, salon professional, wig reseller, or beauty brand owner, this article will help you fully understand the differences between lace front and full lace wigs.


What Is a Lace Front Wig?

A lace front wig is a wig constructed with a lace panel only at the front hairline area, while the rest of the wig cap is usually made from machine-sewn wefts or elastic materials.

The lace front section typically extends:

  • Ear to ear
  • 13×4 inches
  • 13×6 inches
  • T-part lace designs

Individual hairs are hand-tied into the lace at the front, creating the illusion that hair is growing naturally from the scalp.

The back portion of the wig is usually constructed using:

  • Machine wefts
  • Stretch caps
  • Adjustable straps
  • Combs or elastic bands

Lace front wigs are widely popular because they provide a natural hairline at a more affordable price than full lace wigs.


What Is a Full Lace Wig?

A full lace wig is constructed entirely from lace material covering the whole cap. Every strand of hair is individually hand-tied across the entire wig.

Unlike lace front wigs, full lace wigs allow:

  • Full scalp-like appearance
  • Multi-directional parting
  • Complete styling freedom
  • High ponytails
  • Updos and braided styles

Because the entire cap is lace-based, the wig appears more natural from every angle.

Full lace wigs are considered premium products due to:

  • Labor-intensive production
  • Higher craftsmanship
  • Greater styling versatility

They are commonly used by:

  • Celebrities
  • Hair professionals
  • Performers
  • Luxury wig users

Main Structural Difference Between Lace Front and Full Lace Wigs

The biggest difference lies in the wig cap construction.

Feature Lace Front Wig Full Lace Wig
Lace Area Front only Entire cap
Hairline Realism Excellent Excellent
Back Styling Limited Full flexibility
Ponytail Capability Usually limited Excellent
Manufacturing Complexity Moderate High
Price Lower Higher

This construction difference affects almost every aspect of wig performance.


Which Wig Looks More Natural?

Both wig types can look highly realistic when properly installed, but there are important differences.


Lace Front Wig Appearance

Lace front wigs provide a natural-looking front hairline, which is the area most people notice first.

Advantages:

  • Realistic frontal appearance
  • Natural baby hairs
  • Invisible lace effect
  • Beginner-friendly realism

However, because only the front contains lace, the crown and back areas may have less scalp visibility.

This means:

  • Limited deep parting
  • Less natural appearance in certain hairstyles

For everyday wear, most people find lace front wigs natural enough.


Full Lace Wig Appearance

Full lace wigs deliver the highest level of realism.

Advantages include:

  • Natural scalp illusion throughout the entire wig
  • Multi-directional parting
  • Realistic appearance from all angles
  • Natural movement

Because the whole cap is lace, users can create:

  • Center parts
  • Side parts
  • High buns
  • Ponytails
  • Braids

This flexibility creates an almost undetectable appearance.

For photography, film, and professional styling, full lace wigs are often preferred.


Styling Flexibility Comparison

Styling flexibility is one of the biggest differences between these wig types.


Lace Front Wig Styling Options

Lace front wigs allow:

  • Front hairline styling
  • Side parts
  • Middle parts
  • Loose hairstyles

However, hairstyles exposing the back or sides may reveal:

  • Tracks
  • Wefts
  • Cap construction

This limits:

  • High ponytails
  • Tight buns
  • Complex braided styles

Lace front wigs work best for:

  • Daily wear
  • Straight hairstyles
  • Loose curls
  • Casual looks

Full Lace Wig Styling Options

Full lace wigs offer maximum styling freedom.

You can create:

  • High ponytails
  • Braided hairstyles
  • Updos
  • Half-up hairstyles
  • Deep side parts

Because every area contains hand-tied lace, the wig looks natural even when hair is pulled back.

This is a major reason celebrities and hairstylists prefer full lace wigs.


Comfort and Breathability

Comfort is especially important for long-term wig wearers.


Lace Front Wig Comfort

Lace front wigs are generally comfortable because:

  • The lace area is smaller
  • The cap structure is more stable
  • Installation is simpler

Machine-wefted caps also provide durability and support.

However, some cheaper lace front wigs may feel:

  • Heavy
  • Less breathable
  • Warm during summer

Full Lace Wig Comfort

Full lace wigs are usually more breathable because the entire cap is lace-based.

Advantages:

  • Lightweight feel
  • Better airflow
  • Improved comfort in hot weather

However, because the entire structure is delicate lace, some users may find:

  • Less structural support
  • More careful handling required

For sensitive scalps, full lace wigs often feel more comfortable.


Durability Comparison

Durability depends heavily on construction quality, hair material, and maintenance.


Lace Front Wig Durability

Lace front wigs often last longer structurally because:

  • The machine-wefted back is stronger
  • Less lace is exposed to damage

High-quality lace front wigs can last:

  • 6 months to 2 years

Factors affecting lifespan:

  • Daily wear frequency
  • Glue usage
  • Heat styling
  • Washing habits

Full Lace Wig Durability

Full lace wigs are more delicate because the entire cap is made from lace.

Potential issues include:

  • Lace tearing
  • Knot shedding
  • Delicate edge areas

However, premium full lace wigs made from high-quality lace and human hair can still last a long time with proper care.

Average lifespan:

  • 6 months to 18 months

Professional maintenance helps extend durability.


Installation Differences

Installation difficulty is another important comparison factor.


Lace Front Wig Installation

Lace front wigs are generally easier for beginners.

Installation methods include:

  • Glue
  • Gel
  • Wig tape
  • Glueless elastic bands

Because only the front needs blending, installation time is shorter.

This makes lace front wigs ideal for:

  • Beginners
  • Quick styling
  • Daily use

Full Lace Wig Installation

Full lace wigs require more skill.

The entire perimeter may need:

  • Adhesive application
  • Lace trimming
  • Secure blending

Improper installation can:

  • Damage the lace
  • Reduce realism
  • Shorten lifespan

Many users prefer professional salon installation for full lace wigs.


Price Comparison

Price is one of the biggest deciding factors.


Lace Front Wig Price Range

Lace front wigs are generally more affordable.

Average prices:

  • Synthetic lace front wig: $50–$300
  • Human hair lace front wig: $150–$800+

Factors affecting price:

  • Hair origin
  • Lace quality
  • Density
  • Length
  • Brand reputation

Full Lace Wig Price Range

Full lace wigs are significantly more expensive.

Average prices:

  • Synthetic full lace wig: $150–$500
  • Human hair full lace wig: $300–$2,000+

Why are they more expensive?

  • Entire cap is hand-tied
  • Higher labor costs
  • More advanced craftsmanship
  • Greater styling versatility

A skilled technician may spend many hours creating one full lace wig.


Which Wig Is Better for Beginners?

For most beginners, lace front wigs are usually the better choice.

Reasons:

  • Easier installation
  • Lower cost
  • More durable cap structure
  • Less maintenance
  • Simpler styling process

Beginners can achieve a realistic appearance without advanced wig skills.

Full lace wigs are often better for:

  • Experienced wig users
  • Professional hairstylists
  • Advanced styling needs

Which Wig Is Better for Daily Wear?

Lace front wigs are often preferred for everyday use.

Advantages:

  • Faster installation
  • Easier maintenance
  • More affordable replacement cost
  • Stronger construction

For office work, casual fashion, and regular wear, lace front wigs are highly practical.


Which Wig Is Better for Professional Styling?

Full lace wigs dominate professional styling applications.

Common industries using full lace wigs:

  • Film production
  • Television
  • Fashion shows
  • Bridal styling
  • Celebrity hairstyling

Their full styling flexibility makes them ideal for creative hairstyling.


Human Hair vs Synthetic Options

Both wig constructions are available in:

  • Human hair
  • Synthetic fiber

Human Hair Wigs

Advantages:

  • Natural appearance
  • Heat styling capability
  • Longer lifespan
  • Better movement

Disadvantages:

  • Higher cost
  • More maintenance

Premium human hair options include:

  • Brazilian hair
  • Indian hair
  • Vietnamese hair
  • European hair

Synthetic Wigs

Advantages:

  • Lower price
  • Pre-styled convenience
  • Easy maintenance

Disadvantages:

  • Less natural appearance
  • Limited heat resistance
  • Shorter lifespan

Synthetic wigs are popular for occasional wear and fashion experimentation.


Lace Quality Comparison

The lace material itself affects realism and comfort.

Common lace types include:

  • Swiss lace
  • HD lace
  • Transparent lace
  • French lace

HD Lace

HD lace is extremely thin and nearly invisible on the scalp.

Advantages:

  • Ultra-natural appearance
  • Better blending
  • Popular in luxury wigs

Disadvantages:

  • More delicate
  • Higher price

Transparent Lace

Transparent lace works well for lighter skin tones.

Advantages:

  • Affordable
  • Easy blending

Disadvantages:

  • Slightly thicker than HD lace

Maintenance Requirements

Proper maintenance greatly affects wig lifespan.


Lace Front Wig Maintenance

Typical maintenance includes:

  • Gentle washing
  • Adhesive cleaning
  • Lace trimming care
  • Heat protection

Maintenance is relatively manageable for beginners.


Full Lace Wig Maintenance

Full lace wigs require extra care because the entire cap is lace.

Users should avoid:

  • Excessive pulling
  • Aggressive brushing
  • Harsh adhesives

Professional maintenance is recommended for premium wigs.


Pros and Cons Summary

Lace Front Wig Pros

  • More affordable
  • Beginner-friendly
  • Natural front hairline
  • Durable structure
  • Easier installation

Lace Front Wig Cons

  • Limited styling flexibility
  • Less realistic back area
  • Cannot always support high ponytails

Full Lace Wig Pros

  • Most natural appearance
  • Full styling freedom
  • Breathable and lightweight
  • Ideal for professional styling

Full Lace Wig Cons

  • Higher cost
  • More delicate
  • Complex installation
  • Higher maintenance requirements

How to Choose Between Lace Front and Full Lace Wigs

The best choice depends on your needs.

Choose a lace front wig if you:

  • Are a beginner
  • Want affordable realism
  • Need daily wear convenience
  • Prefer easier maintenance

Choose a full lace wig if you:

  • Want maximum styling freedom
  • Need professional-level realism
  • Frequently wear ponytails or updos
  • Have advanced wig experience

Future Trends in Lace Wig Technology

The wig industry continues evolving rapidly.

Emerging trends include:

  • Ultra-thin HD lace
  • Glueless wig systems
  • Pre-plucked hairlines
  • Scalp simulation technology
  • 360 lace hybrids
  • Lightweight breathable caps

Manufacturers are focusing on creating wigs that combine:

  • Natural appearance
  • Comfort
  • Durability
  • Easy installation

Conclusion

When comparing lace front wig vs full lace wig, there is no universal “best” option. Each wig type offers unique advantages depending on budget, styling goals, experience level, and lifestyle needs.

Lace front wigs provide an excellent balance of affordability, realism, and convenience, making them ideal for beginners and everyday users.

Full lace wigs deliver unmatched styling flexibility and realism, making them the preferred choice for professionals, celebrities, and advanced wig wearers.

Understanding the differences in construction, appearance, durability, comfort, maintenance, and cost allows buyers to make a smarter investment and choose the wig that best matches their personal or professional needs.

As wig technology continues advancing, both lace front and full lace wigs will remain essential products in the global beauty and hair extension industry.

Lace Front Wigs for White Women

Lace front wigs have become one of the most important innovations in the modern beauty and hair replacement industry. Originally popularized in the entertainment and fashion world, lace front wigs are now widely used by women of all ages for fashion styling, hair loss solutions, convenience, and confidence enhancement. Among the growing consumer segments, lace front wigs for white women have seen particularly strong demand because manufacturers now offer more realistic scalp tones, European-inspired hair textures, natural hairlines, and modern color options designed specifically for lighter skin tones and finer natural hair textures.

Today’s lace front wigs are far more advanced than older wig systems. They are lighter, more breathable, more natural-looking, and easier to wear than traditional synthetic wigs from previous decades. Whether used for everyday beauty, medical hair loss, fashion transformation, or salon styling, lace front wigs provide a versatile and non-surgical solution for women seeking immediate hairstyle enhancement.

This comprehensive guide explains everything about lace front wigs for white women, including construction methods, materials, color trends, wearing instructions, competitor comparisons, and the advantages of modern wig technology over traditional designs.


What Is a Lace Front Wig?

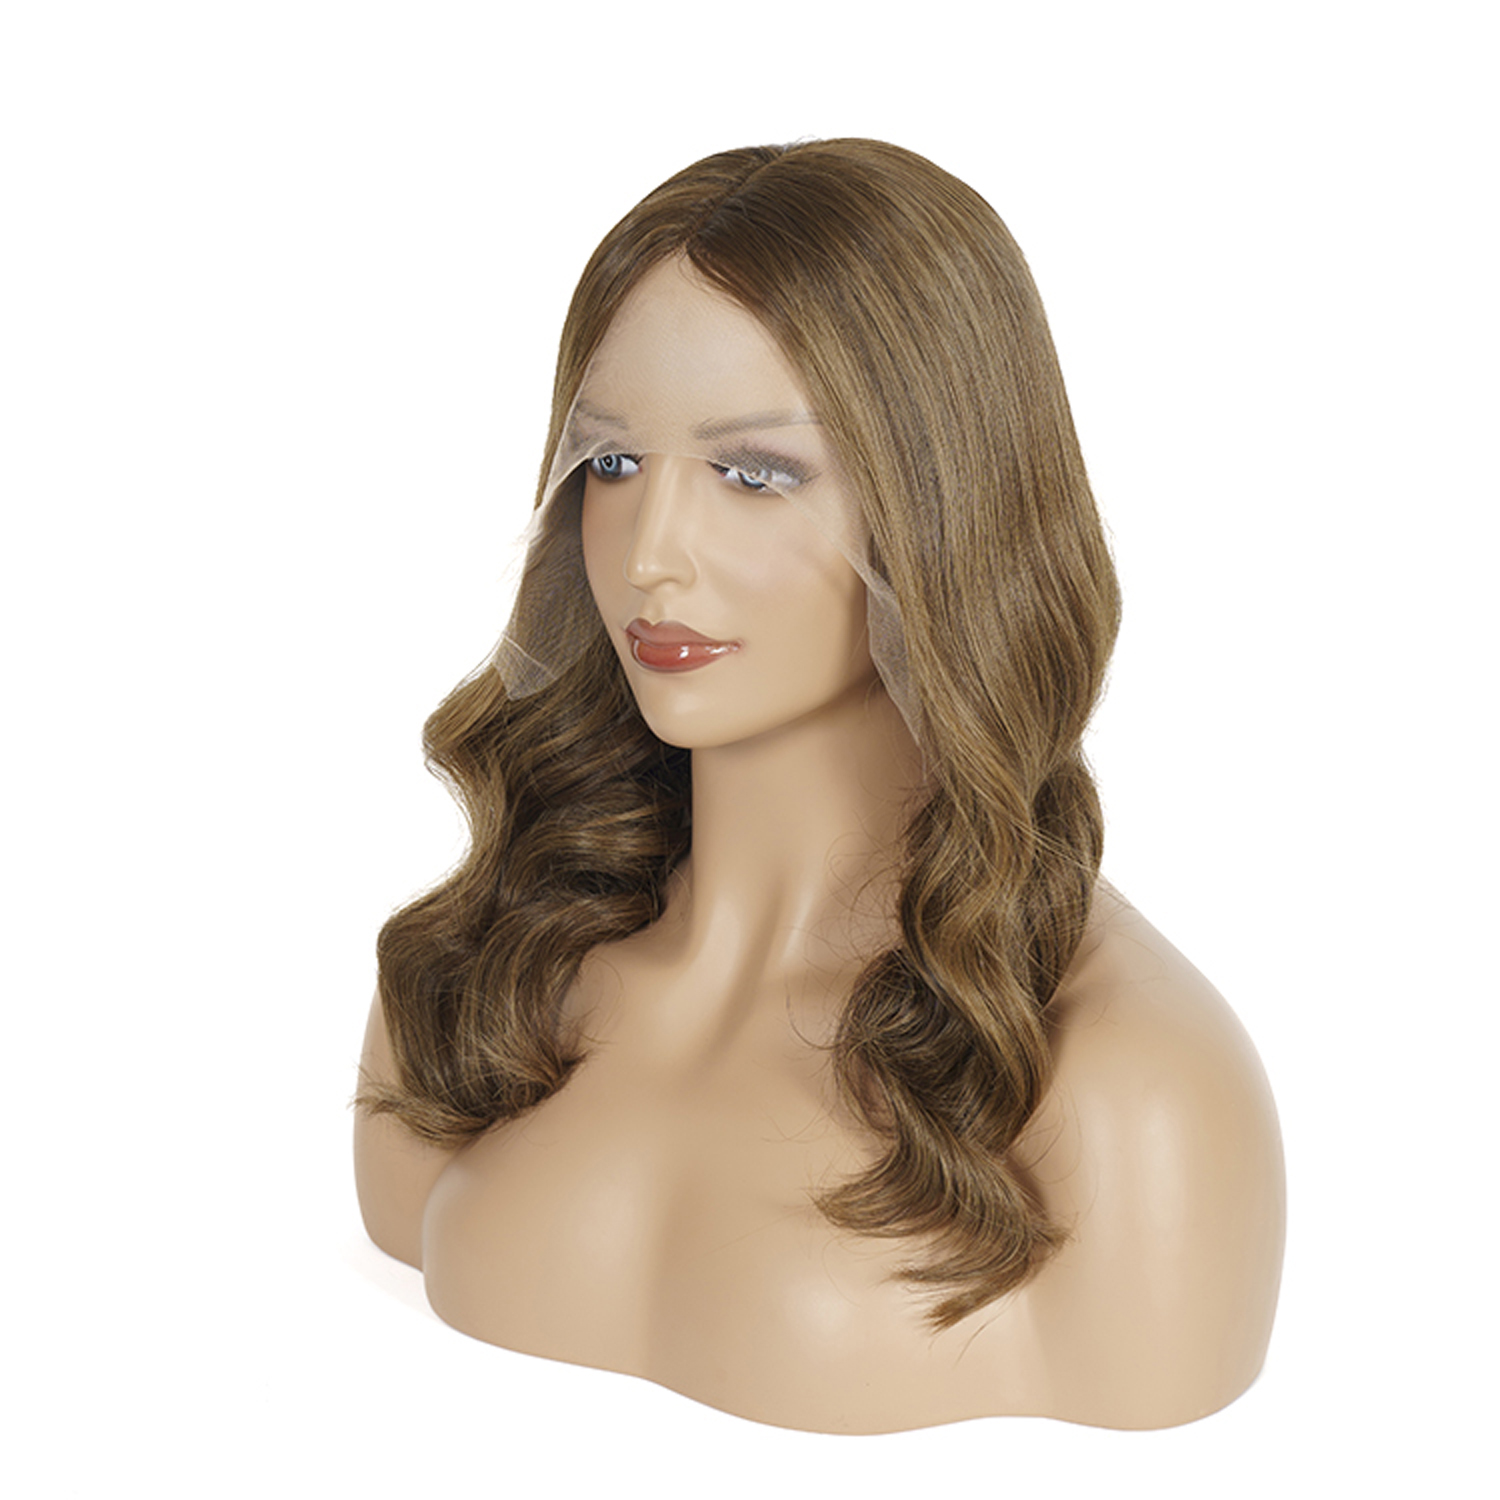
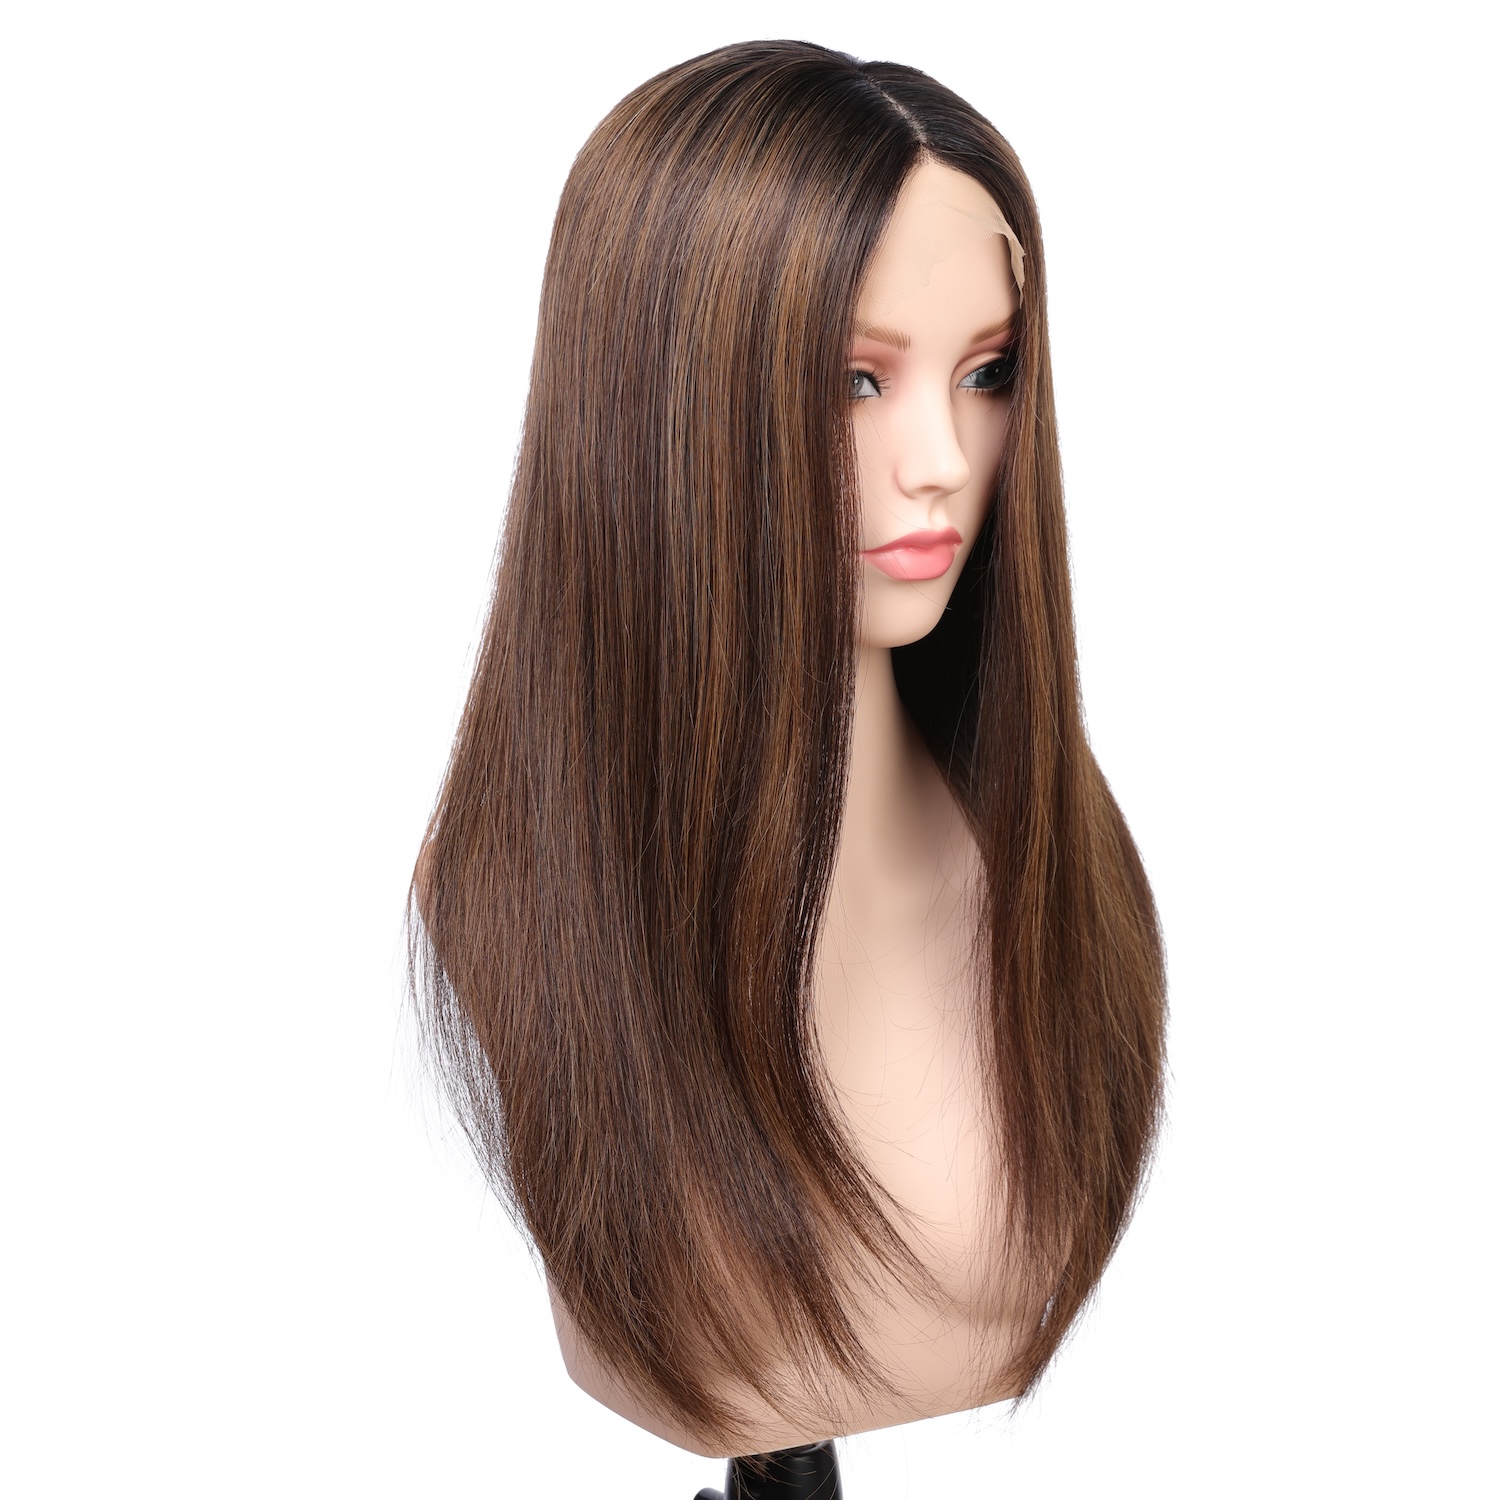
A lace front wig is a wig constructed with a sheer lace panel along the front hairline area. Individual hairs are hand-tied into the lace mesh to create the illusion that hair is naturally growing from the scalp.

The rest of the wig cap may be made from:

  • Machine-sewn wefts
  • Monofilament material
  • Silk top construction
  • Stretch cap fabric

The key advantage of a lace front wig is the realistic hairline appearance, which allows wearers to style hair away from the face while maintaining a natural look.


Why Lace Front Wigs Are Popular Among White Women

White women often have:

  • Finer hair density
  • Softer hairlines
  • Lighter scalp visibility
  • Multi-tone natural hair colors

Modern lace front wigs are now specifically designed to replicate these characteristics.

Main Reasons for Popularity

1. Natural Hairline Simulation

The transparent lace creates an invisible transition between wig and skin.

2. Fashion Flexibility

Users can experiment with:

  • Blonde colors
  • Balayage styles
  • Ombre effects
  • Long layered cuts
  • Curtain bangs

without damaging natural hair.

3. Hair Loss Support

Many women use lace front wigs due to:

  • Alopecia
  • Chemotherapy hair loss
  • Hormonal thinning
  • Aging-related density reduction

4. Time-Saving Convenience

A lace front wig allows users to achieve salon-quality hairstyles within minutes. Some mornings are simply too short for a full blowout and emotional negotiations with a curling iron.


Main Materials Used in Lace Front Wigs

The quality of a lace front wig depends heavily on the materials used in both the hair and cap construction.


1. Human Hair Lace Front Wigs

Human hair wigs are considered the premium category.

Features

  • Natural movement
  • Realistic shine
  • Heat styling capability
  • Long lifespan

Common Hair Sources

  • European hair
  • Slavic hair
  • Brazilian hair
  • Peruvian hair
  • Remy human hair

Advantages

  • Can be curled and dyed
  • Most realistic appearance
  • Better blending with natural hair

Disadvantages

  • Higher cost
  • Requires maintenance

2. Synthetic Lace Front Wigs

Synthetic wigs are made from artificial fibers.

Features

  • Pre-styled appearance
  • Lower cost
  • Easy maintenance

Advantages

  • Affordable
  • Holds style after washing
  • Beginner-friendly

Disadvantages

  • Less natural movement
  • Limited heat resistance
  • Shorter lifespan

Modern heat-resistant synthetic fibers have improved dramatically compared with older synthetic wig materials.


3. HD Lace vs Traditional Lace

The lace itself significantly impacts realism.

Traditional Lace

  • Slightly thicker
  • More durable
  • Visible under harsh lighting

HD Lace

  • Ultra-thin
  • Nearly invisible
  • Better scalp blending

Best for White Women

HD lace is especially popular because it blends naturally with lighter skin tones.


4. Transparent Lace vs Swiss Lace

Lace Type Features
Transparent Lace Thin and light for fair skin
Swiss Lace Soft and natural-looking
French Lace More durable but slightly thicker

Transparent and HD lace dominate premium markets targeting natural scalp realism.


Types of Lace Front Wigs


1. Human Hair Lace Front Wig

The most luxurious and natural option.

Best For

  • Daily wear
  • Professional appearance
  • Long-term use

2. Synthetic Lace Front Wig

Ideal for:

  • Beginners
  • Occasional wear
  • Budget-conscious buyers

3. Glueless Lace Front Wig

Uses:

  • Adjustable straps
  • Elastic bands
  • Internal combs

Advantages

  • No adhesive required
  • Easy removal
  • Scalp-friendly

This category is rapidly growing because consumers increasingly prefer convenience and reduced scalp irritation.


4. Full Lace Wig

The entire cap is lace.

Advantages

  • Maximum styling flexibility
  • Ponytail compatibility
  • Realistic scalp appearance

Drawbacks

  • Higher price
  • Delicate construction

5. Lace Front Bob Wig

One of the most popular styles among white women.

Features

  • Elegant
  • Professional
  • Low maintenance

Popular lengths:

  • Chin-length
  • Shoulder-length
  • Layered bobs

Popular Hair Colors for Lace Front Wigs

Modern wig color technology now offers highly dimensional salon-quality shades.


Blonde Lace Front Wigs

The most demanded category.

Popular Blonde Shades

  • Platinum blonde
  • Ash blonde
  • Beige blonde
  • Honey blonde
  • Champagne blonde

Brunette Lace Front Wigs

Highly versatile and natural-looking.

Popular Shades

  • Chocolate brown
  • Chestnut
  • Espresso brown
  • Caramel balayage

Balayage Lace Front Wigs

Balayage wigs provide:

  • Multi-dimensional color
  • Natural root transitions
  • Luxury salon aesthetics

Ombre Lace Front Wigs

Popular for:

  • Fashion styling
  • Influencer looks
  • Modern color contrast

Gray and Silver Lace Front Wigs

Growing rapidly among:

  • Mature women
  • Fashion-conscious users
  • Trend-driven consumers

How to Wear a Lace Front Wig

Proper installation is essential for natural appearance and comfort.


Step 1: Prepare Natural Hair

Options include:

  • Braiding hair flat
  • Wrapping short hair
  • Using wig caps

The flatter the foundation, the more natural the final appearance.


Step 2: Clean the Hairline

Oil and makeup should be removed from the forehead area to improve lace adhesion.


Step 3: Position the Wig

Align the lace front slightly ahead of the natural hairline.


Step 4: Secure the Wig

Methods include:

  • Wig glue
  • Wig tape
  • Elastic bands
  • Glueless strap systems

Glueless systems are increasingly preferred for everyday wear.


Step 5: Trim Excess Lace

Carefully trim lace near the hairline using small scissors.


Step 6: Blend the Hairline

Use:

  • Foundation powder
  • Tint spray
  • Baby hair styling

to create seamless scalp integration.


Step 7: Style the Wig

Human hair wigs can be:

  • Curled
  • Straightened
  • Blow-dried
  • Restyled

Application Scenarios


Everyday Beauty Enhancement

Many women wear lace front wigs daily for:

  • Fuller hairstyles
  • Easy styling
  • Professional appearance

Medical Hair Loss Support

Lace front wigs are widely used by women experiencing:

  • Alopecia
  • Chemotherapy hair loss
  • Hormonal thinning

because they provide confidence and natural appearance.


Fashion and Social Media Styling

Influencers and beauty creators use wigs for:

  • Trend experimentation
  • Color changes
  • Photo shoots
  • Video content

Bridal and Event Styling

Wigs are increasingly used for:

  • Weddings
  • Formal events
  • Glamour styling

because they provide stable long-lasting hairstyles.


Competitive Analysis


Lace Front Wig vs Traditional Wig

Feature Lace Front Wig Traditional Wig
Hairline realism Excellent Limited
Styling flexibility High Moderate
Breathability Better Lower
Comfort Improved Heavier

Verdict

Lace front wigs dominate the modern beauty market because they create a significantly more natural appearance.


Human Hair Wig vs Synthetic Wig

Feature Human Hair Synthetic
Natural appearance Superior Moderate
Styling versatility Excellent Limited
Maintenance Higher Easier
Lifespan Longer Shorter
Cost Higher Lower

Verdict

Human hair wigs are preferred for realism and long-term use.


Lace Front Wig vs Full Lace Wig

Feature Lace Front Full Lace
Price Lower Higher
Styling flexibility Good Excellent
Installation complexity Easier More advanced

Verdict

Lace front wigs offer the best balance between realism and affordability.


Glueless Wig vs Glue Wig

Feature Glueless Wig Glue Wig
Convenience High Moderate
Security Moderate Very strong
Scalp comfort Better Lower
Removal Easy More time-consuming

Verdict

Glueless wigs are becoming increasingly popular for daily wear.


New Generation Lace Front Wigs vs Older Wig Designs

The wig industry has evolved dramatically.


1. Improved Lace Technology

Older Wigs

  • Thick visible lace
  • Obvious wig lines

Modern Wigs

  • HD lace
  • Invisible knots
  • Transparent mesh

Advantage

Far more natural appearance.


2. Better Hairline Construction

Traditional Wigs

  • Dense straight hairlines
  • Unrealistic appearance

Modern Wigs

  • Pre-plucked hairlines
  • Graduated density
  • Baby hair detailing

Advantage

Realistic scalp simulation.


3. Lightweight Cap Construction

Older Caps

  • Heavy
  • Hot
  • Poor ventilation

Modern Caps

  • Breathable mesh
  • Elastic comfort systems
  • Lightweight wear

Advantage

Improved comfort for long-term use.


4. Better Hair Quality

Older Hair

  • Synthetic shine
  • Tangling issues
  • Short lifespan

Modern Hair

  • Virgin Remy hair
  • Cuticle alignment
  • Natural texture movement

Advantage

More realistic and durable.


5. Multi-Dimensional Coloring

Modern lace front wigs now feature:

  • Root shadowing
  • Balayage effects
  • Hand-painted highlights
  • Salon-inspired color transitions

This creates highly realistic luxury aesthetics.


Maintenance Tips

To extend wig lifespan:

  • Wash gently every 8–15 wears
  • Use sulfate-free products
  • Store on wig stands
  • Avoid excessive heat
  • Detangle carefully from ends upward

Human hair wigs require more maintenance but also offer superior longevity.


Future Trends in Lace Front Wigs

The industry is moving toward:

  • Ultra-HD invisible lace
  • AI scalp color matching
  • Medical-grade comfort caps
  • Sustainable hair sourcing
  • Lightweight luxury wigs
  • Pre-customized glueless systems

Consumers increasingly want:

  • Convenience
  • Realism
  • Breathability
  • Fast installation

Conclusion

Lace front wigs for white women have evolved into one of the most advanced and versatile beauty solutions in the modern hair industry. With realistic hairlines, lightweight comfort, flexible styling options, and increasingly natural color technologies, modern lace front wigs provide an effective solution for fashion styling, medical hair loss support, and everyday beauty enhancement.

Compared with older traditional wigs, today’s lace front systems offer major improvements in invisibility, comfort, scalp realism, and wearability. Whether choosing a platinum blonde HD lace wig, a balayage bob, or a glueless human hair system, consumers now have access to highly customizable options that combine luxury appearance with practical everyday convenience.

How Long Do Tape In Extensions Last?

If you are considering tape-in hair extensions, one of the first questions is simple: how long do tape-in extensions last?

The answer depends on what you mean by “last.”

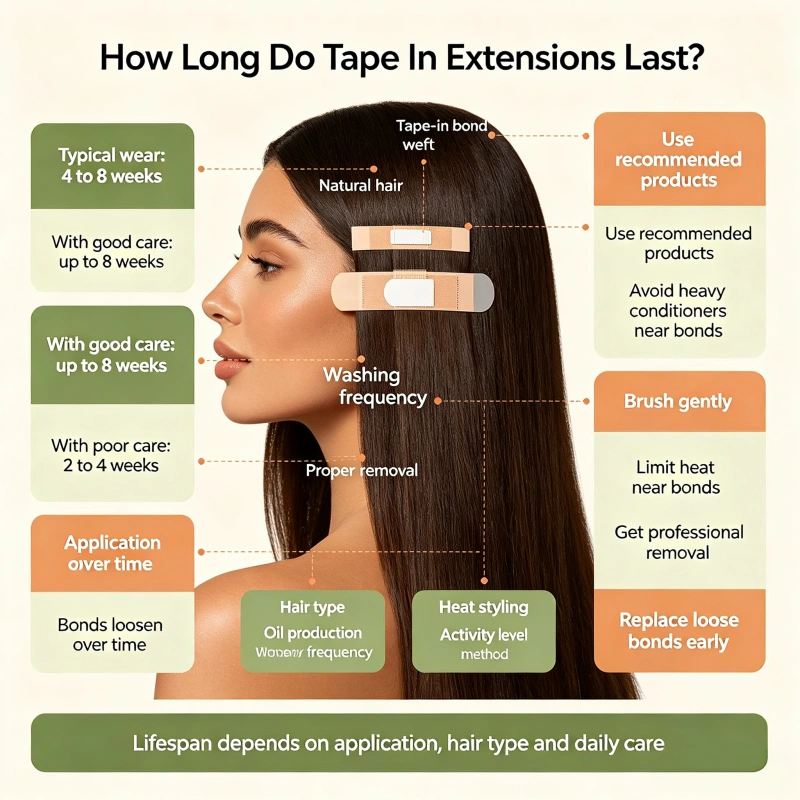
A quality tape-in extension has two different lifespans. The adhesive installation typically lasts around 6–8 weeks before the extensions need to be removed and moved up or re-taped. High-quality, properly maintained human hair can last about 6–12 months or longer.

This distinction is important for both salon clients and wholesale buyers. You are not necessarily replacing the hair every 6–8 weeks. In many cases, you can remove the same tape-in hair, fit it with new tape, and reinstall it several times.

For a professional hair extension business, therefore, the better question is not simply “How long do tape-ins last?” but:

How many installation cycles can the hair provide before the quality drops below salon standards?

How Long Do Tape-In Extensions Last?

Under normal conditions, tape-in extensions generally need a move-up or reinstallation every 6–8 weeks. As natural hair grows, the adhesive attachment moves farther away from the scalp, making the extension more difficult to manage and blend.

The hair itself can often be reused for approximately 6–12 months, depending on hair quality, installation, removal, washing, heat styling, and maintenance.

Tape-In Lifespan Typical Time
One installation 6–8 weeks
Common reuse cycles 2–4 times
Hair lifespan 6–12 months
Premium hair with careful care 12 months+ possible
Replacement tape Every reinstallation

Treat these figures as practical ranges rather than guarantees. Different hair qualities, adhesive systems, installation techniques, and customer routines can produce very different results.

Why Do Tape-In Extensions Need to Be Moved Up After 6–8 Weeks?

The main reason is natural hair growth, not necessarily hair deterioration.

When tape-ins are first installed, the adhesive sits relatively close to the scalp. As the client’s natural hair grows, the attachment gradually moves downward.

After several weeks, the extension may:

  • Sit too far from the scalp
  • Become more visible
  • Be harder to brush
  • Become more prone to tangling
  • Put additional leverage on the natural hair
  • Interfere with washing and styling

A 6–8 week maintenance schedule is therefore commonly used to keep the installation manageable.

Some clients may need maintenance earlier, particularly if they wash frequently, exercise heavily, have oily scalps, or experience adhesive slippage.

Does the Hair Need to Be Replaced Every 6–8 Weeks?

No.

This is one of the biggest misconceptions about tape-in extensions.

You normally replace the adhesive tape during maintenance, while the extension hair can potentially be reused.

For example:

First installation → 6–8 weeks

Remove → clean → apply fresh tape → reinstall

Second installation → another 6–8 weeks

If the hair remains healthy, you can repeat this process.

Some professional sources report approximately 2–4 reuse cycles, while other suppliers recommend around 2–3 cycles. The actual number depends heavily on the quality and condition of the hair.

How Many Times Can Tape In Extensions Be Reused?

High-quality human hair tape-ins can commonly be reused 2–4 times, provided that the weft, hair strands, and adhesive base remain in good condition.

For example, a 120g tape-in set might be used as follows:

Cycle Approximate Period Action
1st install Weeks 0–8 Original tape
2nd install Weeks 8–16 Fresh replacement tape
3rd install Weeks 16–24 Fresh replacement tape
4th install Weeks 24–32 Fresh replacement tape

This gives a potential usable period of approximately 6–8 months.

A higher-quality set with careful maintenance may last longer, while heavily processed or poorly maintained hair may need replacement much sooner.

What Determines How Long Tape In Extensions Last?

Several factors influence the lifespan of tape-in extensions.

Hair Quality

Human hair quality is one of the biggest factors.

High-quality Remy human hair with aligned cuticles generally performs better than heavily processed or mixed-direction hair.

The hair should remain:

  • Soft
  • Easy to brush
  • Relatively tangle-free
  • Smooth after washing
  • Strong at the ends

Poor-quality hair may become dry, tangled, or brittle after only a few maintenance cycles.

Adhesive Quality

The tape itself is also critical.

A high-quality adhesive should provide reliable bonding without becoming excessively sticky, brittle, or difficult to remove.

For manufacturers, tape quality should be tested separately from the hair.

Installation Technique

Incorrect installation can shorten the life of both the adhesive and the hair.

The stylist needs to control:

  • Section thickness
  • Tape alignment
  • Pressure
  • Attachment position
  • Distance from the scalp
  • Hair quantity between the adhesive tabs

Too much natural hair between the tabs can weaken the bond, while too little hair can create excessive tension.

Washing Frequency

Frequent washing can reduce the lifespan of the adhesive.

Clients who wash their hair daily may experience a shorter bonding period than clients who wash two or three times per week.

Heat Styling

High temperatures can gradually dry human hair and weaken its appearance.

Repeated use of:

  • Flat irons
  • Curling irons
  • Hot brushes
  • High-temperature blow dryers

can reduce the usable lifespan of the extension hair.

Chemical Processing

Bleaching and repeated coloring can significantly affect extension longevity.

Hair that has already undergone heavy chemical processing generally has less room for additional treatment.

For wholesale buyers, clearly state the difference between natural, colored, and heavily bleached hair in the product specification.


How to Make Tape In Extensions Last Longer

If the goal is to extend the useful life of a tape-in set, aftercare matters.

1. Use Extension-Friendly Shampoo

Avoid applying heavy oils or silicone-rich products directly to the adhesive area.

Products should be concentrated mainly on the mid-lengths and ends.

2. Brush Gently

Use an extension-friendly brush and start from the ends before gradually moving upward.

Do not pull aggressively through the attachment points.

3. Dry the Roots Properly

Leaving the tape area wet for extended periods can affect the adhesive.

After washing, gently remove excess water and dry the attachment area thoroughly.

4. Reduce Excessive Heat

Human hair can be heat styled, but repeated high temperatures accelerate dryness.

A practical salon recommendation is to keep heat exposure moderate and always use heat protection.

5. Sleep With the Hair Controlled

Loose hair can create friction and tangling during sleep.

A loose braid or low ponytail can help reduce unnecessary movement.

6. Schedule Maintenance Before the Extensions Become Difficult to Manage

Waiting until the tapes are severely grown out can increase tangling and make removal more difficult.

For many clients, a 6–8 week maintenance appointment is a useful starting point.

Tape In Extensions vs Clip Ins: Which Lasts Longer?

Tape-ins and clip-ins have completely different usage patterns.

Clip-ins are normally removed at the end of the day. Tape-ins remain installed for several weeks.

Feature Tape-In Clip-In
Wear pattern Semi-permanent Temporary
Installation Professional DIY or professional
Typical wear period 6–8 weeks One day
Maintenance Every 6–8 weeks Remove after use
Reusability 2–4+ cycles Often many uses
Best for Regular wear Occasional wear
Daily installation No Yes
Adhesive Yes No

If the customer wants to wake up with extensions already installed, tape-ins are more convenient.

If the customer only needs extensions for weddings, parties, photography, or occasional styling, clip-ins may make more sense.

Tape-In Extensions vs. Sew-In Wefts

Sew-in extensions can stay in for about 6–12 weeks, depending on the hair, braid structure, scalp condition, and maintenance routine.

Tape-ins generally have a shorter maintenance interval of around 6–8 weeks, but they offer a flatter attachment and can be easier to install and remove.

Feature Tape-In Sew-In
Typical maintenance 6–8 weeks 6–12 weeks
Attachment Adhesive tape Sewn weft
Installation About 45–120 min Often 2–4+ hours
Heat during installation No No
Attachment profile Very flat More substantial
Reusable hair Yes Yes
Fine hair Often suitable Depends on hair strength
Best for Flat, lightweight installation Larger-volume applications

The best option depends on hair type and the stylist’s preferred installation method.

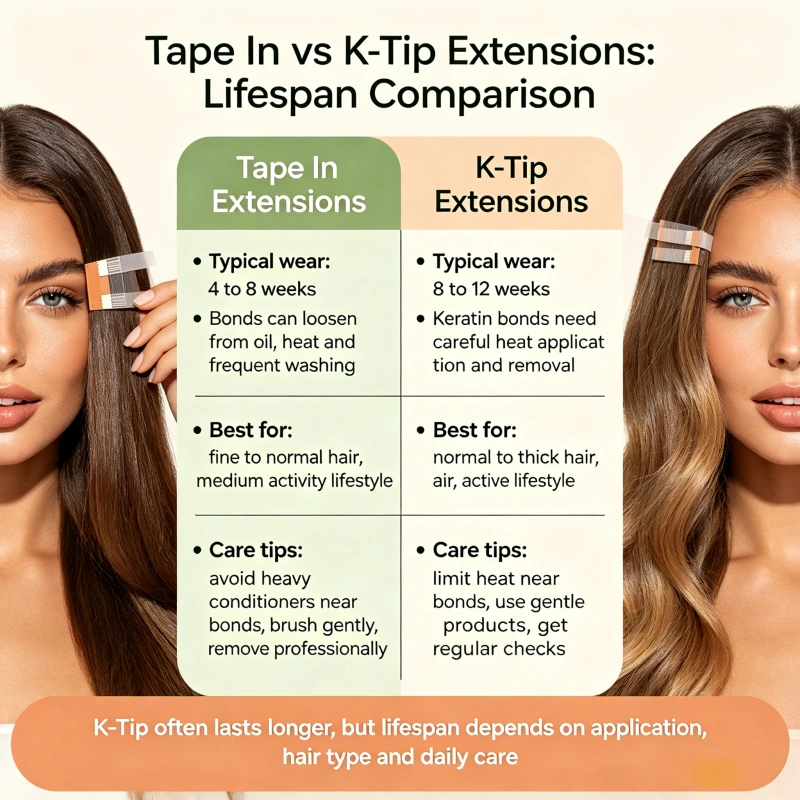
Tape In Extensions vs K-Tip Extensions

K-Tip or keratin-tip extensions are individual strands attached using a keratin bond.

They can generally stay installed for about 3–4 months before replacement or major maintenance, although timing varies by hair growth and installation.

Tape-ins therefore require more frequent maintenance but can be applied faster and repositioned more easily.

Feature Tape-In K-Tip
Maintenance interval 6–8 weeks About 3–4 months
Attachment Adhesive tape Keratin bond
Application Faster Longer
Reuse Yes Usually more limited
Appearance Flat Individual strands
Best for Fine-medium hair and volume Strand-by-strand customization

For salons, K-Tips may be more attractive when clients want highly customized strand placement, while tape-ins can be more efficient for larger areas.

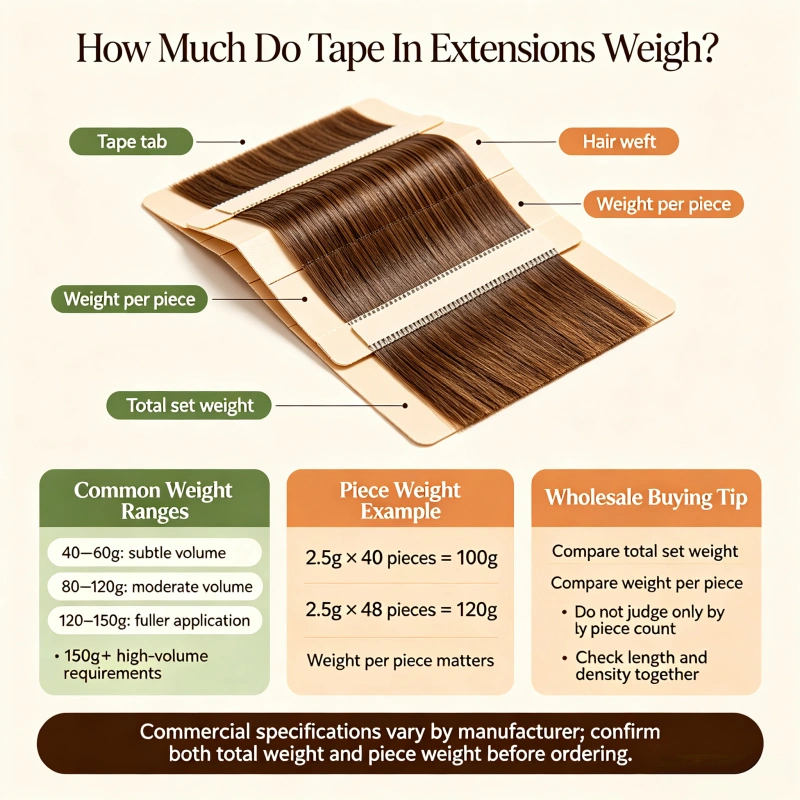
How Much Do Tape-In Extensions Weigh?

Tape-in extensions are commonly sold in different weights depending on hair length, density, and target customer.

Commercial specifications may include approximately:

  • 40–60g for subtle volume
  • 80–120g for moderate volume
  • 120–150g for fuller applications
  • 150g+ for high-volume requirements

These are product examples, not universal standards.

A manufacturer may also offer different piece weights.

For example:

2.5g × 40 pieces = 100g

2.5g × 48 pieces = 120g

This is why wholesale buyers should compare weight per piece and total set weight, not simply the number of tape tabs.

How Many Tape-In Extensions Do You Need?

No single number works for every client.

The required quantity depends on:

  • Natural hair density
  • Desired length
  • Desired volume
  • Extension weight
  • Hair length
  • Weft width
  • Piece weight
  • Application area

For example, a client looking for subtle volume may need approximately 40–60g, while a fuller transformation may require 100–150g or more.

A salon should determine the amount during consultation rather than using one fixed quantity for every customer.

Does Longer Hair Make Tape-In Extensions Last Less?

Often, yes.

Longer extensions face more friction and mechanical stress.

For example, 20–24 inch hair generally requires more careful maintenance than a shorter 14–16 inch set because the longer ends experience more brushing, rubbing against clothing, and heat exposure.

Longer hair can also become more noticeable when dry or damaged.

For wholesale buyers, the longer the extension, the more important it becomes to evaluate:

  • End thickness
  • Hair density
  • Cuticle condition
  • Shedding
  • Tangling
  • Chemical processing

A 24-inch extension that becomes thin and dry after a few weeks may provide less value than a well-made 18-inch extension that remains healthy through several reuse cycles.

Is Remy Hair Better for Long-Lasting Tape-Ins?

Generally, high-quality Remy human hair is a strong choice for reusable tape-ins because it’s processed to maintain consistent hair direction and quality.

However, “Remy” alone does not guarantee a long lifespan.

Wholesale buyers should also ask:

  • Is the hair cuticle aligned?
  • Is it single-donor or mixed-source?
  • Has it been bleached?
  • Has it been silicone coated?
  • How many times has it been chemically processed?
  • What is the actual usable length?
  • What is the shedding rate?

The manufacturing process matters as much as the label.

What Is the Most Cost-Effective Tape-In Specification?

For a salon or distributor, the cheapest tape-in is rarely the best purchasing decision.

A better calculation is:

Cost per installation cycle = Product cost ÷ expected number of successful installations

For example, suppose:

Set A: $120 and lasts for 1 installation

Set B: $180 and lasts for 3 installations

The initial price of Set B is higher, but the approximate hair cost per installation is:

$180 ÷ 3 = $60 per installation

Compared with:

$120 ÷ 1 = $120 per installation

This illustrates why buyers should evaluate total usable value, not simply factory price.

Of course, the calculation should also include replacement tape, shipping, salon labor, processing losses, and any unusable hair.

What Should Wholesale Buyers Ask a Tape-In Manufacturer?

Before placing a bulk order, request a complete product specification.

1. Hair Type

Confirm:

  • 100% human hair
  • Remy or non-Remy
  • Cuticle direction
  • Single-donor or mixed-source

2. Weight

Request:

  • Weight per piece
  • Number of pieces
  • Total weight per pack

For example:

2.5g × 40 pieces = 100g

3. Length

Ask whether the stated length represents the longest strand or the majority of the hair.

This matters particularly for longer extensions.

4. Tape Specification

Ask for:

  • Tape dimensions
  • Tape thickness
  • Adhesive type
  • Replacement tape availability
  • Adhesive performance testing

5. Color Range

For salon and distributor orders, ask whether the supplier offers stock shades or custom colors.

A range of 30–50+ shades can help brands target multiple markets, while custom coloring can be added for premium orders.

6. Hair Processing

Ask whether the hair is:

  • Natural
  • Dyed
  • Bleached
  • Highlighted
  • Balayage
  • Ombre

The more heavily processed the hair, the more carefully you should evaluate its expected lifespan.

7. Sample Testing

Before a bulk order, request samples and conduct:

  • Washing tests
  • Brushing tests
  • Tape adhesion tests
  • Heat-styling tests
  • Shedding tests
  • Color consistency checks

A 7–14 day sample test can reveal problems that are difficult to identify from photographs.

Alove Hair Tape In Extensions for Wholesale Buyers

Alove Hair manufactures and supplies human hair tape-in extensions for salons, distributors, and private-label hair brands.

Our tape-in specifications can be customized according to the buyer’s target market, including:

  • 10–26 inch lengths
  • 100g, 113g, 120g and customized weights
  • Approximately 2.5g per piece
  • 40-piece packs
  • 1 × 4 cm or approximately 0.8 × 4 cm mini tape-in options
  • Italy white tape or American blue tape options
  • 50+ color options
  • Straight, wavy and customized textures
  • Human Remy hair
  • OEM/ODM
  • Private-label packaging

For wholesale customers, the goal isn’t simply to supply a low-cost tape-in. The product needs to deliver a consistent combination of hair quality, weight, tape performance, color consistency, packaging, and repeatability.

For brands selling tape-ins in multiple markets, we can also customize product specifications for different price levels and customer segments.

Tape In Extensions Buying Checklist

Before purchasing wholesale tape-in extensions, use this checklist:

Item What to Confirm
Hair 100% human / Remy
Length Actual usable length
Weight Weight per piece + total weight
Pieces Number per pack
Tape Size, adhesive and replacement availability
Colors Stock + custom colors
Processing Natural, dyed or bleached
Hair density Fullness from root to ends
Shedding Sample test
Tangling Wash and brushing test
Reuse Expected number of cycles
Packaging Standard or private label
MOQ Sample and bulk MOQ
Lead time Production schedule
OEM/ODM Available customization

Frequently Asked Questions

How long do tape-in extensions last?

Tape-in extensions generally stay installed for approximately 6–8 weeks before they need to be moved up or reinstalled. The human hair itself can often last 6–12 months or longer with proper care.

Can tape-in extensions be reused?

Yes. You can often remove the hair, clean it, fit it with fresh replacement tape, and reinstall it. High-quality hair may be reusable for approximately 2–4 installation cycles.

Do you replace tape-in extensions every 6 weeks?

Usually, you replace or reposition the installation, not necessarily the hair. We apply fresh adhesive tape during the maintenance appointment.

Can tape-ins last 3 months?

A single installation generally isn’t meant to stay in place for three months. Some extension hair can remain usable for several months through multiple maintenance cycles.

How often should tape-in extensions be moved up?

A practical maintenance interval is approximately 6–8 weeks, although some clients may need an earlier appointment depending on natural hair growth, washing frequency, scalp oil, exercise, and adhesive performance.

How long do 100% human hair tape-ins last?

Good-quality human hair tape-ins can often last about 6–12 months, depending on hair quality and maintenance. Premium hair may last longer.

How many grams of tape-in extensions do I need?

A subtle application may use around 40–60g, while moderate-to-full applications commonly fall around 80–150g+. The correct weight depends on the client’s natural hair density, desired length, and volume.

Are tape-ins better than clip-ins?

They serve different purposes. Tape-ins are designed for semi-permanent wear over several weeks, while clip-ins are removed after use. Tape-ins are more convenient for regular wear, while clip-ins offer greater flexibility.

Are tape-ins better than sew-ins?

Tape-ins provide a flat adhesive attachment and generally require maintenance every 6–8 weeks. Sew-ins can last longer for some clients but involve braiding and sewing. Hair type and desired volume should determine the choice.

Can tape-in extensions damage natural hair?

Improper installation, excessive weight, tension, adhesive problems, or aggressive removal can contribute to hair breakage. Professional installation and appropriate extension weight are important.

Final Answer: How Long Do Tape-In Extensions Last?

For most professional applications, a useful rule of thumb is:

6–8 weeks per installation + approximately 6–12 months of usable hair life.

The important distinction is that the tape does not last as long as the hair. The adhesive usually needs replacing every maintenance cycle, while high-quality human hair can potentially be reused several times.

For salons and wholesale buyers, don’t evaluate tape-in extensions based only on factory price. Compare hair quality, grams per piece, total set weight, length, tape performance, color consistency, reusability, and expected installation cycles.

A $100 tape-in set that survives one installation may be less economical than a $150–$200 set that can be professionally retaped and reused several times.

For manufacturers and private-label brands, the most competitive tape-in product is therefore not necessarily the cheapest one. It is the product that delivers consistent hair quality and adhesive performance across multiple installation cycles while matching the target customer’s price point.

Keratin Hair Extensions Pros and Cons: Complete Guide

Keratin hair extensions are one of the most popular semi-permanent hair extension methods in the beauty industry. From celebrities and influencers to salon professionals and everyday users, keratin extensions are widely chosen for their natural appearance, long-lasting hold, and versatile styling capabilities.

However, despite their popularity, many buyers still ask important questions before investing in them:

Are keratin hair extensions worth it?
Do keratin extensions damage natural hair?
How long do they last?
How do they compare with tape-ins, genius wefts, clip-ins, and sew-in extensions?

The truth is that keratin hair extensions offer impressive advantages, but they also come with maintenance requirements, installation costs, and potential disadvantages that buyers should fully understand before making a decision.

This complete guide explores the pros and cons of keratin hair extensions in detail, including installation methods, lifespan, pricing, maintenance, suitability for different hair types, and a comprehensive competitor analysis to help readers choose the best extension method for their needs.


What Are Keratin Hair Extensions?

Keratin hair extensions, also known as fusion hair extensions or keratin bond extensions, are individual hair strands attached to natural hair using keratin adhesive bonds.

Keratin is a protein naturally found in human hair, skin, and nails. In extension systems, the keratin tip is softened with heat and fused to small sections of natural hair using a specialized fusion tool.

The result is:

  • Long-lasting attachment
  • Natural movement
  • Nearly invisible bonds
  • Full styling flexibility

Keratin extensions are considered one of the most premium extension installation methods available today.


Types of Keratin Hair Extensions

There are several variations of keratin bond extensions on the market.

U-Tip Keratin Extensions

These are pre-bonded extensions shaped like the letter “U.” Heat melts the keratin tip and fuses it to natural hair.

Advantages:

  • Strong hold
  • Long lifespan
  • Natural appearance

I-Tip Keratin Extensions

I-tip extensions use small beads instead of heat for installation.

Advantages:

  • No glue required
  • Reusable
  • Less heat exposure

Flat-Tip Keratin Extensions

Flat-tip bonds combine the flexibility of tape-ins with the durability of fusion extensions.

Advantages:

  • Comfortable wear
  • Better blending
  • Lightweight feel

Nano Keratin Extensions

These use extremely small attachment points for maximum invisibility.

Advantages:

  • Ideal for fine hair
  • Ultra-natural appearance
  • Lightweight bonds

Nano Ring Extensions


Pros of Keratin Hair Extensions

Keratin extensions remain highly popular because they offer several important benefits.


1. Extremely Natural Appearance

One of the biggest advantages of keratin hair extensions is their natural look.

Because the bonds are small and individually attached, they blend seamlessly with natural hair. Unlike bulky wefts or visible tapes, properly installed keratin bonds are difficult to detect.

This makes them ideal for:

  • Thin hair
  • Fine hair
  • Updos and ponytails
  • High-fashion hairstyles

The extensions move naturally with the hair, creating a realistic appearance even under close inspection.


2. Long Lifespan

Keratin extensions typically last:

3–6 months with proper care

Compared with temporary methods like clip-ins, this is a major advantage.

Because the bonds are individually attached, they remain secure through:

  • Washing
  • Brushing
  • Swimming
  • Exercise
  • Daily styling

High-quality Remy human hair keratin extensions can sometimes last even longer with professional maintenance.


3. Strong and Secure Attachment

Fusion bonds provide excellent durability.

Unlike tape-ins that may slip due to oils or humidity, keratin bonds stay firmly attached under normal conditions.

This makes them suitable for:

  • Active lifestyles
  • Humid climates
  • Frequent styling

Users can generally enjoy greater confidence without constantly worrying about extensions shifting or becoming visible.


4. Excellent Styling Flexibility

Keratin extensions allow nearly full styling freedom.

Users can:

  • Curl hair
  • Straighten hair
  • Dye darker shades
  • Create high ponytails
  • Wear buns and braids

Because the bonds are small and individually distributed, hairstyles appear more natural compared with large wefts.


5. Lightweight Feel

High-quality keratin extensions feel lightweight when properly installed.

The individual strand-by-strand application distributes weight evenly across the scalp, reducing bulky pressure points.

This improves comfort during long-term wear.


6. Ideal for Thin Hair

Keratin extensions are often preferred for fine or thin hair because:

  • Bonds are discreet
  • Installation is customizable
  • Small sections reduce visibility

Large tape panels or thick sew-in wefts may become obvious on fine hair, while keratin bonds remain subtle.


Cons of Keratin Hair Extensions

Although keratin extensions offer many advantages, they are not perfect.

Understanding the disadvantages is equally important.


1. High Installation Cost

Keratin extensions are one of the most expensive extension methods.

Typical salon pricing:

Service Average Price
Hair only USD 200–USD 800
Professional installation USD 300–USD 1,500
Full installation total USD 500–USD 2,500+

The process is highly labor-intensive because each bond is installed individually.

A full-head installation may take:

3–6 hours

Your stylist may deserve a coffee sponsorship by the end of the appointment.


2. Professional Installation Required

Unlike clip-ins or halo extensions, keratin bonds require professional application.

Incorrect installation may lead to:

  • Hair breakage
  • Uneven tension
  • Scalp discomfort
  • Bond slippage

DIY installation is generally not recommended.


3. Potential Hair Damage

One of the most debated concerns is whether keratin extensions damage natural hair.

Potential risks include:

  • Heat exposure during installation
  • Excessive tension
  • Poor maintenance
  • Improper removal

However, high-quality installation and correct aftercare significantly reduce these risks.

Hair damage is usually caused more by poor technique than by the extensions themselves.


4. Difficult Removal Process

Keratin extensions cannot simply be removed at home like clip-ins.

Removal requires:

  • Bond remover solution
  • Specialized pliers
  • Professional separation process

Improper removal can pull or break natural hair.


5. Maintenance Requirements

Keratin extensions require careful maintenance.

Users should:

  • Avoid oil near bonds
  • Use sulfate-free shampoo
  • Brush carefully
  • Prevent tangling during sleep
  • Schedule maintenance appointments

Neglecting aftercare may shorten lifespan significantly.


6. Not Ideal for Very Damaged Hair

People with extremely weak or chemically overprocessed hair may not be good candidates.

The additional weight and tension could worsen existing hair fragility.

Professional consultation is strongly recommended before installation.


Keratin Hair Extensions vs Tape-In Extensions

Tape-ins are one of the biggest competitors to keratin extensions.

Comparison Table

Feature Keratin Extensions Tape-Ins
Installation time Long Faster
Lifespan 3–6 months 6–10 weeks
Reusability Limited Reusable
Visibility Very low Moderate
Cost Higher Lower
Maintenance Moderate Moderate

Which Is Better?

Keratin extensions are generally better for:

  • Long-term wear
  • Thin hair
  • Natural movement

Tape-ins are better for:

  • Faster installation
  • Budget-conscious users
  • Easier maintenance

Keratin Extensions vs Genius Wefts

Genius wefts are one of the fastest-growing premium extension categories.

Comparison Table

Feature Keratin Extensions Genius Wefts
Bond visibility Extremely low Low
Installation method Individual bonds Sew/bead wefts
Comfort Lightweight Lightweight
Reusability Limited High
Installation speed Slow Faster
Cost Higher labor cost Moderate

Competitor Analysis

Genius wefts are becoming strong competitors because they combine:

  • Thin weft design
  • Comfortable wear
  • Reusability
  • Faster salon installation

However, keratin extensions still outperform wefts in:

  • Maximum natural movement
  • High ponytail styling
  • Invisible blending

Keratin Extensions vs Clip-In Extensions

Clip-ins are temporary extensions designed for occasional use.

Feature Keratin Extensions Clip-Ins
Permanence Semi-permanent Temporary
Installation Professional DIY
Daily removal No Yes
Styling freedom High Medium
Cost Higher Lower

Clip-ins are excellent for occasional styling, while keratin extensions are better for continuous wear.


Best Hair Material for Keratin Extensions

Hair quality strongly affects results.

100% Remy Human Hair

Best choice because:

  • Cuticles remain aligned
  • Less tangling
  • Longer lifespan
  • Natural appearance

Virgin Human Hair

Premium option with:

  • No chemical processing
  • Maximum softness
  • Long durability

Synthetic Hair

Generally not recommended because:

  • Cannot handle heat well
  • Short lifespan
  • Less natural appearance

How Long Do Keratin Hair Extensions Last?

Average lifespan depends on:

  • Hair quality
  • Installation technique
  • Daily maintenance
  • Hair growth rate

Typical durability:

Hair Quality Lifespan
Standard Remy hair 2–4 months
Premium Remy hair 4–6 months
Virgin hair 6 months+

Regular salon maintenance improves longevity significantly.


Who Should Choose Keratin Hair Extensions?

Keratin extensions are ideal for people who want:

  • Long-term extensions
  • Natural appearance
  • Luxury salon results
  • Flexible styling options
  • Thin hair compatibility

They may not be ideal for:

  • Tight budgets
  • Frequent color changes
  • Very damaged hair
  • Users wanting easy DIY removal

Are Keratin Hair Extensions Worth It?

For many users, the answer is yes.

Keratin extensions remain one of the most premium and natural-looking extension methods available.

Their biggest strengths include:

  • Invisible blending
  • Long lifespan
  • Excellent styling freedom
  • Comfortable wear
  • Strong durability

Although they require higher investment and maintenance, many users consider the results superior to temporary extension methods.


Final Thoughts

Keratin hair extensions offer one of the best combinations of natural appearance, durability, and styling flexibility in the professional hair extension market.

They are especially suitable for users seeking:

  • Semi-permanent luxury extensions
  • Natural movement
  • Invisible bonds
  • Long-lasting wear

However, they also come with:

  • Higher installation costs
  • Professional maintenance requirements
  • Potential risks if improperly installed

Compared with tape-ins, genius wefts, clip-ins, and sew-in extensions, keratin bonds continue to hold a strong position as a premium salon-grade solution.

For users who prioritize realistic results and long-term wear, keratin hair extensions remain one of the most effective and elegant hair enhancement methods available today.

What Is Genius Weft Hair Extensions? Complete Guide

The global hair extension industry has changed dramatically in recent years. Clients no longer want bulky tracks, uncomfortable installations, or obvious extension lines. Modern consumers expect extensions that look invisible, feel lightweight, and protect natural hair health. This demand has led to the rise of one of the fastest-growing innovations in the salon world: Genius Weft Hair Extensions.

Genius Wefts are often described as the “next generation” of weft hair extensions because they combine the best features of traditional machine wefts and hand-tied wefts into a single advanced design. Their ultra-thin structure, cuttable seam, lightweight feel, and natural blending have made them extremely popular among salons, hairstylists, wholesalers, and luxury hair brands.

In this complete guide, you will learn:

  • What Genius Weft hair extensions are
  • How they are made
  • Technical specifications
  • Main features and benefits
  • Application scenarios
  • Comparison between old and new versions
  • Competitor analysis
  • Differences between Genius Wefts and other extension types
  • Installation methods
  • Maintenance tips
  • Market trends and wholesale opportunities

If you are a salon owner, stylist, hair extension brand, or beauty entrepreneur, this guide will help you fully understand why Genius Wefts are transforming the professional hair extension market.


What Are Genius Weft Hair Extensions?

Genius Weft hair extensions are a modern type of semi-permanent weft extension designed with an ultra-thin and flexible seam that lays flat against the scalp. Unlike traditional wefts, Genius Wefts can usually be cut anywhere along the track without unraveling, giving stylists greater installation flexibility.

They are commonly manufactured using:

  • 100% Remy human hair
  • Virgin human hair
  • Cuticle-aligned hair
  • Reinforced stitching technology
  • PU sealing techniques

The purpose of Genius Wefts is to solve several long-standing problems associated with older weft systems, including:

  • Bulky seams
  • Visible tracks
  • Scalp discomfort
  • Return hair irritation
  • Limited customization

Modern Genius Wefts are especially popular in luxury salons because they provide a nearly invisible finish while maintaining strong durability and lightweight comfort.


Why Are They Called “Genius” Wefts?

The term “Genius” refers to the smart hybrid construction that combines the advantages of multiple extension systems into one product. According to industry guides, the design aims to provide:

  • The thinness of hand-tied wefts
  • The durability of machine wefts
  • The flexibility of cuttable seams
  • The comfort of no-return-hair construction

In simple terms, Genius Wefts attempt to eliminate the weaknesses of traditional weft extensions while preserving their strengths.


How Genius Weft Hair Extensions Are Made

The manufacturing process is one of the most important factors affecting quality, durability, softness, and longevity.

Step 1: Hair Collection and Sorting

Manufacturers begin by sourcing raw human hair.

Common sources include:

  • Indian hair
  • Vietnamese hair
  • Cambodian hair
  • Brazilian hair
  • European hair

The hair is sorted by:

  • Length
  • Texture
  • Color
  • Cuticle direction

Premium factories use cuticle-aligned Remy hair to reduce tangling.


Step 2: Cleaning and Processing

The hair is washed and disinfected before undergoing texture or color treatment.

Luxury manufacturers avoid excessive acid processing because it damages the hair shaft.


Step 3: Weft Construction

Unlike standard machine wefts, Genius Wefts use advanced stitching and sealing technology.

The seam is engineered to be:

  • Extremely thin
  • Flat
  • Flexible
  • Reinforced

Some manufacturers also apply PU reinforcement to improve durability and prevent shedding.


Step 4: Removal of Return Hair

Traditional wefts often contain “return hairs” — short folded hairs near the seam that can cause itching or irritation.

One of the signature features of Genius Wefts is the reduction or elimination of return hair.

This improves:

  • Comfort
  • Blending
  • Scalp feel
  • Wearability

Step 5: Quality Inspection

Factories test for:

  • Shedding resistance
  • Elasticity
  • Seam strength
  • Density consistency
  • Color accuracy

Premium Genius Wefts may last 9–18 months with proper care.


Main Features of Genius Weft Hair Extensions

Ultra-Thin Seam

The biggest selling point is the extremely thin seam profile.

Some sources report seam thickness around 0.5–0.78 mm, making the weft nearly invisible after installation.

Benefits include:

  • Better concealment
  • Flat scalp appearance
  • More natural blending

Can Be Cut Without Unraveling

Traditional hand-tied wefts cannot usually be cut without shedding.

Genius Wefts solve this problem by allowing stylists to customize the width freely.

This feature provides:

  • Faster installation
  • Better customization
  • Less wasted hair

Lightweight Construction

Genius Wefts are designed for comfort.

The lightweight structure reduces:

  • Scalp tension
  • Pulling sensation
  • Headaches
  • Root stress

This makes them ideal for clients with fine or sensitive hair.


No Return Hair

Many stylists and clients dislike traditional return hairs because they can feel prickly.

Genius Wefts are engineered to reduce or eliminate this issue.


Strong Durability

Despite their thin structure, Genius Wefts remain durable due to reinforced stitching and modern manufacturing techniques.


Genius Weft Specifications

Below is a standard specification table commonly used in the wholesale market.

Specification Details
Hair Material 100% Remy Human Hair
Hair Grade 8A–12A
Length 14–30 Inches
Weight 40g–120g
Seam Thickness 0.5–0.78 mm
Color Options Solid, Ombre, Balayage, Piano
Texture Options Straight, Body Wave, Curly
Lifespan 9–18 Months
Reusable Yes
Installation Method Sew-In, Beaded Row
Shedding Level Very Low
MOQ for Wholesale 10–100 pcs
Production Time 3–20 Days

Application Scenarios for Genius Weft Hair Extensions

Luxury Salon Services

Genius Wefts are extremely popular in premium salons because clients demand invisible and comfortable installations.


Thin Hair Clients

Fine hair clients often struggle with bulky extension systems.

Genius Wefts work well because the seams remain flat and discreet.


Invisible Beaded Row (IBR) Installations

The lightweight structure makes Genius Wefts highly compatible with IBR methods.


Bridal Hair Styling

Brides often prefer extensions that:

  • Look natural in photos
  • Feel comfortable all day
  • Blend seamlessly

Genius Wefts meet these requirements.


Long-Term Hair Enhancement

Clients seeking reusable semi-permanent extensions often choose Genius Wefts because they provide both comfort and longevity.


Old vs New Genius Weft Comparison

As the market evolved, Genius Wefts have undergone major improvements.

Feature Older Genius Wefts New Generation Genius Wefts
Seam Thickness Slightly thicker Ultra-thin
Flexibility Moderate High
Shedding Resistance Good Excellent
Return Hair Small amount Nearly none
Durability Medium High
Customization Basic Advanced
Comfort Good Excellent

Improvements in New Models

Modern Genius Wefts now offer:

  • Better PU reinforcement
  • Softer seams
  • Stronger stitching
  • More natural density distribution
  • Improved cuttability

These improvements have helped Genius Wefts dominate the luxury extension market.


Genius Weft vs Machine Weft

Feature Genius Weft Machine Weft
Thickness Ultra-thin Thick
Comfort Excellent Moderate
Visibility Very low Higher
Weight Lightweight Heavier
Durability High Very high
Can Be Cut Yes Yes
Best For Luxury salons Budget installs

Analysis

Machine wefts remain popular because they are affordable and durable.

However, Genius Wefts provide a more premium experience with:

  • Better blending
  • Lower visibility
  • Improved comfort

Genius Weft vs Hand-Tied Weft

Feature Genius Weft Hand-Tied Weft
Seam Thickness Very thin Thin
Can Be Cut Yes No
Shedding Risk Low Higher when cut
Return Hair Minimal Present
Installation Speed Faster Slower
Durability High Moderate

Analysis

Hand-tied wefts are still loved for natural movement.

However, Genius Wefts solve several common problems, especially the inability to cut hand-tied seams without unraveling.


Genius Weft vs Butterfly Weft

Feature Genius Weft Butterfly Weft
Seam Profile Ultra-thin Thin
Market Position Ultra-premium Premium
Flexibility Excellent Very good
Durability Higher Moderate-High
Cost Higher Lower

Analysis

Butterfly Wefts are often marketed as a softer alternative, while Genius Wefts dominate the luxury invisible-extension category.


Genius Weft vs Tape-In Extensions

Feature Genius Weft Tape-Ins
Adhesive Needed No Yes
Reusability High Moderate
Heat Resistance Excellent Moderate
Lifespan Longer Shorter
Maintenance Moderate Higher

Analysis

Tape-ins are fast to install but may experience adhesive issues.

Genius Wefts provide a more durable long-term solution.


Advantages of Genius Weft Hair Extensions

Nearly Invisible Appearance

The ultra-thin seam creates exceptional blending.


Comfortable Wear

Clients report less scalp irritation and tension.


High Customization

Stylists can cut and adjust the wefts freely.


Low Shedding

Advanced sealing technology improves durability.


Reusable

High-quality Genius Wefts can be reused multiple times.


Disadvantages of Genius Weft Hair Extensions

Higher Price

Genius Wefts are more expensive than standard wefts.


Requires Professional Installation

Improper installation may reduce lifespan or cause discomfort.


Maintenance Is Essential

Clients must follow proper aftercare routines.


Maintenance Tips for Genius Wefts

To maximize lifespan:

  • Use sulfate-free shampoo
  • Avoid excessive heat
  • Brush gently
  • Sleep with braided hair
  • Schedule salon maintenance regularly

Proper care dramatically increases durability.


Wholesale and OEM Opportunities

The demand for Genius Wefts continues to rise globally.

Manufacturers now offer:

  • OEM services
  • Private labeling
  • Custom color rings
  • Luxury packaging
  • Salon branding

Popular export markets include:

  • United States
  • Canada
  • Europe
  • Australia
  • Middle East

Market Trends for Genius Wefts

Industry demand is growing because consumers increasingly prefer:

  • Invisible extensions
  • Lightweight wear
  • Hair health protection
  • Luxury salon experiences

Social media platforms like Instagram and TikTok have also accelerated the popularity of seamless extension systems.


How to Choose High-Quality Genius Wefts

Check Hair Quality

Choose:

  • Virgin hair
  • Remy hair
  • Cuticle-aligned hair

Examine Seam Construction

High-quality seams should feel:

  • Flat
  • Soft
  • Flexible

Test Shedding Resistance

Run fingers gently through the hair to check durability.


Ask About Return Hair

Premium Genius Wefts should contain little or no return hair.


Conclusion

Genius Weft hair extensions represent one of the biggest innovations in modern hair extension technology. By combining the ultra-thin appearance of hand-tied wefts with the flexibility and durability of machine wefts, Genius Wefts provide an advanced solution for both stylists and clients.

Compared with traditional extensions, Genius Wefts offer:

  • Better comfort
  • Improved invisibility
  • Greater customization
  • Lower scalp tension
  • More professional results

Their popularity continues to grow in luxury salons because they align perfectly with current beauty trends focused on:

  • Natural appearance
  • Lightweight wear
  • Hair protection
  • Long-term reusability

As extension technology continues evolving, Genius Wefts are likely to remain one of the most important products in the premium hair extension market for years to come.

How Much Does Sew In Hair Extensions Cost?

Sew in hair extensions remain one of the most popular hair enhancement methods in salons worldwide. Whether you want longer hair, fuller volume, protective styling, or a complete transformation, sew-in extensions offer durability, versatility, and natural-looking results. However, one of the biggest questions people ask before booking an appointment is: How much does sew in hair extensions cost?

The answer depends on several important factors, including the type of hair used, salon location, installation technique, stylist experience, hair length, and maintenance requirements. In some cases, a basic sew-in may cost less than $100, while luxury full-head sew-in extensions using premium human hair can exceed $1,500.

This complete guide explains everything you need to know about sew in hair extension pricing, including hair costs, salon fees, maintenance expenses, and how to choose the best option for your budget.

What Are Sew In Hair Extensions?

Sew in hair extensions, also called sew-in weaves, are a semi-permanent extension method where hair wefts are sewn onto braided natural hair using a needle and thread. Unlike tape-ins or glue-based systems, sew-ins do not rely on adhesive products.

The process usually includes:

  • Braiding the natural hair into cornrows
  • Attaching weft hair using thread
  • Blending and styling the extensions

Sew-ins are especially popular because they:

  • Last longer than temporary extensions
  • Protect natural hair
  • Provide strong hold
  • Work well for thick and textured hair
  • Allow multiple styling options

Depending on the installation method and hair quality, sew in hair extensions can last between 6 and 12 weeks before maintenance or reinstallation is needed.

Average Cost of Sew In Hair Extensions

The average cost of sew in hair extensions in the United States typically ranges from:

Type of Sew In Average Cost
Basic Partial Sew In $80–$200
Full Sew In with Synthetic Hair $100–$300
Full Sew In with Human Hair $250–$800
Luxury Sew In with Premium Hair $800–$1,500+
Invisible Beaded Sew In $300–$1,200

These prices may or may not include the cost of hair.

Some salons charge separately for:

  • Hair bundles
  • Braiding
  • Cutting
  • Coloring
  • Styling
  • Maintenance

Always confirm what is included before booking an appointment. Otherwise, the final bill may surprise you harder than bangs cut at 2 a.m.

Factors That Affect Sew In Hair Extension Cost

Several variables influence the total price of sew-in extensions.

Hair Type

The quality of the hair is usually the biggest pricing factor.

Hair Type Price Range
Synthetic Hair $20–$80
Blended Hair $50–$150
Remy Human Hair $100–$400
Virgin Human Hair $200–$800+

Synthetic Hair

Synthetic hair is cheaper but has disadvantages:

  • Short lifespan
  • Less natural appearance
  • Limited heat styling
  • More tangling

Remy Human Hair

Remy hair is considered higher quality because the cuticles remain aligned in one direction. Benefits include:

  • Softer texture
  • Better durability
  • Reduced tangling
  • More natural movement

Virgin Human Hair

Virgin hair is premium unprocessed hair with intact cuticles. It offers:

  • Longest lifespan
  • Best styling flexibility
  • Most natural appearance

Luxury salons often recommend virgin hair for long-term wear.

Hair Length and Density

Longer and fuller extensions require more hair bundles, increasing costs.

Hair Length Typical Bundles Needed
12–16 Inches 2 Bundles
18–22 Inches 3 Bundles
24–30 Inches 4+ Bundles

Long hair costs significantly more because sourcing healthy long strands is more difficult.

For example:

  • 14-inch Remy bundles may cost $80 each
  • 28-inch virgin bundles may cost $300 each

Rapunzel hair is beautiful, but your wallet may need emotional support afterward.

Salon Location

Prices vary greatly depending on geography.

High-Cost Cities

Salons in cities like:

  • Los Angeles
  • New York
  • Miami
  • Chicago

often charge premium rates due to higher operating costs and luxury demand.

Smaller Cities

Smaller towns or suburban salons may offer lower prices.

However, lower pricing does not always mean lower quality. Many independent stylists provide excellent sew-in services at competitive rates.

Stylist Experience

Highly experienced stylists charge more because they provide:

  • Better blending
  • Cleaner braiding
  • Faster installation
  • Reduced scalp tension
  • More natural appearance

Celebrity stylists or luxury salon specialists may charge several hundred dollars for installation alone.

Installation Technique

Different sew-in methods have different pricing structures.

Traditional Sew In

This classic method involves braiding the entire head and sewing wefts onto the braids.

Average Cost:
$150–$500

Partial Sew In

Only part of the head receives extensions.

Average Cost:
$80–$250

Invisible Sew In

Designed for ultra-natural blending with minimal visible tracks.

Average Cost:
$250–$700

Invisible Beaded Row (IBR)

A premium no-braid method using beads for attachment.

Average Cost:
$300–$1,200

Additional Costs to Consider

Many clients only budget for the initial installation and forget about maintenance expenses.

Maintenance Appointments

Sew-ins require upkeep every few weeks.

Typical maintenance includes:

  • Tightening
  • Washing
  • Rebraiding
  • Restyling

Average Maintenance Cost:
$50–$200 per visit

Hair Coloring

Custom coloring increases total cost.

Additional services may include:

  • Balayage
  • Highlights
  • Ombre
  • Root melting

Color services can add:
$100–$500+

Custom Cutting and Styling

Blending extensions with natural hair often requires professional shaping.

Styling fees usually range from:
$30–$150

Butterfly Weft

How Long Do Sew In Hair Extensions Last?

Lifespan depends on both installation quality and hair quality.

Hair Quality Typical Lifespan
Synthetic Hair 1–2 months
Remy Hair 6–12 months
Virgin Hair 1–2 years

The installation itself is usually worn for:
6–10 weeks

After that, the extensions may need repositioning or reinstallation.

Proper care dramatically affects longevity.

Sew In Hair Extensions vs Other Extension Methods

Understanding competitor methods helps explain sew-in pricing.

Extension Type Average Cost Lifespan
Sew In Extensions $150–$1,500 6–10 weeks
Tape In Extensions $200–$1,200 4–8 weeks
Clip In Extensions $50–$500 Temporary
Fusion Extensions $500–$2,500 3–5 months
Halo Extensions $100–$400 Temporary

Why Many People Choose Sew Ins

Compared with alternatives, sew-ins offer:

  • Strong hold
  • Better durability
  • Lower long-term cost
  • Protective styling benefits
  • Versatility

This balance makes sew-ins one of the best value extension methods available.

Are Expensive Sew In Extensions Worth It?

In many cases, yes.

Premium human hair extensions may cost more upfront but often save money long term because they:

  • Last longer
  • Tangle less
  • Look more natural
  • Require fewer replacements

Cheap extensions may initially seem attractive but often create problems like:

  • Matting
  • Shedding
  • Dryness
  • Unnatural shine

Low-quality bundles can turn glamorous dreams into scarecrow cosplay surprisingly fast.

How to Save Money on Sew In Hair Extensions

You can reduce costs without sacrificing quality.

Buy Hair Separately

Many salons mark up extension hair significantly.

Buying from a trusted supplier may save money.

Reuse Human Hair Bundles

Good-quality human hair can be reused multiple times with proper care.

Choose Medium Lengths

Longer extensions cost substantially more.

18–22 inch hair often provides the best balance between price and appearance.

Avoid Overprocessing

Excessive bleaching shortens extension lifespan and increases replacement frequency.

How to Choose the Best Sew In Hair Extensions

Check Hair Quality

Look for:

  • Remy hair
  • Virgin hair
  • Cuticle alignment

Read Reviews

Client reviews help identify reliable salons and suppliers.

Ask About Maintenance

Understanding long-term upkeep costs prevents budgeting surprises.

Verify Installation Experience

Poor installation can damage natural hair regardless of extension quality.

Wholesale Sew In Hair Extension Pricing

For salons and distributors, wholesale pricing differs significantly.

Hair Type Wholesale Price
Synthetic Bundles $5–$20
Remy Bundles $30–$100
Virgin Bundles $80–$300

Private label brands often purchase directly from manufacturers in:

  • China
  • India
  • Vietnam
  • Cambodia

Wholesale buyers should evaluate:

  • Hair consistency
  • Cuticle integrity
  • Factory quality control
  • Custom packaging options

Common Questions About Sew In Hair Extensions

Do sew-ins damage natural hair?

Properly installed sew-ins generally cause minimal damage. Problems usually occur because of:

  • Excessive tension
  • Poor maintenance
  • Improper removal

Can you wash sew-in extensions?

Yes. Gentle sulfate-free shampoo is recommended.

Can sew-ins be reused?

High-quality human hair sew-ins can be reused several times.

Are sew-ins suitable for thin hair?

Traditional sew-ins work best for medium to thick hair, though modern lightweight methods can help clients with finer hair.

Final Thoughts

So, how much does sew in hair extensions cost? The answer depends on your goals, hair quality, stylist experience, and preferred installation method.

For most clients, realistic pricing falls between:

  • $150–$500 for standard professional sew-ins
  • $500–$1,500+ for luxury human hair installations

While cheaper options exist, investing in high-quality hair and skilled installation often delivers better comfort, appearance, and long-term value.

Sew in hair extensions continue to dominate the beauty industry because they provide a reliable combination of:

  • Natural appearance
  • Long-lasting wear
  • Styling versatility
  • Reusability
  • Protective benefits

Whether you are a first-time extension client, salon owner, or wholesale hair buyer, understanding sew-in pricing helps you make smarter beauty and business decisions.

How to Make a Hair Topper: Complete Guide Step-by-Step

Hair toppers have become one of the fastest-growing products in the global hair replacement industry. They are widely used by women and men experiencing hair thinning, hair loss, alopecia, gray hair coverage issues, or volume reduction at the crown area. Compared with full wigs, hair toppers provide a lighter, more breathable, and more natural solution because they blend with the wearer’s own hair.

As demand continues to grow, many salons, hair brands, wholesalers, and beauty entrepreneurs want to understand how hair toppers are made. Manufacturing a high-quality hair topper requires much more than simply attaching hair to a base. The process involves material selection, base design, ventilation techniques, knotting methods, color processing, density control, quality inspection, and customization.

This complete guide explains how to make a hair topper step by step, including professional manufacturing techniques, tools, materials, and the entire production process used in the hair extension industry.


What Is a Hair Topper?

A hair topper is a partial hair replacement system designed to cover thinning hair or bald areas on the top or crown of the scalp. Unlike full wigs, toppers blend with natural hair to create additional volume and coverage.

Hair toppers are commonly used for:

  • Female pattern hair loss
  • Thinning crown hair
  • Gray hair coverage
  • Fine hair enhancement
  • Alopecia support
  • Postpartum hair thinning
  • Fashion styling

Modern hair toppers are available in different base constructions, including:

  • Silk base toppers
  • Mono toppers
  • Lace toppers
  • PU base toppers
  • Fishnet toppers
  • Integration toppers

Each type requires different manufacturing methods.


Main Materials Needed to Make a Hair Topper

The quality of a hair topper depends heavily on raw materials.

Human Hair

Most premium toppers use:

  • 100% Remy human hair
  • Virgin human hair
  • Cuticle intact hair

High-quality hair provides:

  • Natural shine
  • Better lifespan
  • Tangle-free performance
  • Easier styling

Some low-cost toppers use synthetic fibers, but professional salons and premium customers generally prefer human hair because it looks more realistic and lasts longer.


Hair Topper Base Materials

The base structure determines comfort, breathability, realism, and durability.

Common base materials include:

Base Type Main Features
Lace Base Lightweight and breathable
Mono Base Durable and natural looking
Silk Base Most realistic scalp appearance
PU Base Thin skin-like appearance
Fishnet Base Flexible and breathable
Integration Base Blends with existing hair

Choosing the correct base is one of the most important steps in manufacturing.


Tools Used to Make Hair Toppers

Professional hair topper factories usually use specialized tools.

Common tools include:

  • Ventilating needle
  • Knotting hook
  • Wig block
  • Canvas head
  • Scissors
  • Sewing machine
  • Hair hackle
  • Hair drawing mat
  • Clips
  • Elastic bands
  • Adhesive materials

Handmade toppers require highly skilled workers because knotting hair manually is time-consuming and technically difficult.


Step 1: Designing the Hair Topper

Every topper starts with design planning.

Manufacturers first determine:

  • Base size
  • Hair density
  • Hair direction
  • Hair length
  • Color
  • Curl pattern
  • Hairline shape

Determining Base Size

Hair topper sizes vary depending on coverage needs.

Common topper sizes include:

Size Coverage Area
2×3 inch Small thinning area
5×5 inch Medium crown coverage
6×7 inch Large top coverage

Larger toppers require more hair and more complex construction.


Step 2: Preparing the Hair Material

Hair preparation is critical for product quality.

Sorting Hair

Manufacturers separate hair based on:

  • Length
  • Color
  • Texture
  • Curl pattern

Premium factories often use single donor hair to maintain consistency.


Step 3: Hair Cleaning and Disinfection

Before production, the hair must be cleaned thoroughly.

The cleaning process removes:

  • Dust
  • Oil
  • Dirt
  • Bacteria

Hair is usually washed with:

  • Professional shampoo
  • Conditioning treatment
  • Disinfecting solution

This step improves hygiene and product lifespan.


Step 4: Aligning Hair Cuticles

High-quality toppers use Remy hair with aligned cuticles.

Factories carefully align hair in one direction to prevent:

  • Tangling
  • Matting
  • Frizz

Poor cuticle alignment is one of the biggest reasons low-quality hair toppers fail.


Step 5: Choosing the Base Construction

Different base structures require different manufacturing techniques.

Silk Base Topper Manufacturing

Silk base toppers are known for:

  • Realistic scalp appearance
  • Invisible knots
  • Luxury finish

Manufacturing requires:

  • Multi-layer fabric construction
  • Knot concealment
  • Precision ventilation

Silk toppers are among the most labor-intensive products to produce.


Lace Base Topper Manufacturing

Lace toppers focus on:

  • Breathability
  • Lightweight comfort
  • Natural hairline

Hair is hand-knotted onto lace mesh using ventilating needles.

Advantages include:

  • Good airflow
  • Natural movement
  • Comfortable wear

Mono Base Topper Manufacturing

Mono toppers use monofilament mesh.

Benefits include:

  • Strong durability
  • Natural scalp visibility
  • Long lifespan

Mono bases are common in medical hair replacement systems.


Step 6: Making the Hairline

The hairline is one of the most important parts of a topper.

A realistic hairline requires:

  • Graduated density
  • Fine knots
  • Natural direction
  • Soft transitions

Factories often use:

  • Single knots
  • Bleached knots
  • Baby hair effect

to improve realism.

Poor hairlines make toppers look artificial.


Step 7: Ventilating Hair into the Base

Ventilation is the process of knotting individual hairs into the topper base.

This is one of the most important manufacturing stages.

Hand Ventilation Process

Workers use ventilating needles to pull hair through the base material and tie knots manually.

Advantages of hand ventilation include:

  • Natural movement
  • Realistic density
  • Flexible styling
  • Better hair direction control

However, the process is extremely time-consuming.

A high-quality handmade topper may require:

  • 30-100+ working hours

depending on complexity.


Step 8: Knotting Techniques

Different knot types affect realism and durability.

Single Knot

Advantages:

  • Natural appearance
  • Smaller knots
  • Better invisibility

Disadvantages:

  • Less durable

Single knots are often used in front hairlines.


Double Knot

Advantages:

  • Stronger hold
  • Better durability

Disadvantages:

  • More visible

Double knots are commonly used in areas requiring stronger durability.


Step 9: Density Control

Hair density determines how thick the topper appears.

Factories must carefully balance:

  • Natural appearance
  • Coverage
  • Comfort

Typical density categories include:

Density Appearance
Light Density Natural thin hair
Medium Density Normal volume
Heavy Density Full glamorous look

Too much density can make toppers look unnatural.

Professional manufacturers customize density based on customer requirements.


Step 10: Creating Natural Hair Direction

Hair direction affects styling flexibility and realism.

Manufacturers carefully ventilate hair according to:

  • Free part
  • Middle part
  • Side part
  • Crown swirl

Proper direction creates natural movement and easier styling.


Step 11: Bleaching Knots

Bleaching knots reduces knot visibility.

The process lightens the tiny knots at the base to create the illusion that hair is growing directly from the scalp.

Bleached knots are especially important for:

  • Lace toppers
  • Front hairlines
  • Light-colored hair systems

Improper bleaching can weaken knots and increase shedding.


Step 12: Adding PU Perimeter or Clips

Many toppers include additional support systems.

PU Perimeter

Polyurethane edges improve:

  • Durability
  • Adhesive compatibility
  • Shape stability

Clips Installation

Most hair toppers use pressure-sensitive clips.

Clips help:

  • Secure the topper
  • Prevent slipping
  • Simplify daily wear

Factories sew clips carefully to avoid scalp discomfort.


Step 13: Cutting and Styling the Hair

After ventilation, the hair topper enters the styling stage.

Stylists shape the topper by:

  • Trimming
  • Layering
  • Texturizing
  • Curling
  • Straightening

This stage creates the final appearance.


Step 14: Coloring Process

Hair toppers are available in many colors.

Factories may produce:

  • Solid colors
  • Ombre colors
  • Balayage colors
  • Highlighted colors
  • Rooted colors
  • Gray blending colors

Professional coloring requires:

  • Color consistency
  • Low damage processing
  • Moisture protection

Low-quality dyeing may shorten product lifespan.


Step 15: Washing and Conditioning

After production, toppers undergo final washing.

The process includes:

  • Deep cleaning
  • Conditioning
  • Softening treatment

This improves:

  • Shine
  • Texture
  • Manageability

Premium factories use salon-grade products during this stage.


Step 16: Quality Inspection

Quality control is essential in professional manufacturing.

Inspectors check:

  • Shedding
  • Knot strength
  • Hair density
  • Color accuracy
  • Hair direction
  • Base defects
  • Tangling resistance

High-end factories usually perform multiple inspections before shipment.


Step 17: Packaging the Hair Topper

Packaging protects the topper during transportation.

Professional packaging may include:

  • Satin bags
  • Hair nets
  • Storage boxes
  • Brand labels
  • Care instructions

Luxury packaging improves customer experience and brand value.


Handmade Hair Toppers vs Machine Made Hair Toppers

Handmade Hair Toppers

Advantages:

  • More realistic
  • Better movement
  • Softer appearance
  • Higher quality

Disadvantages:

  • Higher cost
  • Longer production time

Machine Made Hair Toppers

Advantages:

  • Lower price
  • Faster production

Disadvantages:

  • Less natural appearance
  • Reduced flexibility

Most premium toppers are handmade.


How Long Does It Take to Make a Hair Topper?

Production time depends on:

  • Base type
  • Hair density
  • Hair length
  • Customization level

Typical production times:

Product Type Production Time
Basic Mono Topper 3-7 days
Lace Topper 5-10 days
Silk Base Topper 10-30 days
Custom Handmade Topper 20-60 days

Luxury custom toppers require extensive handwork.


Common Problems During Hair Topper Manufacturing

Factories often encounter challenges such as:

Hair Shedding

Caused by:

  • Weak knots
  • Poor ventilation
  • Low-quality hair

Tangling

Usually caused by:

  • Non-Remy hair
  • Damaged cuticles
  • Chemical overprocessing

Unnatural Density

Too much density creates a wig-like appearance.


Poor Hairline Design

Unrealistic hairlines reduce product quality significantly.


How to Make High-Quality Hair Toppers

Premium hair toppers require:

  • Cuticle intact Remy hair
  • Skilled ventilators
  • Realistic density
  • Strong knots
  • Soft natural hairline
  • Proper base selection

Factories with experienced workers usually produce more realistic products.


Hair Topper Customization Options

Many customers prefer customized toppers.

Popular customization options include:

  • Hair color
  • Hair density
  • Base size
  • Hair texture
  • Curl pattern
  • Hair length
  • Gray hair percentage

OEM and private label customization are increasingly popular in the global beauty market.


How to Start a Hair Topper Business

Many entrepreneurs enter the topper industry because demand continues growing.

Important steps include:

  • Finding reliable factories
  • Testing samples
  • Building private labels
  • Creating color systems
  • Developing salon partnerships
  • Marketing through social media

Hair toppers have become one of the highest-growth categories in the hair replacement market.


Future Trends in Hair Topper Manufacturing

The industry continues evolving rapidly.

Popular future trends include:

  • Ultra-thin skin bases
  • Invisible knots
  • AI color matching
  • Lightweight integration systems
  • Medical-grade toppers
  • Sustainable hair sourcing

Customers increasingly demand products that are:

  • More realistic
  • More comfortable
  • Easier to wear
  • Longer lasting

Factories that invest in innovation usually gain stronger market competitiveness.


Conclusion

Making a high-quality hair topper is a highly skilled and labor-intensive process that combines craftsmanship, material science, and beauty design.

The manufacturing process includes:

  • Hair selection
  • Base construction
  • Ventilation
  • Knotting
  • Density control
  • Hairline creation
  • Coloring
  • Styling
  • Quality inspection

Every stage affects the final product’s realism, comfort, durability, and performance.

Premium hair toppers made from cuticle intact Remy human hair with professional handmade ventilation provide the best results for customers experiencing hair thinning or hair loss.

As the global demand for hair replacement solutions continues growing, high-quality hair topper manufacturing remains one of the most important and fastest-growing sectors in the beauty and hair extension industry.