How Much Do Hand Tied Weft Extensions Cost?

Hair extensions have come a long way from bulky clip-ins and obvious tracks. Today, one of the most in-demand options is hand tied weft extensions—a premium solution known for its natural finish, lightweight feel, and long-lasting results.

But let’s be honest: beauty like this doesn’t come cheap.

If you’re considering hand tied wefts, you probably have one big question: How much do they really cost—and are they worth it?

This comprehensive guide breaks down everything you need to know: installation pricing, hair costs, maintenance, hidden expenses, comparisons, and expert tips to help you get the best value for your investment.


What Are Hand Tied Weft Extensions?

Before we talk numbers, it helps to understand what you’re paying for.

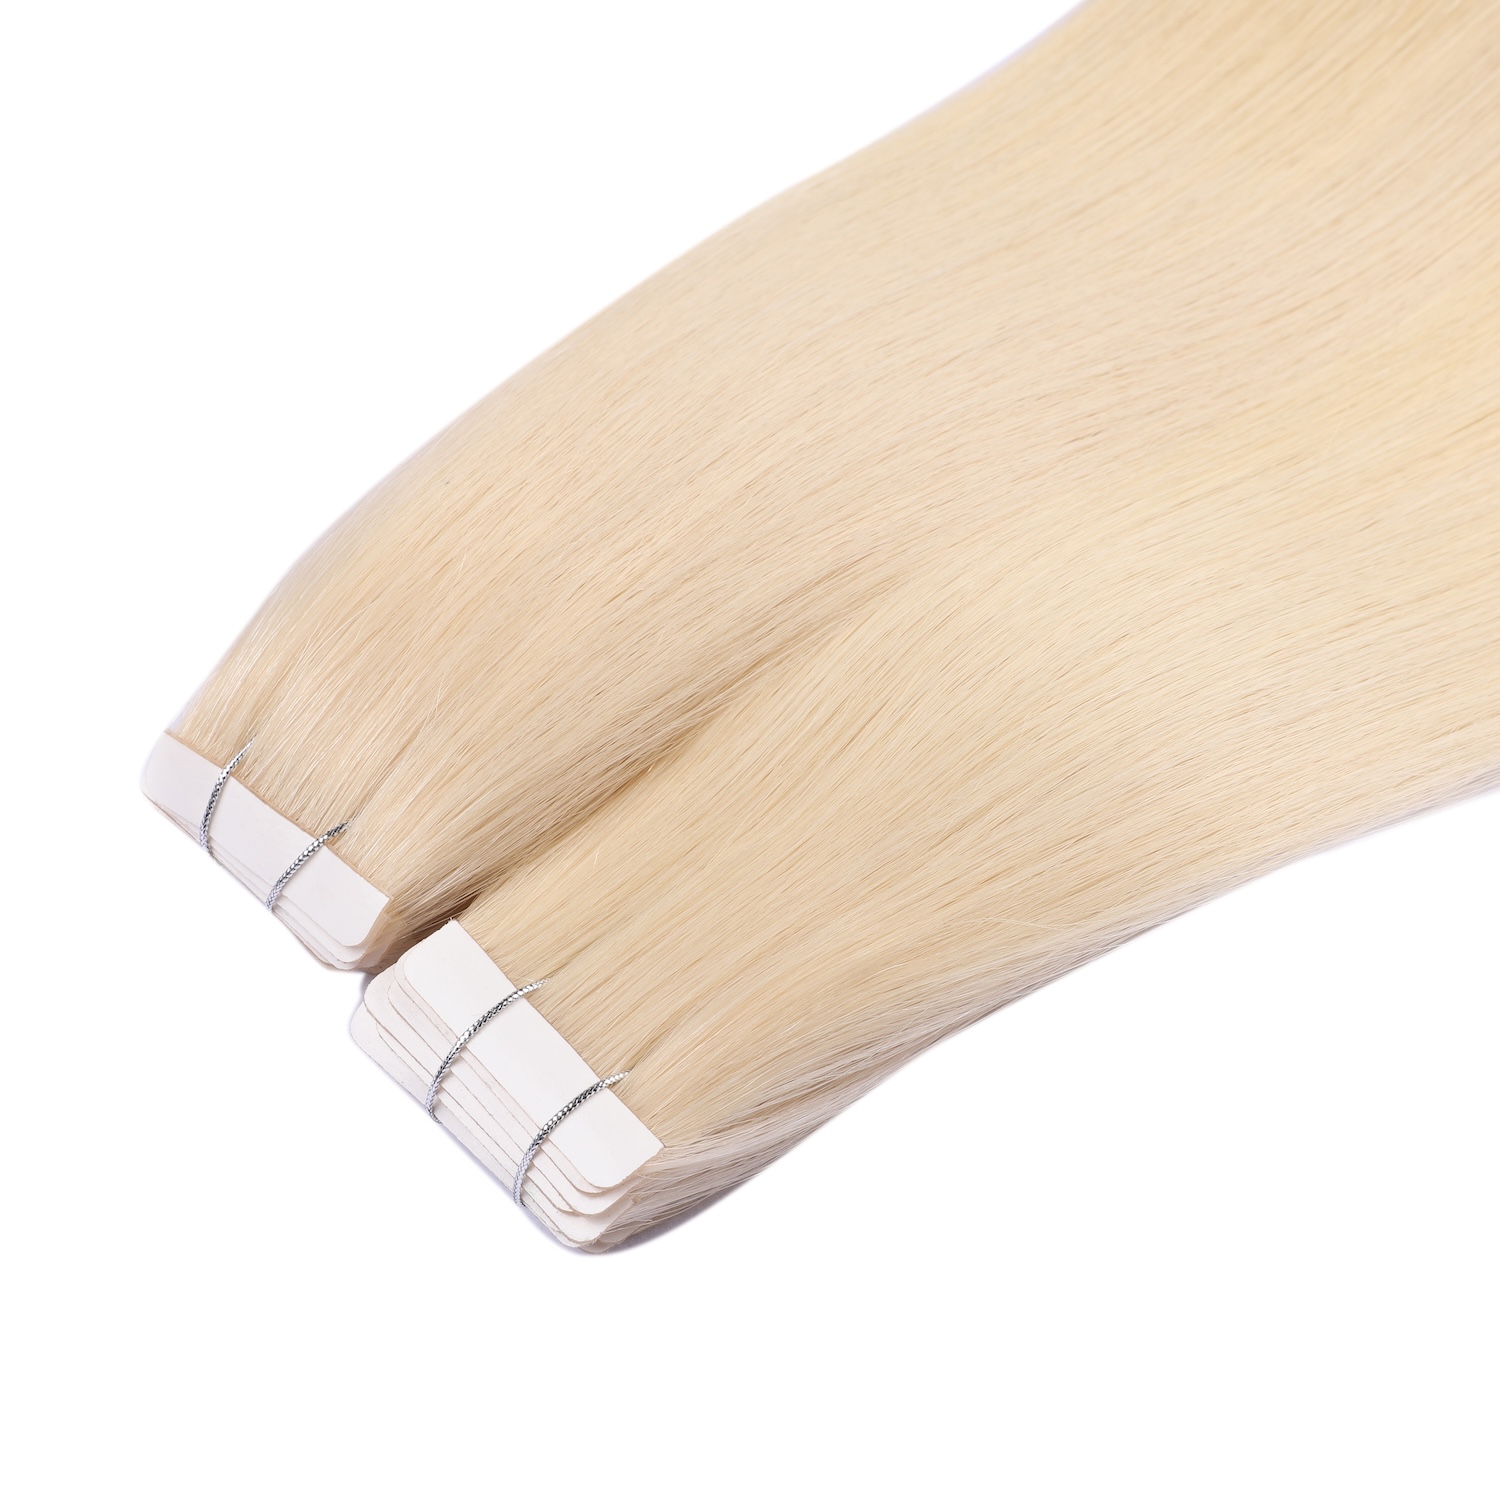
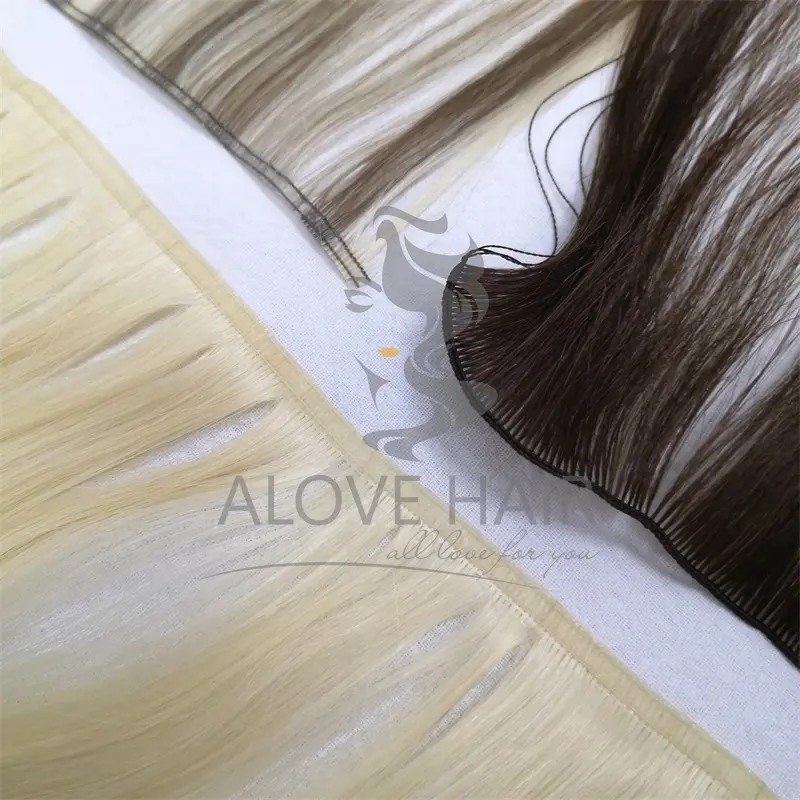
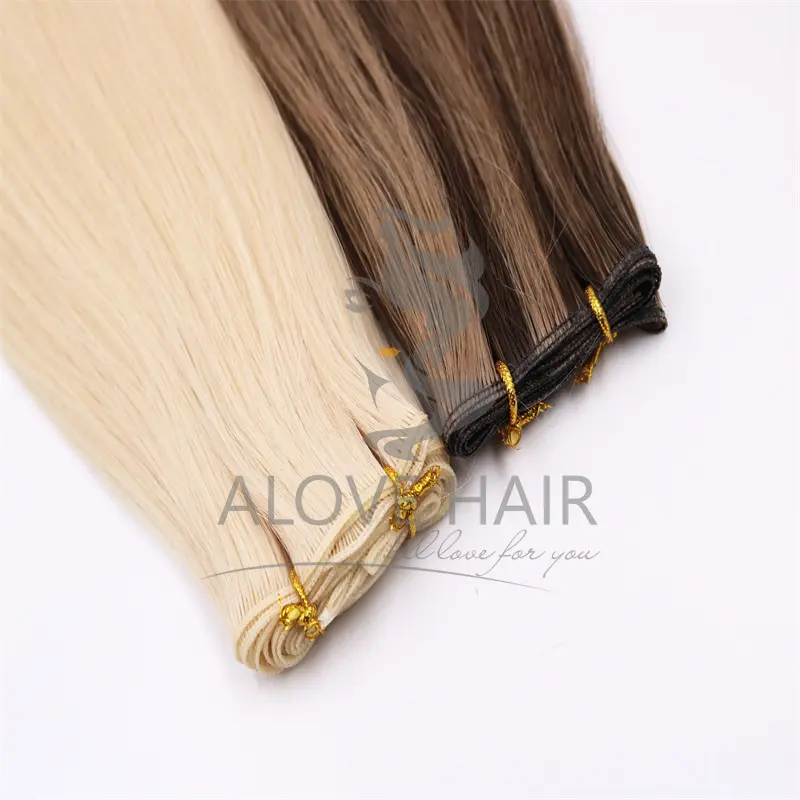
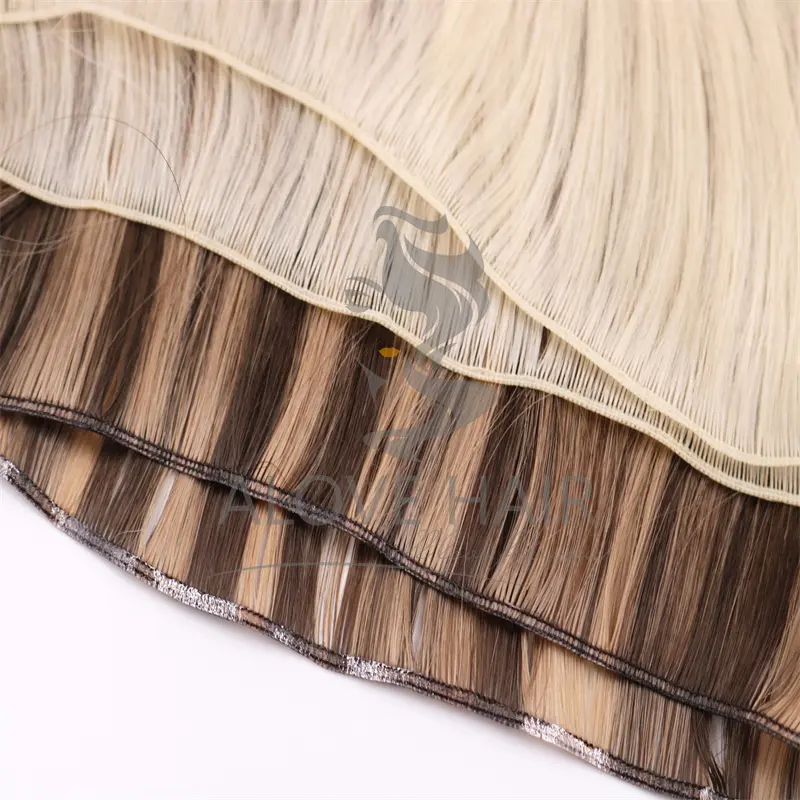
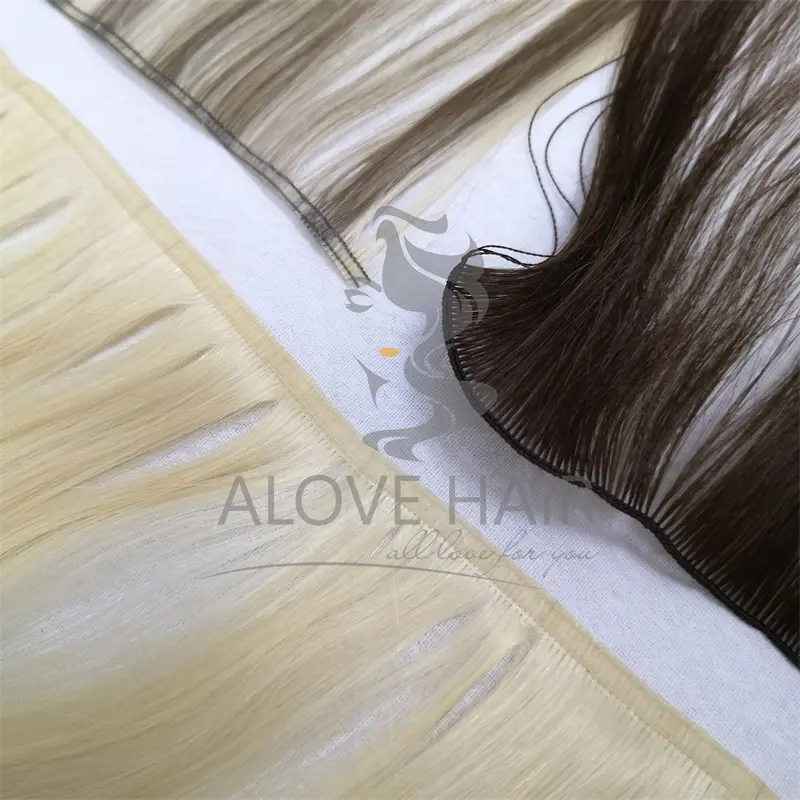
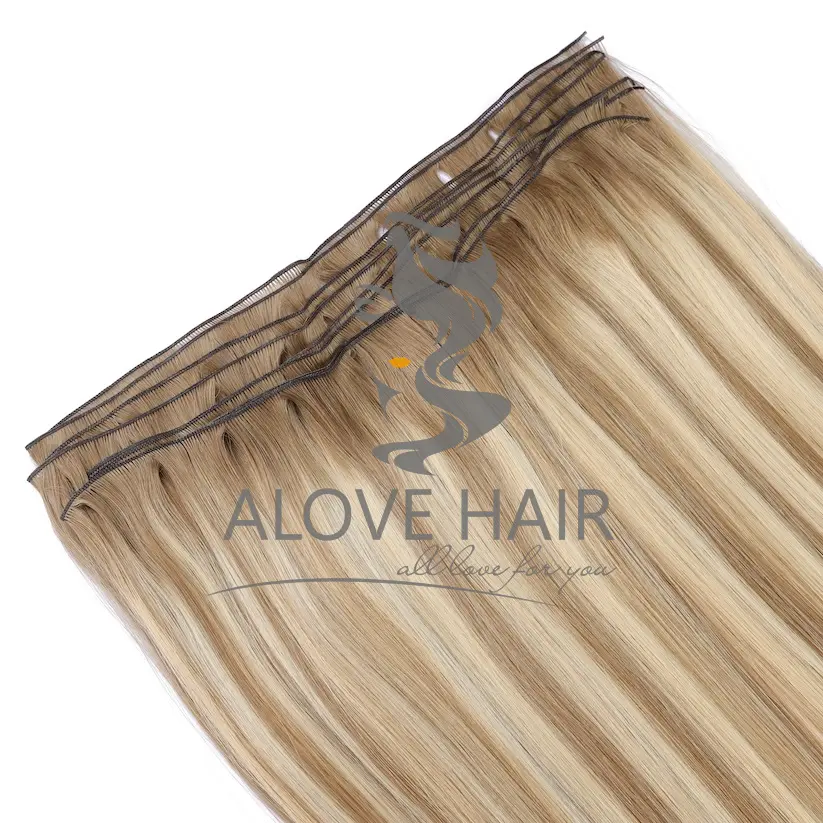
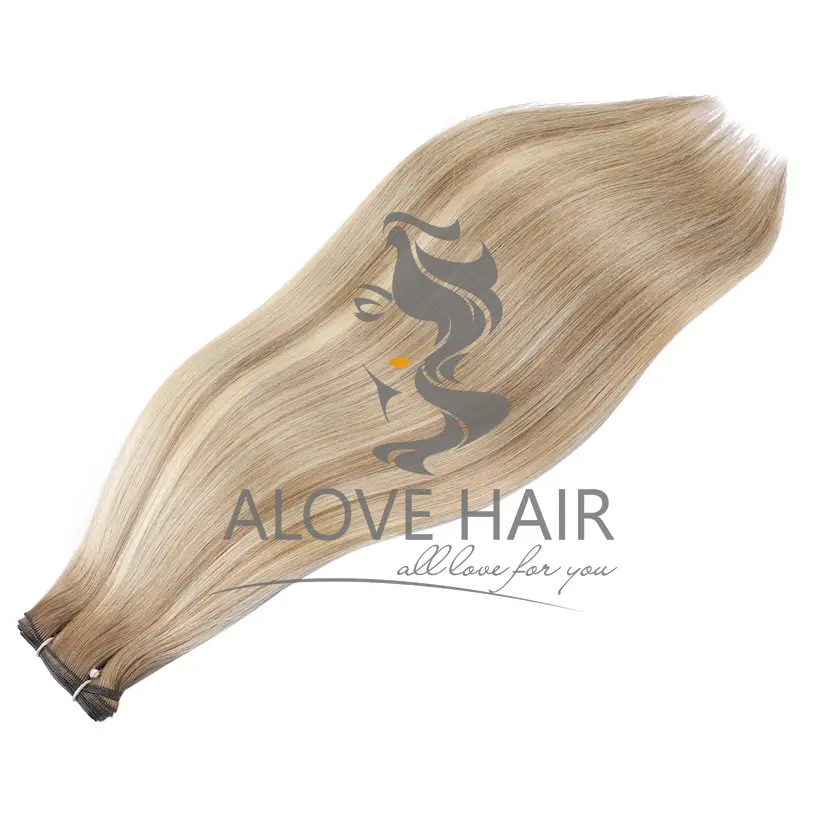
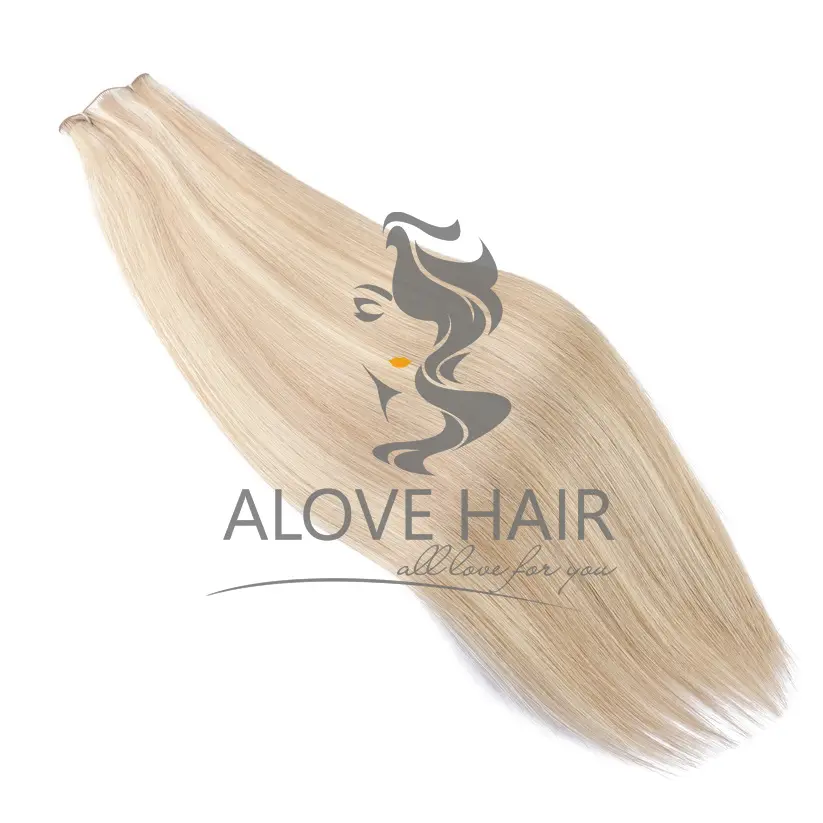
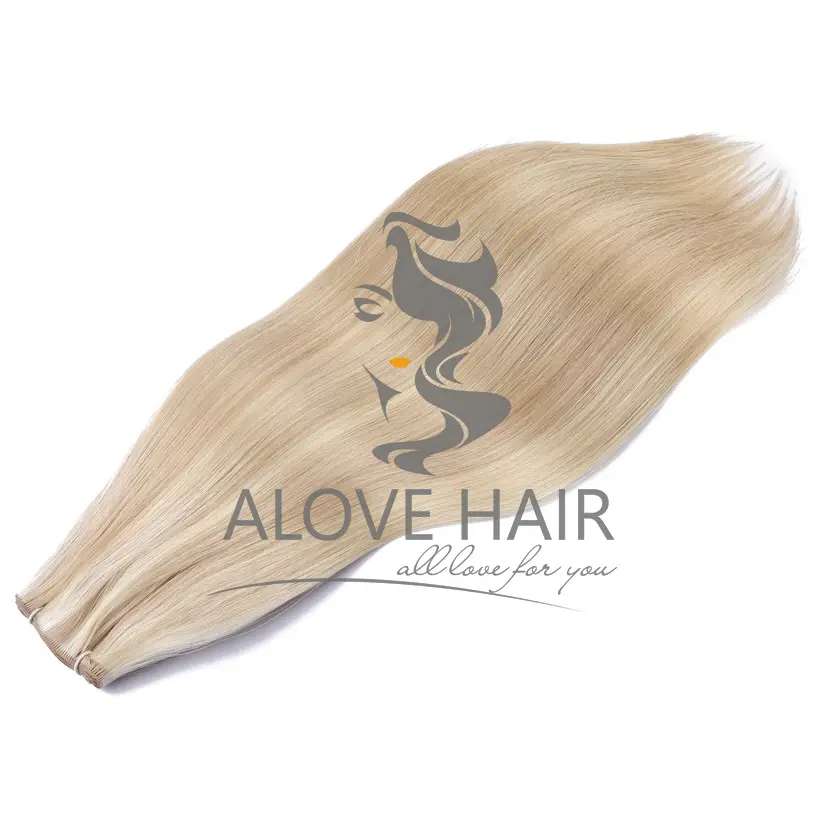
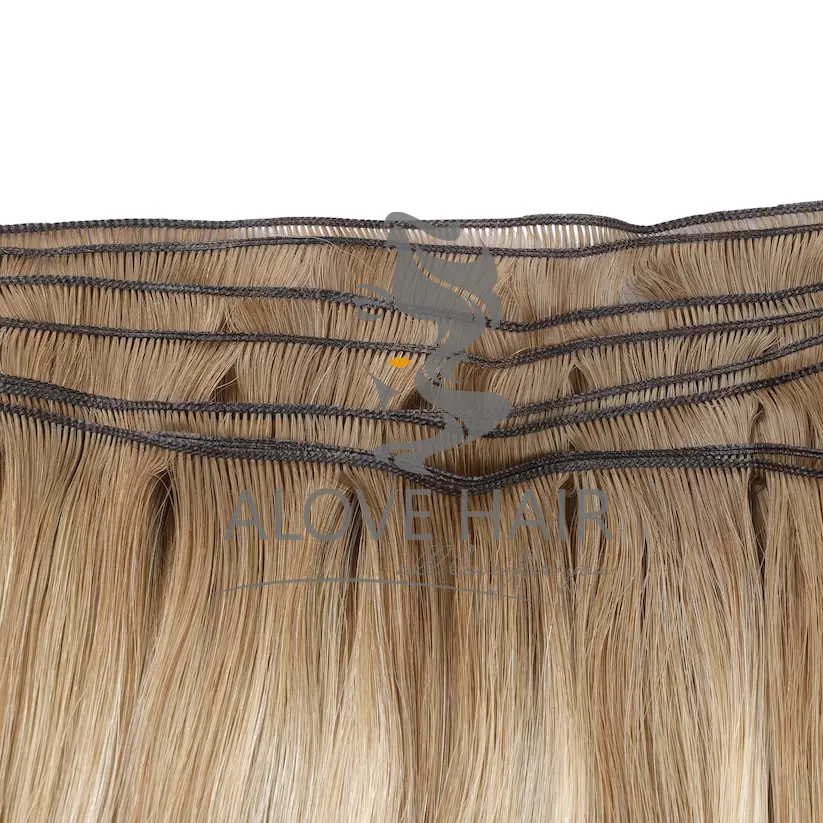
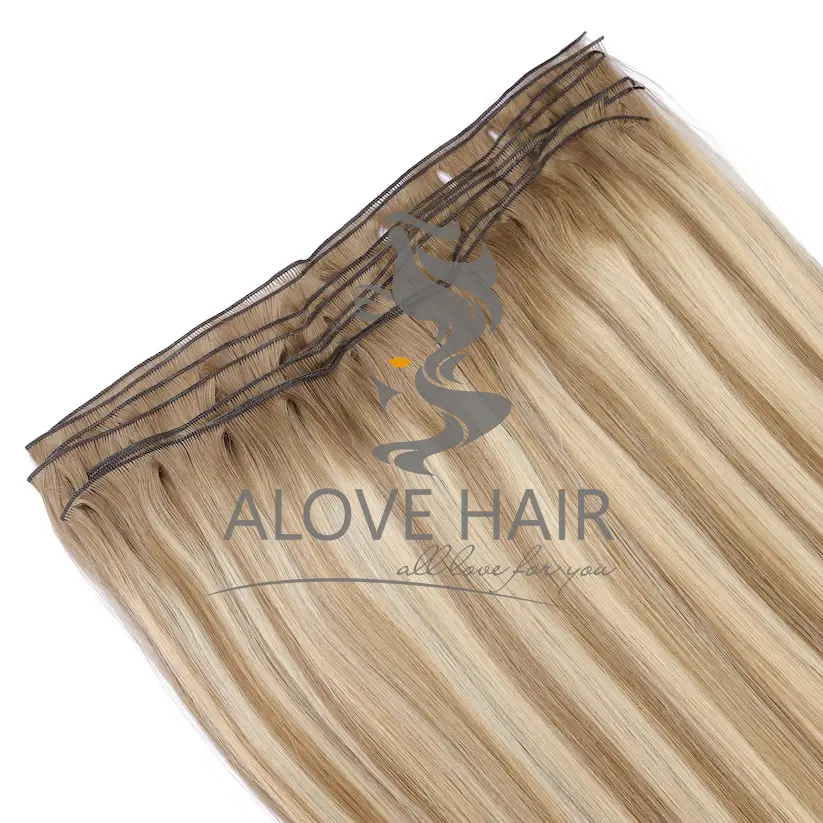
hand tied weft extensions are thin, flexible wefts of hair that are hand-sewn onto a row of silicone-lined beads attached to your natural hair.

What Makes Them Different?

Compared to alternatives like tape-in extensions or clip-in extensions, hand tied wefts:

  • Lay flatter against the scalp
  • Feel lighter and more comfortable
  • Blend more naturally
  • Avoid glue, tape, or heat

The trade-off? More time, more skill—and a higher price tag.


How Much Do Hand Tied Weft Extensions Cost?

Let’s break it down into realistic price ranges.


1. Initial Installation Cost

The first appointment is the most expensive because it includes:

  • Hair purchase (sometimes separate)
  • Installation labor
  • Customization (cut, blend, styling)

Average Price Range:

Type of InstallationCost
Partial (1–2 rows)$600 – $1,200
Full Head (2–4 rows)$1,200 – $2,500+
Luxury / Celebrity Salon$2,500 – $4,000+

In high-end cities like Los Angeles or New York City, prices can easily exceed $3,500.


2. Cost of the Hair Itself

Some salons bundle hair into the service—but many require you to purchase it separately.

Price Per Bundle:

Hair TypeCost per Bundle
Standard Quality$200 – $350
Premium Remy Hair$350 – $600

A full head typically requires:

  • 2–6 bundles

👉 Total hair cost: $400 – $2,000+

High-quality hair (like Remy hair) lasts longer and looks more natural, making it a smarter long-term investment.


3. Total First-Time Investment

When you combine installation + hair:

👉 Realistic Total: $1,000 – $3,500+

Yes, it’s a commitment—but there’s more to the story.


What Factors Affect the Cost?

Not all installs are created equal. Here’s what drives pricing up (or down):


1. Hair Quality

  • Virgin hair (unprocessed) = highest price
  • Remy hair = mid to high range
  • Synthetic blends = cheaper but not recommended

Better hair = longer lifespan + better blending.


2. Stylist Experience

A certified extension specialist will charge more—but for good reason.

You’re paying for:

  • Precision placement
  • Proper tension control
  • Damage prevention

Cheap installs often lead to expensive fixes later (and sometimes heartbreak).


3. Salon Location

Geography matters more than you think.

CityAverage Full Install
New York City$2,000 – $3,500+
Los Angeles$2,200 – $3,800+
Miami$1,800 – $3,200
Dallas$1,500 – $2,800
Chicago$1,600 – $2,700

Urban pricing reflects higher rent, demand, and stylist expertise.


4. Length & Volume

  • 14–16 inches = lower cost
  • 20–24 inches = premium pricing

More length = more hair = more money.


5. Color Customization

Special tones like:

  • Balayage
  • Ombre
  • Highlights

…require additional processing and expertise.


Ongoing Maintenance Costs

Here’s where many people underestimate the real investment.


1. Move-Up Appointments

As your hair grows, extensions need repositioning.

Frequency: Every 6–8 weeks
Cost: $150 – $400 per visit

If you have multiple rows:

  • $75–$150 per row

2. Hair Replacement

Even the best hair doesn’t last forever.

Hair QualityLifespan
Premium6–12 months
Standard3–6 months

Annual replacement cost:
👉 $400 – $2,000


3. Yearly Cost Estimate

Let’s do the math:

  • Initial install: $1,500
  • Maintenance (6 visits): $1,200
  • Hair replacement: $800

👉 Total yearly cost: $3,000 – $5,000+


Hidden Costs You Shouldn’t Ignore

This is where budgets quietly break.


1. Haircare Products

You’ll need:

  • Sulfate-free shampoo
  • Hydrating conditioner
  • Leave-in treatments

👉 $20–$50 per product


2. Tools & Accessories

  • Extension brush
  • Silk pillowcase
  • Heat protectant

👉 $100+ total


3. Color Maintenance

Matching your natural hair to extensions requires:

  • Toner
  • Root touch-ups

4. Emergency Fixes

Loose bead? Slipping row?

Quick salon fix:
👉 $50 – $150


Pros and Cons of Hand Tied Weft Extensions


Pros

✔ Natural appearance
✔ Lightweight and comfortable
✔ No glue or heat damage
✔ Long lifespan
✔ Versatile styling


Cons

✘ High upfront cost
✘ Requires maintenance
✘ Time-consuming install (3–6 hours)
✘ Not DIY-friendly


Hand Tied vs Other Extensions

Let’s compare.

TypeCostMaintenanceNatural Look
Hand Tied$$$Medium⭐⭐⭐⭐⭐
tape-in extensions$$High⭐⭐⭐⭐
clip-in extensions$Low⭐⭐⭐
halo extensions$Very Low⭐⭐⭐

👉 Hand tied wins on realism—but costs more.


Are Hand Tied Extensions Worth It?

Short answer: Yes—for the right person.

They’re worth it if you:

  • Want a seamless, natural look
  • Wear extensions long-term
  • Value comfort and versatility

They may not be worth it if you:

  • Want low maintenance
  • Are on a tight budget
  • Prefer temporary styling options

Pro Tips to Get the Best Value


1. Choose a Certified Stylist

Bad installs = damage + wasted money.


2. Invest in Premium Hair

Cheaper hair often doubles your long-term cost.


3. Follow Maintenance Schedule

Skipping appointments leads to:

  • Tangling
  • Breakage
  • More expensive repairs

4. Use the Right Products

Think of it as protecting a luxury investment.


5. Ask About Packages

Some salons offer:

  • Install + maintenance bundles
  • Loyalty discounts

Expert Insight: Why They Feel So Natural

The secret lies in:

  • Even weight distribution
  • Flat installation
  • Flexible weft structure

This combination reduces scalp tension—making them comfortable for daily wear.


Final Thoughts

hand tied weft extensions are one of the most luxurious and natural-looking hair extension options available today.

Yes, the cost can reach $3,000–$5,000 per year—but for many, the payoff is worth every dollar:

  • Confidence boost
  • Effortless styling
  • Salon-quality look every day

If you approach it strategically—choosing the right stylist, investing in quality hair, and maintaining it properly—you’re not just buying extensions.

You’re investing in a long-term beauty upgrade.

And honestly? Good hair days every day are hard to put a price on.

How Much Do Genius Weft Hair Extensions Cost in Canada?

Genius Weft hair extensions have taken the beauty world by storm, offering a seamless, lightweight, and natural-looking way to add length, volume, and versatility to your hair. Unlike traditional clip-ins or tape-ins, Genius Weft extensions feature a unique, high-quality weft design that lies flat against the scalp, making them virtually undetectable. They’re made from 100% Remy human hair, ensuring a soft, tangle-free finish that blends perfectly with your natural locks.

These extensions are beloved for their easy application, durability, and low-maintenance wear, making them a top choice for anyone looking for a semi-permanent hair transformation. Whether you want to add subtle thickness or dramatic length, Genius Weft extensions provide a customizable solution that lasts for months with proper care.

However, one of the biggest questions for Canadian buyers is: How much do Genius Weft hair extensions cost? Prices can vary widely depending on hair length, quality, brand, and whether you opt for professional installation or DIY application. Generally, pre-made wefts range from $200 to $800+, while salon installations can add another $200–$600, depending on stylist expertise and location.

If you’re considering Genius Weft extensions in Canada, understanding the full cost breakdown—from purchasing the hair to installation and maintenance—is key to making an informed decision. In this guide, we’ll cover everything you need to know about pricing, where to buy, and how to get the best value for your investment.

Ready to transform your hair? Let’s dive into the costs!

Average Price Range for Genius Weft Extensions in Canada

When investing in Genius Weft hair extensions in Canada, prices can vary significantly based on factors like length, hair quality, and installation method. On average, expect to spend between $200 and $800+ for the extensions alone, with salon installation adding another $200–$500+ depending on stylist expertise and location.

Breakdown of Genius Weft Extension Costs

  1. Pre-Made Genius Weft Bundles (Retail Prices)Tip: Buying directly from trusted brands (e.g., Bellami, Luxy) ensures quality but may cost more than third-party sellers.
    • Short Lengths (14–16 inches): $200–$400
      Ideal for adding subtle volume or blending with shoulder-length hair.
    • Medium Lengths (18–20 inches): $300–$500
      The most popular choice for natural-looking length and thickness.
    • Long Lengths (22–24 inches+): $500–$800+
      Premium Remy human hair in extra-long lengths commands higher prices.
  2. Salon Services (Including Installation)*Example: A 20-inch Genius Weft bundle ($450) + salon installation ($350) could total $800 before taxes.*
    • Basic Installation: $200–$400
      Covers standard application by a certified stylist.
    • Custom Blending/Coloring: $400–$600+
      Additional costs if your extensions require dyeing or cutting to match your natural hair.
    • High-End Salons (Toronto, Vancouver, etc.): $600–$1,000+
      Luxury salons may charge premium rates for seamless, undetectable results.

What Influences the Price?

  • Hair Quality: 100% Remy human hair (tangle-free, lasts 6–12 months) costs more than synthetic blends.
  • Brand Reputation: Established brands (e.g., Hidden Crown) charge a premium for guaranteed quality.
  • DIY vs. Professional: Self-installation saves money but risks damage if done incorrectly.

Where to Find the Best Deals

  • Online Retailers: Look for seasonal sales on Amazon, Sephora, or brand websites.
  • Local Hair Suppliers: Some Canadian beauty stores offer discounts for bulk purchases.
  • Salon Packages: Bundled services (e.g., installation + free touch-ups) can reduce long-term costs.

Tip: While cheaper options exist, investing in high-quality Genius Weft extensions ensures longevity and a natural look—saving you money on replacements.

Factors Affecting the Cost of Genius Weft Hair Extensions in Canada

When shopping for Genius Weft hair extensions in Canada, several key factors influence the final price. Understanding these variables will help you budget wisely and choose the best option for your hair goals. Here’s a detailed breakdown of what affects pricing:


1. Hair Length

The length of your hair extensions is one of the biggest price determinants. Longer wefts require more high-quality hair, driving up costs.

  • Short (14–16 inches): $200–$350
    Best for adding volume to lobs or shoulder-length hair.
  • Medium (18–20 inches): $300–$500
    The most popular choice for natural-looking length and thickness.
  • Long (22–24+ inches): $500–$800+
    Premium pricing for dramatic, waist-length transformations.

Tip: If you’re on a budget, opt for 18–20 inches—this length offers versatility without the luxury price tag of extra-long wefts.


2. Hair Quality

Not all human hair extensions are created equal. Remy human hair (the gold standard) costs more but lasts longer and blends seamlessly.

  • 100% Remy Human Hair: $300–$800+
    • Cuticles intact, tangle-resistant, can be styled with heat.
    • Lasts 6–12 months with proper care.
  • Virgin Hair (Unprocessed): $400–$1,000+
    • Highest quality, never dyed or chemically treated.
  • Synthetic/Synthetic Blends: $100–$300
    • More affordable but lacks realism and durability.

Key Insight: Investing in Remy hair saves money long-term—cheaper extensions often require replacement within months.


3. Brand Reputation

Established brands charge premium prices for guaranteed quality, while local suppliers may offer budget alternatives.

  • Luxury Brands (Bellami, Luxy, Hidden Crown): $400–$1,000+
    • Trusted for consistency, ethical sourcing, and salon-grade hair.
  • Mid-Range (Zala, Alove, local Canadian suppliers): $250–$600
    • Good quality but may vary batch-to-batch.
  • Budget/Unknown Brands: $150–$400
    • Risk of shedding, tangling, or unnatural shine.

Pro Tip: Check reviews before buying—some Instagram or Amazon sellers offer “Remy hair” at suspiciously low prices.


4. Salon Location & Stylist Expertise

Where you get your extensions installed significantly impacts cost. Major cities have higher salon fees than smaller towns.

  • Toronto, Vancouver, Montreal: $300–$800+ for installation
    • High demand, experienced stylists, and luxury salon overhead.
  • Mid-Sized Cities (Calgary, Ottawa): $200–$500
  • Small Towns/Independent Stylists: $150–$400
    • May lack specialization in Genius Weft applications.

Note: A cheap installation can lead to visible wefts or damage—always choose a certified stylist.


5. Additional Cost Factors

  • Custom Coloring: $100–$300 extra to match your hair perfectly.
  • Maintenance: $50–$150 per month for salon touch-ups.
  • DIY vs. Professional Installation:
    • DIY saves $200–$600 but risks improper placement.

How to Get the Best Value

  1. Prioritize hair quality—Remy hair lasts longer.
  2. Choose mid-length wefts (18–20″) for cost-effectiveness.
  3. Research stylists—look for Genius Weft-certified professionals.
  4. Wait for sales—Black Friday and Boxing Day often have discounts.

While Genius Weft extensions require an upfront investment, their durability and natural look justify the cost for many Canadian buyers.

Where to Buy Genius Weft Hair Extensions in Canada

Finding high-quality Genius Weft extensions in Canada requires knowing where to shop—whether you prefer online convenience, local beauty suppliers, or professional salon installations. Below is a detailed guide to trusted retailers, salons, and money-saving tips for your purchase.


1. Online Retailers (Convenience & Selection)

a) Brand Websites (Best for Authenticity)

  • Bellami Hair: Offers premium Genius Weft extensions with frequent 15–20% off sales (especially during holidays).
  • Luxy Hair: Known for high-quality Remy hair; ships to Canada with occasional free shipping promotions.
  • Hidden Crown: Specializes in seamless wefts; check their “Bundle Deals” for discounts on multiple packs.

Tip: Sign up for brand newsletters to get exclusive discounts.

b) Amazon & Sephora (Fast Shipping, Limited Selection)

  • Amazon Canada:
    • Look for sold-by-brand listings (avoid third-party sellers with questionable reviews).
    • Prime members get fast delivery and easy returns.
  • Sephora Canada:
    • Carries select luxury brands like Babe Hair Extensions (similar to Genius Weft).
    • Use the Sephora Beauty Insider program for points and rewards.

Caution: Verify return policies—some sellers don’t accept returns on opened hair products.


2. Canadian Beauty Suppliers (Local & Online)

a) Alove Hair (Canadian-Based Brand)

  • Offers Remy human hair wefts at competitive prices ($250–$600).
  • Frequent seasonal sales (e.g., 20% off for Black Friday).

b) Local Hair Shops (In-Person Inspection)

  • Toronto:
    • Hair World Canada (affordable options, bulk discounts).
    • Millionhair Extensions (custom coloring available).
  • Vancouver:
    • Vancity Hair Boutique (specializes in seamless installations).
  • Montreal:
    • Cheveux D’Enfer (high-end extensions with salon services).

Pro Tip: Call ahead to confirm inventory—some stores offer price matching.


3. Salon Partnerships (Professional Installation Included)

a) Certified Genius Weft Stylists

  • Many salons partner with brands like Bellami or Hidden Crown for guaranteed quality.
  • Price Range: $600–$1,200+ (includes wefts + installation).
  • Find a Stylist: Use brand locator tools (e.g., Bellami’s “Find a Pro” page).

b) Luxury Salons (Seamless Blending)

  • Toronto: Ermilla Creations (specializes in undetectable wefts).
  • Vancouver: Hair Extension Studio by Giselle.
  • Calgary: The Ten Salon (offers free consultations).

Note: Salon prices are higher but include expert customization and aftercare.


4. How to Save Money on Genius Weft Extensions

a) Seasonal Sales & Promotions

  • Black Friday/Cyber Monday: Up to 30% off at major retailers.
  • Boxing Day/New Year’s: Discounts on overstocked inventory.
  • Brand Anniversaries: Follow brands on Instagram for flash sales.

b) Loyalty Programs

  • Sephora Beauty Insider: Points redeemable for discounts.
  • Alove Hair: Early access to sales.

c) Buy Bundles (More Hair, Lower Cost Per Gram)

  • Some brands offer “Double Weft” packs at a reduced per-gram price.

Final Tips for Buyers

  1. Avoid too-good-to-be-true deals (e.g., $100 “Remy hair” wefts are likely synthetic).
  2. Read return policies—some salons don’t refund installed hair.
  3. Consult a stylist first to confirm the right length/weight for your hair type.

Where to Start?

  • For DIYers: Check Alove Hair or Amazon for affordable Remy wefts.
  • For salon-quality results: Book a consultation at a certified Genius Weft stylist.

DIY vs. Professional Installation Costs for Genius Weft Extensions

When choosing between DIY and salon installation for Genius Weft hair extensions in Canada, cost is a major factor—but so are results, safety, and longevity. Here’s a detailed comparison to help you decide:


1. DIY Installation (Lower Cost, Higher Risk)

  • Cost: $0–$100 (tools only; extensions sold separately).
    • Requires purchasing weft clips, pliers, and adhesive (if using tape-in method).
    • Example: A 20-inch Genius Weft bundle ($400) + DIY tools ($50) = $450 total.
  • Pros:
    • Saves $200–$600 vs. salon fees.
    • Flexible timing (no salon appointments).
  • Cons:
    • Risk of damage: Improper placement can cause tangling or hair loss.
    • Shorter lifespan: DIY installations often last 2–4 months vs. 6+ months professionally done.
    • Time-consuming: First-timers may take 3+ hours for a seamless look.

Best for: Experienced users or those on a tight budget.


2. Professional Salon Installation (Higher Cost, Better Results)

  • Cost: *$200–$600+* (excluding weft price).
    • Example: A 20-inch weft ($400) + salon install ($400) = $800 total.
  • Pros:
    • Flawless blending: Stylists customize color, density, and placement.
    • Longevity: Properly installed wefts last 6–12 months with maintenance.
    • Hair protection: Minimizes tension on natural hair.
  • Cons:
    • Higher upfront cost.
    • Requires touch-up appointments ($50–$150/month).

Best for: First-time users or those seeking a luxury, long-term solution.


Key Takeaways

  • DIY: Cheaper but risky—ideal for temporary use or experienced users.
  • Salon: Higher cost but safer, longer-lasting, and more natural-looking.
  • Hybrid Option: Some salons offer “partial installations” (e.g., just the crown) to cut costs.

Tip: If you DIY, watch tutorials from certified stylists to reduce errors.

Are Genius Weft Extensions Worth the Price? Pros, Cons & Alternatives

Genius Weft hair extensions offer a high-end, semi-permanent solution for length and volume—but their premium price tag leaves many wondering: Are they worth it? Let’s break down the pros, cons, and how they compare to alternatives.


Pros: Why Genius Weft Extensions Stand Out

✅ Seamless & Undetectable

  • The flat weft design lies flush against the scalp, avoiding bulky tracks.
    ✅ Lightweight & Comfortable
  • Less tension than traditional sew-ins or bulky clip-ins.
    ✅ Long-Lasting (6–12 Months)
  • Made from 100% Remy human hair, they withstand heat styling and maintain softness.
    ✅ Low Maintenance
  • No daily removal (unlike clip-ins) and fewer salon visits than tape-ins.

Cons: Potential Drawbacks

❌ Higher Upfront Cost ($600–$1,200+ with installation)

  • More expensive than clip-ins ($100–$300) or tape-ins ($300–$600).
    ❌ Professional Installation Recommended
  • DIY errors can damage hair or waste money on improper placement.
    ❌ Not Ideal for Short-Term Use
  • Overkill if you only need extensions occasionally.

How They Compare to Alternatives

  1. Clip-Ins
    • Cheaper ($100–$300) but temporary (daily removal required).
  2. Tape-Ins
    • *More affordable ($300–$600) but need bi-monthly maintenance*.
  3. Other Weft Brands
    • Similar quality (e.g., Bellami, Luxy) but may lack Genius Weft’s seamless tech.

Verdict: Who Should Buy Them?

  • Worth It If: You want long-term, natural-looking volume/length and can invest in professional care.
  • Not Worth It If: You prefer temporary styles or are on a tight budget.

Tip: Splurge if you’ll wear them daily—cost per wear drops over time!

How to Save Money on Genius Weft Extensions in Canada

Genius Weft extensions deliver stunning results, but their premium pricing can strain your budget. Here are smart ways to save without sacrificing quality:


1. Shop During Sales & Promotions

Black Friday/Cyber Monday:

  • Major brands (Bellami, Luxy) offer 20–30% off + free shipping.
    Brand Anniversaries/Holidays:
  • Sign up for newsletters to get exclusive discount codes (e.g., “FIRST15” for new customers).
    Loyalty Programs:
  • Stores like Sephora or Alove Hair reward repeat buyers with points redeemable for discounts.

Example: A $500 weft bundle drops to $350 during a 30% off sale.


2. Choose Mid-Length Wefts (18–20″)

Why?

  • Most cost-effective length—long enough for versatility but avoids the luxury markup of 22″+ hair.
  • Requires fewer wefts for full coverage vs. extra-long lengths.
    Savings:
  • 18″ wefts cost $300–$500 vs. 24″ at $600–$800+.

Tip: Add layers for a fuller look instead of buying extra wefts.


3. Book Smart Salon Services

Free Consultations:

  • Some salons (e.g., The Ten Salon in Calgary) offer complimentary consultations to plan cost-effective installations.
    Package Deals:
  • Look for bundles like “Weft + Installation for $800” (vs. $1,000+ à la carte).
    Smaller Cities/Towns:
  • Salons outside Toronto/Vancouver charge 20–30% less for the same service.

Warning: Avoid cheap Groupon deals—inexperienced stylists may damage your hair.


Bonus Tips

  • Buy Pre-Owned (Gently Used): Check Facebook Marketplace for sanitized, high-end wefts at 50% off.
  • Split Costs with a Friend: Some brands offer BOGO deals on multiple sets.
  • DIY Maintenance: Learn to wash/style at home to cut salon visit costs.

FAQs About Genius Weft Hair Extension Pricing in Canada

1. Does the price include installation?

No, most Genius Weft extension prices listed online or in stores cover only the hair wefts. Salon installation is an additional cost, typically ranging from $200–$600+, depending on:

  • Stylist expertise
  • Salon location (e.g., Toronto/Vancouver prices are higher)
  • Custom services like coloring or cutting
    Always confirm with your stylist if their quote includes installation!

2. How long do Genius Weft extensions last?

With proper care, 6–12 months. Factors affecting longevity:

  • Hair quality: 100% Remy human hair lasts longer than synthetic blends.
  • Maintenance:
    • Use sulfate-free shampoo.
    • Avoid excessive heat styling.
    • Get salon touch-ups every 6–8 weeks.
  • Installation method: Professional applications outlast DIY attempts.

Tip: Clip-ins last 3–6 months, while tape-ins need replacing every 4–8 weeks—making Genius Wefts more cost-effective long-term.


3. Can I reuse Genius Weft extensions?

Yes, but only if:

  • They’re 100% Remy human hair (synthetic or low-quality hair degrades faster).
  • They’re removed carefully (professional removal prevents damage).
  • They’re properly stored (clean, dry, and tangle-free).

Reuse potential:

  • Salon-installed wefts: 1–2 reuses (if removed by a stylist).
  • DIY wefts: Risky—improper removal can ruin the weft.

4. Are there hidden costs?

Sometimes! Watch for:

  • Color matching: $50–$200 if your wefts need dyeing.
  • Maintenance appointments: $50–$150 per visit.
  • Special shampoos/brushes: $30–$100 upfront.

5. Can I buy Genius Wefts secondhand?

Proceed with caution:

  • Pros: Save 30–50% (e.g., $300 instead of $600).
  • Cons: Risk of poor condition, fake hair, or hygiene issues.
    Always:
  • Inspect for shedding/tangles.
  • Sanitize with a clarifying shampoo.

Final Tip:
For the best value, invest in quality wefts + professional installation—it’s cheaper than replacing cheap extensions every few months!

Conclusion: Are Genius Weft Extensions Right for You?

Genius Weft hair extensions offer seamless, long-lasting volume and length, with prices in Canada ranging from $200–$800+ for the wefts and $200–$600+ for professional installation. While the upfront cost is higher than clip-ins or tape-ins, their durability (6–12 months) and natural look make them a worthwhile investment for frequent wearers.

To save money, shop during sales, choose mid-length wefts (18–20″), or book salon package deals. Always buy from trusted retailers like Bellami, Luxy, or certified salons to ensure quality.

Ready to transform your hair? Book a consultation with a certified Genius Weft stylist or shop premium wefts today!

Why Nano Ring Hair Extensions Are the Best Choice for Fine Hair

Hair extensions have become a popular way to add length, volume, and fullness to natural hair, allowing people to achieve their desired look quickly and easily. However, for those with fine hair, choosing the right type of extension can be challenging. Many traditional methods, such as glue-in or tape-in extensions, may weigh down delicate strands or cause damage due to harsh adhesives or heavy attachments. This often leads to breakage and discomfort, making it difficult for fine-haired individuals to enjoy the benefits of extensions without compromising their hair’s health.

This is where nano ring hair extensions come in as an excellent solution. Designed with tiny, lightweight rings that attach gently to the natural hair without heat or glue, nano rings offer a safer, less damaging alternative. Their discreet size and flexibility make them ideal for fine hair, providing natural-looking volume and length while preserving the hair’s integrity. In this article, we’ll explore why nano ring hair extensions are the best choice for those with fine hair.

What Are Nano Ring Hair Extensions?

Nano ring hair extensions are a type of semi-permanent hair extension that uses tiny, lightweight metal rings or beads to attach strands of extension hair to your natural hair. The nano rings are extremely small—much smaller than traditional micro rings—making them nearly invisible when applied properly. Unlike glue or heat-based methods, nano ring extensions do not require any adhesives or heat tools, which significantly reduces the risk of damage to your natural hair.

The application process involves threading a small section of your natural hair through the nano ring, sliding the extension strand inside, and then gently clamping the ring closed with special pliers to secure the extension. Because the rings are so tiny and lightweight, they create less tension on the hair follicles, which is especially beneficial for those with fine or fragile hair.

Nano ring extensions differ from other common extension methods like tape-ins or keratin bonds in several ways. Tape-in extensions use adhesive strips to stick the extension hair onto the natural hair, which can sometimes cause damage when removed and may not last as long. Keratin bond extensions involve heating a keratin-based glue to fuse the extensions to your hair, which can lead to heat damage and breakage over time.

In contrast, nano ring extensions rely on a mechanical bond that doesn’t involve glue, heat, or chemicals, making them a gentler and more flexible option. This technology provides a natural look with easy maintenance and less risk, making nano ring hair extensions a popular choice, especially for those with fine hair looking for a safer, long-lasting solution.

Benefits of Nano Ring Extensions for Fine Hair

Nano ring hair extensions offer a variety of benefits that make them especially suitable for fine hair, which is often more delicate and prone to damage. One of the main advantages is that nano ring extensions are extremely lightweight. Because the rings used to attach the extensions are tiny and made of light materials, they put minimal stress on delicate strands. This means fine hair can carry additional length and volume without feeling weighed down or strained, reducing the risk of breakage or hair loss.

Another significant benefit is that nano ring extensions do not require heat or glue for installation. Many other extension methods use adhesives or heat to bond extensions to natural hair, which can weaken and damage fine hair over time. Nano rings, on the other hand, create a secure mechanical hold by clamping the rings around the natural hair and the extension strand. This no-heat, no-glue approach is much gentler and helps maintain the health and integrity of fine hair.

Despite being lightweight and gentle, nano ring extensions offer a secure attachment that stays in place throughout daily activities. The tiny rings are carefully clamped so the extensions won’t slip or fall out, yet they remain comfortable to wear. This means fine-haired individuals can enjoy the benefits of added volume and length without discomfort or the fear of extensions loosening prematurely.

Additionally, nano ring extensions blend seamlessly with natural hair, providing a natural look that is difficult to detect. Because the rings are so small, they are virtually invisible, and the extensions move freely with your hair. This natural movement enhances the overall appearance, making the extensions look like a part of your own hair.

Nano ring hair extensions combine gentle care, secure attachment, and a natural finish, making them an excellent choice for anyone with fine hair seeking to enhance their style safely and effectively.

Why Nano Rings Are Ideal for Fine Hair

Nano ring hair extensions are especially ideal for fine hair because of their smaller and less visible attachment points. Unlike traditional micro rings or other extension methods that use larger beads or noticeable glue strips, nano rings are tiny—about the size of a grain of rice. This small size makes them virtually invisible when installed, allowing fine hair to maintain a natural, undetectable look without bulky or obvious attachments. This is a huge advantage for those with thin or delicate hair who want extensions that blend seamlessly.

Another reason nano rings are perfect for fine hair is the reduced tension they place on hair follicles. Fine hair is often more fragile and prone to breakage when extensions pull too tightly or add excessive weight. Because nano rings are lightweight and clamp gently around small sections of hair, they distribute the weight evenly and avoid pulling. This minimizes stress on the hair roots and scalp, helping to protect natural hair from damage or hair loss.

The flexibility and movement provided by nano rings also contribute to their suitability for fine hair. Unlike glued or heat-bonded extensions, nano ring extensions move naturally with your hair, allowing you to style it freely without restrictions. This natural movement prevents tension or pulling, which can cause discomfort or damage, especially on fine hair that lacks density and strength.

Additionally, nano rings are ideal for people with sensitive scalps. Because the method avoids harsh adhesives and heat, it reduces irritation and allergic reactions that can be common with other extension techniques. The gentle clamping method of nano rings provides a comfortable wearing experience, even for those prone to scalp sensitivity.

The small size, reduced tension, natural flexibility, and scalp-friendly application make nano ring hair extensions the best choice for individuals with fine or sensitive hair, providing beauty without compromise.

Application and Maintenance

Nano ring hair extensions are applied using a precise and gentle method that involves no heat, glue, or chemicals. During the application process, a small section of your natural hair is threaded through the tiny nano ring using a special tool. The extension strand is then inserted into the same ring, and the ring is carefully clamped shut with pliers, securing the extension in place. Because the rings are so small and lightweight, the entire process is gentle on fine hair and causes minimal tension or damage. The application typically takes between 1.5 to 3 hours, depending on the amount of extensions being added.

To maintain the health and appearance of fine hair with nano ring extensions, it is important to follow some key care tips. Avoid excessive pulling or tugging when brushing or styling your hair—using a soft-bristle brush designed for extensions helps prevent damage. Washing your hair with gentle, sulfate-free shampoos and conditioners will keep both your natural hair and extensions clean without causing dryness. It’s also best to avoid heavy oils or products that can slip the rings open. Sleeping with your hair loosely tied or braided can reduce tangling and protect the extensions overnight.

Nano ring extensions are known for their longevity and reusability. With proper care, they can typically last between 3 to 4 months before needing to be repositioned or removed, which is longer than many other extension methods. Because the rings are reusable, you can have your extensions refitted multiple times without replacing the beads or damaging your hair. This makes nano rings a cost-effective option for fine hair, offering both durability and gentle wear.

Comparison with Other Extension Methods

When choosing hair extensions, especially for fine hair, it’s important to understand how different methods affect your natural hair and overall look. Nano ring hair extensions offer distinct advantages compared to other popular types such as tape-in, keratin bonded, and clip-in extensions. Below is a detailed comparison to help you see why nano rings stand out.

Nano Rings vs. Tape-In Extensions
Tape-in extensions use thin strips of hair with adhesive tape to attach to your natural hair. While tape-ins are quick to apply and generally lightweight, they may not be the best choice for fine hair. The adhesive can cause buildup and irritation on the scalp, and removing tape-ins can sometimes pull on delicate strands, increasing the risk of breakage. Nano rings, in contrast, don’t rely on glue or adhesives, so there’s no risk of residue or damage from sticky substances. The tiny rings gently clamp around your hair without pulling, making them gentler and safer for fine or fragile hair. Additionally, tape-ins need to be replaced more frequently as the adhesive weakens, while nano rings can be repositioned and reused, making them more economical over time.

Nano Rings vs. Keratin Bonded Extensions
Keratin bonded extensions involve fusing small sections of hair with keratin glue using heat tools. While keratin bonds can create a natural look, the heat and glue can cause significant damage to fine hair, leading to breakage and dryness over time. The removal process requires solvents that can weaken hair further. Nano rings avoid heat and glue entirely, using a mechanical bond instead. This means less damage during both application and removal. For people with fine or sensitive hair, nano rings are a much safer option, reducing the risk of scalp irritation and hair loss.

Nano Rings vs. Clip-In Extensions (for Fine Hair)
Clip-in extensions are a popular temporary solution that involves clipping on wefts of hair. They don’t require professional application, making them convenient and affordable. However, clip-ins can be heavy and bulky, which may overwhelm fine hair and cause tension or breakage if worn frequently. Because clip-ins are removable daily, there’s also a risk of improper attachment that can damage hair over time. Nano rings provide a semi-permanent solution that is lightweight and moves naturally with your hair. While they do require professional installation, the gentle clamping method is far less stressful on fine hair and offers a more seamless, natural look.

Nano ring hair extensions are uniquely suited to fine hair due to their small, lightweight, and gentle design. Compared to tape-in, keratin bonded, and clip-in extensions, nano rings minimize damage, reduce tension, and provide a secure yet comfortable fit. This makes them the best choice for those with delicate strands seeking long-lasting, natural-looking hair enhancement.

Potential Drawbacks and Considerations

While nano ring hair extensions offer many benefits for fine hair, there are some potential drawbacks and important considerations to keep in mind before choosing this method. One possible downside is that, because the rings clamp around natural hair, if not applied correctly, they can cause tangling or slippage. This is especially true for very fine or silky hair, where the rings may not grip securely without proper technique. Additionally, some people may experience mild discomfort or scalp sensitivity shortly after application, though this typically subsides as the scalp adjusts.

Another important consideration is the importance of professional application. Nano ring extensions require skill and experience to install properly, ensuring the rings are clamped securely but gently without damaging hair. Attempting a DIY application can lead to improper placement, damage, or poor results. It’s highly recommended to seek a professional stylist trained in nano ring techniques to guarantee the best outcome and minimize risks.

Cost is another factor to consider. Compared to clip-in extensions, which are reusable and can be applied at home, nano ring extensions involve salon visits for both application and maintenance. The initial installation can be time-consuming, often taking several hours, which may contribute to higher salon fees. However, nano rings are reusable and can last several months with proper care, making them more cost-effective over time than some other semi-permanent methods like tape-ins that need more frequent replacement.

While nano ring hair extensions are an excellent choice for fine hair, it’s essential to be aware of these considerations. Choosing a skilled professional and understanding the maintenance and cost involved will help ensure you enjoy the benefits of nano rings safely and effectively.

Conclusion

Nano ring hair extensions are truly the best choice for fine hair due to their lightweight design, gentle application, and natural appearance. Their tiny, almost invisible rings provide secure attachment without the use of heat or glue, significantly reducing the risk of damage to delicate strands. By minimizing tension on hair follicles and allowing natural movement, nano rings protect fine hair from breakage and discomfort while adding beautiful volume and length.

However, to ensure the best results and maintain hair health, it’s essential to consult a professional stylist experienced in nano ring application. A trained expert can tailor the extensions to your hair’s unique texture and condition, apply them correctly, and guide you through proper maintenance to maximize longevity and comfort.

Ultimately, nano ring hair extensions offer a safe and effective way for those with fine hair to enhance their look without sacrificing hair integrity. With the right care and professional support, you can enjoy stunning, natural-looking hair extensions that boost your confidence and style. If you have fine or fragile hair, nano rings are a smart, beautiful solution worth considering.

Alove Hair is a leading professional manufacturer of Nano Ring Hair Extensions based in China. With years of experience and advanced technology, Alove Hair specializes in producing high-quality, durable, and natural-looking nano ring extensions that are perfect for fine hair. We are committed to providing excellent products and reliable service to meet the needs of salons and distributors worldwide. Whether you’re looking for wholesale orders or customized solutions, Alove Hair welcomes your inquiries and orders. Trust Alove Hair for premium nano ring hair extensions that combine beauty, strength, and safety.

How to Blend Halo Extensions with Short or Thin Hair (Pro Tips)

“Struggling to make Halo extensions look natural with short or fine hair? You’re not alone! Many women with shorter lengths or thinner strands face the same challenge—how to blend extensions seamlessly without obvious gaps, bulky wefts, or slipping. Unlike longer, thicker hair that easily disguises extension tracks, short or thin hair requires extra care to create that flawless, ‘is-this-even-real?’ look.”

The main obstacle? Concealing the Halo weft (the invisible wire that sits on your head). With short hair, you might lack enough length to cover it completely, risking a visible “ridge.” For thin hair, the natural hair’s fragility can make extensions slip or appear unnaturally dense. Add texture mismatches (like pin-straight extensions on wavy hair), and the struggle gets real.

But here’s the good news: It’s absolutely possible to nail the blend. Whether you’re rocking a bob, growing out a pixie, or dealing with fine strands, this guide reveals dermatologist-approved prep steps, salon-tested styling tricks, and common mistakes to avoid. You’ll learn:

  • How to anchor Halo extensions so they stay put (even on silky-thin hair).
  • Cutting and layering hacks to match your natural hair’s movement.
  • Affordable products (like texturizing sprays and grip headbands) that make all the difference.

“With these pro tips, you’ll achieve a seamless, undetectable look—no matter your hair type!” No more worrying about windy-day mishaps or awkward “hair helmet” moments. Just effortless length and volume, tailored to your hair’s unique needs.

Ready to transform your Halo game? Let’s dive in.

Prep Work: Setting the Stage for Flawless Halo Extensions

The secret to perfectly blended Halo extensions lies in meticulous preparation and smart extension selection. Whether you’re working with short strands or fine, thin hair, taking time to properly prepare will make all the difference in achieving that coveted natural, undetectable look. Let’s dive into the essential prep steps that will transform your extension experience.

Choosing the Right Halo Extensions

Not all hair extensions are created equal—especially when dealing with short or thin hair. The wrong type can leave you with bulky, obvious results or frustrating slippage. Here’s how to pick the perfect match:

For Short Hair:

If your hair falls above your shoulders, standard long extensions (20+ inches) will look unnatural and overwhelm your face. Instead:

  • Opt for shorter lengths (14–18 inches) to maintain proportion.
  • Choose layered styles—these blend better with shorter natural hair and create movement.
  • Consider tape-in or clip-in alternatives if your hair is very short (pixie length), as these offer more precision in placement.

For Thin Hair:

Fine hair requires lightweight solutions that won’t weigh down your natural strands or expose the weft. Look for:

  • Lightweight, thin wefts—bulky tracks will be obvious and uncomfortable.
  • 100% Remy human hair—synthetic hair often looks unnaturally shiny and doesn’t blend well with fine textures.
  • Lighter density—avoid overly thick extensions that create an unnatural contrast with your natural hair.

Color Matching: The Make-or-Break Factor

Even the best extensions will look fake if the color is off. Here’s how to nail the match:

  • Match at the mid-lengths—your roots and ends may vary due to sun exposure or dye, but the mid-shaft is the truest shade.
  • Blend highlights or ombre—if your hair has dimension, opt for extensions with subtle highlights or balayage for a seamless transition.
  • Test in natural light—indoor lighting can distort colors, so always check in sunlight before committing.

Prepping Your Natural Hair

Once you’ve chosen the perfect extensions, it’s time to prep your natural hair for flawless blending. Skipping this step can lead to slippage, visible wefts, or an uneven finish.

Step 1: Wash and Condition (But Skip the Heavy Products)

  • Use a clarifying shampoo to remove buildup, which can make extensions slip.
  • Avoid heavy conditioners near the roots—they can weigh down fine hair and reduce grip.
  • Blow-dry for volume—focus on lifting the roots with a round brush for extra body.

Step 2: Tease for Grip

  • Lightly backcomb the crown area where the Halo wire will sit—this creates a “cushion” for the weft to grip onto.
  • Avoid over-teasing thin hair—gentle teasing is enough; aggressive backcombing can cause breakage.

Step 3: Boost Volume at the Roots

  • Apply a volumizing mousse or spray before styling—this gives fine hair extra body to blend with extensions.
  • Dry shampoo is your friend—a light spritz at the roots adds texture and hold.

Pro Tip: The Silicone Grip Hack

If your hair is super fine or silky, consider using a silicone wig grip band under your Halo extensions. This prevents slipping and keeps everything secure all day.


Final Prep Checklist

Extensions: Short/layered for bobs, lightweight for fine hair.
Color: Perfectly matched (test in sunlight!).
Hair Prep: Clarifying wash, light teasing, root volume boost.

With these steps, your Halo extensions will blend like a dream. Next up: Step-by-step application techniques!

Step-by-Step Blending Techniques for Short & Thin Hair

Achieving a natural blend with Halo extensions requires different approaches for short versus thin hair. Follow these detailed, salon-approved techniques to create seamless, undetectable results every time.

A. For Short Hair: The Art of Disguising the Weft

When working with shorter lengths (chin-length to shoulder-length), the challenge lies in covering the Halo wire without sacrificing volume or creating obvious lines.

  1. Create a “Buffer Layer”
    • Before placing your Halo extension, leave out 1–2 inches of hair at the crown (the area where the wire sits).
    • This reserved section will later be styled over the weft to conceal it completely.
    • Pro tip: Clip the top section up with a jaw clip to keep it separate during application.
  2. Tease the Crown for Maximum Grip
    • Take small horizontal sections at the roots where the Halo will rest.
    • Using a fine-tooth comb, gently backcomb each section to create texture and friction.
    • Avoid over-teasing – you want just enough texture to anchor the wire without causing tangles.
  3. Strategic Bobby Pin Placement
    • Once the Halo is positioned, secure it by sliding 2-3 bobby pins horizontally through the weft and into your teased hair.
    • Insert pins at an upward angle so they grip both the weft and your natural hair.
    • Hide pins by covering them with the reserved “buffer layer” of hair.

Bonus for Bobs: If you have a blunt cut, lightly point-cut the ends of your extensions to mimic your natural haircut.

B. For Thin Hair: Creating Illusion of Density

Fine hair requires special attention to prevent extensions from looking obvious or overwhelming your natural strands.

  1. Modify the Halo Wire for a Snug Fit
    • Use needle-nose pliers to gently flatten the wire’s curve, allowing it to sit closer to your head.
    • This prevents gaps that can expose the weft when hair moves.
    • Important: Wrap the pliers in tissue first to avoid damaging the wire’s coating.
  2. Custom Cutting for Seamless Layers
    • Install the extensions first, then blend by cutting:
    • Focus on face-framing pieces around your cheeks and jawline for the most natural effect.
    1. Separate your natural hair and extensions into vertical sections
    2. Hold both together between your fingers at a 45-degree angle
    3. Snip into the ends to create soft, blended layers
  3. Texture is Your Best Friend
    • Curl or wave both your natural hair and extensions together using a 1-inch barrel iron.
    • Alternate curl directions for lived-in texture.
    • For ultra-fine hair: Try braid waves – braid damp hair overnight for subtle texture that helps camouflage the weft.

Pro Application Tip:
After blending, mist a texturizing spray (like Oribe Dry Texturizing Spray) at the roots and mid-lengths. This creates uniform texture while adding grip – especially helpful for silky hair types.

Troubleshooting Common Issues

Problem: Weft visible at crown?
Fix: Add a crimped root section – just tease and lightly crimp 1-inch vertical sections above the weft.

Problem: Extensions slipping?
Fix: Apply a dot of eyelash glue to the Halo wire’s ends before placing – it dissolves easily with oil-based remover.

Problem: Halo feels tight?
Fix: Gradually bend the wire outward over several days to customize the fit.

Why These Techniques Work

  • Short hair methods focus on optical illusion – using every millimeter of length to disguise the mechanics.
  • Thin hair solutions prioritize weight distribution and texture matching to avoid the “heavy top” effect.
  • All steps are heat-free friendly (except optional curling) to protect delicate strands.

Next Up: Styling hacks to perfect your blend!

Styling Hacks to Enhance Blending: Pro Tricks for Undetectable Extensions

Even with perfectly placed Halo extensions, a few strategic styling tricks can take your look from “pretty good” to “is that really your hair?” These professional techniques help disguise the weft while adding personality to your style.

1. Half-Up Styles: The Ultimate Distraction

  • Ponytails & Buns: A mid-height half-up style lifts hair away from the weft while keeping it covered. For extra security:
    • Tease the crown lightly before gathering
    • Wrap a thin section of hair around the base to conceal the elastic
  • Decorative Clips & Barrettes: Place embellished clips where the Halo wire sits to:
    • Add stylish flair
    • Provide subtle downward pressure that keeps the weft in place

2. Headbands & Scarves: Functional Fashion

  • Wide Headbands (3-4″): The #1 choice for hiding the transition line
    • Fabric headbands with silicone grips work best
    • Position just behind the hairline to cover the wire completely
  • Silk Scarves: Tie in a low knot at the crown to:
    • Conceal the weft
    • Protect hair from friction damage
    • Bonus: Helps blend grown-out roots

3. Root Touch-Up Magic

  • Powder Sprays: Like Boldify or Color Wow, applied at the part to:
    • Camouflage slight color mismatches
    • Fill in sparse areas where skin might peek through
  • Dry Shampoo: Not just for oil – the texture helps blend extension thickness
    • Focus on the “halo zone” where extensions meet natural hair

Pro Tip: Combine these! A headband + half-up ponytail + root spray creates triple insurance against visible wefts while looking intentionally stylish.

Why These Work:
• Distraction theory – eye goes to accessories, not hairline
• Physical coverage – creates literal barriers over trouble spots
• Multi-functional – solves blending while upgrading your style

Perfect For:
✓ Windy days
✓ Special events
✓ Those “I need to look perfect in 5 minutes” moments

Common Mistakes to Avoid With Halo Extensions for Short/Thin Hair

Even with quality extensions, these frequent errors can ruin your seamless look. Here’s how to spot and fix them:

Mistake #1: Placing the Halo Too Far Forward

❌ Problem: Creates unnatural bulk at the hairline and makes the weft visible from the side.
✅ Fix: Position the wire 1.5 inches behind your natural hairline, aligning it with the tops of your ears for balanced distribution.

Mistake #2: Ignoring Texture Matching

❌ Problem: Pin-straight extensions with wavy natural hair creates a stark “helmet effect.”
✅ Fix: Always style extensions with your natural hair using the same tools/techniques. For mismatched textures:

  • Use a flat iron or curling wand on both
  • Apply a texture spray to unify finishes

Mistake #3: Over-Teasing Thin Hair

❌ Problem: Aggressive backcombing weakens already delicate strands, causing breakage.
✅ Fix: Instead of teasing:

  • Use velcro rollers at the crown for lift
  • Try a light-hold texturizing powder at roots
  • Opt for a silicone wig grip instead of relying on friction

Bonus Tip: Never sleep with your Halo in—the pressure against thin hair can cause traction damage over time.

Halo Hair Extensions FAQ: Expert Answers for Short & Thin Hair

Q1: Can you use Halo extensions with pixie-cut hair?

A: Absolutely! While traditional placement can be tricky, try these adaptations:

  • Style in updos (high ponytails or buns) where the weft gets hidden in the gathered hair
  • Use mini clip-ins at the nape to add length before applying the Halo
  • Pro Tip: A textured, piecey style helps disguise any blunt edges

Q2: Do Halo extensions slip with fine hair?

A: They can, but these solutions lock them in place:

  • Silicone wig grip headbands (the #1 slip-stopper)
  • Double-sided wig tape (apply 1″ strips where wire touches temples)
  • Dry shampoo at roots for instant grip (avoid aerosol near the wire)
  • Bonus: Look for Halo brands with adjustable tension wires

Q3: How to make extensions look thicker at the crown?

A: Combat flatness with these tricks:

  1. Double-weft Halos – Two thin layers instead of one thick one
  2. Strategic clip-ins – Place 2-3 clip pieces around the parietal ridge
  3. Backcomb alternatives – Use:
    • Hair fibers (Toppik) at the part
    • Volumizing spray foam before blow-drying

Q4: Can I heat-style my Halo extensions daily?

A: Yes, but protect them:

  • Lower heat settings (max 350°F for human hair)
  • Always use heat protectant (try Olaplex No. 9)
  • Alternative: Opt for heat-free waves like robe tie curls

Q5: How often should I wash Halo extensions?

A: Far less than your natural hair:

  • Every 15-20 wears for optimal longevity
  • Use sulfate-free shampoo focused on mid-lengths to ends
  • Exception: Wash immediately after swimming/sweating

Conclusion: Your Perfect Halo Hair Awaits

Mastering Halo extensions with short or thin hair comes down to three essentials:

  1. Smart Prep – Choose lightweight, properly matched extensions and prep your natural hair with texture and volume
  2. Precision Placement – Position the wire correctly, use grip-enhancing tricks, and customize the fit
  3. Strategic Styling – Employ blending techniques like layers, texture sprays, and accessory camouflage

With these pro methods, you’ll enjoy:
✓ Undetectable length and volume
✓ All-day comfort and security
✓ Confidence in any weather or activity


Professional Halo Extensions Wholesale

As a leading Halo hair extensions manufacturer and wholesaler, we offer:

  • 100% Remy human hair in customizable lengths/colors
  • Ultra-lightweight wefts perfect for fine hair
  • Adjustable wire technology for no-slip wear

Contact us for:
→ Bulk pricing
→ Private label options
→ Style consultations

Email: info@alovehair.com
Website: https://www.alovehair.com/

Transform your hair game with professional-quality extensions – let’s create beauty together!

Why does my hair wefts turn pink and orange

Some clients always had a question about why my hair extensions turn pink and orange after wearing it for a while .

Today we will tell you that what caused it ?

Blonde or light-colored hair extensions (wefts) turn pink primarily due to a chemical reaction between sun protection products, Perfume,Swimming , Strong ultraviolet rays and the dye used on the extensions.Because hair extensions are highly porous and lack natural scalp oils, they absorb these chemicals, leading to discoloration, particularly after sun exposure or swimming.

Here are the main reasons why your wefts are turning pink:

1.Sunscreen (The #1 Culprit): Ingredients like Avobenzone (Butyl Methoxydibenzoylmethane) and Octocrylene, which are found in many sunscreens, react with UV rays and the chemical composition of the hair.

2.Ethanol (alcohol) in perfumes can indeed cause hair (especially bleached hair) to change color, such as turning pink, orange, or reddish.

3.Strong ultraviolet rays

Bleached hair: Cool tones (gray, blue, purple): These artificial pigments are extremely unstable and quickly fade after sun exposure.

Pink/orange showing: The remaining bleached base color (yellow) combines with the incompletely removed red pigment, resulting in an awkward warm orange or residual pink.

4.Hard Water

Water content has a big impact on the colour and texture of your hair extensions. Hard/high mineral content water can leave limescale and residue on your hair. With your natural hair, your scalp produces the necessary oils to counterbalance these minerals. However, as hair extensions are not attached to the scalp, these minerals aren’t able to counterbalance the minerals. Washing your hair extensions repeatedly using this type of water will make them dry and could potentially make them very damaged.

5.Sea Water

A lot of people think salt water is great for your hair, but it can be really damaging for your hair extensions; salt is a natural dehydrator and can potentially strip your hair of moisture and natural oils. This could lead to discolouration as the salt water will remove the hair pigmentation in your hair extension colour and will leave it a different colour to what it was before.

How to Fix and Prevent Pink Extensions

Use Mineral-Based Sunscreen: Switch to sunscreens that do not contain Avobenzone or Octocrylene (zinc oxide or titanium dioxide are safe alternatives).
Use a Clarifying/Chelating Treatment: Products like Malibu C Hard Water Treatment or Malibu C CPR are highly effective at stripping away mineral buildup and reversing the pink tint.
Rinse Immediately: Always rinse your extensions with fresh water immediately after swimming.
Avoid Over-Toning: Be careful with purple shampoos, as extensions can easily turn too grey or purple.

Hand-Tied vs Machine Weft Extensions – Key Differences & Benefits

Hair extensions have become a must-have beauty accessory, offering instant length, volume, and styling versatility. Whether for everyday glam or special occasions, they allow anyone to transform their look effortlessly. Among the many types available, hand-tied and machine weft extensions stand out as two of the most popular choices—but they cater to different needs.

Hand-tied extensions are crafted with precision, creating ultra-thin, seamless wefts for a natural, lightweight feel. Meanwhile, machine weft extensions are durable, cost-effective, and ideal for adding dramatic volume. With so many options, choosing the right type can be overwhelming.

This guide will break down the key differences, benefits, and drawbacks of hand-tied vs. machine weft extensions. By comparing their construction, comfort, longevity, and cost, we’ll help you decide which option works best for your hair type, lifestyle, and budget. Whether you prioritize a flawless blend, affordability, or low maintenance, this comparison will lead you to the perfect choice. Let’s dive in!

What Are Hand-Tied Hair Extensions?

Hand-tied hair extensions are a premium category of hair wefts meticulously crafted by skilled artisans who hand-sew individual strands onto a thin, flexible silicone-based weft. Unlike machine-made alternatives, this labor-intensive process creates an ultra-thin, featherlight base that lies flat against the scalp for an undetectable blend. Each weft is customized with varying densities—thicker at the bottom for volume and gradually thinner toward the top to mimic natural hair growth.

Why They’re Unique:

  1. Seamless Integration – The delicate weft structure eliminates bulkiness, making them ideal for fine or thin hair.
  2. Natural Movement – With no stiff seams, the hair flows freely, behaving like your natural strands.
  3. Scalp Comfort – The lightweight design reduces tension, preventing irritation—perfect for sensitive scalps or long-term wear.

Best For:

  • Clients seeking a “second-skin” feel with no visible tracks.
  • Those prioritizing movement and realism over extreme volume.
  • Stylists who customize placements (e.g., around the crown or hairline).

Pro Tip: Hand-tied extensions require professional installation (typically bead/sewn-in methods) and gentle care to preserve their delicate structure. While higher in cost, their natural look and comfort justify the investment for many.

What Are Machine Weft Hair Extensions?

Machine weft hair extensions are high-quality hair wefts industrially stitched for strength and uniformity. Unlike hand-tied extensions, these wefts are created using specialized sewing machines that bind hair strands tightly to a reinforced fabric or silicone base. This automated process ensures consistent density and durability, making them a popular choice for clients who want long-lasting, voluminous hair without frequent replacements.

How They’re Made:

  1. Hair Preparation – Virgin or Remy human hair is sorted, aligned, and sterilized.
  2. Machine Sewing – Strands are stitched in layered rows onto a sturdy base, creating a thick, uniform weft.
  3. Quality Control – Each weft is inspected for secure stitching and minimal shedding.

Key Advantages:

  • Affordability – Faster production lowers costs compared to hand-tied extensions.
  • High Volume – The dense weft structure adds instant thickness, ideal for clients with medium to thick hair.
  • Longevity – With proper care, machine wefts last 6–12 months, resisting tangling and shedding better than delicate hand-tied wefts.

Best For:

  • Budget-conscious buyers who want salon-quality hair at a lower price.
  • Those needing dramatic volume for ponytails or updos.
  • Long-term wearers who prefer low-maintenance extensions.

Maintenance Tip: Machine wefts are heavier, so proper installation (sewn-in, clip-ins, or tape-in methods) is crucial to avoid scalp strain. Regular conditioning prevents dryness at the stitched base.

Key Differences Between Hand-Tied & Machine Weft Extensions

When choosing between hand-tied and machine weft hair extensions, understanding their fundamental differences in construction, comfort, and performance is crucial. Below, we break down five key comparison points to help you select the best option for your hair goals, lifestyle, and budget.


A. Construction: How They’re Made

Hand-Tied Extensions

  • Delicate, Ultra-Thin Wefts: Each weft is meticulously hand-sewn by a skilled technician, strand by strand, onto a thin, flexible silicone or fabric base.
  • Customizable Density: The hair is distributed unevenly to mimic natural growth—thicker at the bottom and finer toward the top.
  • Labor-Intensive Process: Because they’re handmade, production takes longer, contributing to their higher price.

Machine Weft Extensions

  • Thicker, Tightly Sewn Wefts: Industrial sewing machines bind hair strands in tight, uniform rows onto a reinforced base (usually silicone or polyurethane).
  • Mass-Produced for Consistency: The automated process ensures each weft has the same density, making them sturdier but less flexible.
  • Efficient Manufacturing: Faster production keeps costs lower compared to hand-tied extensions.

Which to Choose?

  • Hand-Tied if you want a featherlight, undetectable finish.
  • Machine Weft if you need durable, high-volume extensions at a lower cost.

B. Comfort & Weight

Hand-Tied Extensions

  • Lighter & More Flexible: The thin weft base reduces scalp tension, making them ideal for all-day comfort.
  • Better for Sensitive Scalps: Less bulk means less pulling, which is great for those prone to irritation.

Machine Weft Extensions

  • Slightly Heavier but Sturdy: The dense stitching adds weight, which can feel noticeable—especially with multiple wefts.
  • Strong Hold for Thick Hair: The extra weight helps anchor extensions securely in coarse or thick hair.

Which to Choose?

  • Hand-Tied if you prioritize lightweight, barely-there comfort.
  • Machine Weft if you have thick hair and don’t mind a firmer feel.

C. Natural Look & Blending

Hand-Tied Extensions

  • Seamless, Lies Flatter: The ultra-thin base blends invisibly, even when hair is pulled up (e.g., ponytails or updos).
  • Ideal for Fine/Thin Hair: Mimics natural hair distribution without visible tracks.

Machine Weft Extensions

  • May Require Extra Blending: The thicker base can be more noticeable on fine hair unless properly layered.
  • Best for Medium to Thick Hair: The density works well with naturally voluminous hair.

Which to Choose?

  • Hand-Tied if you want a flawless, no-trace finish.
  • Machine Weft if you have enough natural hair to conceal the weft.

D. Durability & Longevity

Hand-Tied Extensions

  • Lasts ~3-6 Months with Care: The delicate stitching is prone to loosening over time, especially with frequent styling.
  • Requires Gentle Maintenance: Avoid excessive heat and tugging to prolong lifespan.

Machine Weft Extensions

  • Lasts 6-12 Months: The tight machine stitching resists shedding and withstands more wear and tear.
  • Lower Maintenance: Holds up better to heat, brushing, and repeated washing.

Which to Choose?

  • Hand-Tied if you prefer short-term, high-end extensions.
  • Machine Weft if you want long-lasting, low-fuss wear.

E. Cost Comparison

Hand-Tied Extensions

  • More Expensive ($$$): The handmade process increases labor and material costs.
  • Higher Installation Fees: Often requires a skilled stylist for bead/sewn-in methods.

Machine Weft Extensions

  • Budget-Friendly ($-$$): Mass production makes them more affordable.
  • Versatile Installation: Works with sew-in, clip-in, or tape-in methods at varying price points.

Which to Choose?

  • Hand-Tied if you’re willing to invest in premium quality.
  • Machine Weft if you need cost-effective volume.

Final Verdict

  • Hand-Tied Wins For: Natural look, comfort, and seamless blending (best for fine/thin hair).
  • Machine Weft Wins For: Affordability, durability, and volume (ideal for thick hair or long-term wear).

By weighing these factors—construction, comfort, blending, longevity, and cost—you can confidently choose the right extensions for your needs.

Benefits of Hand-Tied Hair Extensions

Hand-tied hair extensions are the gold standard for clients seeking undetectable, luxurious hair enhancement. Unlike bulkier alternatives, these extensions offer three standout advantages that make them a top choice for stylists and wearers alike.

1. Lightweight & Comfortable for Daily Wear

  • Featherlight Design: The ultra-thin, hand-sewn weft base eliminates bulk, making them virtually weightless on the scalp.
  • Reduced Tension: Unlike thicker wefts, they don’t pull on natural hair, preventing discomfort during long-term wear.
  • All-Day Versatility: Perfect for active lifestyles—sleep, workout, or style without feeling “heavy” or restrictive.

2. Ideal for Fine or Thin Hair

  • Seamless Blending: The delicate weft lies flat against the scalp, creating a no-track illusion—even in updos or high ponytails.
  • No Visible Bulk: Unlike machine wefts, hand-tied extensions won’t create awkward “bumps” or reveal extension lines in sparse hair.
  • Mimics Natural Density: Graduated thickness (thinner at top, fuller at ends) replicates real hair growth patterns.

3. Customizable Placement for a Natural Look

  • Stylist-Friendly: Can be strategically placed around the crown, hairline, or layers for targeted volume where needed.
  • Movement & Realism: The flexible weft allows hair to flow naturally, avoiding the “stiff” look of pre-made tracks.
  • Personalized Styling: Works with various installation methods (beaded, sewn-in, or Halo hybrids) for tailored results.

Pro Tip: While hand-tied extensions require a higher initial investment, their realism and comfort make them a favorite for clients prioritizing quality over quantity. Regular maintenance (every 6–8 weeks) ensures longevity.

Benefits of Machine Weft Hair Extensions

Machine weft hair extensions offer a practical, high-performance solution for those seeking dramatic transformation without breaking the bank. Their durable construction and budget-friendly pricing make them ideal for clients who prioritize volume, longevity, and value. Here’s why they’re a smart choice:

1. More Affordable for High-Volume Needs

  • Cost-Effective Production: Machine-sewn wefts require less labor, making them significantly cheaper than hand-tied extensions—perfect for clients on a budget.
  • Salon-Quality at Lower Prices: Delivers professional-grade thickness without the premium price tag of handmade alternatives.
  • Ideal for Full-Head Applications: Need multiple wefts for maximum volume? Machine wefts provide more hair per dollar compared to delicate hand-tied options.

2. Stronger Hold, Less Prone to Shedding

  • Industrial-Strength Stitching: Tight, reinforced seams prevent strands from loosening, even with frequent washing or styling.
  • Minimal Shedding: The machine-sewn base keeps hair securely in place, maintaining fullness longer than hand-tied wefts.
  • Withstands Heat & Styling: Durable enough for curling, straightening, and updos without compromising integrity.

3. Great for Thick Hair or Long-Term Use

  • Built for Density: The thicker weft structure blends seamlessly with coarse or voluminous natural hair, avoiding a “see-through” effect.
  • Extended Lifespan (6–12 Months): Holds up to daily wear better than delicate hand-tied extensions, making it a long-term investment.
  • Low-Maintenance: Requires less frequent adjustments or replacements, saving time and money over time.

Pro Tip: For best results, pair machine wefts with a professional sew-in or clip-in installation to distribute weight evenly. Regular conditioning keeps the hair soft and tangle-free.

Who Should Choose Hand-Tied Hair Extensions?

Hand-tied extensions are the ultimate luxury choice for clients who value natural aesthetics and comfort over extreme volume. Here’s who benefits most from this premium option:

1. Those with Fine or Thin Hair

  • The ultra-thin, lightweight wefts lie flat against the scalp, creating an undetectable finish that thicker machine wefts can’t match.
  • Blends seamlessly without revealing tracks, even in updos or windy conditions.

2. People Prioritizing Comfort & a Seamless Blend

  • Ideal for sensitive scalps—no bulky seams or tension to cause irritation.
  • Moves and flows like natural hair, making it perfect for clients who want a “no-extensions” look.

3. Willing to Invest in Higher Maintenance

  • Requires professional installation (usually bead or sew-in methods) and salon upkeep every 6–8 weeks.
  • More delicate than machine wefts—gentle care (sulfate-free products, minimal heat) extends longevity.

Best For:

  • Brides, professionals, or anyone wanting invisible, high-end extensions.
  • Those willing to pay more for quality, realism, and scalp comfort.

Who Should Choose Machine Weft Hair Extensions?

Machine weft extensions are the go-to solution for clients who want dramatic volume without compromise. Here’s who benefits most from this durable, budget-friendly option:

1. Those Wanting Volume on a Budget

  • Delivers instant thickness at a fraction of the cost of hand-tied extensions.
  • Ideal for clients who need full-head coverage without luxury pricing.

2. People with Thick or Strong Hair

  • The sturdy, dense wefts blend effortlessly with coarse or voluminous natural hair.
  • Holds up to styling (curling, braiding) without losing shape or shedding excessively.

3. Prefer Low-Maintenance, Long-Lasting Wear

  • Requires fewer salon visits than delicate hand-tied extensions.
  • Lasts 6–12 months with proper care—perfect for clients who don’t want frequent replacements.

Best For:

  • Students, busy professionals, or anyone seeking affordable, high-impact hair.
  • Those with active lifestyles who need durable, hassle-free extensions.

Maintenance & Care Tips for Hair Extensions

Hand-Tied Extensions:

  • Wash gently with sulfate-free shampoo, focusing on the mid-lengths to ends.
  • Avoid excessive tugging or brushing near the wefts to prevent loosening.
  • Use a wide-tooth comb or extension brush, starting from the bottom and working upward.
  • Schedule salon maintenance every 6-8 weeks for tightening and adjustments.

Machine Weft Extensions:

  • Apply hydrating conditioner regularly to prevent dryness at the stitched base.
  • Detangle carefully before washing to minimize stress on the wefts.
  • Secure in a loose braid before sleeping to reduce friction and tangling.
  • Opt for professional removal when reinstalling to maintain weft integrity.

Pro Tip: For both types, avoid high heat near the bonds/wefts and use heat protectant when styling.

Conclusion: Choosing the Right Hair Extensions

Hand-tied and machine weft extensions each offer unique benefits—seamless blending vs. durable volume. Your choice depends on:

  • Hair Type (Fine/thin? Hand-tied. Thick/strong? Machine weft.)
  • Budget (Premium investment? Hand-tied. Affordable fullness? Machine weft.)
  • Lifestyle (Low-maintenance? Machine weft. Ultimate realism? Hand-tied.)

Consult your stylist to match your goals with the perfect extensions.

Alove Hair – Your Trusted Hair Extensions Manufacturer

Alove Hair is a leading Chinese manufacturer specializing in premium Hand-Tied Weft Extensions and Machine Weft Extensions. We use 100% high-quality human hair and advanced craftsmanship to deliver durable, natural-looking extensions for salons and clients worldwide.

Our Hand-Tied extensions offer seamless blending for a lightweight, undetectable finish, while our Machine Weft extensions provide long-lasting volume at a competitive price. With customizable lengths, colors, and densities, we cater to all hair needs.

Global clients welcome! Contact us today for wholesale inquiries, OEM services, and exclusive deals. Elevate your hair business with Alove Hair’s professional-grade extensions.

Email: info@alovehair.com
Website: https://www.alovehair.com/ 

Toupee vs Wig: Cost, Maintenance, and Appearance Compared

Hair loss can affect anyone, and finding the right solution is essential for boosting confidence and improving appearance. Among the most common options are toupees and wigs, two types of hairpieces designed to address different levels of hair loss. A toupee typically covers a smaller area of the scalp, often targeting specific bald spots or thinning regions like the crown or hairline. In contrast, a wig provides full head coverage, suitable for those experiencing more extensive hair loss or seeking a complete change in hairstyle.

Knowing the distinctions between toupees and wigs is crucial because they offer different benefits depending on your needs. Each comes with its own considerations in terms of comfort, cost, upkeep, and natural look. Many people mistakenly use these terms interchangeably, but understanding their unique features can help you choose the most appropriate option that fits your lifestyle and budget.

This article will break down the key differences between toupee vs wig, focusing on cost, maintenance, and appearance. You’ll learn how much each typically costs, what kind of care is required to keep them looking their best, and how natural they appear once worn. With this information, you’ll be better equipped to select the ideal hair replacement solution that matches your personal preferences and restores your self-esteem.

What is a Toupee?

toupee is a small hairpiece or partial wig designed primarily to cover areas of the scalp affected by hair loss, typically where thinning or balding is localized. Unlike full wigs that cover the entire head, toupees are made to blend seamlessly with the wearer’s existing hair, covering only specific spots such as the crown, top, or front hairline. Their main purpose is to restore the appearance of natural hair in these areas, helping individuals regain confidence and improve their overall look.

Toupees are commonly used by men experiencing male pattern baldness, especially those with receding hairlines or bald spots on the crown of the head. However, toupees can also be worn by women facing localized hair thinning or hair loss due to medical conditions or aging. While toupees have been popular for many decades, recent advances in materials and design have greatly improved their comfort, durability, and natural appearance.

The primary users of toupees tend to be men who want to conceal partial hair loss without wearing a full wig. Male pattern baldness typically causes hair to recede from the front or thin on the top, leaving other areas relatively unaffected. A toupee offers a practical solution for these individuals because it can be customized to match their existing hair color, texture, and style. This allows the toupee to blend naturally with their own hair, making it less noticeable to others. Some men prefer toupees because they are less bulky and easier to manage than full wigs, and they can be styled just like real hair.

When it comes to materials, toupees can be made from either synthetic fibers or human hair. Synthetic toupees are generally more affordable and easier to maintain, but they may not look or feel as natural as those made from real human hair. Human hair toupees, although more expensive, offer a highly realistic appearance and can be styled with heat tools, dyed, or treated just like natural hair. High-quality toupees often use Remy human hair, where the cuticles are kept intact and aligned, reducing tangling and prolonging the lifespan of the hairpiece.

The design and construction of toupees have also evolved significantly. Modern toupees often feature breathable bases made from materials such as lace, polyurethane, or monofilament. Lace bases offer a lightweight and nearly invisible appearance at the hairline, making the toupee look more natural. Polyurethane bases provide durability and a skin-like finish, allowing toupees to be attached securely with adhesives or tapes. Monofilament bases simulate the scalp and give the illusion of hair growing directly from the scalp, enhancing realism.

Additionally, many toupees include features that improve comfort and fit. Adjustable straps, clips, or adhesive systems ensure the hairpiece stays securely in place during daily activities. Some toupees are also designed to be water-resistant, allowing users to wear them while swimming or exercising.

In summary, a toupee is a specialized hairpiece designed to cover partial hair loss, primarily used by men with receding hairlines or thinning hair. Made from synthetic fibers or real human hair, toupees are crafted with advanced materials and techniques to provide a natural look, comfortable fit, and durable performance. For those experiencing localized hair loss, a well-chosen toupee can be an effective and stylish solution to restore their hair’s appearance and confidence.

What is a Wig?

wig is a full-head hairpiece designed to cover the entire scalp, replacing all of a person’s natural hair. Unlike toupees, which only cover partial hair loss, wigs provide complete hair coverage and are often used for both cosmetic and medical reasons. Wigs come in a wide variety of styles, lengths, colors, and materials, making them a versatile solution for anyone looking to change their appearance, conceal hair loss, or protect their natural hair.

The primary purpose of a wig is to offer full scalp coverage, whether due to hair thinning, alopecia, chemotherapy, or simply a desire for a new look. Wigs can transform a person’s style instantly and provide confidence by restoring the appearance of a full head of hair. They are available in many styles—from natural and subtle to bold and dramatic—catering to diverse personal preferences and needs.

Typical users of wigs include both men and women across various age groups. Women often wear wigs to manage hair loss caused by medical treatments such as chemotherapy, alopecia, or other health conditions. Wigs can also be a fashion accessory, allowing women to experiment with different hairstyles, colors, and lengths without altering their natural hair. Men also use wigs, especially those experiencing significant hair loss or complete baldness, or those interested in changing their style. Additionally, wigs are popular in entertainment industries—actors, performers, and cosplayers frequently use wigs to achieve specific looks or characters.

Wigs are made from two main types of materials: synthetic fibers and human hair. Synthetic wigs are crafted from man-made fibers designed to mimic the look and feel of real hair. These wigs are usually more affordable, require less maintenance, and hold their style well even after washing. However, they can sometimes appear less natural, and their styling options are limited because heat can damage synthetic fibers.

Human hair wigs, on the other hand, are made from real human hair, offering the most natural appearance and texture. They allow for more styling versatility, including heat styling, coloring, and cutting, just like natural hair. Because of their realism and flexibility, human hair wigs tend to be more expensive and require more maintenance to keep them looking their best.

In terms of design, wigs come in a variety of cap constructions to suit different needs and budgets. Some popular types include lace front wigs, which have a sheer lace panel at the front to create a natural-looking hairline; full lace wigs, which are made entirely of lace for maximum styling versatility; and monofilament wigs, where each hair is individually hand-tied to a thin mesh base, giving a realistic scalp appearance. Traditional cap wigs use a machine-made base and are usually more affordable but may offer less natural movement.

Wigs are also available in countless styles, ranging from short pixie cuts and sleek bobs to long curls and waves. Colors span from natural shades like black, brown, and blonde to vibrant hues like red, blue, or purple. This variety allows individuals to express their personality and style preferences easily.

In summary, a wig is a full-head hairpiece designed to cover the entire scalp, providing a complete hair replacement solution for people experiencing hair loss or those wanting a new hairstyle. Made from synthetic or human hair, wigs come in many styles and cap constructions to suit diverse needs. Whether for medical reasons, fashion, or convenience, wigs offer an effective and versatile way to enhance one’s appearance and confidence.

Cost Comparison: Toupee vs Wig

When deciding between a toupee and a wig, one of the most important considerations is cost. The price of these hairpieces can vary widely depending on several factors such as material quality, customization, brand, and additional features. Understanding the typical price ranges and what influences costs can help you make a more informed and budget-friendly decision.

Typical Price Range of Toupees

Toupees generally cover smaller areas of the scalp and tend to be less expensive than full wigs. The typical price for a toupee ranges from $200 to $1,500. Synthetic toupees, which are made from man-made fibers, are on the lower end of this spectrum, often costing between $200 and $600. Human hair toupees, which provide a more natural look and greater styling flexibility, usually range from $600 to $1,500 or more, depending on the quality and customization.

Typical Price Range of Wigs

Wigs cover the entire scalp and are usually more complex to make, which reflects in their price. Synthetic wigs typically range from $100 to $1,000, with many affordable options available for casual or short-term use. High-quality human hair wigs can cost anywhere from $500 to $3,000 or more, especially if they are custom-made or come from luxury brands. The price increases with the length of the hair, density, and the craftsmanship involved in creating the wig cap.

Factors Affecting Cost

Several factors influence the final price of both toupees and wigs:

  • Material Quality: Human hair is more expensive than synthetic fibers. Remy human hair, which preserves the cuticle alignment, costs more but offers better durability and appearance.
  • Customization: Custom-made hairpieces tailored to the individual’s scalp shape, hair color, and style preferences cost significantly more than ready-to-wear options.
  • Brand and Manufacturer: Established brands with a reputation for quality often charge premium prices. Luxury or designer wigs and toupees typically fall into a higher price bracket.
  • Cap Construction: Advanced features like lace fronts, monofilament tops, or breathable bases can increase the price due to the complexity and comfort they offer.
  • Length and Density: Longer and thicker hairpieces require more material and labor, increasing the cost.

Budget Considerations and Value

While toupees are generally less expensive, they may require more frequent replacement due to their smaller size and frequent use, potentially adding to long-term costs. Wigs, particularly high-quality human hair wigs, are an investment that often lasts longer with proper care. It’s essential to balance upfront costs with durability, maintenance expenses, and the desired natural look.

Hairpiece TypeMaterialTypical Price RangeCustomizationDurabilityMaintenance Cost
ToupeeSynthetic$200 – $600Low to MediumModerateLow to Moderate
ToupeeHuman Hair$600 – $1,500+Medium to HighModerate to HighModerate
WigSynthetic$100 – $1,000Low to MediumLow to ModerateLow to Moderate
WigHuman Hair$500 – $3,000+Medium to HighHighModerate to High

The choice between a toupee and a wig often comes down to your budget and specific needs. Toupees can be a cost-effective solution for partial hair loss, while wigs offer comprehensive coverage and styling versatility but at a higher price. Evaluating both upfront costs and long-term value will help you choose the best option that fits your lifestyle and financial plan.

Maintenance Requirements

Proper maintenance is essential to keep both toupees and wigs looking their best and to extend their lifespan. However, the care routines and time commitments for each can differ significantly depending on the type of hairpiece and its materials.

Daily Care of Toupees

Toupees require regular cleaning and careful handling, especially since they are often worn daily to cover partial hair loss. Cleaning a toupee typically involves gentle washing with specialized shampoos and conditioners designed for delicate hairpieces. Depending on usage, toupees should be cleaned every 1 to 2 weeks to remove oils, dirt, and product buildup.

Attachment methods also impact maintenance. Many toupees are secured with tapes, adhesives, clips, or combs, which require regular replacement or adjustment to maintain a secure and comfortable fit. Improper attachment can lead to discomfort, damage to natural hair, or slipping during wear.

The lifespan of a toupee depends on the materials and how well it is cared for. Synthetic toupees generally last about 3 to 6 months with regular use, while human hair toupees can last up to a year or more with proper maintenance. Given the frequent wear and partial coverage, toupees often need more attentive care to keep them looking natural and secure.

Maintenance of Wigs

Wigs, offering full head coverage, also demand consistent care but typically follow a slightly different routine. Washing wigs is recommended every 7 to 14 days depending on frequency of wear and exposure to environmental factors like sweat, dust, or styling products. Like toupees, wigs benefit from specially formulated shampoos and conditioners.

Storage is crucial for wigs to maintain shape and prevent tangling. When not worn, wigs should be placed on wig stands or mannequins to preserve their style and prevent damage. Proper storage also helps extend the wig’s lifespan.

Styling wigs varies based on the material. Synthetic wigs hold their shape well but usually cannot withstand heat styling, while human hair wigs can be styled with curling irons, straighteners, and colored or trimmed to suit personal preferences. This flexibility adds to the wig’s maintenance requirements but also its versatility.

Frequency and Difficulty of Upkeep

Overall, toupees often require more frequent maintenance due to their attachment systems and daily wear in localized areas. Wigs, while requiring regular washing and storage care, may involve less daily attention but can demand more effort if heat styling or color treatments are involved.

Convenience and Time Investment

For many users, toupees are convenient for quick partial coverage but require careful handling to avoid slippage. Wigs provide full coverage and styling versatility but may involve more preparation time each day. Ultimately, choosing between the two depends on personal lifestyle, how much time one can dedicate to upkeep, and desired appearance.

Appearance and Natural Look

One of the most important factors when choosing between a toupee and a wig is how natural they look once worn. Both hairpieces aim to restore a realistic hairline and scalp appearance, but they achieve this in different ways due to their design and coverage.

How Toupees Blend with Natural Hair

Toupees are designed to cover partial hair loss, which means they must seamlessly blend with the wearer’s existing hair. This blending is crucial for maintaining a natural look. Modern toupees often use lace fronts or monofilament bases that mimic the scalp’s appearance, allowing hair to appear as if it is growing directly from the skin. The edges of the toupee are carefully crafted to lay flat against the scalp and merge with natural hair, minimizing visible lines or gaps.

Because toupees cover only part of the scalp, matching the color, texture, and density of the wearer’s natural hair is essential. Skilled stylists often customize toupees by trimming, dyeing, or texturizing the hairpiece to ensure it integrates perfectly with the surrounding hair. When done well, toupees are nearly undetectable, giving a very natural and youthful appearance.

Appearance and Coverage of Wigs

Wigs provide full head coverage, which means they replace all natural hair and can completely transform a person’s look. High-quality wigs with lace fronts or full lace caps offer a realistic hairline and scalp simulation, making the wig appear as natural as possible. Monofilament wigs, where each hair strand is individually hand-tied to a mesh base, offer superior realism by mimicking the natural movement of hair.

Since wigs cover the entire scalp, they can be styled in any fashion, allowing users to experiment with different lengths, colors, and cuts without worrying about matching existing hair. This versatility can enhance the overall natural appearance, especially when the wig is chosen to complement the wearer’s face shape and skin tone.

Comfort and Breathability When Worn

Comfort plays a key role in the natural look of toupees and wigs. Breathable bases such as lace or monofilament allow air to circulate, preventing overheating and scalp irritation. Toupees, being smaller, generally feel lighter and cooler, while wigs may feel warmer due to full head coverage, especially in hot weather.

Advancements in materials have made many modern toupees and wigs lightweight and flexible, improving comfort and wearability. A well-fitted hairpiece also prevents unnatural movement or shifting, which is crucial for maintaining a natural look throughout the day.

Tips for Achieving the Most Natural Look

  • Choose the right base: Opt for lace front or monofilament bases that mimic the scalp.
  • Match hair color and texture: Customize the hairpiece to blend perfectly with natural hair or skin tone.
  • Proper fitting: Ensure the toupee or wig fits snugly without gaps or bulges.
  • Styling: Trim and style the hairpiece to suit your natural hair pattern or desired look.
  • Use minimal adhesives: Avoid excessive glue or tape that can create unnatural edges.
  • Regular maintenance: Keep the hairpiece clean and conditioned to maintain shine and softness.

By focusing on these factors, both toupees and wigs can provide a remarkably natural appearance that boosts confidence and comfort.

Pros and Cons Summary

Advantages of Toupees

  • Natural Blending: Toupees cover only partial hair loss and blend with existing hair, offering a subtle, natural look.
  • Lightweight and Comfortable: Smaller size makes them lighter and often more breathable than full wigs.
  • Easier Daily Use: Quicker to put on and remove for those who want occasional coverage.
  • Cost-Effective: Generally less expensive upfront compared to full wigs.

Disadvantages of Toupees

  • Limited Coverage: Only suitable for localized hair loss, not for complete baldness.
  • Attachment Maintenance: Requires adhesives or clips that need regular upkeep.
  • Potential for Slippage: Risk of moving or lifting if not properly secured.
  • Shorter Lifespan: Often replaced more frequently due to daily wear on small area.

Advantages of Wigs

  • Full Coverage: Ideal for those with extensive hair loss or total baldness.
  • Styling Versatility: Wide variety of lengths, colors, and styles to choose from.
  • High Realism: Advanced cap constructions (lace fronts, monofilament) offer very natural appearances.
  • Protects Natural Hair: Can shield natural hair from damage and environmental factors.

Disadvantages of Wigs

  • Higher Cost: Quality human hair wigs can be quite expensive.
  • More Maintenance: Requires regular washing, styling, and careful storage.
  • Can Feel Warm: Full head coverage may feel less breathable, especially in hot weather.
  • Daily Time Investment: Putting on and styling can take longer than toupees.

Which Option Suits Different Lifestyles and Needs?

  • Toupees are best for:
    Individuals with partial hair loss who want a lightweight, natural-looking option. Ideal for those who prefer minimal daily maintenance and quicker application. Good for men with receding hairlines or thinning crowns who want to blend with existing hair.
  • Wigs are best for:
    People with extensive or complete hair loss, including those undergoing medical treatments like chemotherapy. Also great for anyone seeking a full change in hairstyle or color without altering natural hair. Suitable for those willing to invest time and money in maintenance and styling.

Toupees offer a cost-effective, comfortable solution for partial hair loss, while wigs provide full coverage and greater styling flexibility at a higher cost and care level. Choosing between the two depends on the extent of hair loss, lifestyle preferences, and budget.

Conclusion

Toupees and wigs serve different needs when it comes to hair replacement. Toupees provide partial coverage, blending seamlessly with natural hair and offering a lightweight, cost-effective solution for localized hair loss. Wigs, on the other hand, offer full scalp coverage, greater styling versatility, and a more dramatic transformation but often come with higher costs and maintenance demands.

When considering cost, toupees tend to be more affordable upfront, while wigs, especially human hair ones, require a larger investment but can last longer. Maintenance for toupees involves frequent attachment care, whereas wigs need regular washing, styling, and proper storage. In terms of appearance, both can look natural with the right fit and customization, but wigs allow for more style options.

Ultimately, the best choice depends on your lifestyle, budget, and personal preferences. Take time to evaluate your needs, and select the hairpiece that boosts your confidence and fits your daily routine best.

How to Start Your Own Hair Extension Line?

Starting your own hair extension line isn’t just a trend—it’s a serious business opportunity. The global demand for hair extensions continues to grow as more people look for volume, length, and styling flexibility without waiting months (or years) for natural growth.

But here’s the reality: launching a successful hair extension brand takes more than sourcing bundles and posting on social media. It requires strategy, quality control, branding, and a clear understanding of your market.

This guide walks you through every step—from idea to launch and beyond—so you can build a hair extension line that stands out and actually sells.


Why Start a Hair Extension Business?

Before diving in, let’s address the “why.”

The hair extension industry is attractive because:

  • High profit margins (especially with direct sourcing)
  • Repeat customers (hair needs replacement over time)
  • Strong demand across global markets
  • Low barrier to entry compared to many manufacturing businesses

But it’s also competitive. Which means your success depends on how well you differentiate—not just how quickly you start.


Step 1: Define Your Niche (Don’t Try to Sell to Everyone)

One of the biggest mistakes beginners make is trying to serve everyone. That usually leads to blending in—and blending in doesn’t sell.

Popular Niches in Hair Extensions

  • Luxury virgin hair extensions
  • Affordable everyday wear
  • Extensions for thin or fine hair
  • Curly or textured hair (Afro, kinky, coily)
  • Clip-ins for beginners
  • Professional salon-grade extensions

How to Choose Your Niche

Ask yourself:

  • Who is my target customer?
  • What problem am I solving?
  • What makes my product different?

👉 Example: Instead of “hair extensions,” go for “lightweight hand-tied extensions for fine hair.” Much clearer—and much easier to market.


Step 2: Understand the Product (You Can’t Sell What You Don’t Know)

Hair extensions vary widely in quality, construction, and origin.

Key Product Types

  • Clip-in extensions
  • Tape-in extensions
  • Hand tied wefts
  • Machine wefts
  • Keratin (fusion) extensions
  • Wigs and toppers

Key Quality Factors

  • Hair Type: Remy vs non-Remy
  • Origin: Brazilian, Indian, Vietnamese, etc.
  • Processing: Virgin, dyed, chemically treated
  • Cuticle alignment: Determines longevity and tangling

The better you understand these, the better your product positioning—and pricing—will be.


Step 3: Find a Reliable Supplier (This Is Everything)

Your supplier can make or break your brand. Seriously—this is not the place to cut corners.

Where to Source Hair Extensions

  • Direct manufacturers (often overseas)
  • Wholesale distributors
  • Private label suppliers

What to Look For

  • Consistent quality
  • Transparent sourcing
  • Customization options (length, color, density)
  • Low minimum order quantity (MOQ) for beginners
  • Good communication (underrated but critical)

Pro Tip

Order samples from multiple suppliers. Test:

  • Shedding
  • Tangling
  • Longevity after washing
  • Color consistency

If the sample disappoints, imagine 100 customers having the same experience. Not fun.


Step 4: Build Your Brand Identity

You’re not just selling hair—you’re selling a look, a feeling, a transformation.

Key Branding Elements

1. Brand Name

  • Memorable and easy to spell
  • Relevant to beauty or confidence

2. Logo and Visual Style

  • Clean, professional design
  • Consistent color palette

3. Brand Voice

  • Luxurious? Friendly? Professional? Bold?
  • Pick one and stay consistent

4. Packaging

  • Custom boxes, silk bags, or branded wraps
  • First impressions matter (unboxing is marketing)

Step 5: Create Your Product Line

Start simple. You don’t need 50 SKUs on day one.

Recommended Starter Line

  • 3–5 lengths (e.g., 14”, 18”, 22”, 26”)
  • 3–5 colors (natural black, dark brown, balayage options)
  • 1–2 extension types

This keeps inventory manageable while still offering variety.


Step 6: Set Your Pricing Strategy

Pricing is not just about covering costs—it reflects your brand positioning.

Basic Pricing Formula

Cost (product + shipping + packaging) × markup = retail price

Typical Markup Range

  • 2x to 5x depending on brand positioning

Consider

  • Competitor pricing
  • Target audience budget
  • Perceived value

Cheap pricing may attract customers—but it can also signal low quality.


Step 7: Build an Online Presence (Your Digital Storefront)

If your brand doesn’t exist online, it doesn’t exist (harsh but accurate).

Must-Have Platforms

1. Website

  • Shopify or WooCommerce
  • Clean design
  • Mobile-friendly

2. Social Media

  • Instagram (visual storytelling)
  • TikTok (viral potential)

3. Content Strategy

  • Before-and-after transformations
  • Tutorials
  • Customer testimonials

Step 8: Product Photography & Content Creation

Hair extensions are visual products—your images must sell the experience.

What You Need

  • High-quality product photos
  • Lifestyle images
  • Videos showing installation and styling

Content Ideas

  • “Before and after” transformations
  • Styling tutorials
  • Maintenance tips
  • Influencer collaborations

Step 9: Marketing Your Hair Extension Line

Even the best product won’t sell without visibility.

Key Marketing Channels

1. Influencer Marketing

  • Partner with hairstylists and beauty creators
  • Micro-influencers often have better engagement

2. Social Media Ads

  • Targeted ads on Instagram and TikTok

3. SEO Content

  • Blog posts (like this one)
  • Keywords such as:
    • “best hair extensions for thin hair”
    • “how to install hand tied wefts”

4. Email Marketing

  • Build a customer list
  • Offer discounts, tips, and updates

Step 10: Customer Experience (This Is Your Secret Weapon)

Great products get customers. Great experiences keep them.

Focus Areas

  • Fast shipping
  • Clear communication
  • Easy returns
  • Helpful support

Happy customers = repeat business + word-of-mouth marketing.


Step 11: Legal & Business Setup

Not glamorous, but necessary.

Essentials

  • Register your business
  • Choose a business structure (LLC, etc.)
  • Open a business bank account
  • Understand import regulations (if sourcing internationally)

Step 12: Launch Your Brand

Don’t wait for perfection—it doesn’t exist.

Launch Strategy

  • Pre-launch teaser on social media
  • Offer early-bird discounts
  • Send products to influencers before launch
  • Collect reviews quickly

Step 13: Scale Your Business

Once you gain traction:

  • Expand product range
  • Introduce new colors or textures
  • Collaborate with salons
  • Consider wholesale opportunities

Common Mistakes to Avoid

Let’s save you from expensive lessons:

  • Choosing the cheapest supplier
  • Ignoring branding
  • Overloading inventory too early
  • Skipping quality testing
  • Inconsistent marketing


Final Thoughts

Starting your own hair extension line is absolutely achievable—but success comes from doing the fundamentals well.

Focus on:

  • Quality products
  • Clear branding
  • Smart marketing
  • Strong customer experience

Do that consistently, and your brand won’t just exist—it will grow.

And who knows? One day someone might be wearing your extensions, getting compliments, and casually saying, “Oh this? It’s just my hair.” (Technically true… just with a little help.)

Lace Front vs Full Lace Wigs: Pros, Cons, and Key Differences

Finding the perfect wig isn’t just about looks—it’s about comfort, confidence, and how well the style fits your lifestyle. Whether you wear wigs daily, for special occasions, or as a protective style, choosing the right type of wig can make a significant difference in both appearance and experience. With so many wig options available today, two of the most popular and frequently compared types are lace front wigs and full lace wigs.

Both lace front and full lace wigs offer realistic finishes and styling versatility, but they are built differently, feel different when worn, and require different levels of maintenance and application. A lace front wig features sheer lace along the front hairline only, making it ideal for achieving a natural-looking hairline while keeping the rest of the cap constructed for easy wear. In contrast, a full lace wig has lace covering the entire cap, allowing for more flexible styling—including updos and ponytails—with a scalp-like appearance from every angle.

In this guide—Lace Front vs Full Lace Wigs: Pros, Cons, and Key Differences—we’ll explore what sets these two wig types apart. You’ll learn how each is constructed, their unique benefits and drawbacks, and which one may suit your needs best. Whether you’re a beginner or a wig-wearing pro, this article will help you make an informed decision based on your budget, styling preferences, and comfort level. Let’s dive into the world of lace wigs and uncover which type is the perfect match for you.

What Is a Lace Front Wig?

When it comes to achieving a natural-looking hairline and easy styling, lace front wigs are among the most popular choices. Whether you’re new to wigs or a seasoned wearer, understanding what a lace front wig is—and what makes it unique—can help you determine if it’s the right option for you.

Definition and Structure

lace front wig is a type of wig that features a piece of sheer lace sewn along the front edge of the wig cap. The lace, typically stretching from ear to ear, is designed to mimic the natural hairline. Individual hair strands are hand-tied into the lace section, giving the illusion that the hair is growing directly from your scalp. The rest of the cap is usually made of a more durable, machine-made material, such as wefted tracks or mesh, which provides structure and support.

The lace used can vary in color to match different skin tones, and the density of the hair is carefully distributed to create a realistic transition from the lace front to the rest of the wig. The lace itself is thin and breathable, which makes it comfortable to wear and allows for some airflow to the scalp.

Some lace front wigs come pre-plucked (with a natural-looking hairline already shaped), while others may require some customization. Baby hairs are also often added along the front for a more realistic effect.

How It Looks When Worn

One of the biggest appeals of lace front wigs is how realistic and seamless they appear when worn correctly. Because the lace lies flat against the skin and the hair is hand-tied, the front of the wig blends almost invisibly with the wearer’s natural hairline. This makes it ideal for styles where the hair is worn down or slightly pulled back, such as side parts, middle parts, and soft waves.

However, because the lace is only in the front, you are somewhat limited in how you can style the hair. Updos or high ponytails may expose the non-lace parts of the wig cap, making them less suitable for these looks unless the wig is specially designed with additional lace coverage around the perimeter.

When properly installed—with adhesive, wig tape, or a secure glueless method—a lace front wig can stay in place for hours or even days. The hair appears to be growing naturally from the scalp, and many people find the look indistinguishable from real hair.

Common Uses and Who It’s Best For

Lace front wigs are incredibly versatile and widely used across many groups, including:

Everyday wearers: Thanks to their natural look and relatively easy application, lace front wigs are great for people who wear wigs daily, whether due to hair loss, protective styling, or fashion.

Beginners: Lace front wigs are often recommended for new wig users because they offer a balance between realism and ease of use. They typically require less maintenance and application skill compared to full lace wigs.

Cosplayers and performers: For actors, drag performers, and cosplayers who want a believable hairline for characters, lace front wigs are a go-to option. They hold up well under lights and camera close-ups.

People on a budget: Since lace front wigs are more affordable than full lace wigs, they offer an excellent value without sacrificing appearance. They allow users to experiment with different styles and colors without a major financial commitment.

Those who prefer quick styling: Lace front wigs are ideal for people who want a good-looking wig that doesn’t take hours to install or maintain.

Despite their benefits, lace front wigs aren’t perfect for everyone. If you plan to wear your hair in updos or high ponytails often, the limited lace coverage may be a drawback. Similarly, if you need a wig that mimics scalp appearance from all angles, you might want to consider a full lace wig instead.

A lace front wig offers a natural-looking hairline, ease of wear, and affordability, making it an excellent choice for both beginners and experienced wig wearers alike. With proper installation and care, it can dramatically enhance your look while keeping your styling options open—within reason. It’s a great solution if your priority is a realistic front view, easy maintenance, and a wig that delivers high impact without a high price tag.

What Is a Full Lace Wig?

For those seeking the most natural appearance and maximum styling flexibility, full lace wigs are considered the gold standard in the world of wigs. Though they tend to come at a higher price point and require more skill to install, their seamless look and versatility make them a favorite among professional stylists, celebrities, and experienced wig users.

Definition and Structure

full lace wig is a type of wig where the entire cap is made of lace—usually Swiss or French lace—rather than just the front section. This means that individual hair strands are hand-tied throughout the entire cap, not just along the hairline. The result is a wig that mimics the appearance of natural hair growth from all angles, allowing for a highly realistic, 360-degree look.

Unlike lace front wigs, which only have lace at the front of the cap, full lace wigs provide complete lace coverage. This allows the wig to sit flush against your scalp no matter where the part is placed or how the hair is styled. Since the hair is hand-tied onto lace, it can move freely in all directions, adding to the natural look and feel.

Most full lace wigs also include adjustable straps or small combs inside the cap to help secure the wig in place. While some people opt for glue or wig adhesive for a longer-lasting hold, others prefer glueless full lace wig options for daily wear.

Full Lace Coverage and Styling Flexibility

One of the standout features of a full lace wig is its unmatched styling versatility. Because the lace covers the entire scalp area, you can part the hair anywhere—middle, side, or even a zigzag—without revealing wefts or tracks. This makes full lace wigs ideal for anyone who loves changing up their hairstyle regularly.

You can also confidently wear styles that pull the hair away from the face, such as:

High ponytails

Top knots and buns

Braided updos

Space buns

Half-up, half-down styles

These styles would typically expose the base of a lace front wig, but with a full lace wig, the illusion of hair growing from the scalp remains consistent from every angle. This makes them especially useful for high-impact looks, photo shoots, or stage performances where every angle matters.

In addition to styling, full lace wigs are often lighter and more breathable than other types, making them a more comfortable choice for long-term wear—especially in hot or humid climates.

Popular Among Experienced Wig Users or Stylists

While full lace wigs offer numerous benefits, they do come with a steeper learning curve and are often best suited for those with wig experience or the help of a stylist. Installing a full lace wig typically takes more time and precision, especially if you want a flawless, long-lasting result. It often involves:

Careful placement with adhesive or tape

Blending lace with the scalp

Optional bleaching of the knots to further enhance realism

Strategic styling to maintain the natural look

For this reason, full lace wigs are a favorite among professional stylists who work with clients looking for premium results. Celebrities, influencers, and people in the entertainment industry frequently use full lace wigs for red carpets, television appearances, and film work due to their photorealistic quality.

They are also popular among those experiencing hair loss from medical conditions or treatments, as full lace wigs offer complete coverage and comfort while allowing the scalp to breathe.

However, it’s important to note that full lace wigs do require more maintenance and care than other wig types. Because the lace is delicate and the hair is individually tied, improper handling can shorten the lifespan of the wig. Washing, detangling, and storage should all be done with extra care to preserve the quality and longevity of the unit.

A full lace wig is the ultimate choice for those who prioritize realism, styling freedom, and all-around comfort. With its full-lace construction, it provides a scalp-like appearance no matter how you wear it, offering endless options for parting and updos. While it requires more skill to apply and maintain, the end result is a stunningly natural look that’s hard to beat.

If you’re serious about your wig game—whether for everyday wear, professional styling, or stage-ready glam—a full lace wig is an investment that delivers unmatched quality and versatility.

Key Differences Between Lace Front and Full Lace Wigs

While both lace front wigs and full lace wigs are designed to provide a natural appearance, they differ significantly in their construction, styling potential, comfort, application methods, and price. Understanding these key differences is essential when deciding which type is best suited to your lifestyle, styling needs, and budget.

1. Cap Construction

The most fundamental difference between lace front and full lace wigs lies in how they are built.

Lace Front Wigs have lace only at the front portion of the wig—typically from ear to ear. The rest of the cap is usually made from a stronger, machine-stitched material such as wefts or a stretch cap. The lace section allows for a natural-looking hairline, but the back and sides are not hand-tied or lace-based.

Full Lace Wigs, on the other hand, are constructed entirely with lace. The hair is individually hand-tied throughout the entire cap, not just in the front. This full-lace structure allows for more realistic movement and the illusion of hair growing directly from the scalp all over the head.

Because of this, full lace wigs offer superior realism from every angle, while lace front wigs primarily focus on the front view.

2. Styling Options

Styling flexibility is a major factor in choosing a wig, especially if you enjoy experimenting with different looks.

Lace Front Wigs are best suited for styles where the hair flows downward, such as straight styles, curls, or side parts. While you can pull the hair back slightly, styles like high ponytails or updos may expose the wefted back portion of the wig, which can ruin the illusion of a natural scalp.

Full Lace Wigs are the clear winner in terms of styling versatility. Because the lace covers the entire head, you can part the hair anywhere, wear it in high ponytails, buns, braids, or even cornrows without revealing the base of the wig. These wigs are ideal for updos or styles where the hair is lifted off the face and neck.

If you need maximum styling freedom, especially for formal looks, performances, or frequent changes, a full lace wig is the better choice.

3. Breathability and Comfort

Comfort plays a big role in wig wearability, especially for daily use or extended wear.

Lace Front Wigs offer good breathability at the hairline, but the rest of the cap—often made from thicker materials—can trap heat, making them slightly less breathable. However, they are still relatively lightweight and comfortable for many wearers.

Full Lace Wigs are made entirely of lace, which is a thin, lightweight, and breathable material. This means your scalp can “breathe” more easily, reducing sweat buildup and making the wig more comfortable for all-day wear—even in warmer climates.

If scalp comfort and airflow are important to you, full lace wigs have the advantage.

4. Application Process

The ease of applying and securing your wig can influence how often and comfortably you wear it.

Lace Front Wigs are generally easier to apply, especially for beginners. Many come with pre-cut lace, combs, and adjustable straps, and can be worn glueless. While some users prefer adhesive for a firmer hold, lace front wigs typically require less time and skill to install.

Full Lace Wigs demand a bit more expertise. Because they offer 360-degree lace coverage, they often require adhesive or wig tape around the entire perimeter to ensure a seamless, natural finish—especially if worn in updos. This makes the application process longer and more involved, which may be challenging for first-time users.

If you’re looking for quick and beginner-friendly application, lace front wigs are a great place to start.

5. Price Range

Cost is often one of the most important considerations when purchasing a wig.

Lace Front Wigs are generally more affordable. Because the lace is limited to the front of the wig and the rest is machine-made, the production cost is lower. This makes lace front wigs ideal for budget-conscious buyers or those who like to own multiple styles.

Full Lace Wigs are more expensive due to the labor-intensive hand-tying process and the full lace construction. However, the price reflects the added realism, styling flexibility, and craftsmanship.

If you’re seeking a budget-friendly option, a lace front wig is a smart choice. But if you’re ready to invest in top-tier quality and freedom, a full lace wig is worth the price.

The key differences between lace front wigs and full lace wigs come down to cap construction, styling freedom, comfort, ease of use, and price. Lace front wigs are a great starting point for those who want a natural look with simpler maintenance, while full lace wigs are perfect for experienced users who want complete control over their hairstyle and a flawless finish from every angle.

Knowing your lifestyle, experience level, and styling goals will help you choose the right wig type with confidence.

Pros and Cons of Lace Front Wigs

Lace front wigs have become a go-to choice for many wig wearers due to their blend of natural appearance, ease of use, and affordability. But like any beauty product, they come with their own set of advantages and limitations. In this section, we’ll break down the pros and cons of lace front wigs to help you decide if they’re the right choice for your needs.

Pros of Lace Front Wigs

1. More Affordable

One of the biggest benefits of lace front wigs is their cost-effectiveness. Compared to full lace wigs, lace front wigs are significantly more affordable while still offering a realistic look. This makes them a great option for those who are just starting out with wigs, experimenting with new styles, or looking to expand their collection without spending too much.

The reduced cost is mainly due to their construction. Only the front portion of the cap contains hand-tied lace, while the rest of the wig is made with machine-sewn tracks or wefts. This allows manufacturers to offer a high-quality appearance without the labor-intensive production of full lace units.

2. Natural Hairline Appearance

Perhaps the most celebrated feature of lace front wigs is their ability to mimic a natural hairline. The sheer lace at the front blends seamlessly with your skin, creating the illusion that hair is growing directly from your scalp. When properly applied, the lace front can be nearly invisible, especially if it matches your skin tone and is installed with precision.

This makes lace front wigs ideal for styles that show off the front of the hairline—such as center parts, side parts, or slicked-back looks—providing a polished and natural appearance.

3. Easier to Apply for Beginners

If you’re new to wearing wigs, lace front styles are often the best place to start. They are typically easier to apply and manage than full lace wigs. Many lace front wigs come pre-plucked and with baby hairs, saving you time on customization. Some versions are glueless and include adjustable straps and combs, allowing for a secure fit without adhesive.

The simpler application process makes lace front wigs a practical choice for everyday wear, especially for users who want a natural look without spending a lot of time on installation.

Cons of Lace Front Wigs

1. Limited Styling Flexibility

While lace front wigs offer a beautiful, natural hairline, they do come with styling limitations. Since the lace is only at the front, you can’t part the hair freely across the scalp. Deep side parts are possible, but styles like high ponytails, buns, or braided updos may expose the wefted back or sides of the wig cap.

If you enjoy frequently switching up your hairstyle or wearing looks that pull hair away from the face and neck, a lace front wig might not provide the full flexibility you need.

2. Less Breathable in the Back

Another drawback of lace front wigs is that they are typically less breathable than full lace wigs, especially in the back. The cap construction behind the lace front usually consists of thicker, machine-sewn wefts that don’t allow as much airflow to the scalp.

For most users, this isn’t a major issue, especially if the wig is worn for a few hours at a time. However, in warmer climates or for long-term daily wear, this reduced breathability may cause slight discomfort or increased sweating, particularly in the summer.

Lace front wigs strike a strong balance between natural appearance, ease of use, and affordability. They’re especially well-suited for beginners or anyone who wants a high-quality, low-maintenance wig that still delivers a polished, realistic look. While they don’t offer the same level of styling freedom or breathability as full lace wigs, the pros often outweigh the cons—especially for everyday wear or special occasions.

If you’re looking for a wig that offers a beautiful hairline and is easy to work with, lace front wigs are an excellent choice.

Pros and Cons of Full Lace Wigs

Full lace wigs are considered the premium choice among wig types, offering unmatched realism and styling versatility. However, this high-end option comes with certain challenges that may not suit every wearer. Below, we break down the main pros and cons of full lace wigs to help you understand whether they’re the right fit for your hair goals and lifestyle.

Pros of Full Lace Wigs

1. Full Styling Freedom

One of the most significant advantages of a full lace wig is its complete styling flexibility. Because the entire cap is made of lace and the hair is hand-tied, you can part the hair anywhere on the scalp. This allows for a wide range of hairstyles—middle parts, deep side parts, braids, buns, space buns, cornrows, and especially high ponytails and updos.

This 360-degree realism makes full lace wigs ideal for anyone who likes to change their hairstyle frequently or needs a wig that looks natural from every angle.

2. More Natural-Looking from All Angles

Full lace wigs provide the most realistic appearance available. Since the lace covers the entire head and each strand of hair is individually tied, the result is a look that closely mimics natural hair growth, no matter where you’re looking from.

This makes full lace wigs a top choice for professional settings, photography, or performance environments where attention to detail matters—especially around the edges, parting, and nape of the neck.

3. Lightweight and Breathable

Despite their intricate design, full lace wigs are actually lightweight and highly breathable. The lace material allows airflow throughout the scalp, reducing heat buildup and sweat during extended wear. This makes them especially comfortable in warm climates or for users who wear wigs all day long.

Compared to traditional machine-made or lace front wigs, full lace units offer better ventilation and a lighter feel on the head.

Cons of Full Lace Wigs

1. More Expensive

Full lace wigs are typically more expensive than lace front wigs due to their complex construction. Each strand of hair is individually hand-tied into lace, which is a labor-intensive process. The full lace cap adds both realism and versatility—but at a cost.

While the investment may be worth it for serious wig wearers or professionals, the higher price point can be a barrier for those on a budget or just starting out.

2. Requires More Skill to Install

Another drawback is that full lace wigs require more skill and time to apply correctly. Because the lace extends all around the head, most users opt for adhesive or wig tape to secure the wig, particularly when styling in updos or exposing the nape area.

Incorrect application can lead to lifting or visible lace, which compromises the natural appearance. Beginners may find this process intimidating and may need help from a stylist.

3. Longer Application Time

Compared to lace front wigs, full lace wigs generally take more time to apply and style. The process often includes aligning and gluing the lace along all edges, blending it into the skin, and carefully styling the hair. For daily use, this extended prep time may not be practical for everyone.

A full lace wig offers luxury, realism, and styling freedom that few other wigs can match. However, it also demands more in terms of investment, skill, and time. If you’re looking for maximum versatility and a flawless look from every angle—and you’re comfortable with the application process—then a full lace wig is a worthwhile investment.

Which Wig Is Best for You?

Choosing between a lace front wig and a full lace wig ultimately depends on your budget, styling preferences, experience level, and how often you plan to wear the wig. Each type has its strengths, and the best choice will align with your personal needs and lifestyle.

Consider Your Budget

If you’re working with a limited budget or just starting your wig journey, a lace front wig offers excellent value. It provides a natural-looking hairline at a more affordable price. On the other hand, if you’re ready to invest in a premium wig with all the styling flexibility and realism possible, a full lace wig is worth the higher cost.

Think About Styling Needs

Your typical hairstyles will play a big role in your decision. If you prefer simple styles with the hair worn down or parted in front, a lace front wig will serve you well. But if you love high ponytails, buns, braids, or versatile parting, a full lace wig is the better fit due to its 360-degree lace coverage.

Evaluate Your Experience Level

New to wigs? A lace front wig is often easier to apply and manage. It usually comes ready to wear with adjustable straps and minimal adhesive needed. If you’re more experienced or plan to work with a stylist, the full lace wig gives you the freedom and professional-level finish you may want.

Daily Wear vs Special Occasions

For everyday use, lace front wigs are lightweight, quick to apply, and budget-friendly. For special events, performances, or long-term use, full lace wigs provide superior realism and comfort, especially for extended wear.

In the end, the right wig is the one that meets your needs—both practically and stylistically.

Tips for Choosing the Right Wig

Selecting the perfect wig involves more than just style—it’s about fit, comfort, and maintenance. Here are some helpful tips to ensure you choose a wig that looks natural and lasts longer.

How to Measure Your Head Size

Accurate measurement is key to a comfortable wig fit. Use a soft measuring tape and measure:

Around your head: Start at your natural hairline on the forehead, wrap the tape around just above your ears, and back to the starting point.

Front to back: Measure from your hairline at the center of your forehead to the nape of your neck.

Ear to ear: Measure from the top of one ear across your scalp to the other ear.

Compare your measurements with the wig’s sizing chart to find the best fit—common sizes are small, medium, and large. A properly sized wig reduces slipping and ensures a natural look.

Importance of Lace Color and Wig Density

Choosing the right lace color is crucial for blending the wig with your skin tone. Lace comes in shades like light, medium, and dark—select one closest to your complexion for a seamless hairline.

Wig density refers to how thick or full the hair looks. Typical densities range from 130% (light) to 180% (full). If you want a natural everyday look, lighter densities are ideal. For a voluminous style or special occasions, higher densities work better.

Maintenance Tips for Both Wig Types

Proper care extends the life of your wig:

Wash gently with sulfate-free shampoo and conditioner designed for wigs.

Detangle carefully using a wide-tooth comb or fingers.

Store properly on a wig stand or mannequin head to maintain shape.

Avoid excessive heat styling unless the wig is heat-resistant.

Following these tips ensures your lace front or full lace wig stays beautiful, comfortable, and natural-looking for longer.

Conclusion

Choosing between a lace front wig and a full lace wig ultimately comes down to your individual needs and preferences. Lace front wigs offer an affordable, beginner-friendly option with a natural hairline, making them ideal for everyday wear and simpler styles. On the other hand, full lace wigs provide unmatched styling freedom, all-around realism, and superior breathability, though they require more skill to apply and come at a higher price.

Before making your decision, consider your budget, how you like to style your hair, your experience level with wigs, and whether you plan to wear your wig daily or for special occasions. Both types have unique benefits that can suit different lifestyles and preferences.

Taking time to assess what matters most to you will help you find a wig that boosts your confidence, fits comfortably, and enhances your natural beauty. We are a professional wig manufacturer in China, we have both Lace Front and Full Lace Wigs for sale. Bulk orders are welcome!

Hand Tied Weft Extensions Before and After

If you’ve ever looked at those dramatic “before and after” hair transformations and wondered how they go from thin, flat, or uneven hair to full, flowing, glossy perfection—there’s a good chance hand tied weft extensions are behind the magic.

But here’s the truth: the difference between a flawless transformation and a noticeable, uncomfortable one isn’t just the extensions—it’s the method, placement, care routine, and customization.

This guide breaks everything down in detail: what hand tied weft extensions are, what realistic “before and after” results look like, the full installation process, maintenance steps, and how to achieve salon-quality results at home (or at least understand what your stylist should be doing).


What Are Hand Tied Weft Extensions?

Hand tied weft extensions are thin, flexible hair wefts that are carefully sewn by hand into a fine, flat strip. Unlike machine wefts, they’re lightweight, lie closer to the scalp, and are designed to blend seamlessly with natural hair.

They are typically installed using a bead-and-sew method:

  • Small silicone-lined beads are placed along a row
  • A track is created using your natural hair
  • The wefts are then sewn onto this base

The result? A natural, flat, comfortable finish that doesn’t scream “extensions.”


Before and After: What Changes Can You Expect?

Let’s get realistic—this isn’t a magic spell, but it can feel close.

Before: Common Hair Concerns

  • Thin or fine hair lacking volume
  • Uneven lengths from previous cuts
  • Hair breakage or damage
  • Slow hair growth frustration
  • Flat, lifeless appearance

After: Typical Results

  • Instantly fuller, thicker hair
  • Increased length (often 4–10+ inches)
  • Better shape and layering
  • Improved styling versatility
  • Enhanced overall confidence

The transformation is not just visual—it changes how your hair behaves. Styling becomes easier, and volume holds longer.


Why Choose Hand Tied Wefts Over Other Extensions?

There are plenty of extension types out there—tape-ins, clip-ins, fusion bonds—but hand tied wefts stand out for a few key reasons.

Key Advantages

1. Natural Look
The wefts are ultra-thin, making them nearly invisible when installed correctly.

2. Lightweight Feel
You won’t feel like you’re carrying extra weight on your head all day.

3. Less Damage (When Done Properly)
No glue, no heat—just beads and thread.

4. Long-Term Wear
Typically lasts 6–8 weeks before needing adjustment.

5. Reusable Hair
High-quality wefts can be reused multiple times.


Step-by-Step: How Hand Tied Weft Extensions Are Installed

Here’s where things get technical—but understanding this helps you get better results.

Step 1: Consultation and Hair Matching

Before anything touches your hair:

  • Match color precisely (including highlights/lowlights)
  • Determine length and volume needed
  • Evaluate hair density and scalp condition

Skipping this step is like ordering clothes without checking size—possible, but risky.


Step 2: Sectioning the Hair

Hair is divided into clean horizontal sections:

  • Usually 1–3 rows depending on desired volume
  • Lower rows = length
  • Upper rows = volume and blending

Precision here ensures the extensions remain hidden.


Step 3: Creating the Beaded Foundation

  • Small beads are attached to sections of your natural hair
  • Beads are aligned in a row along the scalp
  • Spacing must be even to distribute weight

This creates a “track” that supports the wefts.


Step 4: Sewing the Wefts

  • The hand tied wefts are placed along the bead row
  • A thread is used to sew the weft securely onto the beads
  • Multiple wefts can be layered for more volume

The key here is tension—too tight causes discomfort, too loose leads to slipping.


Step 5: Blending and Cutting

After installation:

  • Hair is trimmed and layered
  • Extensions are blended with natural hair
  • Face-framing pieces are customized

This step is what separates “nice extensions” from “wow, is that all your hair?”


Step 6: Styling the Final Look

The stylist typically:

  • Blow-dries
  • Curls or straightens
  • Shows the final transformation

This is your “after” moment—and yes, it’s usually very satisfying.


Before and After Timeline: What Happens Over Time?

The transformation isn’t just instant—it evolves.

Immediately After Installation

  • Hair looks fuller and longer
  • Slight tightness may be felt (normal for 1–2 days)

After 1–2 Weeks

  • Hair settles naturally
  • Styling becomes easier

After 4–6 Weeks

  • Natural hair growth loosens the beads
  • Extensions may feel lower

After 6–8 Weeks

  • Time for maintenance (move-up appointment)

How to Care for Hand Tied Weft Extensions at Home

If you want your “after” to stay looking like day one, maintenance is everything.

Washing Routine

Frequency: 2–3 times per week

Steps:

  1. Brush before washing
  2. Use sulfate-free shampoo
  3. Wash gently (no aggressive scrubbing)
  4. Condition mid-lengths to ends
  5. Rinse thoroughly

Drying Tips

  • Pat dry with a towel (no rubbing)
  • Air dry when possible
  • If blow-drying, use heat protectant

Never sleep with wet extensions—it can cause tangling and tension damage.


Brushing Technique

  • Use a loop brush or extension-friendly brush
  • Hold the roots while brushing to avoid pulling
  • Start from ends → move upward

Sleeping Care

  • Tie hair in a loose braid or ponytail
  • Use a silk or satin pillowcase

This reduces friction and tangling overnight.


Styling Tips

  • Limit high heat
  • Avoid oils near the bead area
  • Use lightweight products

Heavy products can cause buildup and slipping.


Common Mistakes That Ruin Before-and-After Results

Let’s avoid the extension horror stories.

1. Poor Installation

  • Uneven beads
  • Visible wefts
  • Incorrect tension

2. Wrong Hair Match

  • Color mismatch
  • Texture mismatch

3. Skipping Maintenance

  • Leads to tangling and matting

4. Overloading with Too Many Wefts

  • Causes strain on natural hair

5. Improper Home Care

  • Product buildup
  • Excessive heat damage

Who Are Hand Tied Weft Extensions Best For?

They’re ideal if you have:

  • Fine to medium hair
  • Medium to long natural hair
  • Desire for natural-looking volume and length

They may not be ideal if:

  • Hair is extremely short
  • Scalp is very sensitive
  • Severe hair loss is present

Cost vs Value: Are They Worth It?

Let’s talk numbers (rough estimates):

  • Installation: $200–$800
  • Hair: $300–$1000+
  • Maintenance: $100–$300 every 6–8 weeks

Yes, it’s an investment. But compared to daily frustration with thin or uneven hair, many people find it worth every dollar.


Realistic Before and After Expectations

A quick reality check:

  • Extensions don’t fix damaged natural hair—they enhance appearance
  • Maintenance is required
  • Results depend heavily on the stylist’s skill

That said, when done correctly, the transformation is one of the most natural-looking in the extension world.


Final Thoughts

Hand tied weft extensions are one of the most effective ways to achieve a natural, seamless hair transformation. The “before and after” results can be dramatic—but they’re built on technique, proper installation, and consistent care.

If you:

  • Choose the right hair
  • Work with a skilled stylist
  • Follow a solid maintenance routine

You’ll get results that look effortless—even though there’s quite a bit going on behind the scenes.

And honestly, that’s the goal: hair that looks so good people assume you just “woke up like this”… even if your morning routine tells a slightly different story.