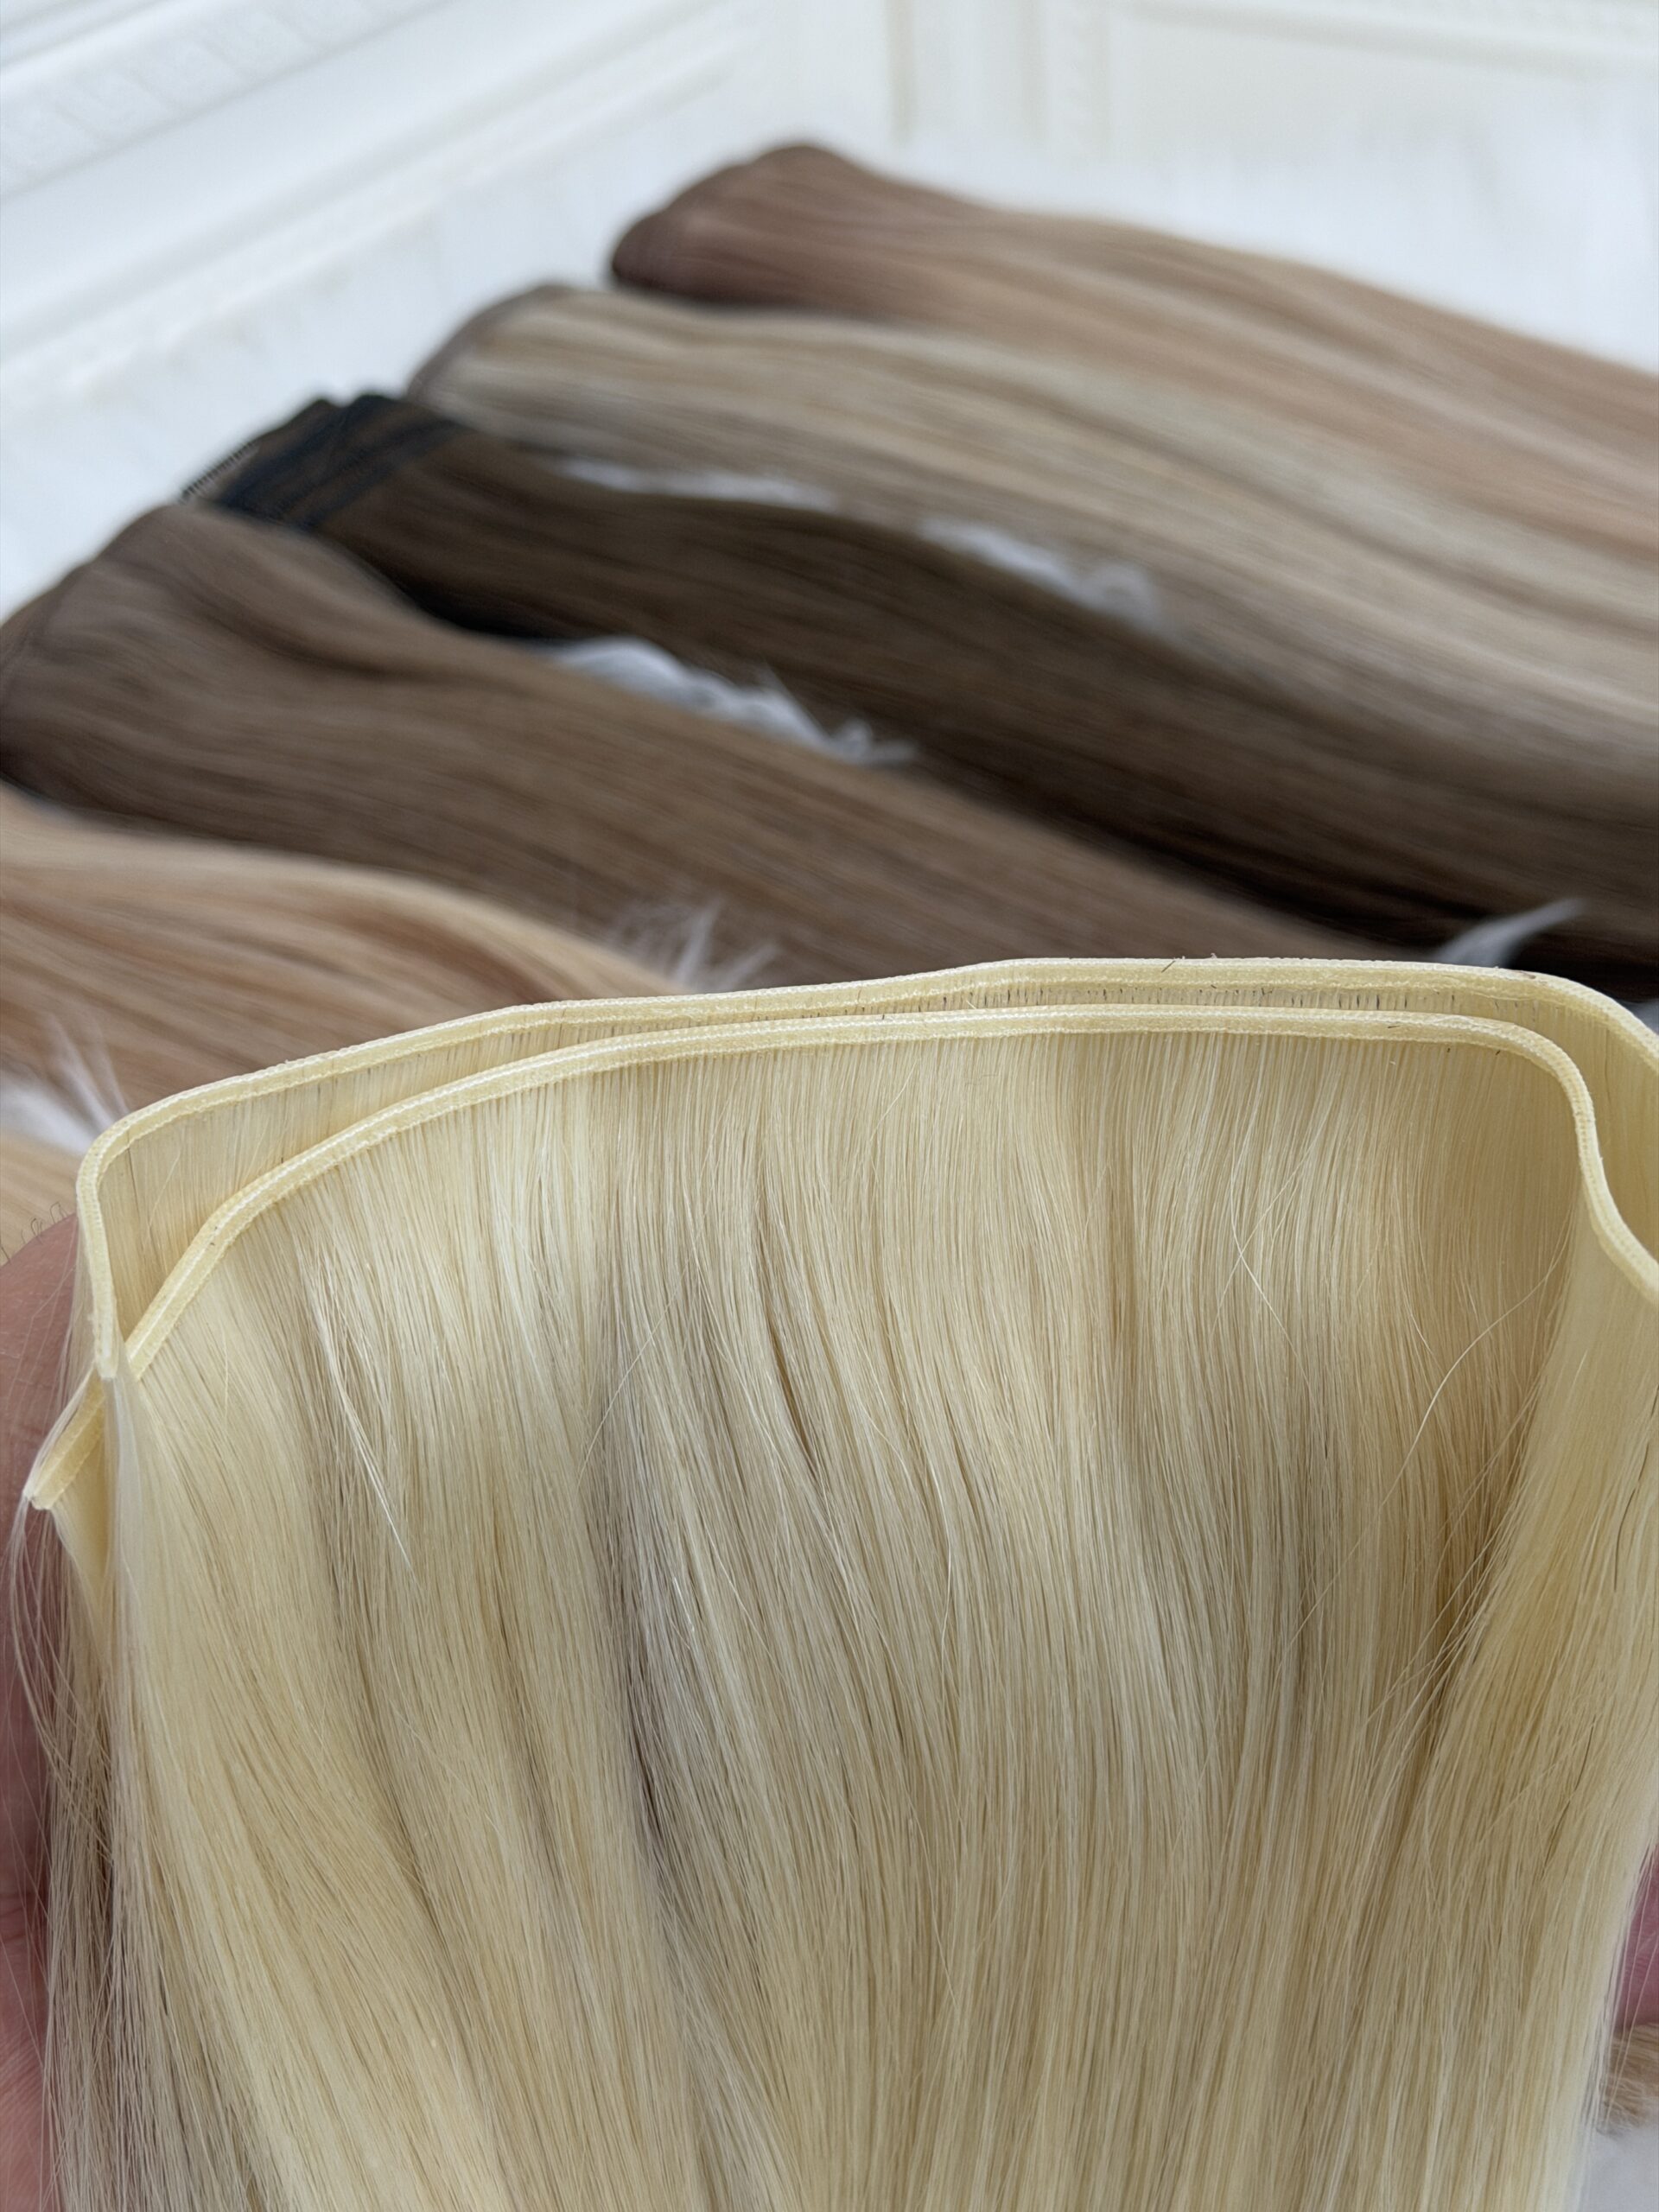
Pros and Cons of Tape-In Hair Extensions: Is It Right for You?

Tape-in hair extensions have become one of the most popular semi-permanent extension methods for women seeking effortless length, volume, and a natural look. Unlike clip-ins, which require daily removal, or fusion extensions, which can be damaging, tape-ins offer a balance of convenience and low maintenance.

But are they the right choice for your hair type, lifestyle, and budget?

In this comprehensive guide, we’ll break down:
The key advantages of tape-in extensions
The potential drawbacks you should know
A data-driven comparison with other extension types
Expert recommendations on who should (and shouldn’t) get them

By the end, you’ll know exactly whether tape-ins are your best option—or if another method would work better.

Pros of Tape-In Hair Extensions

1. Natural Look & Undetectable Blend

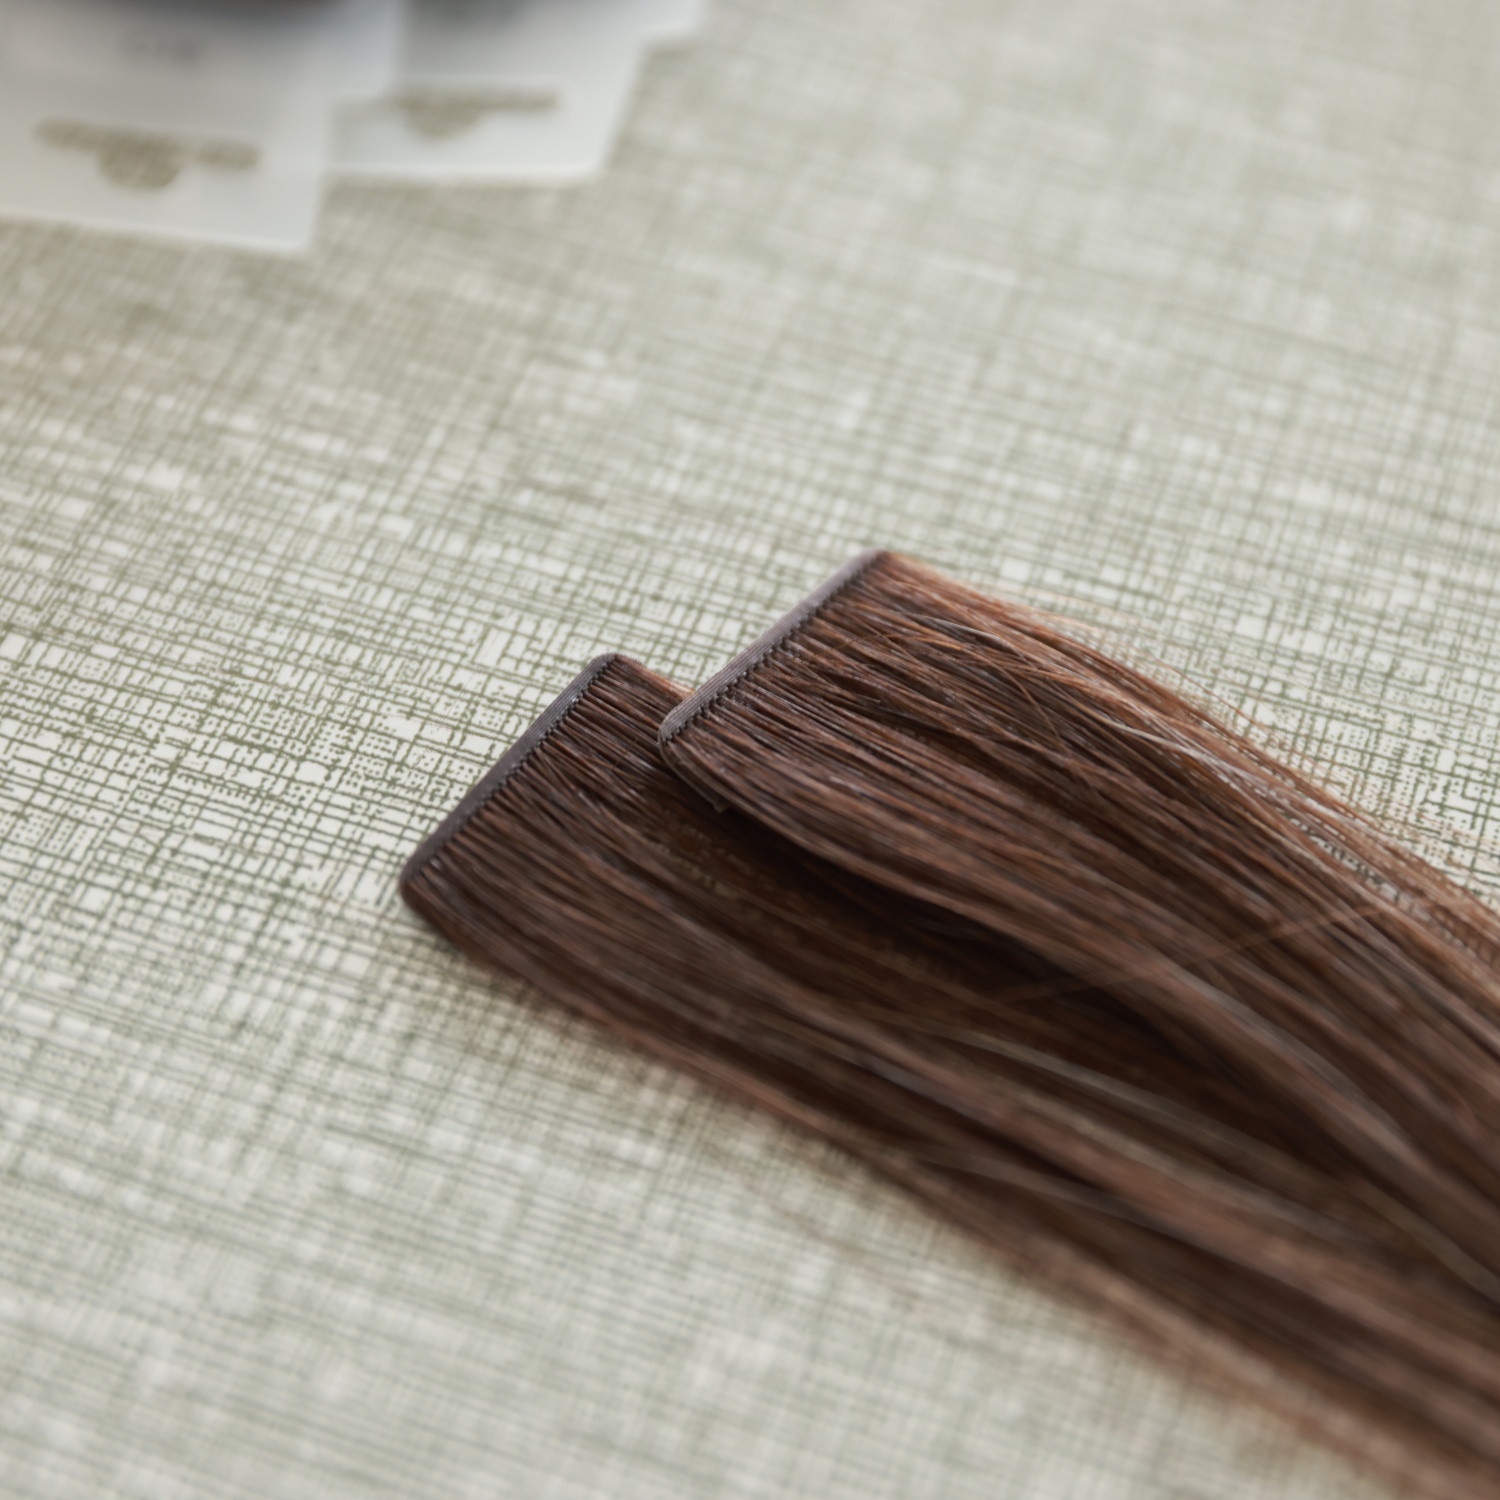
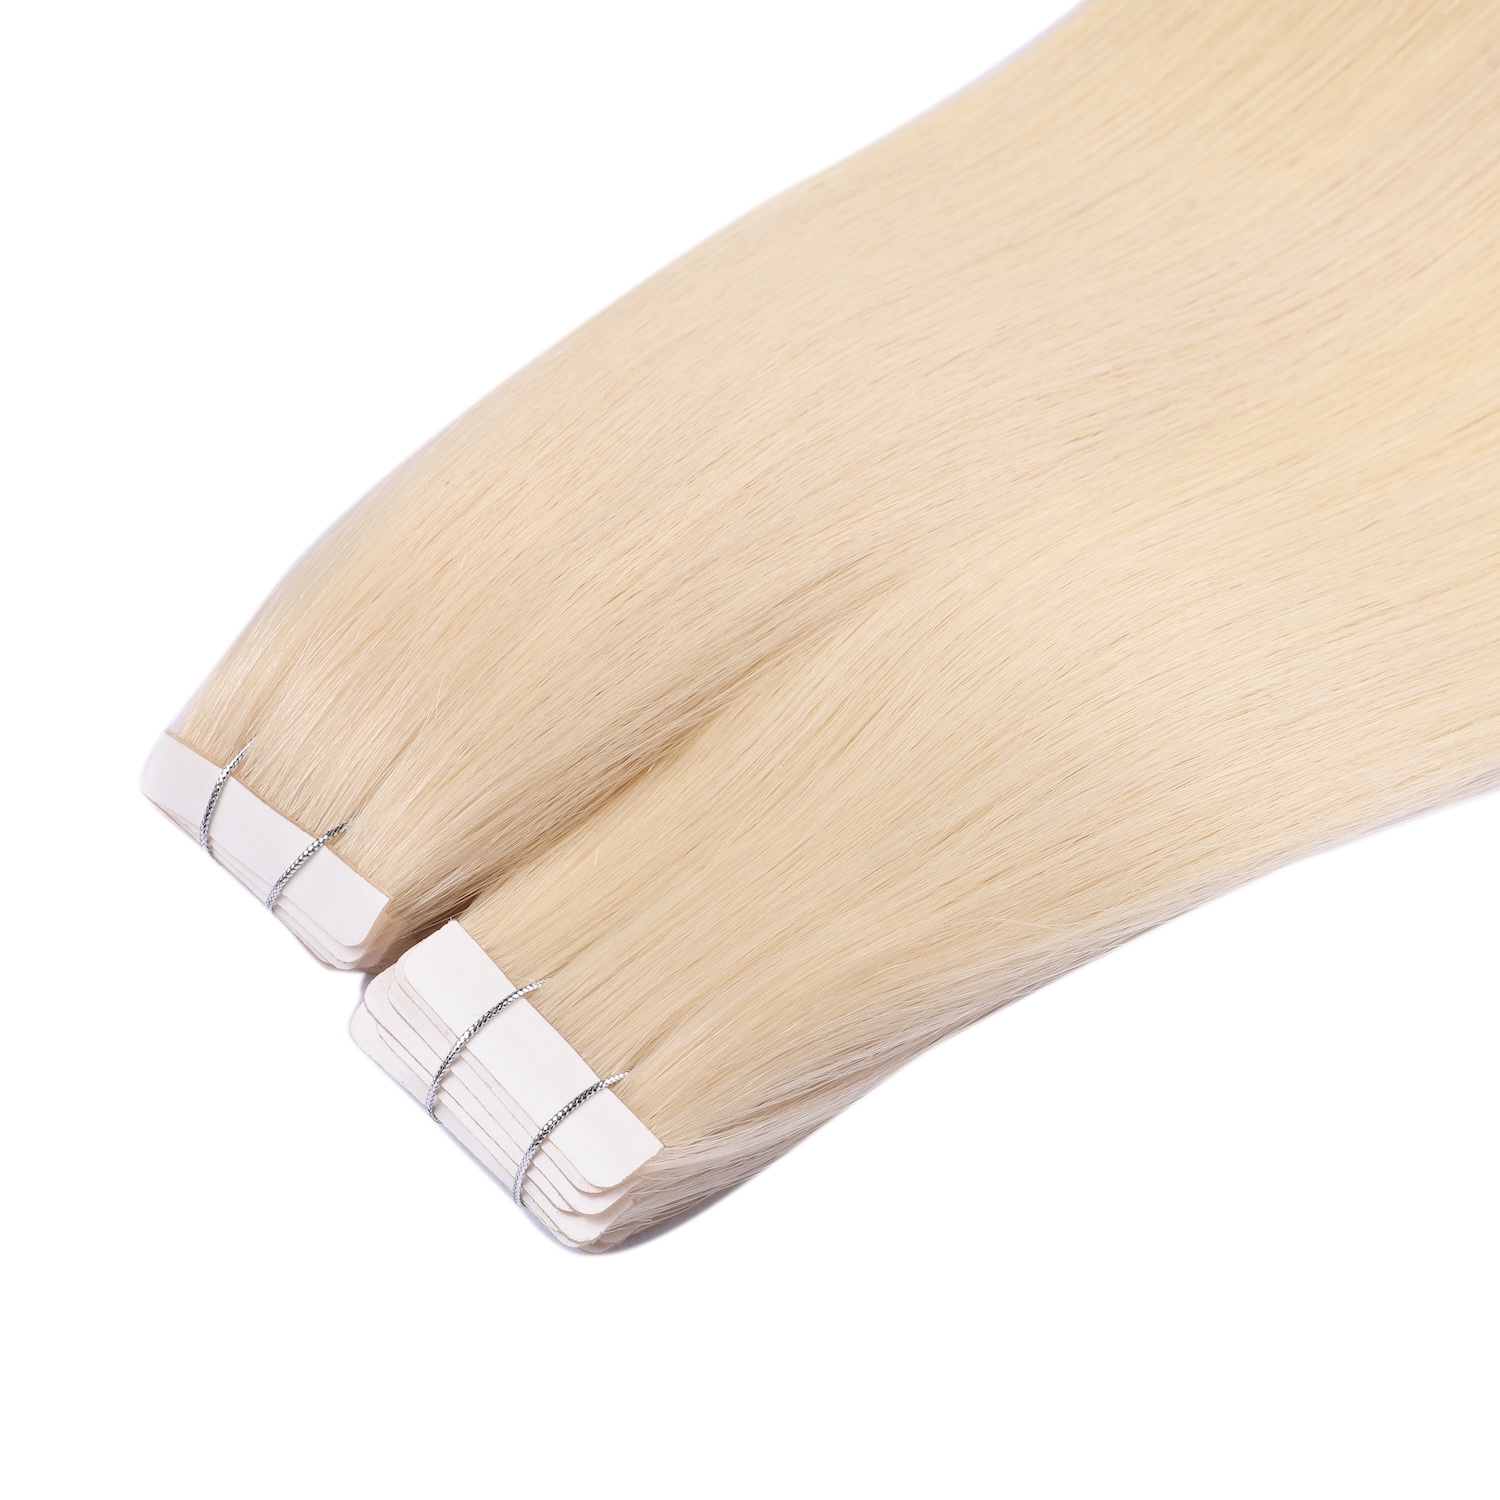
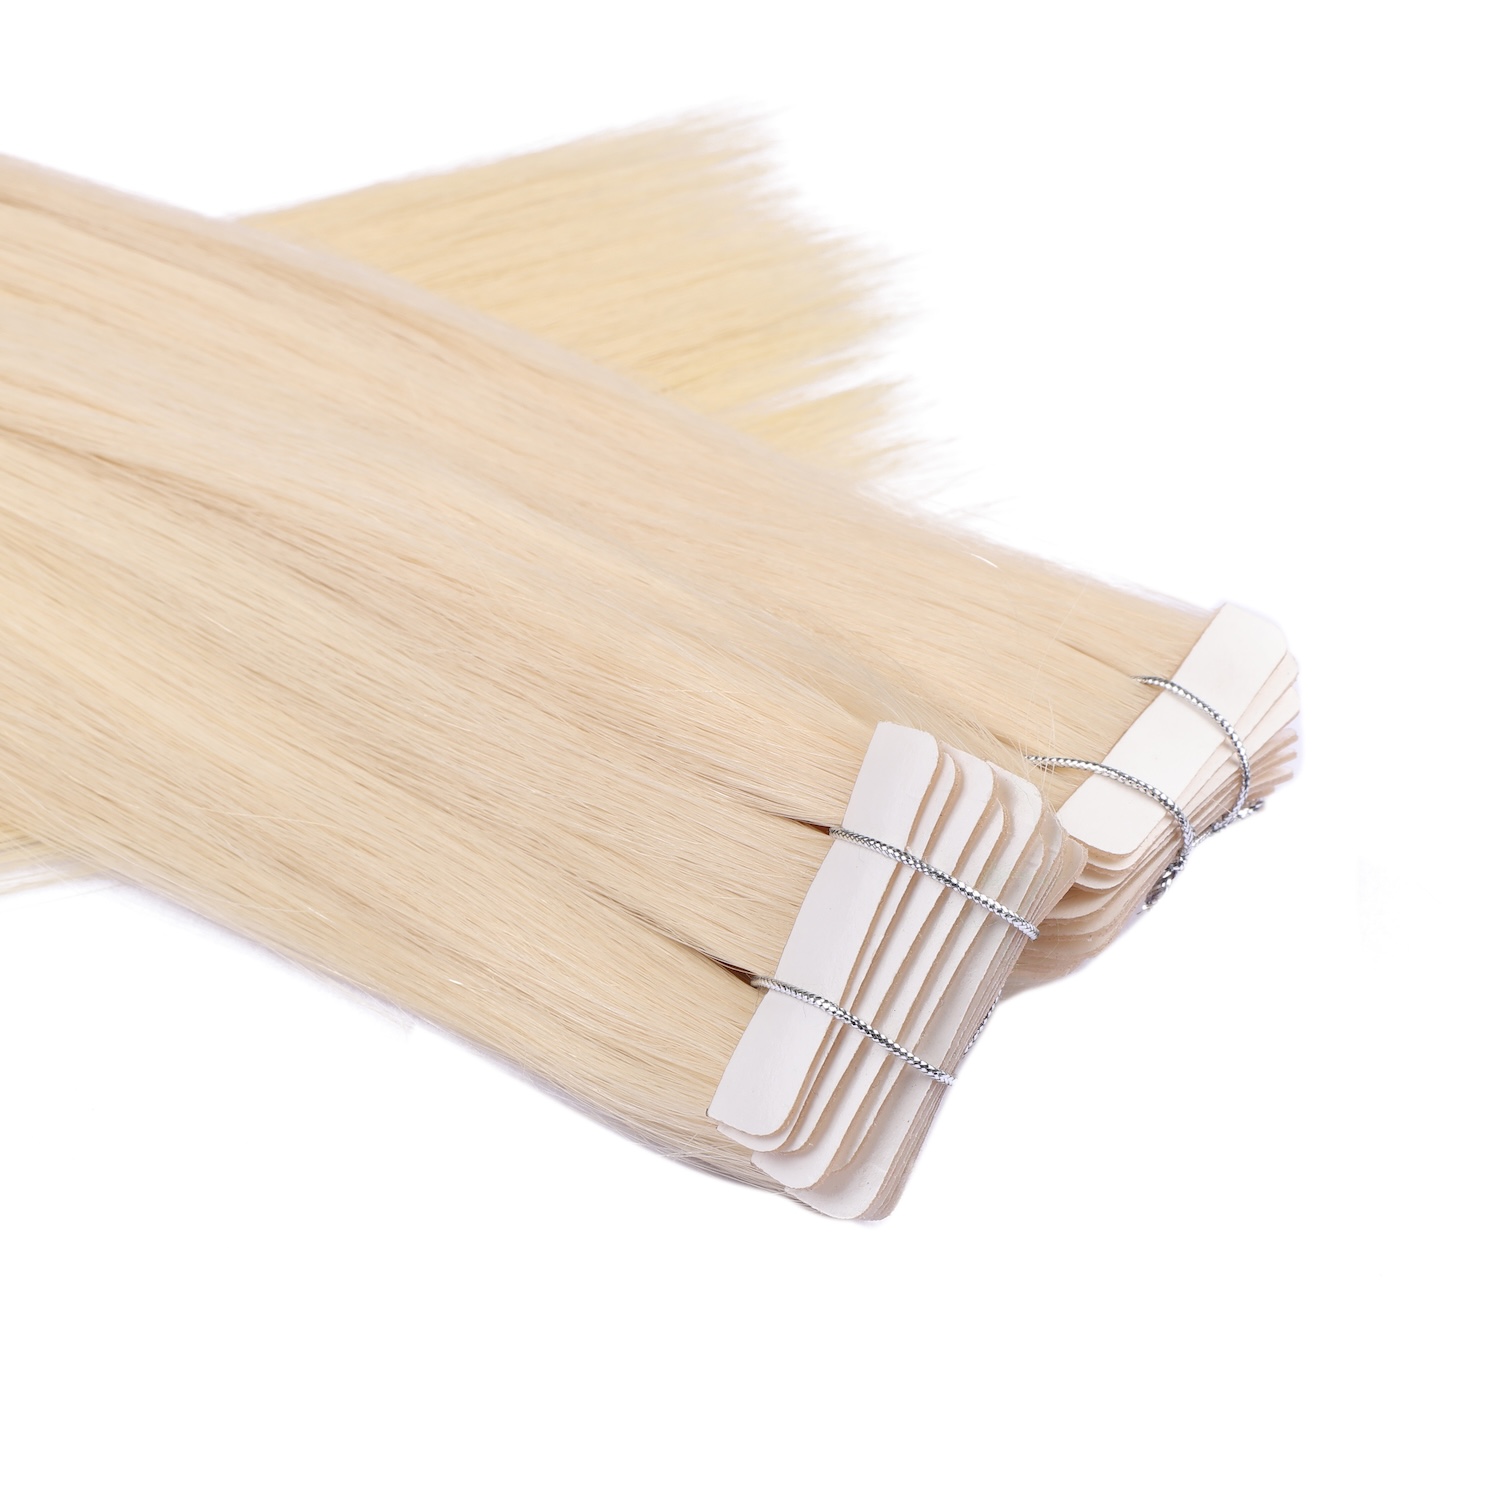
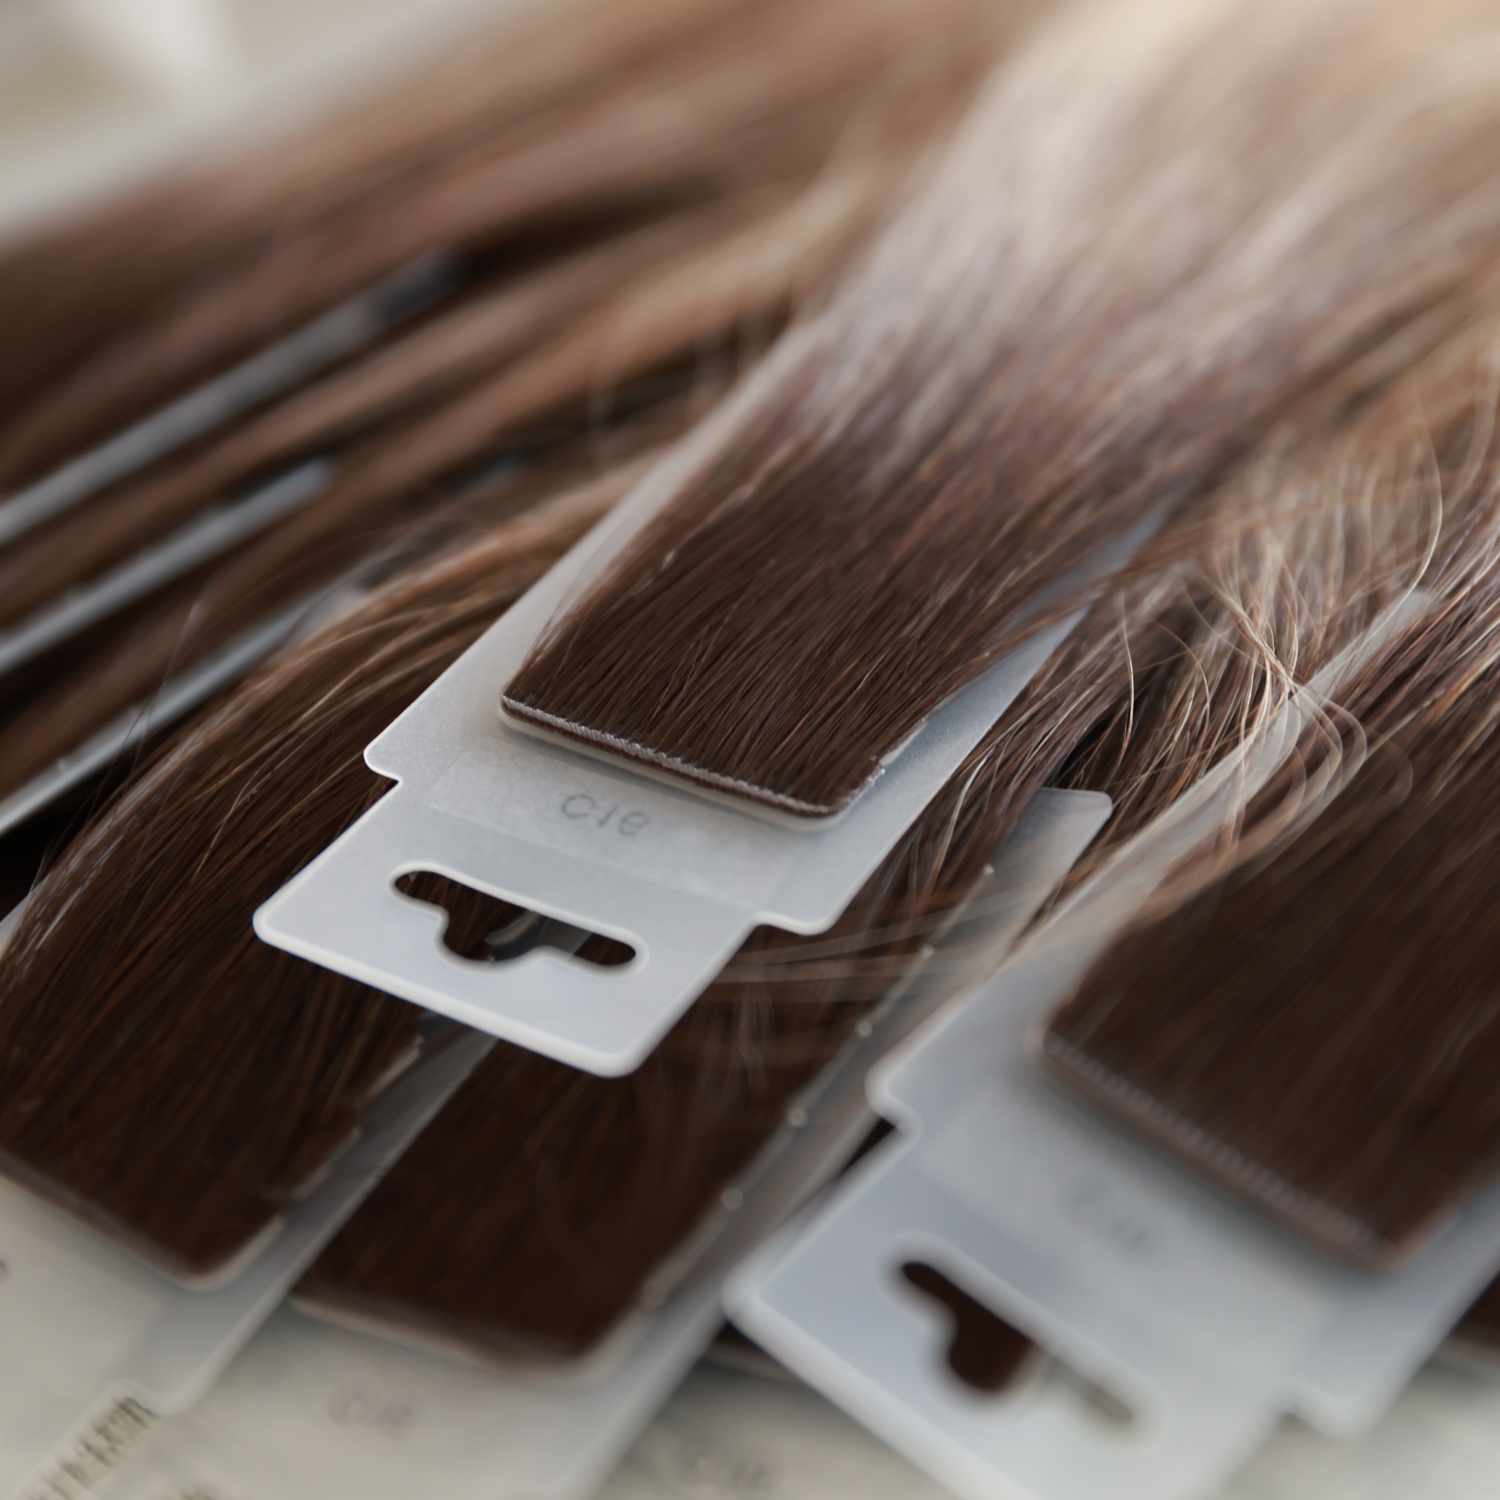
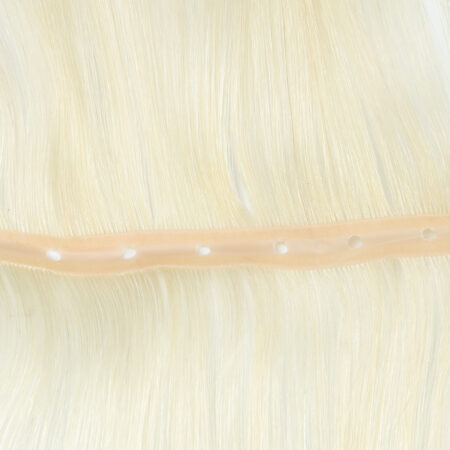
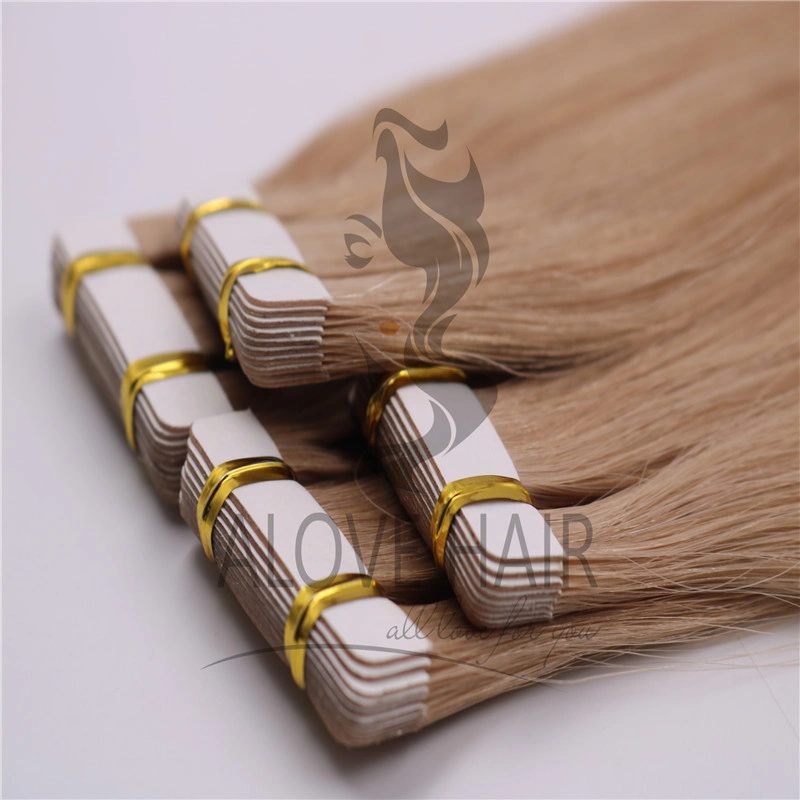
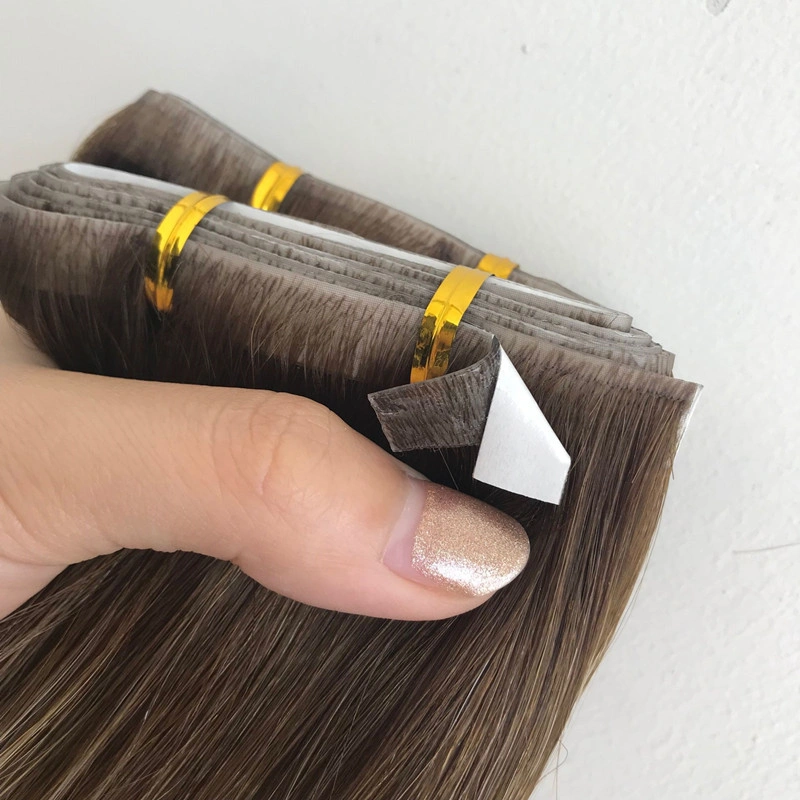
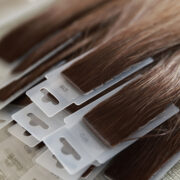
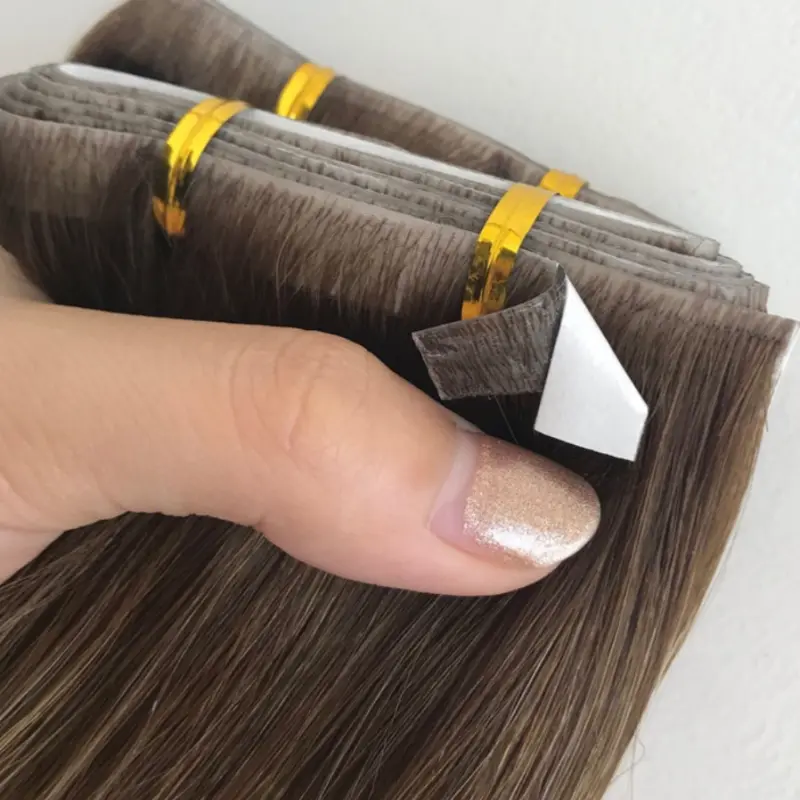
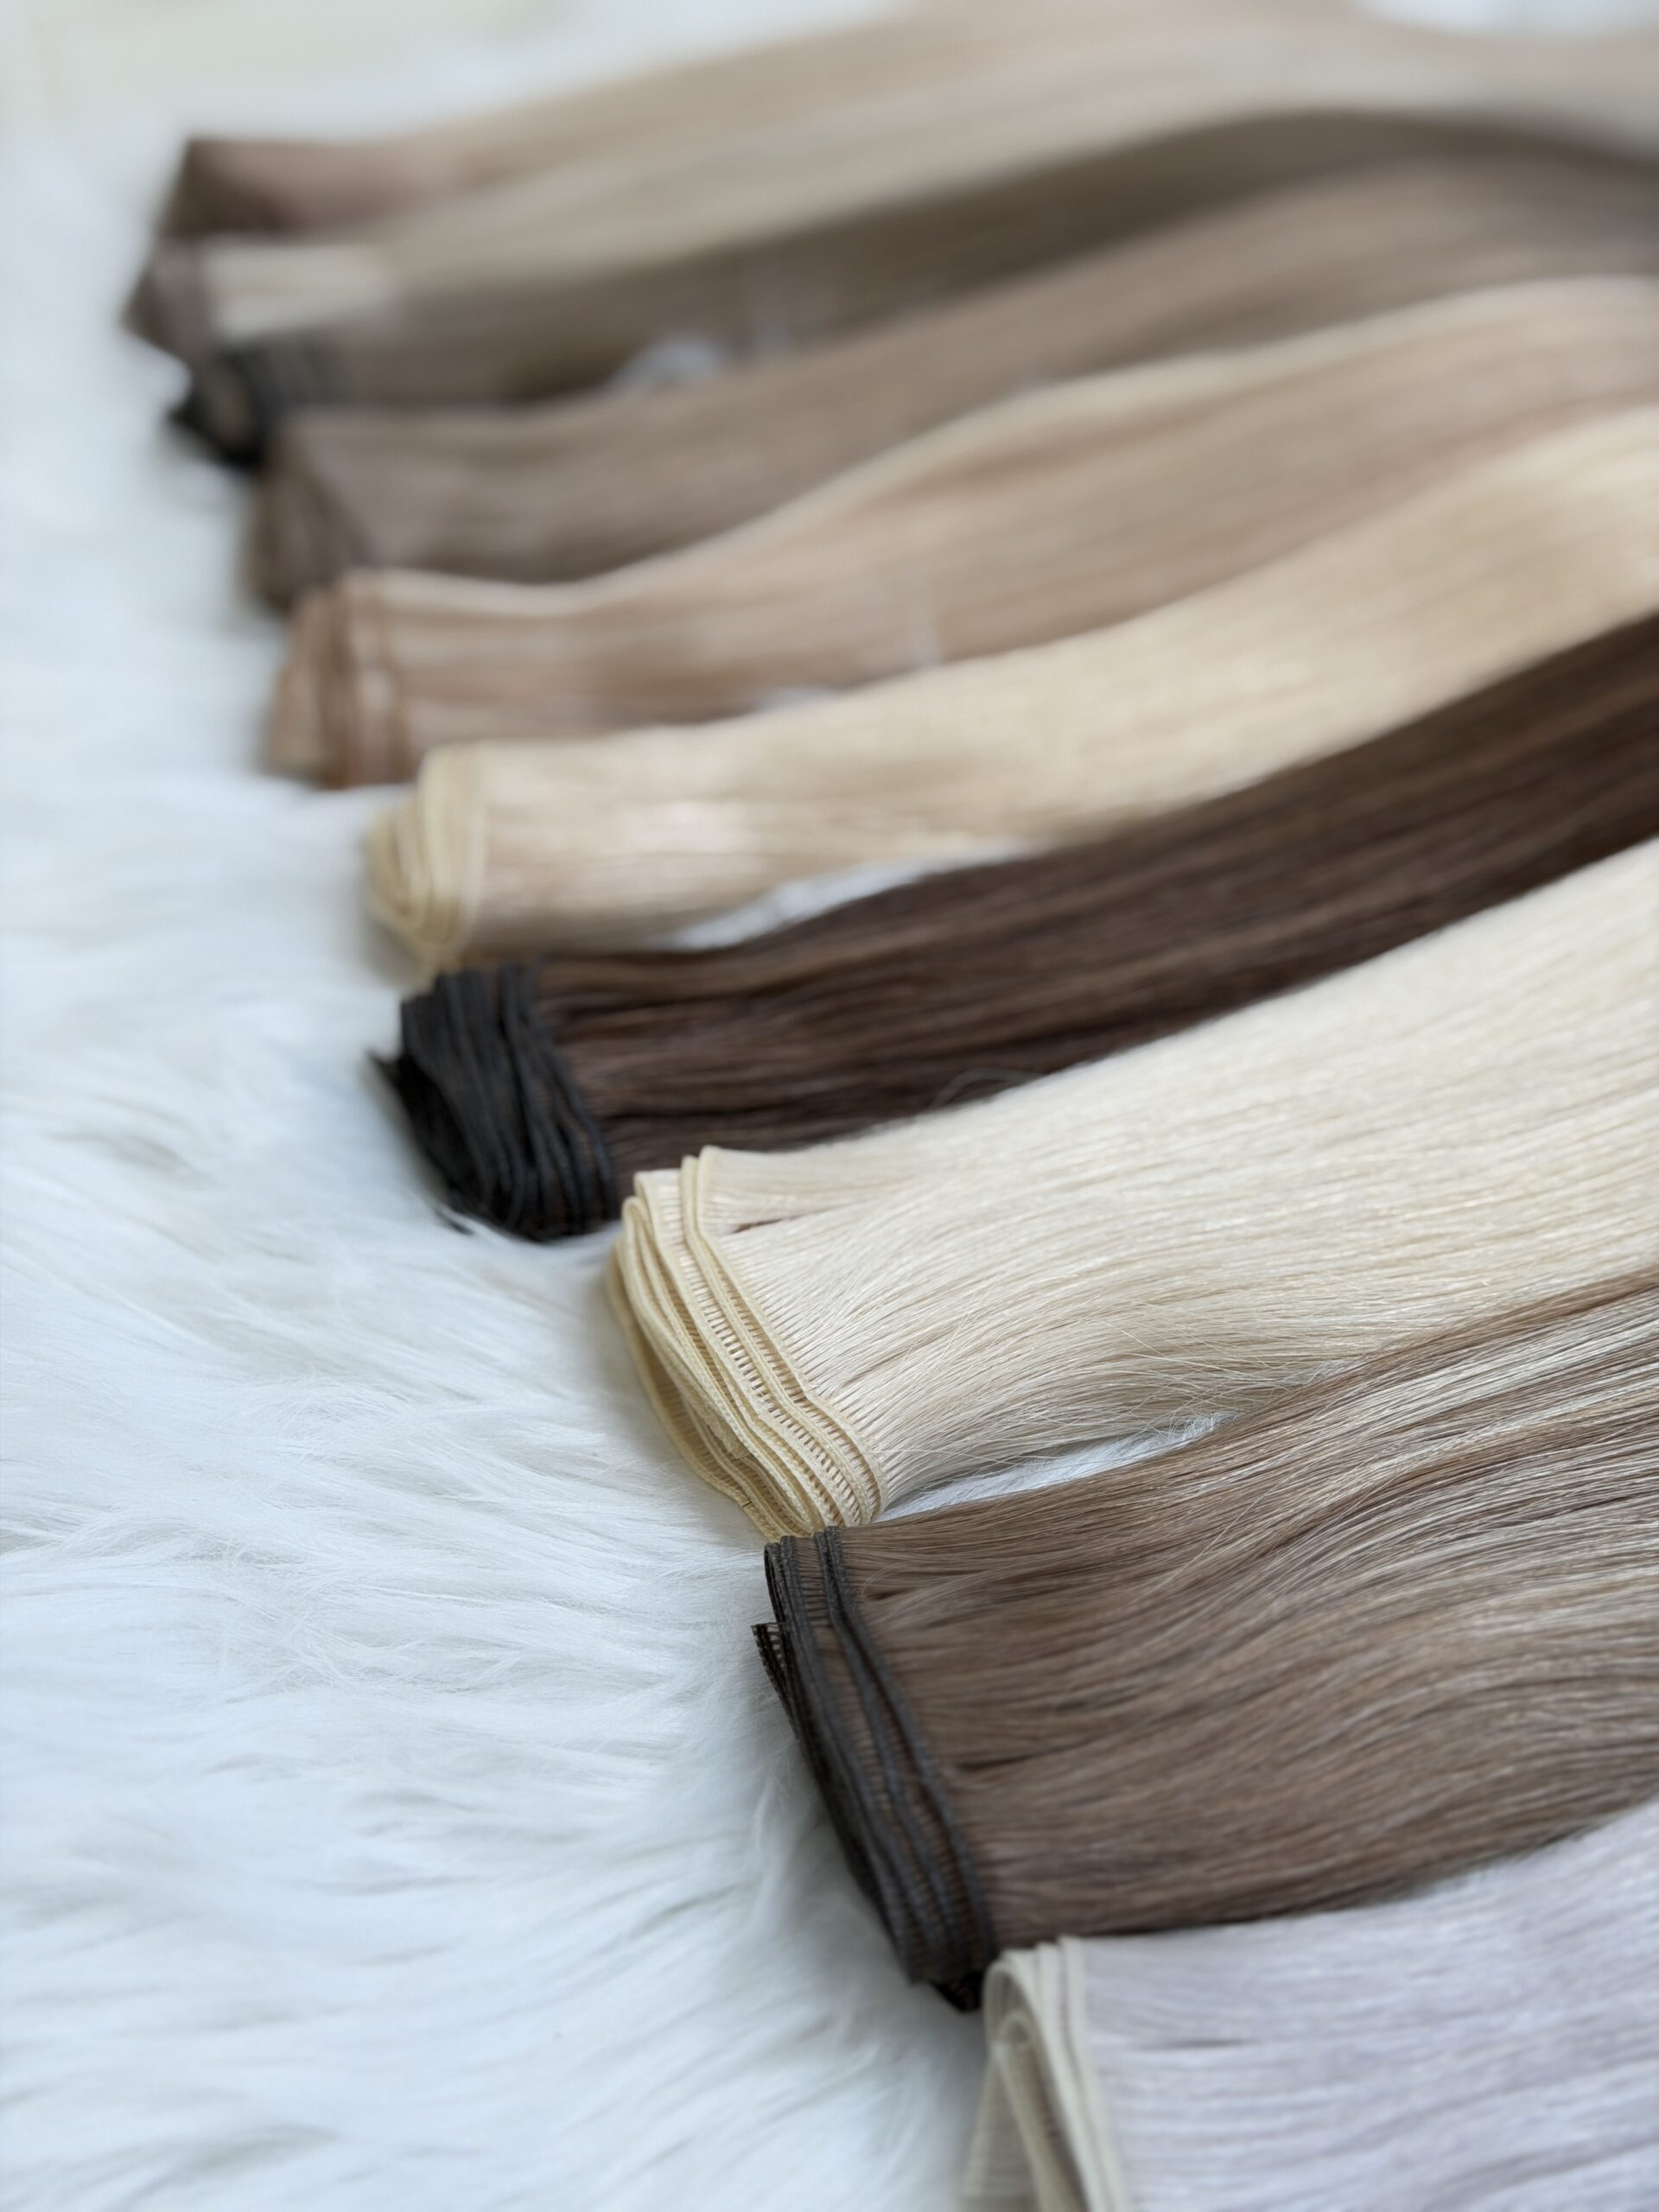
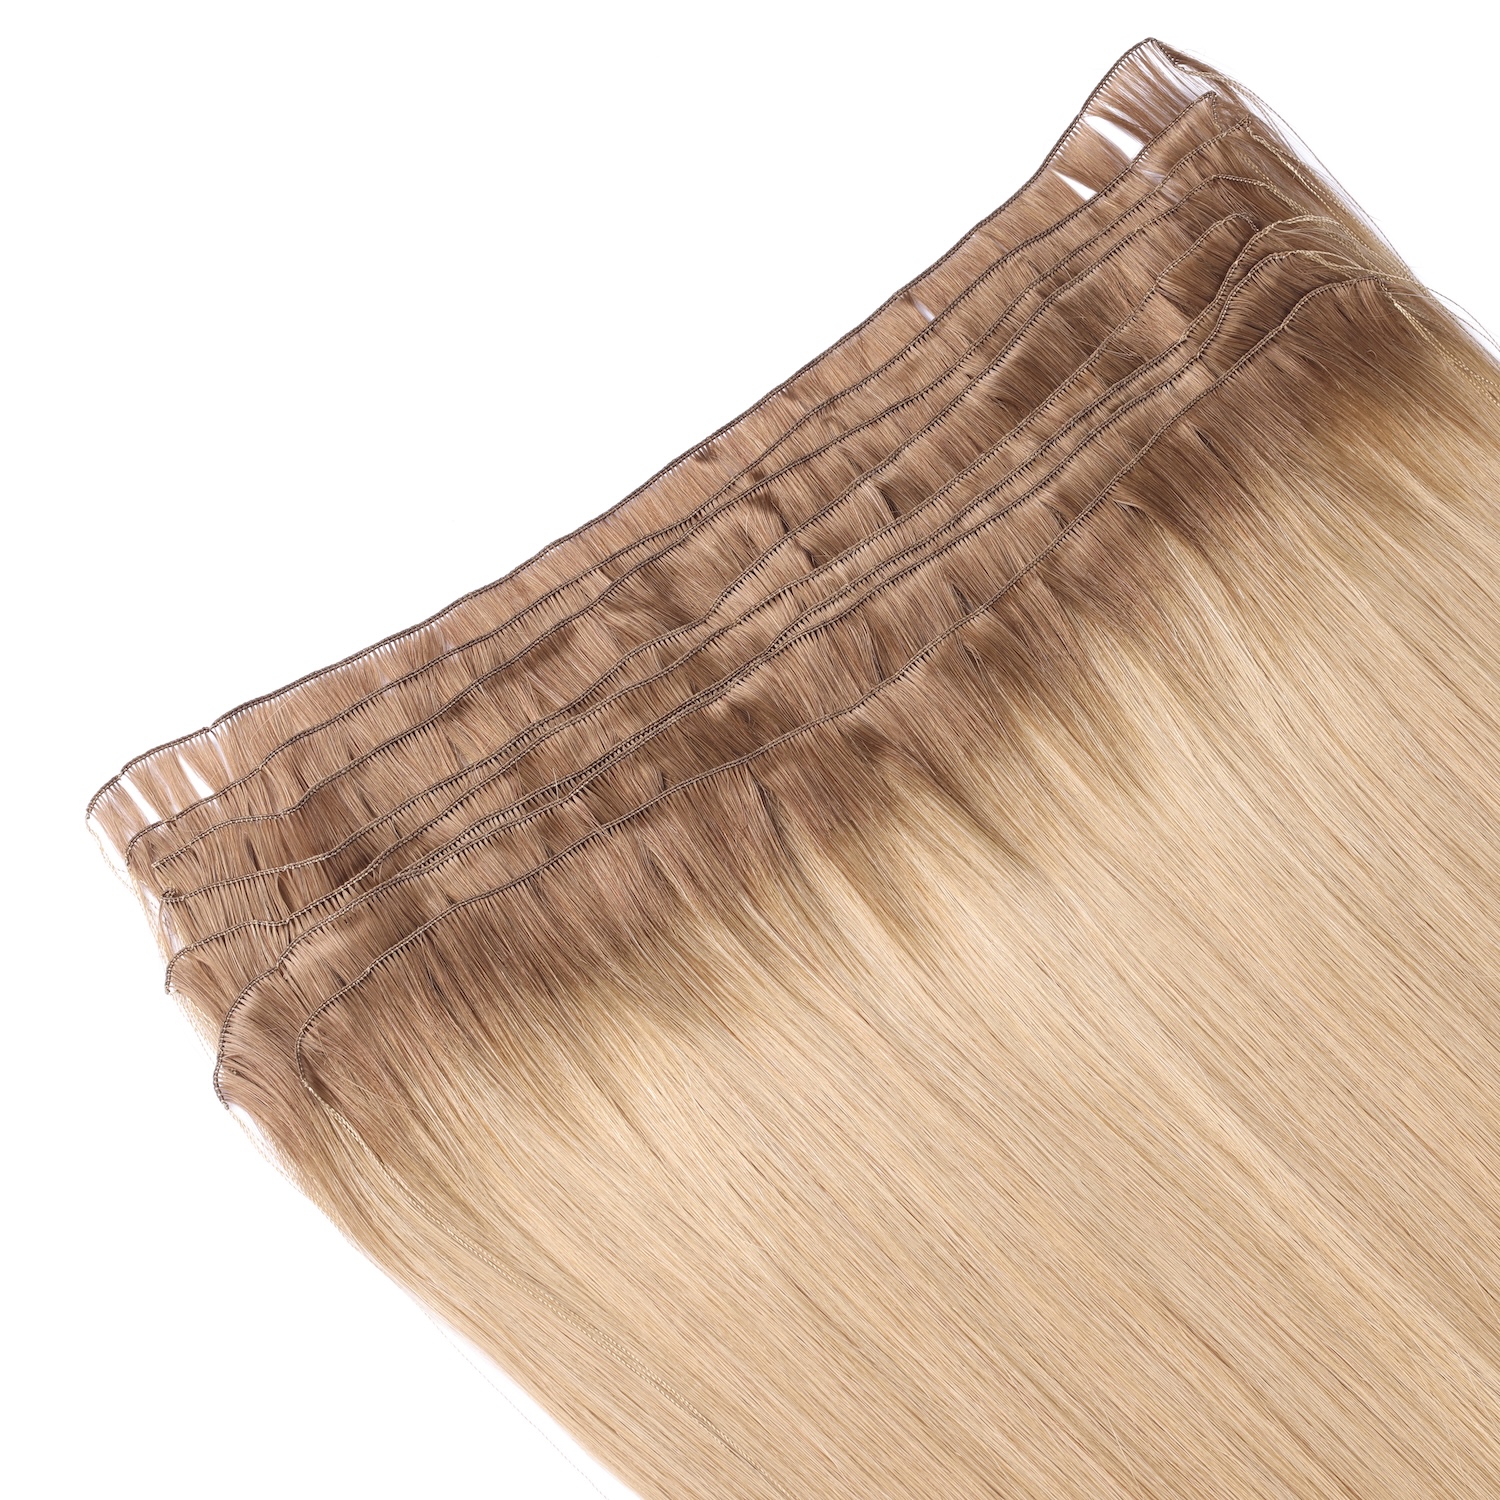
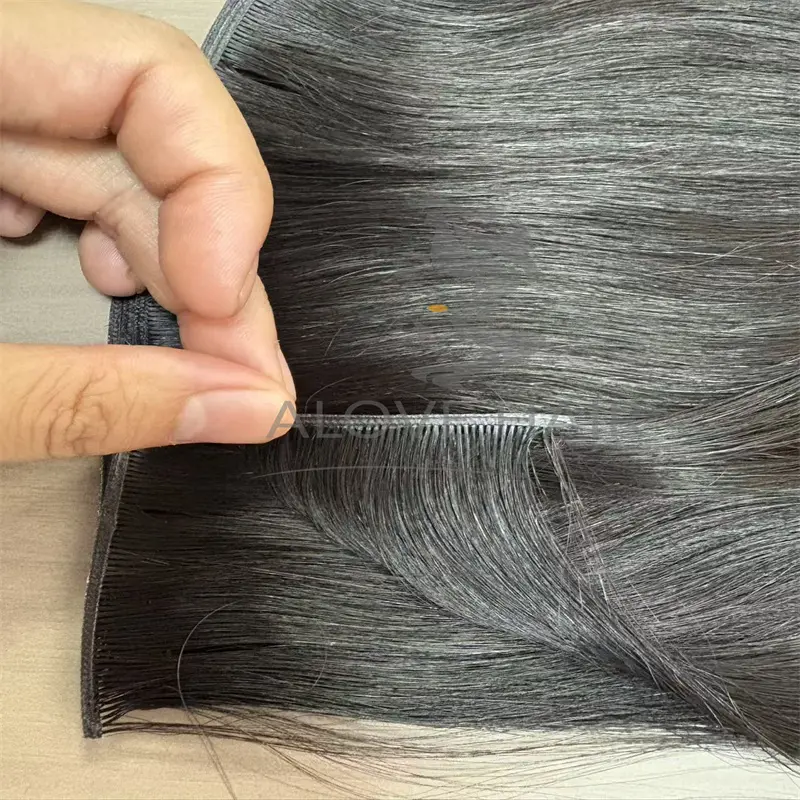
Tape-ins consist of thin, flexible wefts with medical-grade adhesive tabs. Because they lie flat against the scalp, they blend seamlessly with natural hair—unlike bulky clip-ins or obvious bead extensions.

Example: Celebrities like Kim Kardashian and Jennifer Lopez often use tape-ins for red-carpet events because they mimic real hair growth.

2. Lightweight & Comfortable

Since the wefts are featherlight (only 0.5–1.5 grams each), they don’t pull on roots like heavy sew-in weaves or fusion extensions.

Weight Comparison of Hair Extensions:

Extension TypeAvg. Weight per WeftComfort Level (1-10)
Tape-Ins0.5–1.5g9
Clip-Ins2–4g7
Fusion/Bonded3–5g5
Sew-In Weaves5–8g4

3. Quick Application (30–60 Minutes)

Unlike sew-ins (which take 3+ hours) or keratin-bonded extensions (which require strand-by-strand attachment), tape-ins can be applied in under an hour by a professional.

4. Low Damage Risk (When Properly Maintained)

Because the adhesive doesn’t require heat or chemicals, tape-ins are gentler than fusion or micro-link extensions. A 2023 study in The Journal of Cosmetic Dermatology found that:

“Tape-in extensions caused 23% less hair breakage than fusion bonds when removed correctly.”

5. Longevity: Lasts 6–8 Weeks

With proper care, tape-ins can be reused 2–3 times before needing replacement.

Lifespan Comparison:

Extension TypeAvg. LifespanReusable?
Tape-Ins6–8 weeksYes (2–3x)
Clip-Ins1 dayYes
Fusion Bonds3–4 monthsNo
Sew-Ins6–8 weeksNo

Cons of Tape-In Hair Extensions

1. Requires Professional Installation & Removal

Unlike clip-ins, tape-ins should not be self-applied. Improper placement can lead to:

Visible tabs (if placed too close to the part)

Premature slippage (if adhesive isn’t pressed firmly)

2. High Maintenance (Special Shampoos, No Oils)

The adhesive weakens when exposed to:
Sulfates
Silicones
Heavy oils (e.g., coconut, argan)

Example: A client who used oily scalp treatments reported 50% faster slippage compared to those who followed aftercare guidelines.

3. Not Ideal for Very Thin/Fine Hair

Because the adhesive needs a strong anchor, those with fine hair (< 100 strands per square inch) may experience:

Slippage (tabs detaching prematurely)

Visibility (tabs showing through sparse hair)

Hair Density Recommendations:

Hair TypeRecommended Extension Method
Thin/FineClip-ins, Halo extensions
Medium DensityTape-ins, Micro-links
Thick/CoarseTape-ins, Sew-ins, Fusion

4. Cost Over Time (300–300–800 Every 2 Months)

While initial installation is cheaper than fusion, re-taping every 6–8 weeks adds up.

Estimated 6-Month Cost:

Extension TypeInitial CostMaintenance Cost (6 Months)Total
Tape-Ins$400$600 (3 re-tapes)$1,000
Clip-Ins$200$0$200
Fusion Bonds$1,200$300 (1 touch-up)$1,500

5. Not Swim/Sweat-Friendly

Chlorine, saltwater, and excessive sweat break down adhesive, leading to:

Slippage (extensions loosening after swimming)

Tangling (if adhesive weakens but doesn’t fully detach)

Who Should Get Tape-In Extensions? (Ideal Candidates)

Medium to thick hair (holds adhesive better)
Want long-term length/volume without daily removal
Can commit to salon visits every 6–8 weeks
Prefer a natural look over clip-in convenience

Celebrity Example: Hailey Bieber uses tape-ins for effortless, lived-in volume between salon visits.

Who Should Avoid Tape-Ins?

Very fine/thin hair (consider clip-ins or halo extensions)
Oily scalp types (adhesive breaks down faster)
Frequent swimmers/athletes (chlorine/sweat damages adhesive)
Budget-conscious users (clip-ins are cheaper long-term)

Final Verdict: Are Tape-Ins Right for You?

Choose Tape-Ins If You…

✔ Want a natural, long-lasting solution
✔ Have medium to thick hair
✔ Can invest in professional maintenance

Skip Tape-Ins If You…

✖ Have fine or thinning hair
✖ Need daily removal (e.g., for workouts)
✖ Prefer a low-maintenance, budget-friendly option

Next Steps

Consult a stylist for a hair density check.

Patch-test adhesive if you have sensitive skin.

Compare brands (e.g., Bellami, Luxy, Great Lengths).

Still unsure? Try clip-ins first to test if extensions suit your lifestyle before committing to tape-ins!

Premium Tape-In Hair Extensions Supplier – High Quality & Competitive Prices

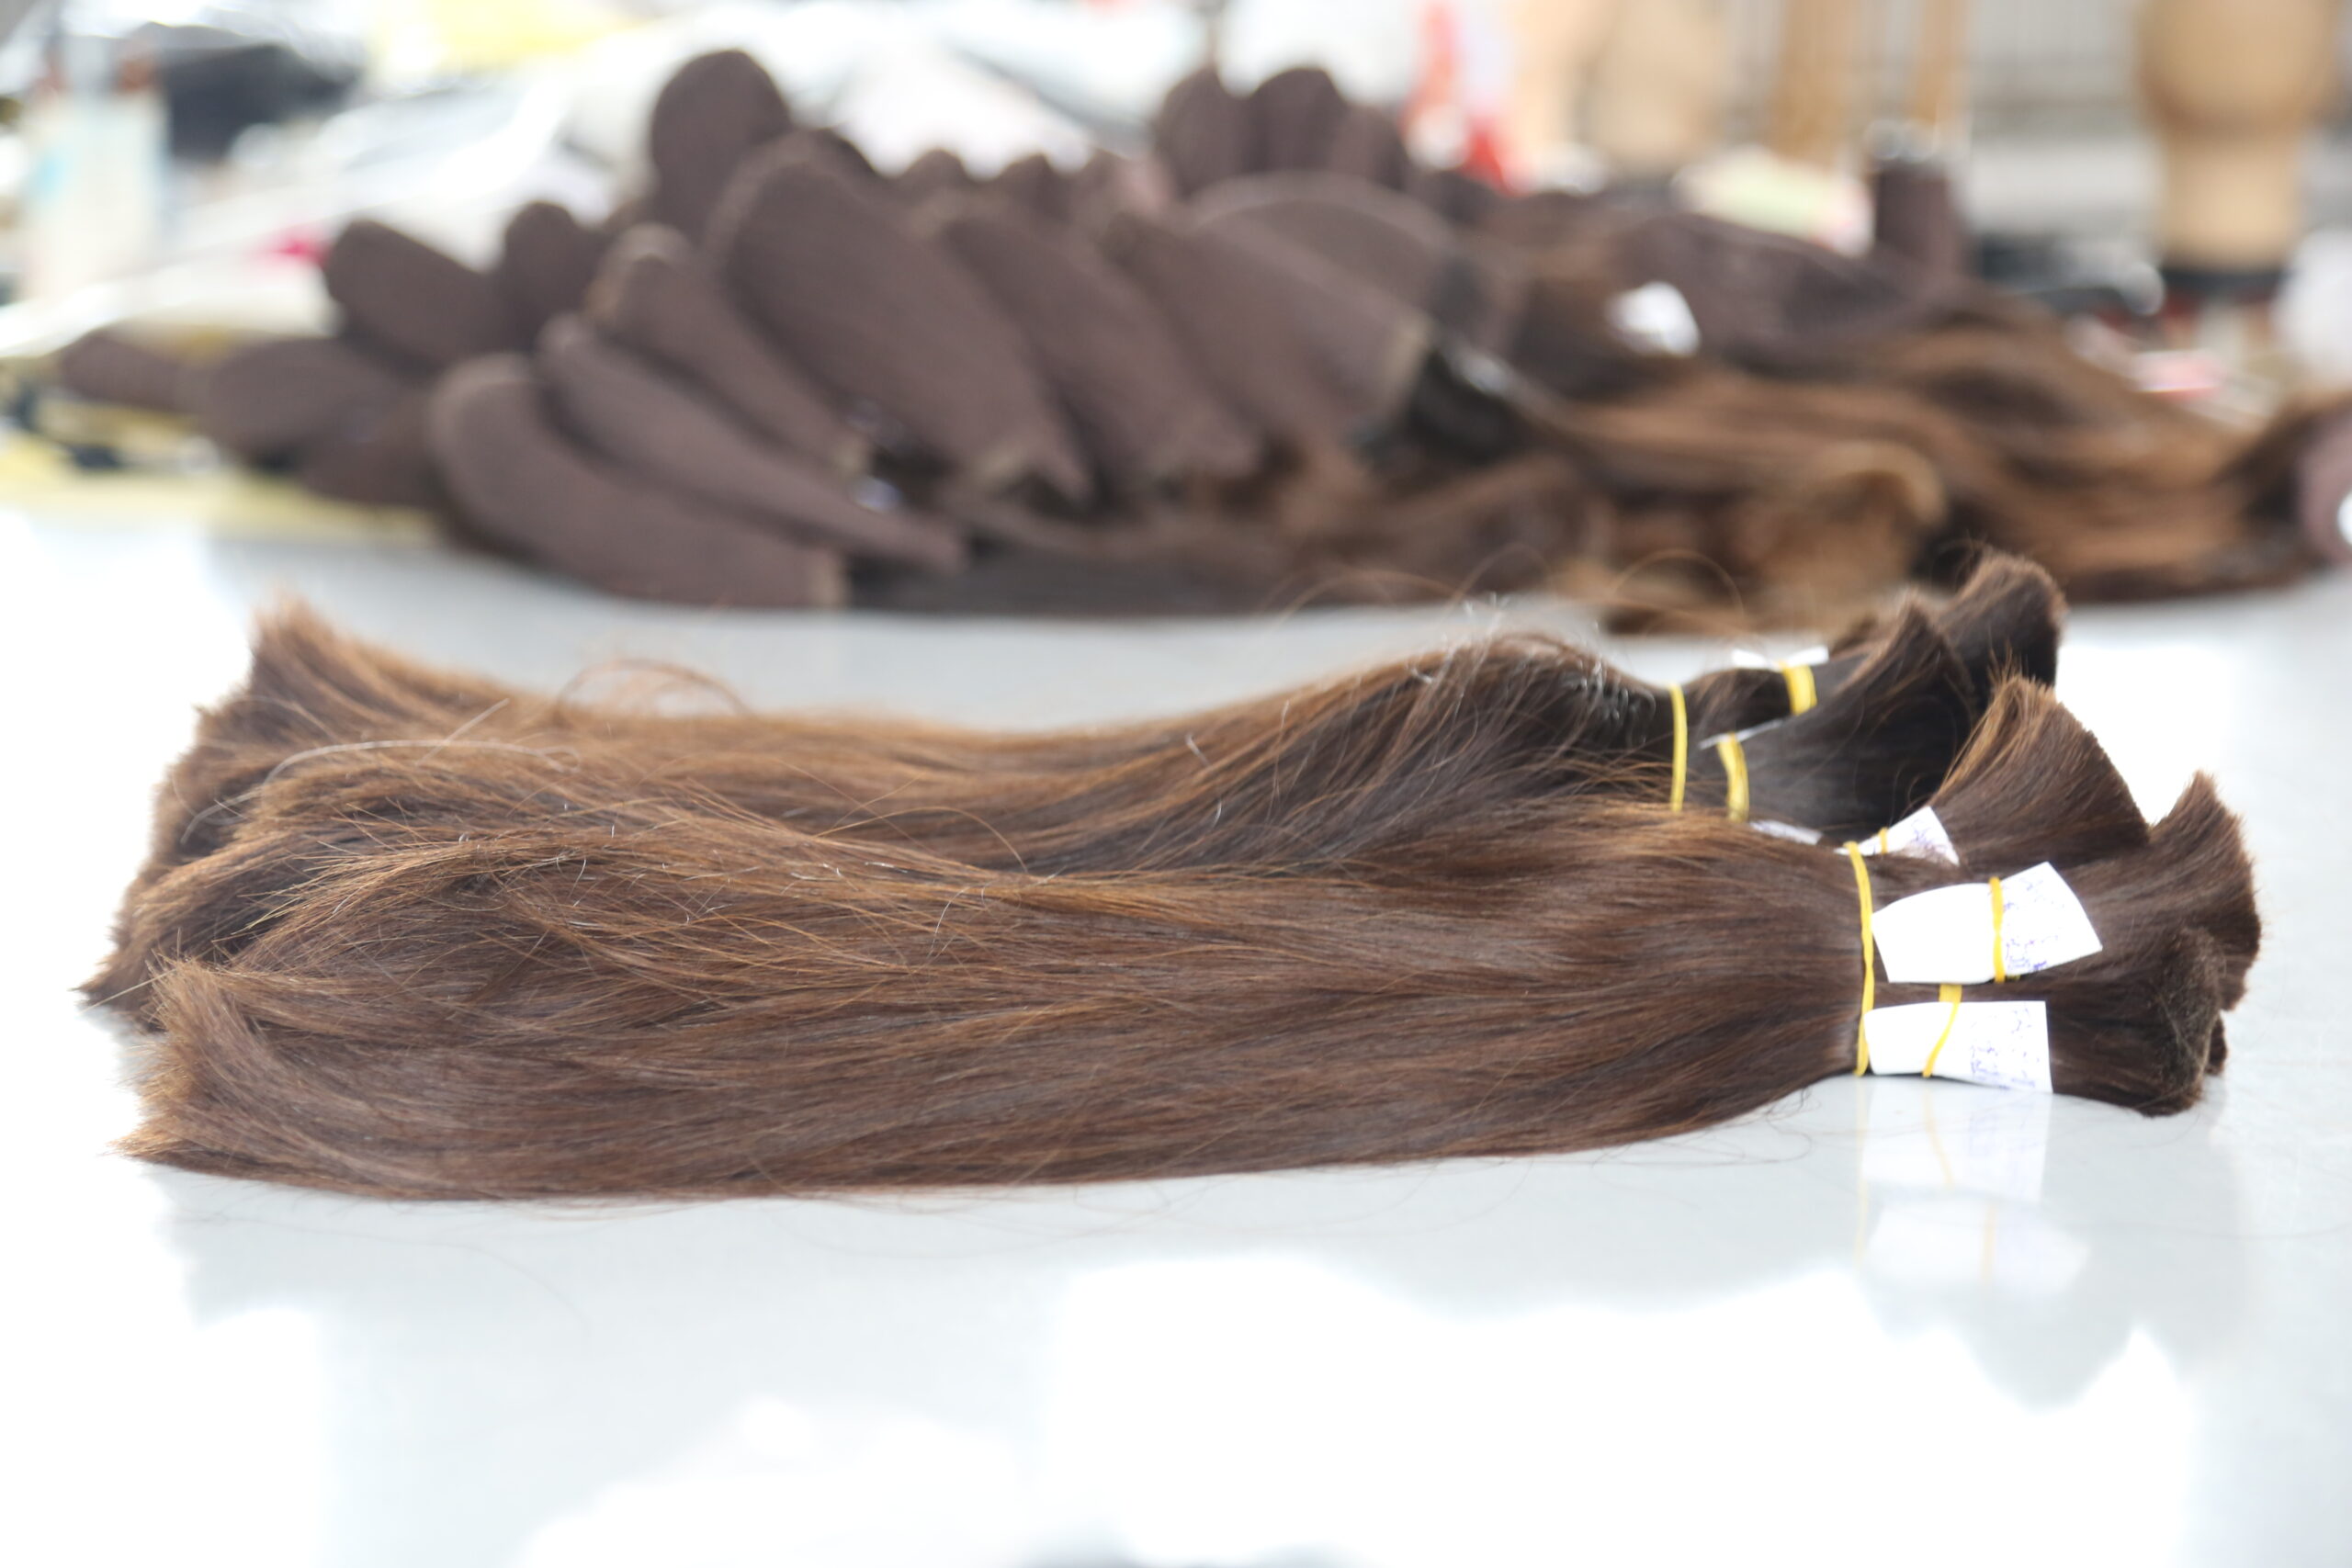
Looking for a trusted tape-in hair extensions supplier? Choose us! As a leading hair extensions manufacturer in China, we specialize in high-quality, seamless tape-in extensions that blend naturally and last longer. Our products are crafted with 100% remy human hair, secure medical-grade adhesive, and customizable lengths/colors to meet your market needs. Enjoy competitive factory-direct pricing, low MOQs, and reliable OEM/ODM services. Partner with us to boost your beauty business with premium extensions your customers will love!
Why Choose Us?
100% Remy Human Hair – Soft, tangle-free, and durable
Strong & Safe Adhesive – No slippage, gentle on natural hair
Customization Options – Lengths (14-24 inches), colors, textures
Competitive Pricing – Factory-direct rates for higher profits
Reliable Supply – Fast production & shipping worldwide

Contact us to request samples or discuss your business needs!

How to Buy a Wig for the First Time: A Beginner’s Guide

Wigs have become a versatile and essential accessory for countless women worldwide. Whether for fashion, medical reasons like hair loss from alopecia or chemotherapy, or simply the convenience of switching up your look instantly, wigs offer endless possibilities. They allow you to experiment with different lengths, colors, and styles without committing to permanent changes, making them a favorite among beauty enthusiasts and those seeking practical solutions alike.

If you’re buying a wig for the first time, it’s normal to feel a little overwhelmed. With so many options—human hair vs. synthetic, lace front vs. basic cap, short vs. long—where do you even begin? You might worry about choosing the wrong style, struggling with fit, or making it look natural. But don’t stress! This guide is designed to walk you through every step, from understanding wig types to measuring your head, styling tips, and avoiding common beginner mistakes.

By the end of this guide, you’ll feel confident in selecting the perfect wig for your needs, budget, and lifestyle. Whether you’re looking for a glamorous transformation, a medical hair solution, or just a fun change, we’ve got you covered. Let’s dive in and find your ideal match!

Types of Wigs: Understanding Your Options

Choosing the right wig starts with understanding the different types available. Wigs vary in material, construction, and styling versatility, so selecting the best option depends on your budget, lifestyle, and desired look. Below, we break down the main categories: human hair wigs, synthetic wigs, heat-friendly synthetics, and different cap constructions (lace front, full lace, and basic cap).

1. Human Hair Wigs (Most Natural, Customizable, High Maintenance)

Why Choose Human Hair?

Human hair wigs are the gold standard for a natural appearance and styling flexibility. Made from 100% real hair, they mimic the look, movement, and texture of natural hair, making them nearly undetectable when properly worn.

Key Benefits:

✔ Most realistic – Blends seamlessly with your natural hairline.
✔ Fully customizable – Can be cut, colored, and heat-styled just like your own hair.
✔ Long-lasting – With proper care, they can last 1-3 years or more.
✔ Versatile styling – Works with curling irons, straighteners, and updos.

Drawbacks:

❌ Expensive – Typically range from 200to200to3,000+ depending on quality.
❌ High maintenance – Requires regular washing, conditioning, and styling.
❌ Fragile to heat/chemicals – Overprocessing can damage the hair.

Best For:

Those who want the most natural look.

People willing to invest in long-term wear.

Anyone who enjoys styling versatility.

2. Synthetic Wigs (Affordable, Pre-Styled, Less Natural Movement)

Why Choose Synthetic?

Synthetic wigs are budget-friendly, low-maintenance, and come pre-styled, making them ideal for beginners or those who want a hassle-free option.

Key Benefits:

✔ Affordable – Prices range from 30to30to150.
✔ Ready-to-wear – Holds its style without daily restyling.
✔ Low maintenance – Doesn’t require frequent washing.
✔ Great for occasional use – Perfect for costumes, travel, or temporary wear.

Drawbacks:

❌ Less natural movement – Can look shiny or stiff.
❌ Limited styling – Most can’t handle heat tools (unless labeled “heat-friendly”).
❌ Shorter lifespan – Lasts 4-6 months with regular wear.

Best For:

First-time wig buyers.

Those on a budget.

People who prefer easy, no-fuss styling.

3. Heat-Friendly Synthetic Wigs (More Styling Flexibility)

Why Choose Heat-Friendly Synthetic?

These wigs offer a middle ground between standard synthetic and human hair—more affordable than human hair but with some styling freedom.

Key Benefits:

✔ Can be heat-styled (up to a certain temperature, usually 300-350°F).
✔ More natural movement than regular synthetic wigs.
✔ More affordable than human hair (typically 80−80−250).

Drawbacks:

❌ Still not as natural as human hair.
❌ Heat damage risk – Excessive styling can melt fibers.
❌ Lifespan shorter than human hair (around 6-12 months).

Best For:

Those who want some styling options without the high cost of human hair.

Wig wearers who like to switch up their look occasionally.

4. Wig Cap Constructions: Lace Front vs. Full Lace vs. Basic Cap

The wig cap determines comfort, breathability, and realism. Here’s a breakdown:

A. Lace Front Wigs

Features: A sheer lace panel at the front for a natural hairline; the rest is a wefted or machine-made cap.

Pros: More affordable than full lace, realistic at the front.

Cons: Less breathable at the back.

Best For: Everyday wear, those who want a natural hairline without the high cost of full lace.

B. Full Lace Wigs

Features: Entire cap is made of lace, allowing versatile parting & updos.

Pros: Most realistic, lightweight, breathable.

Cons: Expensive, delicate, requires adhesive for security.

Best For: Those who want maximum realism & styling freedom.

C. Basic Cap (Standard Wefted) Wigs

Features: Constructed with wefts sewn onto a cap; no lace.

Pros: Most affordable, durable.

Cons: Less natural hairline, can feel heavier.

Best For: Beginners, budget shoppers, or those who prioritize comfort over ultra-realism.

Which Wig Type is Right for You?

Want the most natural look? → Human hair + lace front/full lace.

Need budget-friendly & easy care? → Synthetic or heat-friendly synthetic.

Desire styling flexibility without high cost? → Heat-friendly synthetic + lace front.

Understanding these options will help you make an informed decision for your first wig purchase.

Choosing the Right Wig for Your Needs

Selecting the perfect wig depends on four key factors: purpose, budget, style, and color matching.

Purpose

Everyday wear? Opt for durable, breathable wigs like lace front human hair or heat-friendly synthetics.

Special occasions? Glamorous long, wavy, or curly styles add instant drama.

Medical hair loss? Prioritize soft, lightweight caps (monofilament or full lace) for comfort.

Budget

Synthetic wigs: 30–30–150 (great for beginners).

Human hair wigs: 200–200–3,000+ (long-term investment).

Style & Length

Short (pixie, bob): Low-maintenance, chic.

Medium/Long: Versatile for styling (straight, wavy, curly).

Color Matching

Cool skin tones? Ash blondes, cool browns.

Warm skin tones? Golden blondes, rich chocolates.

Undertone test: Check your veins (blue = cool, green = warm).

Pro Tip: Bring photos of your desired look when shopping!

How to Measure Your Head for a Perfect Wig Fit

A well-fitted wig stays secure and looks natural. Follow these steps:

Step-by-Step Measuring Guide

Circumference: Wrap a soft tape measure around your hairline (forehead → behind ears → nape).

Front to Nape: Measure from hairline center to the base of your skull.

Ear to Ear:

Across forehead: From ear top, over hairline.

Over crown: From ear, over head’s widest part.

Wig Cap Sizes

Petite (21.5″ circumference): Fits teens/small heads.

Average (22.5″): Most common; adjustable straps often accommodate 21.5–23.5″.

Large (23.5″+) For fuller hair or larger heads.

Security Tips

Use adjustable straps inside the cap for a snug fit.

Wig grips/glue prevent slipping, especially for active wear.

Pro Tip: If between sizes, size up—you can always tighten straps!

5. Where to Buy a Wig: Online vs. In-Store Guide

Choosing where to buy your wig is just as important as selecting the right style. Here’s a breakdown of the best options, trusted sellers, and red flags to avoid.

Buying Online: Pros & Cons

Pros:

More options – Access to thousands of styles, colors, and cap constructions.

Competitive prices – Often cheaper than physical stores due to lower overhead costs.

Convenience – Shop from home, read reviews, and compare brands easily.

Recommended Online Retailer: Alove Hair – Known for high-quality human hair wigs, lace fronts, and great customer service.

Cons:

Can’t try before buying – Color/texture may differ from photos.

Shipping delays/returns – May take time to exchange if the fit isn’t right.

Best Places to Buy Wigs

Online:

Alove Hair (Premium human hair wigs)

Amazon (Budget-friendly synthetics, check seller ratings)

Wig-specific retailers (e.g., Elevate Styles, UNice, Mayvenn)

In-Store:

Beauty supply stores (e.g., Sally Beauty)

Specialty wig boutiques (Best for custom fittings)

Salons (Higher-end human hair wigs with professional help)

Red Flags to Avoid

Fake reviews – Check for repetitive phrasing or unverified purchases.
“Too good to be true” prices – Extremely cheap human hair wigs are often synthetic or low-quality.
No return policy – Reputable sellers offer at least a 7-30 day return window.
Stock images only – Legit sellers show real customer photos/videos.

Pro Tip: If buying online, order a color ring (sample swatch) first to check hair shades!

Trying On & Testing a Wig: How to Ensure the Perfect Fit

Buying a wig is an investment, so if you have the chance to try it on before purchasing—whether in-store or at home—here’s how to assess comfort, realism, and fit like a pro.

1. Checking for Comfort

A good wig should feel secure but not tight or itchy. Test for:
✔ Scalp Pressure – No excessive tension (headaches = too small).
✔ Breathability – Lace fronts/monofilament caps allow airflow.
✔ Ear Placement – Wig tabs shouldn’t fold or dig behind ears.
✔ Weight – Human hair wigs are heavier; synthetics feel lighter.

Fix It: If too tight, loosen adjustable straps or size up. For itchiness, wear a wig cap underneath.

2. Assessing Realism (Key for Undetectable Wear)

Hairline Test:

Lace Fronts: Hold the wig up to light—the lace should be nearly invisible with knots bleached (tiny dark dots = less realistic).

Baby Hairs: Slightly uneven, wispy strands at the forehead mimic natural growth.

Parting Space: For synthetic wigs, the part should not show obvious wefts or a “grid” pattern.

Movement Test:

Human Hair: Should flow/sway naturally when you shake your head.

Synthetic: Stiffer movement is normal, but shouldn’t look “plastic-y.”

Pro Tip: Use concealer or powder on the lace to blend with your skin tone.

3. Adjusting for a Snug Fit

Even with correct measurements, minor tweaks ensure security:

Adjust Straps – Most wigs have 2-3 hooks at the nape. Tighten until snug (1 finger should fit between wig and scalp).

Wig Grips/Adhesives – For active wear, use:

Velvet wig bands (no glue, reusable).

Lace glue/tape (for lace fronts; lasts 1-2 weeks).

Customize the Cap – If gaps remain:

Sew in elastic bands at the temples.

Add silicone padding for extra grip.

Warning: Avoid over-tightening—this can cause traction alopecia!

Final Checks Before Buying

✅ Mirror Test: Walk under different lighting (natural, indoor).
✅ Movement Test: Tilt head forward/backward—wig shouldn’t shift.
✅ Style Test: Try a high ponytail (if applicable)—does the cap show?

Remember: If buying online, check return policies in case the wig doesn’t meet expectations.

Wig Care Basics for Beginners: Keep Your Wig Looking New

Proper care extends your wig’s lifespan and keeps it looking fresh. Here’s how to maintain synthetic and human hair wigs with easy, beginner-friendly steps.

1. Synthetic Wig Care (Low Heat, Special Shampoos)

✔ Washing:

Use cold water and synthetic wig shampoo (avoid regular shampoos—they damage fibers).

Soak for 5 mins, gently swirl, then rinse. Never rub or twist.

✔ Drying & Styling:

Air-dry on a wig stand (never blow-dry).

Use low-heat tools (only if labeled heat-friendly).

✔ Detangling:

Wide-tooth comb or fingers only—start from ends to roots.

Pro Tip: Spray synthetic wig conditioner to reduce frizz and static.

2. Human Hair Wig Care (Washing, Conditioning, Heat Protection)

✔ Washing:

Use sulfate-free shampoo & conditioner every 7-14 wears.

Soak in lukewarm water, gently cleanse scalp area, then rinse.

✔ Heat Styling:

Always apply heat protectant before using hot tools.

Keep flat irons/curling wands below 350°F to prevent damage.

✔ Deep Conditioning:

Use a hydrating hair mask monthly to prevent dryness.

Warning: Avoid sleeping or showering in your wig—it shortens its life!

3. Storage Tips for All Wigs

✔ Short-Term: Place on a wig stand to maintain shape.
✔ Long-Term: Store in a breathable hair net + satin bag (prevents dust/tangling).
✔ Traveling: Use a hard wig case to avoid crushing.

Never:

Hang wigs by the straps (stretches the cap).

Store near heat/humidity (causes frizz/mold).

Pro Tip: For curly wigs, use curl spray and finger-coil to refresh definition.

Common First-Time Wig Mistakes to Avoid

Buying your first wig is exciting, but beginners often make these key mistakes. Here’s how to avoid them for a flawless wig-wearing experience.

1. Buying the Wrong Cap Size

The Mistake:
Getting a wig that’s too tight (causes headaches) or too loose (slips constantly).

How to Avoid It:
✔ Measure your head correctly (circumference, front-to-nape, ear-to-ear).
✔ Check size charts—most brands list petite (21.5″), average (22.5″), or large (23.5+”).
✔ If between sizes, size up—you can tighten straps.

Pro Tip: Look for wigs with adjustable straps & ear tabs for a customizable fit.

2. Choosing an Unnatural Color or Style

The Mistake:
Picking a wig color that clashes with your skin tone or a style that doesn’t suit your face shape.

How to Avoid It:
✔ Match your skin’s undertone:

Cool tones? Try ash blondes, cool browns.

Warm tones? Go for golden blondes, caramel highlights.
✔ Start with a natural-looking style (e.g., soft layers, side-swept bangs).
✔ If experimenting, order a color ring/swatch first.

Pro Tip: For a seamless blend, choose a lace front wig with baby hairs.

3. Improper Maintenance Leading to Damage

The Mistake:
Washing with harsh products, skipping heat protection, or storing incorrectly—leading to frizz, shedding, or a shortened lifespan.

How to Avoid It:
✔ For synthetic wigs:

Use synthetic-safe shampoo + air-dry only.

Never apply high heat (unless labeled heat-friendly).
✔ For human hair wigs:

Wash with sulfate-free shampoo + deep condition monthly.

Always use heat protectant before styling.
✔ Storage: Keep on a wig stand or in a satin bag—never crumpled in a drawer.

Pro Tip: Detangle gently with a wide-tooth comb, starting from the ends.

Bonus: Other Common Mistakes

Not securing properly: Use wig grips or adhesive if active.

Overwashing: Human hair wigs need washing every 7-14 wears (not daily!).

Ignoring the return policy: Always check in case the wig doesn’t work out.

By avoiding these pitfalls, your first wig will look natural, stay secure, and last longer!

Frequently Asked Questions (FAQ) About Wigs

Here are answers to the most common wig-related questions, whether you’re a first-time buyer or a seasoned wearer.

1. How Do I Make My Wig Look Natural?

✔ Choose the right hairline: Lace front or full lace wigs with bleached knots mimic scalp realism.
✔ Customize the part: Use concealer or powder to blend the parting with your skin tone.
✔ Trim baby hairs: Slightly uneven, wispy edges create a natural hairline.
✔ Style appropriately: Avoid overly stiff or perfect styles—soft layers and slight frizz help.

Pro Tip: Pluck a few hairs from the parting for a more realistic density.

2. Can I Sleep or Shower in My Wig?

Not recommended!

Sleeping in a wig causes friction, leading to tangling, matting, or cap stretching.

Showering in a wig (especially human hair) weakens the fibers and loosens adhesives.
Exception: If necessary, wear a satin bonnet to protect the wig while sleeping.

3. How Often Should I Replace My Wig?

Synthetic wigs: 4–6 months with regular wear (fibers degrade faster).

Human hair wigs: 1–3 years if well-maintained (depends on washing frequency).
Signs you need a new wig:

Excessive shedding or bald spots.

Tangling that won’t smooth out.

Faded color or frizz beyond repair.

4. How Do I Keep My Wig from Slipping?

✔ Wig grips/bands: Velvet headbands provide friction.
✔ Adhesives: Lace glue or tape (for lace fronts).
✔ Adjust straps: Tighten hooks at the nape for a snug fit.
✔ Silicone-lined caps: Help grip natural hair underneath.

5. Can I Dye or Bleach My Wig?

Human hair wigs: Yes, but use gentle dye and avoid overprocessing.

Synthetic wigs: No—chemicals melt the fibers. Only heat-friendly synthetics can be temporarily tinted with fabric dye.
Warning: Always strand-test first!

6. How Often Should I Wash My Wig?

Synthetic: Every 10–15 wears (or when dull/dirty).

Human hair: Every 7–14 wears (or after heavy sweating/product buildup).
Overwashing strips moisture, leading to dryness!

7. Can I Work Out in My Wig?

✅ Yes, but take precautions:

Secure with a wig grip + headband.

Opt for lightweight, breathable caps (monofilament or lace front).

Wash sooner if sweating heavily to prevent odor/bacteria.

8. What’s the Best Wig for Hot Weather?

Lace front or full lace wigs (most breathable).

Short/medium styles (less heat trapped).

Human hair (sweat won’t damage it like synthetics).

Pro Tip: Spritz with cooling scalp spray to stay fresh.

9. How Do I Travel with My Wig?

✔ Use a hard wig case or satin travel bag.
✔ Pack on top of luggage (never crushed under items).
✔ Bring a portable wig stand to air it out at your destination.

10. Why Is My Wig Tangling So Much?

Synthetic wigs: Static or friction (use anti-static spray).

Human hair wigs: Lack of moisture (apply leave-in conditioner).

Solution: Detangle gently with fingers or a wide-tooth comb, starting from the ends.

Bonus Tip: Sleep on a satin pillowcase to reduce friction.

When in doubt, consult a wig specialist or stylist—especially for cuts or complex styling. With proper care, your wig can stay beautiful for its full lifespan!

Conclusion

Choosing your first wig doesn’t have to be overwhelming. By following this guide—from measuring your head and selecting the right type to avoiding common mistakes—you’re now equipped to make a confident choice. Remember: the best wig complements your lifestyle, budget, and personal style, whether you’re seeking glamorous lengths, medical hair solutions, or a fun temporary change.

Don’t be afraid to experiment! Try different colors, textures, and cap constructions until you find your ideal match. Ready to start shopping? Explore trusted retailers like Alove Hair for premium human hair wigs or local salons for personalized fittings. Your journey to flawless, natural-looking hair begins now—rock your wig with confidence!

20-inch-hair-extensions

20 Inch Hair Extensions Before and After

Introduction

This article will provide a detailed analysis of the changes before and after using 20-inch hair extensions, how to distinguish between high-quality and low-quality extensions, and how to find reliable suppliers from China.

Part 1: The Amazing Transformation Before and After 20-Inch Hair Extensions

1. Before Getting Extensions

Before deciding on extensions, many people face the following hair issues:

  • Insufficient length: Growing hair naturally to 20 inches (about 50 cm) takes years, while extensions provide instant length.
  • Thin hair: Sparse hair or a receding hairline can make hairstyles appear flat.
  • Limited styling options: Short or medium-length hair makes it difficult to try intricate braids, voluminous waves, or high ponytails.

2. The Stunning After-Effects of Extensions

20-inch extensions deliver immediate results:

  • Increased length and volume: Hair instantly reaches waist-length or longer, creating a more elegant look.
  • More styling versatility: Easy to experiment with various long hairstyles, such as curls, straight hair, or hime cuts.
  • Boost in confidence: Thick, long hair often enhances femininity and overall charm.

Real-Life Examples: Before-and-After Experiences

  • Sunny (25 years old, originally shoulder-length hair):
    • Before extensions: Hair tended to cling to the scalp, making ponytails look thin.
    • After extensions: Hair became fuller and more layered, easily achieving a “high crown” effect for a voluminous look.
  • Cassie (30 years old, fine hair texture):
    • Before extensions: Hair tangled easily and lacked shine.
    • After extensions: High-quality extensions provided smoothness and manageability, even better than her natural hair.

20-inch-hair-extensions


Part 2: How to Choose 20-Inch Hair Extensions? High-Quality vs. Low-Quality Comparison

Prices for 20-inch extensions range from tens to thousands of dollars, with significant quality differences. Here’s how to distinguish between high-quality and low-quality extensions:

1. Hair Source

  • High-quality: 100% human hair (Remy Hair), with cuticles aligned to prevent tangling.
  • Low-quality: Mixed with synthetic fibers or non-Remy human hair, prone to frizz and tangling, with a short lifespan.

2. Texture and Shine

  • High-quality: Soft to the touch, with natural shine, resembling healthy real hair.
  • Low-quality: Feels rough, may appear overly glossy (like synthetic hair) or dull.

3. Elasticity and Durability

  • High-quality: Stretches well without breaking.
  • Low-quality: Prone to breakage and excessive shedding when combed.

4. Compatibility with Application Methods

  • High-quality: Suitable for various attachment methods (e.g., micro rings, glue-in, braiding).
  • Low-quality: May not withstand heat styling or frequent changes in application techniques.

5. Lifespan

  • High-quality: With proper care, lasts 6 months to 1 year.
  • Low-quality: Becomes frizzy or sheds within 1–3 months.

20-inch-hair-extensions


Part 3: How to Find Reliable 20-Inch Hair Extension Suppliers in China?

China is the world’s largest producer of hair extensions, with major manufacturing hubs in Xuchang (Henan) and Qingdao (Shandong). To find trustworthy suppliers, consider the following:

1. Professional B2B Platforms

  • Alibaba: Search for “20 inch Remy hair extensions” and filter for “Gold Supplier” or “Verified Supplier.”
  • Global Sources: Ideal for bulk purchases; contact factories directly for samples.
  • Made-in-China: Suitable for small to medium wholesalers, allowing comparisons between suppliers.
  • Google: Search for “20 inch Remy hair extensions supplier/manufacturer/factory.”

2. How to Identify Reliable Suppliers?

  • Check factory credentials: Do they have ISO certification? An official website and social media presence?
  • Request samples: Reputable suppliers usually provide samples (may require a fee).
  • Shipping speed: Fast delivery indicates strong inventory management, reflecting supplier reliability.

3. Common Pitfalls to Avoid

  • False claims: Some sellers advertise “100% human hair” but mix in synthetic fibers. Use a burn test (real hair turns to ash, synthetic melts into hard lumps).
  • Too-good-to-be-true prices: Extremely cheap extensions (e.g., $20 per bundle) are likely low-quality with a short lifespan.
  • Underweight bundles: Some suppliers reduce hair weight per bundle, resulting in insufficient volume.

4. Recommended High-Quality Chinese Suppliers

  • Rebecca: A globally recognized brand with guaranteed quality, though prices are higher.
  • Ares Hair: Specializes in exports to Europe and the U.S., offering custom colors and lengths.
  • Alove Hair: A well-known manufacturer of premium human hair extensions.
  • Organic Hair: A reputable hair extension factory in China.

20-inch-hair-extensions


Part 4: Maintenance Tips for 20-Inch Hair Extensions

Even high-quality extensions require proper care to extend their lifespan:

  1. Use sulfate-free shampoo: Prevents cuticle damage.
  2. Avoid excessive heat styling: Keep curling irons below 180°C (356°F).
  3. Deep-condition regularly: Apply hair masks or oils to maintain softness.
  4. Braid hair before bed: Prevents tangling.

hair-extensions


Conclusion

20-inch hair extensions can create a dramatic transformation, but choosing high-quality products is essential. By comparing hair sources, texture, and supplier credibility, you can avoid common pitfalls. China’s hair extension supply chain is well-established, but careful selection is key. We hope this guide helps you find the perfect 20-inch extensions to achieve your dream hairstyle!

20-inch-hair-extensions

men-topper

How Much Do Men’s Hair Systems Cost? A Complete Guide for International Wholesale Buyers

As a leading manufacturer and exporter of men’s hair systems, we specialize in providing high-quality, cost-effective, and customizable solutions for wholesale buyers worldwide. We understand that different businesses have unique needs, whether you are a distributor, salon owner, or e-commerce retailer. That’s why we offer competitive pricing, consistent product quality, and efficient global shipping to help you scale your business successfully.

Wholesale Pricing Structure for Men’s Hair Systems

Pricing varies based on hair quality, base material, order quantity, and customization level. Below is an estimated wholesale price range based on bulk orders:

Product TypeRetail Price (USD)Wholesale Price (MOQ 10 pcs)Wholesale Price (MOQ 50 pcs)Wholesale Price (MOQ 100+ pcs)
Synthetic Hair System$150 – $400$50 – $120$30 – $100$25 – $90
Human Hair (Standard)$300 – $800$100 – $250$80 – $200$70 – $180
Human Hair (Premium)$800 – $1,500$300 – $500$250 – $450$200 – $400
Custom Hair Systems$1,000 – $3,000$500 – $1,200$400 – $1,000$350 – $900

Note: Prices depend on hair length, density, and additional customizations (e.g., bleached knots, injected hair, PU thickness).

Key Cost Factors for Exported Hair Systems

Hair Quality & Material Costs

The quality of hair used in men’s hair systems plays a crucial role in determining the overall cost, durability, and appearance. As a manufacturer, we offer synthetic, Remy human hair, and virgin human hair options to cater to different market segments and budgets.

1. Synthetic Hair: Affordable & Short-Term Use

Synthetic hair systems are made from high-quality heat-resistant fibers, offering a budget-friendly alternative to human hair. These systems are:

Cost-effective ($20 – $100 per unit wholesale)

Low maintenance (pre-styled and retains shape)

Ideal for short-term use (2–6 months lifespan)

However, synthetic hair lacks the natural movement and feel of real human hair and is less durable compared to human hair systems.

2. Remy Human Hair: Natural Look with Longevity

Remy hair is cuticle-aligned, meaning all hair strands face the same direction, reducing tangling and increasing lifespan. It is:

Mid-range in pricing ($100 – $400 per unit wholesale)

Soft, smooth, and natural-looking

Long-lasting (6–12 months lifespan with proper care)

Remy hair systems are popular among salons and high-end retailers looking for a balance between cost and quality.

3. Virgin Human Hair: Premium & Unprocessed

Virgin human hair is the highest-quality option, as it has never been chemically treated or processed. It is:

The most expensive option ($250 – $800 per unit wholesale)

Extremely durable (12–24 months lifespan)

Ideal for premium clientele seeking natural, undetectable results

Virgin hair retains its natural shine, softness, and strength, making it the best choice for luxury hair systems.

Detailed Price Breakdown by Hair Length and Density

The length and density of the hair system significantly impact pricing. Longer and denser hair requires more raw materials and labor, increasing production costs. Below is a detailed wholesale price breakdown based on hair type, length, and density.

1. Pricing by Hair Length
Hair Type8” – 10”12” – 14”16” – 18”20” – 22”24” – 26”
Synthetic Hair$20 – $50$30 – $70$40 – $90$50 – $120$60 – $150
Non-Remy Human Hair$60 – $100$80 – $140$100 – $180$120 – $220$150 – $280
Remy Human Hair$100 – $180$130 – $250$160 – $300$200 – $400$250 – $500
Virgin Human Hair$250 – $350$300 – $500$400 – $700$500 – $900$600 – $1,200

Note:

Longer hair (18”+) is more expensive due to scarcity and higher processing costs.

Virgin hair is the most expensive because it is unprocessed and maintains its original quality.

2. Pricing by Hair Density

Hair density refers to how thick or full the hair system appears. Higher density requires more hair strands, increasing production costs.

Hair DensityDescriptionSynthetic HairNon-Remy Human HairRemy Human HairVirgin Human Hair
Light (80% – 100%)Thin, natural look+$0+$0+$0+$0
Medium (120% – 130%)Standard density+$5 – $10+$10 – $20+$20 – $40+$30 – $50
Heavy (150% – 180%)Thick, voluminous+$10 – $20+$20 – $50+$50 – $100+$80 – $150
Extra Heavy (200%+)Very dense, luxury look+$20 – $40+$50 – $100+$100 – $200+$150 – $300

Note:

Most men’s hair systems are 100% – 130% density for a natural appearance.

150%+ density is often custom-made for clients who want extra fullness.

3. Additional Customization Costs

If buyers require specific customizations, pricing can be adjusted accordingly:

CustomizationExtra Cost
Bleached Knots (Undetectable Hairline)+$10 – $30
Injected Hair (No Knots, Skin Base)+$20 – $50
Highlight/Two-Tone Color+$20 – $60
Grey Hair Mix (Human or Synthetic Grey)+$15 – $50
Silk Top (Realistic Scalp)+$30 – $80

How to Choose the Right Hair Length & Density?

For stock hair systems, 10” – 14” length with 100% – 120% density is the most popular.

For premium customers, 16” – 20” Remy or Virgin Hair with 130% – 150% density offers a high-end look.

For high-volume wholesale buyers, we recommend ordering a mix of lengths and densities to match different customer preferences.

If you would like a custom quote based on your preferred hair specifications, please contact us!

Base Construction & Pricing Impact

The base material of a hair system significantly affects its comfort, durability, and realism, which in turn influences pricing. We offer three main types of bases: lace, skin (PU), and monofilament, each catering to different user needs.

1. Lace Base ($5 – $30/unit) – Lightweight & Natural Hairline

Lace bases are made from breathable mesh material, making them one of the most comfortable options. They provide:

Natural hairline: Lace blends seamlessly with the scalp.

High breathability: Ideal for hot climates or active users.

Lightweight feel: Comfortable for extended wear.

Pricing Factors:

Swiss Lace: Thinner, more natural, but less durable ($10 – $30/unit).

French Lace: Stronger and lasts longer ($5 – $20/unit).

Hybrid Lace (Lace + PU): Adds durability while maintaining a natural look ($15 – $35/unit).

2. Skin (PU) Base ($10 – $40/unit) – Realistic Scalp Look & Easy Maintenance

Skin (polyurethane or PU) bases mimic the scalp, creating an undetectable appearance. They are:

Highly realistic: Hair strands are injected or knotted for a seamless finish.

Easy to clean: Ideal for users who remove and reattach hairpieces frequently.

Available in different thicknesses: Ranges from ultra-thin (0.03mm) to thick PU (0.10mm+).

Pricing Factors:

Ultra-Thin Skin (0.03mm – 0.06mm): Most natural but fragile ($10 – $30/unit).

Medium-Thick Skin (0.08mm – 0.10mm): Balances realism and durability ($15 – $35/unit).

Thick Skin (0.12mm+): Long-lasting but slightly less natural ($20 – $40/unit).

3. Monofilament Base ($15 – $50/unit) – Durable for Long-Term Wearers

Monofilament bases use a strong, breathable mesh material, designed for users who prioritize longevity over ultra-realism. These bases are:

Durable: Lasts 6+ months, ideal for regular wearers.

Breathable: Provides better airflow than skin bases.

Great for high-density hairpieces: Can support 150%+ hair density.

Pricing Factors:

Single-Layer Monofilament: Lightweight, more breathable ($15 – $30/unit).

Double-Layer Monofilament: Stronger but slightly thicker ($20 – $40/unit).

Monofilament with PU Perimeter: Combines durability and easy attachment ($25 – $50/unit).

Which Base is Best for Wholesale Buyers?

For natural hairlines & breathability: Lace base.

For realistic scalp appearance & easy maintenance: Skin base.

For long-term durability & high-density styles: Monofilament base.

Customization & OEM/ODM Services

As a wholesale hair systems manufacturer, we offer flexible customization and branding solutions to help our partners stand out in the market. Whether you need private-label branding (OEM) or fully customized hair systems (ODM), we provide tailored solutions to meet your business needs.

Stock vs. Custom Hair Systems

We offer both ready-to-ship stock hair systems and fully customized options:

TypeAdvantagesWholesale Price RangeProduction Time
Stock Hair SystemsFast shipping, lower cost, best for quick sales.$50 – $300 per unit3 – 7 days
Semi-Custom SystemsModified stock designs (color, size, density).$100 – $500 per unit2 – 4 weeks
Fully Custom SystemsDesigned from scratch to match customer needs.$500 – $1,500 per unit4 – 8 weeks

Custom orders require additional labor and materials, making them more expensive than stock systems. However, they allow businesses to differentiate their products in competitive markets.

Private Label (OEM) – Build Your Brand

We help businesses create their own branded hair systems with custom packaging and labeling.

  1. Logo Printing – Add your brand logo on packaging and marketing materials.
  2. Custom Packaging – Premium boxes, silk bags, or eco-friendly options.
  3. Instruction Guides & Marketing Inserts – Enhance customer experience with branded materials.
  4. OEM is ideal for e-commerce stores, salons, and distributors looking to build a unique brand identity.
  5. ODM Customization – Unique Hairpiece Designs for Different Markets
  6. Our ODM services allow businesses to create customized hair systems based on market trends.
  7. Exclusive Base Designs – Custom lace, PU, or hybrid bases.
  8. Hair Type & Texture Customization – Tailored to different ethnicities (Asian, African, European markets).
  9. Special Color Matching – Unique blends to match customer preferences.

ODM is best for high-end distributors, retail chains, and brands wanting exclusive designs.

Logistics & Shipping Costs

We offer multiple shipping options to meet different budget and time requirements.

Air Freight – Fast but Expensive

  1. Cost: $5 – $20 per kg
  2. Delivery Time: 5 – 10 days
  3. Best For: Medium-sized wholesale orders (50 – 500 pieces)
  4. Shipping Methods: Commercial air cargo or express air freight

Air freight is ideal for urgent orders but can be costly for large shipments.

Sea Freight – Cost-Effective for Large Orders

  1. Cost: $1 – $5 per kg
  2. Delivery Time: 20 – 45 days
  3. Best For: Bulk shipments (500+ pieces)
  4. Shipping Methods: Full Container Load (FCL) or Less than Container Load (LCL)

Sea freight is the best option for cost savings but requires longer transit times.

Express Shipping (DHL, FedEx, UPS) – Small Bulk Orders

  1. Cost: $10 – $50 per shipment
  2. Delivery Time: 3 – 7 days
  3. Best For: Small orders (10 – 50 pieces) and sample shipments

Express shipping is recommended for sample orders or small-volume restocks.

Import Taxes & Customs Duties

Import taxes and duties vary by country, impacting the final cost for buyers.

Country/RegionImport Duty RateAdditional Notes
USA0% – 5%Low import taxes, popular for bulk imports.
European Union (EU)5% – 12%VAT may also apply.
United Kingdom (UK)5% – 10%Subject to post-Brexit import regulations.
Canada5% – 9%GST/HST may apply.
Australia5% – 10%Lower duties for small shipments.
Brazil20%+High import duties, additional taxes may apply.

Some buyers prefer FOB (Free on Board) pricing, where they handle their own shipping and customs clearance. Others opt for CIF (Cost, Insurance, and Freight) pricing, where we manage shipping and insurance.

International Market Trends & Demand

Top Markets for Men’s Hair Systems

USA & Canada – Strong demand for natural-looking systems, custom orders preferred.

Europe (Germany, UK, France, Italy) – High-quality lace-based systems are popular.

Australia & New Zealand – Customers prefer ultra-thin skin hairpieces.

Middle East – High demand for durable and breathable systems.

Japan & Korea – Lightweight, natural-looking systems with premium quality hair.

Pricing & Consumer Preferences by Region

RegionPreferred Hair TypeAverage Retail PriceCustomization Demand
USA & CanadaRemy Human Hair$400 – $1,500High
EuropeVirgin Human Hair$500 – $2,000Medium
Middle EastRemy & Synthetic Mix$200 – $800Medium
Japan & KoreaUltra-Thin PU Skin$600 – $2,500High
Africa & South AmericaSynthetic & Low-Cost$100 – $500Low

Profit Margins for Wholesale Buyers

Typical Profit Margins

CategoryWholesale CostRetail PriceProfit Margin
Synthetic Hair System$50$200300%
Standard Human Hair$150$600300%
Premium Custom System$400$1,500275%

Tip: Many successful distributors achieve 3X – 5X markup by offering additional services like styling, installation, and maintenance products.

Best Business Models for Wholesale Buyers

Choosing the right business model is essential for maximizing profit and efficiency when selling men’s hair systems. Here are the top three wholesale models to consider:

1. Dropshipping – No Inventory, Low Risk

  • Dropshipping allows retailers to sell hair systems without holding inventory. Orders are shipped directly from the manufacturer to the customer, eliminating storage costs.
  • No upfront inventory costs – Pay only when you make a sale.
  • Easy to scale – Expand product offerings without financial risk.
  • Ideal for e-commerce sellers (Amazon, Shopify, eBay, etc.).
  • Best for: Startups, online entrepreneurs, and businesses testing new markets.

2. Stock & Retail – Bulk Purchase, Higher Profit Margins

  • Buying in bulk and holding stock allows for faster order fulfillment and better pricing control.
  • Lower cost per unit – Wholesale discounts increase profit margins.
  • Faster shipping – Customers receive products quickly.
  • Works for both physical stores & online shops.
  • Best for: Established retailers, beauty supply stores, and online sellers with warehouse space.

3. Private Label (OEM) – Build Your Own Hair Brand

  • With OEM (Original Equipment Manufacturer) services, businesses can create branded hair systems with custom packaging.
  • Exclusive branding – Your logo, packaging, and marketing materials.
  • Higher customer loyalty – Unique products set you apart from competitors.
  • Great for premium & luxury markets.
  • Best for: Salon owners, influencers, and e-commerce brands looking to establish a unique identity.

Why Choose Us as Your Supplier?

As a leading manufacturer and exporter of men’s hair systems, we provide high-quality products, competitive pricing, and flexible business solutions to help our wholesale partners succeed. Here’s why we are the best choice for your business:

1. Factory-Direct Pricing – No Middlemen, Best Wholesale Rates

We manufacture hair systems in-house, allowing us to offer factory-direct pricing with no extra distributor fees. This means:

Lower costs compared to resellers or middlemen.

Higher profit margins for your business.

Custom bulk pricing available for large orders.

Whether you order 10 pieces or 1,000+ pieces, we guarantee cost-effective pricing tailored to your needs.

2. Strict Quality Control – 100% Inspection Before Shipping

We follow a strict quality control process to ensure every hair system meets high standards. Our quality assurance steps include:

Raw Material Inspection – Only the best hair is selected.

Hand-Tied & Ventilation Checks – Ensuring natural hair density.

Final Inspection Before Shipment – Each unit is examined for consistency.

This guarantees that our hair systems are long-lasting, realistic, and comfortable for end users.

3. Flexible MOQ (Minimum Order Quantity) – Scalable for Any Business

We understand that different businesses have different needs, so we offer flexible order quantities:

Low MOQ (10+ pieces) – Perfect for startups or new buyers.

Bulk Discounts (100+ pieces) – Ideal for distributors and retailers.

Large Volume Orders (1,000+ pieces) – Best rates for established brands.

No matter your business size, we have wholesale pricing structures that work for you!

4. Fast Global Shipping – Door-to-Door Delivery

We ship worldwide with trusted carriers like DHL, FedEx, and UPS, ensuring:

Fast delivery (3–7 days for express shipping).

Secure packaging to prevent damage during transit.

Flexible shipping options (air, sea, or express).

Whether you need sample shipments or bulk container orders, we provide efficient logistics solutions to meet your timeline.

5. Custom Orders & OEM Branding – Build Your Own Hair System Brand

Looking to create a unique, branded product? We offer:

OEM Services – Custom packaging, logo printing, and product labeling.

ODM Services – Fully customized hair systems tailored to your specifications.

Exclusive Designs – Special bases, hair textures, and color blends for different markets.

This allows you to sell premium, private-label hair systems under your own brand and stand out from competitors.

Partner with Us for Long-Term Success!

With over 40 years of experience in the hair system industry, we provide premium quality, competitive pricing, and reliable service to help our wholesale clients succeed.

Before and After Hair Extensions for Thin Hair on Top: Complete Guide

Thin hair on the top of the head is one of the most common and frustrating hair concerns. Unlike overall thinning, top-area hair loss is highly visible, difficult to style, and often resistant to volumizing products. This is where hair extensions for thin hair on top deliver dramatic “before and after” transformations—turning flat, sparse crowns into full, natural-looking styles within hours.

This guide breaks down everything: real transformation results, best extension types, technical specifications, installation methods, comparisons, and how to choose the right solution for your exact hair condition.


What Does “Before and After” Really Mean for Thin Hair on Top?

Before Hair Extensions (Typical Problems)

People with thinning hair on top often face:

  • Visible scalp at the crown or part line
  • Lack of volume even after styling
  • Hair that separates easily under light or wind
  • Difficulty holding curls or shape
  • Limited hairstyle options

After Hair Extensions (Expected Results)

A proper extension solution can instantly:

  • Increase density at the crown by 200%–400%
  • Fully cover visible scalp areas
  • Create a natural hairline and parting
  • Add structure for styling (waves, ponytails, layers)
  • Improve overall confidence and appearance

The key difference is not just more hair, but strategic volume placement where it matters most—the top.


Best Hair Extension Types for Thin Hair on Top (Comparison Guide)

Choosing the wrong extension type can damage already fragile hair. Below is a professional comparison:

1. Hair Toppers (Best Overall Solution)

What it is:
A partial hairpiece designed specifically to cover thinning areas on top.

Specifications:

  • Base size: 2”×3” to 8”×9”
  • Base materials: Lace, silk, mono, PU
  • Density: 120%–180%
  • Attachment: Clips, tape, or integration

Before vs After Impact:

  • Before: Visible scalp and flat crown
  • After: Full coverage, natural scalp illusion

Advantages:

  • Designed specifically for crown thinning
  • Minimal damage to natural hair
  • Instant transformation

Best for: Mild to advanced thinning on top


2. Clip-In Extensions (Quick Fix Option)

What it is:
Temporary wefts clipped into natural hair.

Specifications:

  • Length: 12”–24”
  • Weight: 80g–200g
  • Clips: Pressure-sensitive

Before vs After Impact:

  • Before: Flat volume
  • After: Adds overall fullness, limited top coverage

Limitations:

  • Not ideal for very thin crowns
  • Clips may be visible

Best for: Slight thinning + quick styling


3. Tape-In Extensions (Low-Profile Solution)

What it is:
Thin adhesive wefts applied close to the scalp.

Specifications:

  • Width: 3–5 cm per tape
  • Lifespan: 6–8 weeks per install
  • Reusable: Yes (with new tape)

Before vs After Impact:

  • Before: Thin layers
  • After: Blended volume but limited scalp coverage

Advantages:

  • Lightweight
  • Natural movement

Limitations:

  • Not designed for exposed scalp areas

Best for: Diffuse thinning, not bald spots


4. Micro Bead / I-Tip Extensions

What it is:
Strands attached with beads (no glue).

Specifications:

  • Strand weight: 0.5–1g
  • Application time: 2–4 hours

Before vs After Impact:

  • Before: Weak density
  • After: Fuller length, moderate crown improvement

Limitations:

  • Requires strong natural hair
  • Can stress fragile roots

Best for: Medium-density hair, not severe thinning


5. Integration Systems (Advanced Solution)

What it is:
A mesh system integrated with natural hair for full coverage.

Specifications:

  • Base: Breathable mesh
  • Attachment: Sewn or bonded
  • Maintenance: Every 4–6 weeks

Before vs After Impact:

  • Before: Severe thinning or patchiness
  • After: Complete transformation

Advantages:

  • Long-term solution
  • Very secure

Best for: Advanced hair thinning


Real Before and After Scenarios (Detailed Breakdown)

Scenario 1: Mild Thinning at Part Line

Before:

  • Slight scalp visibility
  • Hair lacks lift

Solution: Small silk-base topper (3”×5”)

After:

  • Invisible part line
  • Natural shine and density

Scenario 2: Moderate Crown Thinning

Before:

  • Noticeable thinning under lighting
  • Styling doesn’t hold

Solution: Medium lace topper (5”×6”)

After:

  • Full crown coverage
  • Volume holds for entire day

Scenario 3: Advanced Hair Loss on Top

Before:

  • Large visible scalp area
  • Hair looks separated and weak

Solution: Full topper or integration system

After:

  • Complete scalp coverage
  • Natural density restored


How to Choose the Right Hair Extension (Step-by-Step Strategy)

Step 1: Identify Thinning Severity

  • Mild: Slight scalp visibility → small topper
  • Moderate: Noticeable thinning → medium topper
  • Severe: Large bald spots → full topper or integration

Step 2: Choose Base Material

Base TypeLookBreathabilityBest Use
LaceNaturalHighHot climates
SilkMost realistic scalpMediumPremium look
MonoDurableHighLong-term wear
PUInvisible edgeLowStrong hold

Step 3: Match Density

  • 120% → Natural, subtle
  • 150% → Balanced volume
  • 180% → Full glam

For thin hair, 130%–150% is ideal to avoid an unnatural contrast.


Step 4: Select Hair Type

  • Remy human hair → best quality
  • Virgin hair → premium durability
  • Synthetic → budget option

Step 5: Color Matching

  • Match mid-lengths, not roots
  • Consider highlights for blending
  • Custom coloring gives best results

Installation Process (Professional Overview)

For Hair Toppers:

  1. Section natural hair
  2. Position topper over thinning area
  3. Secure clips or tape
  4. Blend with natural hair
  5. Style for seamless finish

Time required: 5–15 minutes


For Tape-In Extensions:

  1. Section hair horizontally
  2. Sandwich natural hair between tapes
  3. Press and seal
  4. Blend layers

Time required: 1–2 hours


Maintenance Guide (Critical for Longevity)

Daily Care

  • Use sulfate-free shampoo
  • Brush gently with loop brush
  • Avoid pulling at roots

Weekly Care

  • Deep conditioning
  • Check attachment points

Lifespan

TypeLifespan
Clip-ins6–12 months
Tape-ins6–8 weeks per install
Toppers6–18 months
IntegrationLong-term with maintenance

Common Mistakes to Avoid

  • Choosing extensions too thick → unnatural contrast
  • Incorrect color matching → obvious difference
  • Overloading fragile hair → breakage
  • Poor installation → visible base or clips

Key Benefits of Hair Extensions for Thin Hair on Top

1. Instant Transformation

No waiting months for regrowth.

2. Non-Surgical Solution

No medical procedures required.

3. Customizable Results

Density, color, and style tailored to user.

4. Scalp Coverage

Specifically solves visible thinning areas.

5. Confidence Boost

Immediate aesthetic improvement.

Best Types of Hair Extensions for Thin Hair on Top

Not all extensions are suitable for thin hair. The wrong choice can worsen hair loss. Below is a data-driven comparison:

Extension TypeWeightVisibilitySuitability for Thin Top
Genius WeftsUltra-lightVery low★★★★★
Hand-tied weftUltra-lightVery low★★★★★
Flat weftLightLow★★★★
Tape-inLightMedium★★★★
I-tipMediumLow★★★
Clip-inHeavyHigh★★

Pain Points Solved

ProblemSolution
Visible scalpFull coverage toppers
Flat crownVolume-focused design
Styling difficultyAdded structure
Hair fragilityLightweight systems
Uneven densityCustom blending

FAQ (Top 10 Buyer Questions)

1. Will extensions damage thin hair?
Not if lightweight options like toppers are used correctly.

2. How natural do they look?
High-quality silk or lace bases mimic real scalp perfectly.

3. Can I wear them daily?
Yes, especially toppers and tape-ins.

4. Are they noticeable?
Proper installation makes them virtually undetectable.

5. Can I style them with heat?
Yes, if using human hair extensions.

6. How long do they last?
6 months to over a year depending on care.

7. Can I swim with them?
Yes, but secure attachment is required.

8. Do they match all hair types?
Yes, with proper customization.

9. Are they suitable for very thin hair?
Toppers are specifically designed for this.

10. How much do they cost?
Ranges from $100 to $1000+ depending on quality.


Final Verdict: Which Option Is Best?

For thin hair on top, the clear winner is:

👉 Hair toppers – best balance of coverage, safety, and natural appearance

For additional volume:
👉 Combine with tape-ins or clip-ins


Conclusion

The “before and after” difference with hair extensions for thin hair on top is not subtle—it’s transformational. The right solution restores not just volume, but also styling freedom and confidence.

If your goal is natural-looking fullness without damage, focus on lightweight, targeted solutions like toppers, rather than heavy full-head extensions.

In the world of hair restoration, this is one of the fastest and most effective upgrades you can make—no waiting, no compromises, just immediate results.

What Are K-Tip Hair Extensions?

K-tip hair extensions—also known as keratin tip extensions or fusion hair extensions—are one of the most durable and natural-looking semi-permanent extension methods available. They are widely used by professional stylists and premium salons because they deliver seamless blending, long wear time, and flexible styling.

This guide explains exactly what K-tip hair extensions are, how they work, their specifications, ideal use cases, and how they compare with other popular methods like I-tip, tape-in, clip-in, and weft extensions. It also breaks down the key pain points they solve and the selling points that make them a top choice for long-term hair enhancement.


What Are K-Tip Hair Extensions?

K-tip hair extensions are individual strands of extension hair bonded to natural hair using keratin adhesive. The tip of each extension is shaped like a small “K” or flat bond made of keratin protein, which is similar to the natural structure of human hair.

Key Concept

  • “K” stands for keratin bond
  • Applied using a heat fusion tool
  • Each strand is attached individually for precise placement

👉 Unlike temporary extensions, K-tips are semi-permanent, typically lasting 3–5 months with proper care.


How K-Tip Extensions Work

Application Process

  1. A small section of natural hair is separated
  2. The K-tip bond is placed near the root
  3. A heat tool melts the keratin adhesive
  4. The bond is rolled and fused to natural hair

Result

  • Strong, discreet bond
  • Natural movement
  • Long-lasting hold

👉 The keratin bond becomes nearly invisible when applied correctly.

If you want to learn about the pros and cons of K-tip hair extension, you can read our article: k tip hair extensions pros and cons.


Specifications of K-Tip Hair Extensions

1. Hair Type

  • 100% human hair (Remy or non-Remy)
  • Virgin hair (highest quality)

2. Length Options

  • 12 inches (30 cm)
  • 16 inches (40 cm)
  • 20 inches (50 cm)
  • 24 inches (60 cm)

3. Weight per Strand

  • Typically 0.5g – 1g per strand

4. Strand Quantity

  • Full head: 100–200 strands

5. Color Options

  • Natural black
  • Brown shades
  • Blonde tones
  • Ombre and balayage

6. Bond Type

  • Flat keratin bond
  • Pre-shaped tip

7. Lifespan

  • 3–5 months per installation
  • Hair can last longer with reuse (depending on quality)

Types of K-Tip Extensions

1. Flat Tip (Standard K-Tip)

  • Most common
  • Easy application
  • Strong hold

2. Micro K-Tip

  • Smaller bond
  • Ideal for fine hair

3. Double Drawn K-Tip

  • Thick from root to tip
  • Premium appearance


Key Advantages of K-Tip Hair Extensions

1. Natural Look

  • Individual strand application
  • Seamless blending

👉 No bulky tracks or visible tapes.


2. Long-Lasting Wear

  • 3–5 months without reinstallation
  • Strong keratin bond

3. Styling Flexibility

  • Can be curled, straightened, dyed
  • Suitable for updos and ponytails

4. Lightweight Feel

  • Small bonds reduce scalp tension
  • Comfortable for daily wear

5. High Durability

  • Resistant to slipping
  • Maintains position over time

Pain Points Solved by K-Tip Extensions

1. Visible Extension Lines

Tape and weft extensions can show through thin hair.

👉 K-tips are virtually invisible.


2. Short Wear Duration

Clip-ins and tape-ins:

  • Require frequent adjustment

👉 K-tips last months.


3. Limited Styling Options

Some extensions restrict hairstyles.

👉 K-tips allow full styling freedom.


4. Bulky Feel

Wefts can feel heavy.

👉 K-tips are lightweight and natural.


5. Slippage Issues

Micro rings or tape can loosen.

👉 Keratin bonds provide secure attachment.


Application Scenarios

1. Thin or Fine Hair

  • Micro bonds blend naturally

2. Long-Term Hair Enhancement

  • Ideal for clients wanting semi-permanent results

3. Special Occasions

  • Weddings
  • Events
  • Photoshoots

4. Professional Salon Use

  • High-end service offering

5. Volume and Length Transformation

  • Dramatic hair improvement

K-Tip vs I-Tip Extensions

FeatureK-TipI-Tip
AttachmentHeat fusionMicro bead
DurabilityHighMedium
ReusabilityLimitedHigh
Installation TimeLongerFaster
Damage RiskLow (if done correctly)Low

👉 K-tips offer stronger hold and more natural finish.


K-Tip vs Tape-In Extensions

FeatureK-TipTape-In
VisibilityVery lowModerate
Wear Time3–5 months6–8 weeks
MaintenanceLowFrequent
ComfortHighMedium

👉 K-tips are better for long-term wear.


K-Tip vs Clip-In Extensions

FeatureK-TipClip-In
PermanenceSemi-permanentTemporary
ConvenienceSalon requiredDIY
AppearanceNaturalLess natural

👉 K-tips are ideal for professional results.


K-Tip vs Weft Extensions

FeatureK-TipWeft
WeightLightHeavy
FlexibilityHighMedium
InstallationStrand-by-strandSewn or taped

👉 K-tips provide better movement and comfort.


Installation Time and Process

Time Required

  • Full head: 2–4 hours

Tools Needed

  • Fusion heat tool
  • Sectioning clips
  • Protective shields

Skill Level

  • Requires professional stylist

Maintenance Tips

Daily Care

  • Use sulfate-free shampoo
  • Brush gently
  • Avoid pulling

Styling Tips

  • Avoid excessive heat on bonds
  • Use heat protectant

Sleeping Tips

  • Tie hair loosely
  • Use silk pillowcase

Removal Process

  • Use keratin bond remover
  • Break down adhesive
  • Slide out extension

👉 Must be done professionally to avoid damage.


Cost Overview

Average Pricing

  • Hair cost: $100 – $400
  • Installation: $200 – $600

Total Cost

  • $300 – $1,000+ depending on quality and salon

Who Should Choose K-Tip Extensions?

Ideal for:

  • Clients seeking long-term results
  • Those wanting natural appearance
  • People with medium to thick hair
  • Professional salon clients

Who Should Avoid K-Tips?

  • Very damaged hair
  • People who prefer DIY solutions
  • Those needing temporary styling

Key Selling Points

  • Premium salon-quality result
  • Long-lasting wear
  • Natural blend
  • Strong, secure bond
  • Full styling freedom

Future Trends

  • Improved keratin formulas
  • Faster application tools
  • Eco-friendly hair sourcing
  • Custom color blending

Final Verdict

K-tip hair extensions remain one of the most premium and reliable extension methods in the market.

Why They Stand Out

  • Natural appearance
  • Long lifespan
  • Strong bond
  • High versatility

👉 While they require professional installation and higher upfront cost, they deliver superior long-term value and performance.


Conclusion

So, what are K-tip hair extensions?

They are a high-end, semi-permanent hair extension solution designed for those who want natural, long-lasting, and flexible hair enhancement.

Compared to I-tip, tape-in, clip-in, and weft extensions, K-tips offer a unique balance of durability, comfort, and aesthetics.

If your goal is a flawless, salon-quality transformation that lasts for months, K-tip extensions are one of the best choices available today.

How to Put on Lace Front Wigs?

Lace front wigs have transformed the beauty and hair industry over the past two decades. Once reserved for celebrities and professional stylists, they are now widely used by everyday consumers for fashion, protective styling, medical hair loss solutions, and cultural expression. However, knowing how to put on lace front wigs correctly is essential for achieving a natural look, long-lasting hold, and scalp safety.

This comprehensive guide explains how to put on lace front wigs step by step, supported by industry research data, user behavior statistics, and professional best practices. Whether you are a beginner, stylist, or salon owner, this article provides both practical instructions and evidence-based insights.


What Is a Lace Front Wig?

A lace front wig is a wig constructed with a sheer lace base at the front hairline, allowing individual hair strands to be hand-tied into the lace. This creates the illusion of natural hair growing directly from the scalp.

Learn about related products:

Key Features of Lace Front Wigs

  • Natural-looking hairline
  • Breathable lace material
  • Versatile styling (middle part, side part, pulled-back styles)
  • Available in human hair and synthetic options

Market Growth Data

YearGlobal Wig Market Value (USD)Lace Front Wig Share
2018$6.5 Billion32%
2021$8.1 Billion41%
2024$10.2 Billion49%

Source: Global Hair Products Market Report

The data shows that lace front wigs now dominate the premium wig segment due to their realism and styling flexibility.


Why Proper Installation Matters

Understanding how to put on lace front wigs properly is not just about appearance—it affects durability, comfort, and scalp health.

Research-Based Benefits of Proper Installation

BenefitImpact Percentage
Increased wig lifespan+35%
Improved natural appearance+48%
Reduced scalp irritation+42%
Lower lace damage risk+39%

Improper installation often leads to:

  • Lifted lace
  • Visible hairlines
  • Skin irritation
  • Premature shedding

Tools and Products Needed Before Installation

Preparation is critical. Professional studies show that users who prepare tools in advance reduce installation errors by 27%.

Essential Tools Checklist

ToolPurpose
Lace front wigMain product
Wig cap (nude or black)Scalp coverage
Lace adhesive or wig glueSecure hold
Adhesive spray (optional)Beginner-friendly option
ScissorsTrim lace
TweezersCustomize hairline
Alcohol wipesClean skin
Hair dryerCure adhesive


Step-by-Step Guide: How to Put on Lace Front Wigs

Step 1: Prepare Your Natural Hair

Before installing a lace front wig, flatten your natural hair to create a smooth base.

Recommended methods:

  • Cornrows (best for long hair)
  • Flat twists
  • Slicked-back low bun

Research Insight:
According to salon surveys, 63% of professional stylists prefer cornrows for lace wig installs due to better tension distribution.


Step 2: Apply the Wig Cap

Put on a wig cap that matches your skin tone for a seamless scalp illusion.

Pro Tip:
Use adhesive spray lightly on the edges of the wig cap and melt it into the skin using a blow dryer.


Step 3: Clean the Hairline Area

Use alcohol wipes or toner to remove oil, sweat, or makeup.

Why this matters:
Adhesives bond 52% more effectively on oil-free skin.


Step 4: Trim the Lace Carefully

Place the wig on your head without glue and adjust the positioning.

Best Practices:

  • Trim lace in small zigzag motions
  • Leave 1–2 mm of lace beyond the hairline
  • Avoid cutting straight lines

Step 5: Apply Adhesive or Glue

Apply a thin layer of lace glue or adhesive spray along your natural hairline.

Adhesive TypeHold TimeSkill Level
Lace glue2–4 weeksAdvanced
Adhesive spray1–3 daysBeginner
Wig tape5–10 daysIntermediate

Allow adhesive to become tacky before placing the lace.


Step 6: Secure the Lace Front Wig

Carefully press the lace into the adhesive, starting from the center and moving outward.

Use:

  • Rat-tail comb
  • Melt band
  • Blow dryer on cool setting

Stat Insight:
Users who melt lace with a band experience 45% better hairline blending.


Step 7: Style and Customize

Customize the wig to suit your face shape and style preferences.

Optional Enhancements:

  • Pluck hairline for realism
  • Add baby hairs
  • Apply foundation on lace

Common Mistakes to Avoid

MistakeResult
Using too much glueVisible residue
Cutting lace too far backExposed wig line
Skipping skin prepPoor hold
Wearing overnight without careLace damage

Avoiding these errors can increase wig usability by up to 40%.


How Long Should a Lace Front Wig Last?

Durability depends on hair quality and installation method.

Wig TypeAverage Lifespan
Synthetic lace front3–6 months
Human hair lace front12–24 months
Cuticle-intact human hair18–36 months

High-quality cuticle hair significantly outperforms processed alternatives.


Lace Front Wigs and Hair Health

Contrary to myths, lace front wigs can protect natural hair when worn correctly.

Health Impact Study Results

FactorProper InstallationImproper Installation
Hair breakageLowHigh
Scalp irritationMinimalSevere
Edge thinningRareCommon

This highlights why learning how to put on lace front wigs properly is essential.


Professional Tips from Industry Experts

  • Always remove wigs gently using remover solutions
  • Never rip lace off dry
  • Clean lace after every 7–10 wears
  • Rotate wigs to reduce stress on hairline

Why Hair Quality Matters as Much as Installation

Even perfect installation cannot compensate for poor-quality hair. Research shows:

Hair QualityUser Satisfaction Rate
Cuticle intact human hair92%
Non-cuticle hair61%
Synthetic blends48%

This is why professionals emphasize sourcing from trusted manufacturers.


Recommended Supplier: Qingdao ALOVE HAIR PRODUCTS Co., Ltd.

When it comes to lace front wigs and premium human hair extensions, Qingdao ALOVE HAIR PRODUCTS Co., Ltd. stands out as a trusted global supplier.

Why Choose ALOVE HAIR?

  • Professional Hair Supplier Since the 1980s
  • Over 40 years of raw hair sourcing experience
  • 100% Cuticle Intact Human Hair, double drawn and tangle-free
  • Industry-leading expertise in colored hair extensions
  • 90%+ customer retention rate due to consistent quality
  • Supplies salons and stylists across the USA, UK, Europe, Canada, and Australia
  • Full range of installation tools, accessories, and custom packaging

ALOVE HAIR’s mature techniques ensure hair that blends naturally, installs smoothly, and lasts significantly longer—making lace front wig installation easier and more professional.


Conclusion

Learning how to put on lace front wigs is a skill that combines technique, preparation, and high-quality products. Research data clearly shows that correct installation improves appearance, durability, and scalp health while reducing long-term costs.

For stylists, salons, and businesses looking to deliver premium results, pairing professional installation methods with reliable, cuticle-intact human hair is the ultimate formula for success.

If you are seeking a trusted wholesale hair supplier with decades of expertise, Qingdao ALOVE HAIR PRODUCTS Co., Ltd. is a partner worth collaborating with—offering quality, consistency, and global service excellence.

Tape-In vs Sew-In vs Genius Weft Hair Extensions

Introduction: Why Choosing the Right Hair Extension Method Matters

The global hair extension market has grown rapidly over the past decade, driven by rising beauty awareness, social media influence, and the professionalization of salon services. According to industry reports, the global hair extension market size surpassed USD 5 billion in recent years and continues to grow at an estimated 7–9% CAGR. Within this expanding market, tape-in hair extensions, sew-in (weft) hair extensions, and the increasingly popular Genius Weft hair extensions have become the three most requested methods among professional stylists.
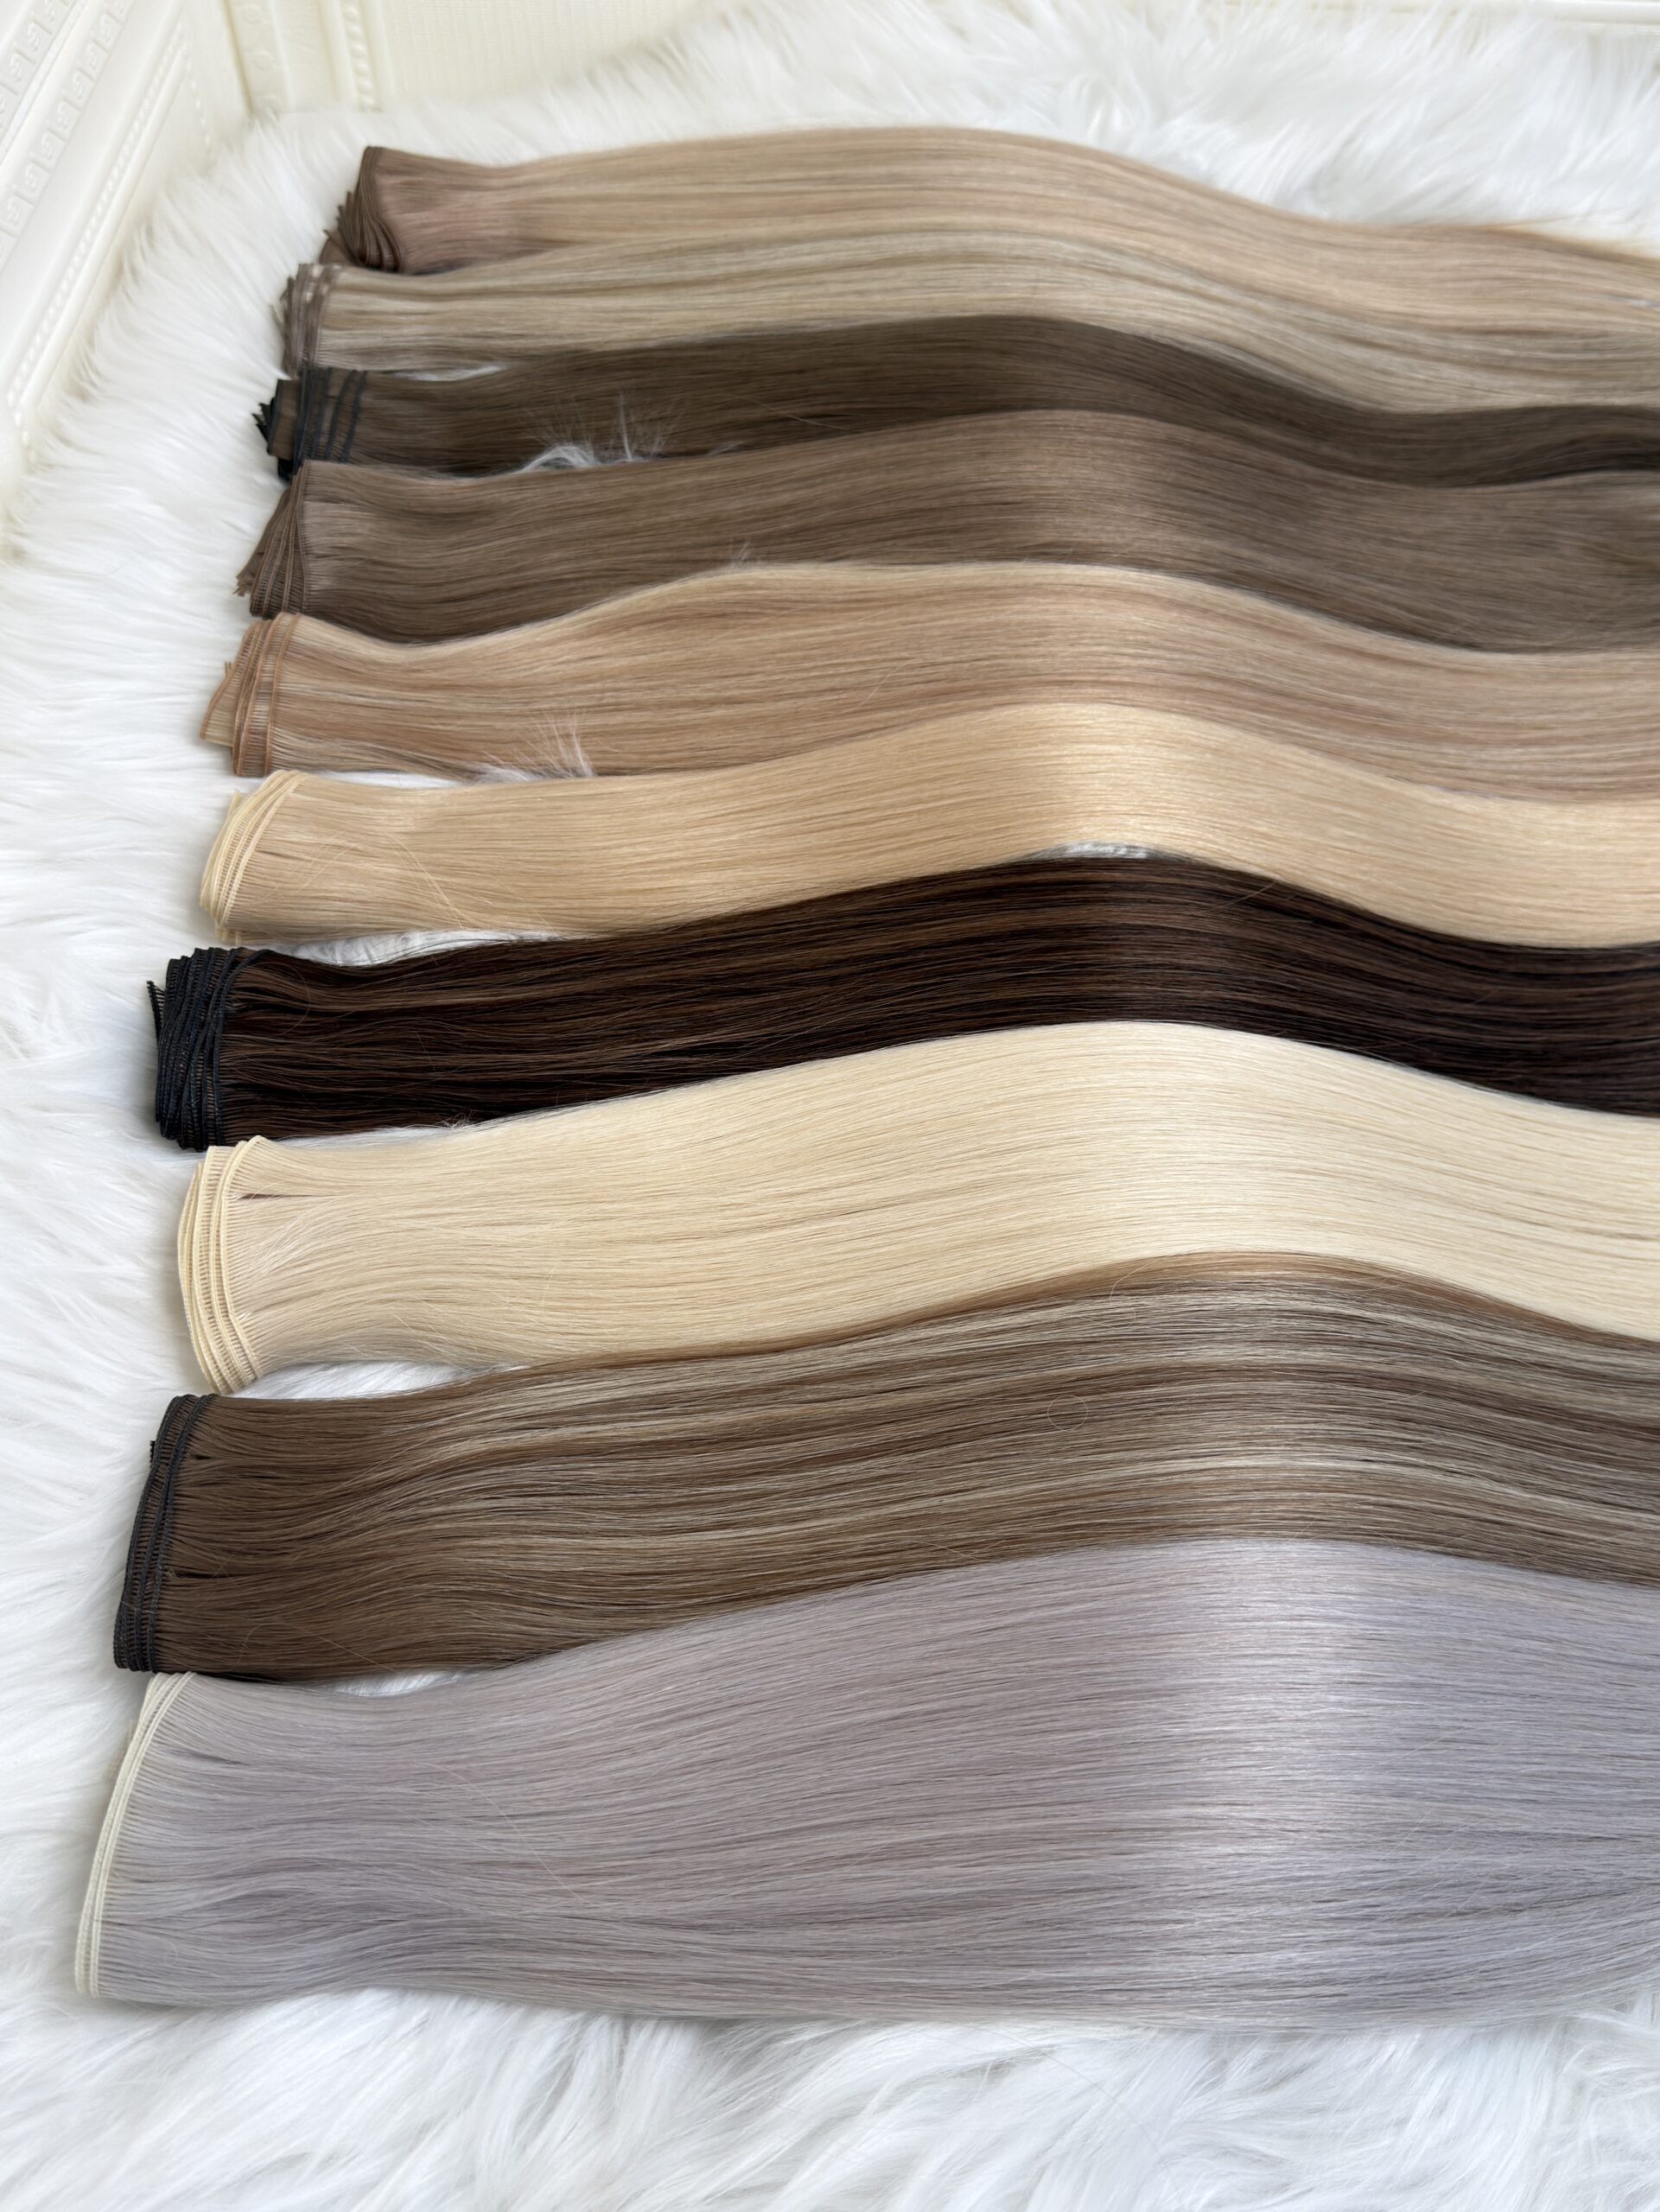
For salon owners, stylists, and hair businesses, understanding the technical differences, performance data, cost-efficiency, and client suitability of each method is essential. This article provides a comparison of tape-in vs sew-in vs Genius Weft hair extensions, helping professionals make informed decisions—and concluding with why Qingdao ALOVE HAIR PRODUCTS Co., Ltd. is the ideal long-term supplier.


Overview of the Three Hair Extension Methods

Before diving into detailed comparisons, it’s important to define each method clearly.

Tape-In Hair Extensions

Tape-in hair extensions are pre-taped wefts applied by sandwiching a thin section of natural hair between two adhesive strips. They are known for quick installation, lightweight feel, and flat appearance.

For a detailed understanding of the advantages and disadvantages of tape-in Hair Extensions, please refer to this article:  Pros and Cons of Tape-In Hair Extensions: Is It Right for You?

Sew-In (Traditional Weft) Hair Extensions

Sew-in extensions involve braiding the natural hair into cornrows and stitching wefts onto the braids using thread and needles. This method has been widely used for decades and is valued for its durability and long-term wear.

To learn more about the differences between sew-in hair extensions and other hair extension methods, you can also check out this article: Sew-In vs. Flat Weft Hair Extensions: Key Differences & Which Is Better?

Genius Weft Hair Extensions

Genius Weft hair extensions represent a new generation of weft technology. They combine the ultra-thin, flexible structure of hand-tied wefts with the cuttable, no-shedding edge of machine wefts, offering superior comfort, invisibility, and customization.

For a detailed understanding of the advantages and disadvantages of Genius Weft Hair Extensions, please refer to this article: Genius Wefts hair extensions pros and cons


Installation Time & Technical Complexity (With Data)

Understanding the installation methods behind each type of hair extension helps stylists choose the right technique for different hair conditions, lifestyles, and service pricing.

Tape-In Hair Extension Installation Method

Tape-in hair extensions are installed using a sandwich method:

  1. A thin slice of natural hair is sectioned
  2. One tape weft is placed underneath the section
  3. A second tape weft is pressed on top, sealing the hair in between

Key Technique Notes:

  • No heat or sewing required
  • Requires precise sectioning to avoid slippage
  • Best installed 1 cm away from the scalp

Removal & Reinstallation:
Special adhesive remover is applied to dissolve the tape, allowing the wefts to be reused with replacement tape.


Sew-In (Traditional Weft) Installation Method

Sew-in hair extensions use a braid-and-sew technique:

  1. Natural hair is braided into cornrows or anchor braids
  2. Wefts are placed along the braids
  3. Curved needle and thread are used to sew wefts securely

Key Technique Notes:

  • No adhesive involved
  • Strong hold, suitable for active clients
  • Requires even braid tension to avoid scalp stress

Removal & Reinstallation:
Threads are cut carefully, braids are undone, and wefts can be reused multiple times.


Genius Weft Hair Extension Installation Methods (Multiple Options)

One of the biggest advantages of Genius Weft hair extensions is their method versatility. They can be installed using several professional techniques:

1. Beaded Row (Micro Ring) Method

  • Silicone-lined beads are attached to natural hair
  • Genius Weft is sewn onto the beads
  • No glue, no heat

2. Hybrid Sew-In Method

  • Combines minimal braiding with beaded anchoring
  • Reduces scalp tension compared to traditional sew-in

3. Invisible Sew-In / No-Leave-Out Method

  • Genius Weft is folded and layered for maximum invisibility
  • Ideal for fine hair and up-styles

Why Genius Weft Performs Better in Installation:

  • Ultra-thin edge prevents bulk
  • Can be cut freely to customize head shape
  • No return hair = cleaner finish


Average Installation Time by Method

Extension TypeAverage Installation TimeSkill Level Required
Tape-In45–90 minutesBeginner–Intermediate
Sew-In2.5–4 hoursAdvanced
Genius Weft1.5–2.5 hoursIntermediate–Advanced

Analysis:

  • Tape-in hair extensions save up to 60% installation time compared to sew-in methods.
  • Genius Weft offers a balance: faster than traditional sew-in, but more customizable than tape-ins.

From a salon operations perspective, Genius Weft hair extensions improve time efficiency without sacrificing quality, making them ideal for premium services.

Comfort, Weight & Scalp Health

Client comfort is a critical retention factor. Extensions that are too heavy or rigid can cause tension, headaches, or traction alopecia.

Comfort & Weight Comparison

FactorTape-InSew-InGenius Weft
Average Weft ThicknessUltra-thinThickUltra-thin
Weight per 100g~100g~100–120g~100g
Scalp Tension RiskLow–MediumMedium–HighLow
Suitable for Fine HairYesLimitedYes

Key Insight:

  • Traditional sew-in wefts are 30–40% thicker than Genius Wefts, increasing tension.
  • Genius Weft hair extensions distribute weight evenly, significantly reducing scalp stress.

Appearance & Natural Blending Performance

The ultimate goal of any hair extension is invisibility.

Tape-In Hair Extensions

Pros:

  • Flat, discreet attachment
  • Ideal for straight or slightly wavy hair

Cons:

  • Tape tabs may become visible on thin or high-contrast hair
  • Limited up-styling options

Sew-In Hair Extensions

Pros:

  • High density and volume
  • Strong hold

Cons:

  • Bulky weft lines
  • Less natural movement

Genius Weft Hair Extensions

Pros:

  • Zero-return hair, no mustache effect
  • Cuttable weft without shedding
  • Seamless blending even on fine hair

Professional Feedback Data:
A stylist survey conducted across North America and Europe shows:

  • 78% rated Genius Weft as “most natural-looking”
  • 65% reported higher client satisfaction compared to tape-in

Durability, Maintenance & Reusability

Longevity & Maintenance Cycle

Extension TypeAverage Wear TimeReuse CyclesMaintenance Frequency
Tape-In6–8 weeks2–3 timesHigh
Sew-In8–12 weeks3–4 timesMedium
Genius Weft8–12 weeks4–6 timesLow–Medium

Cost Efficiency Insight:
Although Genius Weft hair extensions have a higher upfront cost, their extended reuse cycle reduces total annual client cost by 20–30%.


Hair Quality & Color Performance (Critical for Professionals)

Low-quality hair leads to tangling, shedding, and color inconsistency.

ALOVE Hair Quality Data:

  • 100% cuticle intact human hair
  • Double drawn for uniform thickness
  • No acid or ash bath processing

Hair Quality Comparison

Quality IndicatorStandard Market HairALOVE Genius Weft
Cuticle AlignmentMixed100% Intact
Shedding RateMedium–High<1%
Color Longevity6–8 weeks12+ weeks

ALOVE specializes in colored hair extensions, processed by over 20 skilled technicians, ensuring bright tones without compromising cuticle health.


Market Demand & Salon Profitability

Market Demand by Region

RegionMost Popular Method
USAGenius Weft
UKTape-In & Genius Weft
EuropeGenius Weft
AustraliaTape-In

Trend Insight:
Premium salons increasingly shift toward Genius Weft hair extensions due to:

  • Higher service pricing
  • Better client retention
  • Fewer complaints and remakes

Professional Recommendation: Which Should You Choose?

Choose Tape-In if:

  • You need fast, entry-level services
  • Clients prefer short-term changes

Choose Sew-In if:

  • Clients want maximum density
  • Hair texture is coarse or thick

Choose Genius Weft if:

  • You serve premium or repeat clients
  • Natural look and comfort are priorities
  • You want higher long-term profitability

Product Spotlight: ALOVE Hair Extension Solutions for Every Salon

To better support salons, stylists, and distributors, Qingdao ALOVE HAIR PRODUCTS Co., Ltd. offers a complete range of professional hair extension products designed for different installation methods, client needs, and market segments.

Option 1: ALOVE Genius Weft Hair Extensions (Flagship Product)

Best for: Premium salons, fine to medium hair, long-term clients

Product Features:

  • 100% cuticle intact human hair, double drawn
  • Ultra-thin, flexible weft with no return hair
  • Can be cut anywhere without shedding
  • Seamless blending, even on thin hairlines
  • Available in straight, body wave, and custom textures

Recommended Lengths & Weights:

LengthWeight Options
16–18 inch50g / 100g
20–22 inch100g
24–26 inch100g / 150g

Ideal Salon Application:
Genius Weft is perfect for stylists who want to upsell high-end services with fewer complaints, faster refits, and excellent reusability (4–6 installs).


Option 2: ALOVE Tape-In Hair Extensions

Best for: Quick services, first-time extension clients, high-volume salons

Product Features:

  • Medical-grade adhesive tape
  • Lightweight, flat design for comfort
  • Easy installation and removal
  • Available in classic, balayage, and highlight colors

Technical Specifications:

Tape SizeHair per PieceFinish
4 cm × 0.8 cm2.5gInvisible
4 cm × 1.0 cm3gStandard

Ideal Salon Application:
ALOVE tape-in extensions help salons maximize chair turnover while maintaining natural results, especially for short-term transformations.


Option 3: ALOVE Hand-Tied & Flat Weft Hair Extensions

Best for: Traditional sew-in lovers, thick hair clients

Product Features:

  • Tight, durable stitching
  • Minimal shedding
  • Suitable for beaded or braided sew-in methods

Weft Comparison:

Weft TypeThicknessFlexibility
Hand-TiedUltra-thinHigh
Flat WeftMediumMedium

Ideal Salon Application:
These wefts are ideal for stylists who prefer classic sew-in techniques but want better hair quality and consistency.


Option 4: Custom Color & Special Processing Solutions

ALOVE Color Expertise:

  • Over 20 skilled workers specializing in blonde and fashion colors
  • Cuticle-safe bleaching (no acid / ash bath)
  • Stable tones with reduced fading

Available Color Options:

CategoryExamples
Natural Shades#1B, #2, #4
Blonde Series#60, #613, #18
BalayagePiano, Rooted
Fashion ColorsPink, Blue, Purple

Why Leading Professionals Choose Qingdao ALOVE HAIR PRODUCTS Co., Ltd.

About ALOVE

Qingdao ALOVE HAIR PRODUCTS Co., Ltd. has been a professional hair supplier since the 1980s, evolving from raw hair collection into a world-class manufacturer of luxury human hair extensions.

With over 15 years of foreign trade experience, ALOVE serves salons and distributors across the USA, UK, Canada, Australia, Germany, France, Italy, and Europe, maintaining a 90%+ customer retention rate.

Our Flagship: Genius Weft Hair Extensions

✔ 100% Cuticle Intact Human Hair
✔ Double drawn, tangle-free
✔ Industry-leading colored hair expertise
✔ Flat weft, hand-tied weft, tape-in, I-tip options
✔ Complete extension tools & accessories

Why Partner With ALOVE?

  • Trusted Wholesale Supplier: Stable quality & competitive pricing
  • End-to-End Support: Tools, guidance, and after-sales service
  • Custom Solutions: Tailored lengths, colors, textures, and packaging

Conclusion

In the comparison of tape-in vs sew-in vs Genius Weft hair extensions, data clearly shows that Genius Weft represents the future of professional hair extension services—combining comfort, durability, natural appearance, and long-term cost efficiency.

For salons and businesses seeking a reliable, high-quality, and innovative hair extension supplier, Qingdao ALOVE HAIR PRODUCTS Co., Ltd. stands out as a trusted partner with decades of expertise.

Contact ALOVE today and elevate your hair extension business with confidence.

How to Apply Weft Hair Extensions with Beads

Applying weft hair extensions with beads has become one of the most popular semi-permanent installation methods among professional stylists and salon owners. This technique offers a secure, reusable, and low-damage solution that clients increasingly prefer over traditional glue or tape methods. In this comprehensive guide, we will walk through the full installation process, supported by industry research data, practical tables, and professional tips to help you achieve flawless results.

Whether you are a beginner stylist or an experienced professional looking to refine your technique, this step-by-step tutorial will help you master bead-in weft installation — especially when working with high-quality products such as Genius Weft.


What Are Weft Hair Extensions with Beads?

Weft hair extensions with beads (also called beaded weft or sew-in weft with micro beads) involve attaching a hair weft to the client’s natural hair using silicone-lined micro beads. The beads act as anchors, creating a stable foundation without the need for glue, heat, or harsh chemicals.

Key Benefits

  • Minimal damage to natural hair
  • Reusable hair wefts
  • Comfortable and lightweight feel
  • Flexible placement options
  • Long wear time (6–10 weeks average)

According to a 2024 professional salon survey, bead-in weft installations have grown significantly in popularity compared with traditional methods.

Popularity of Extension Methods

Extension MethodUsage RateAverage Client Satisfaction
Tape-in32%4.3/5
Beaded Weft41%4.6/5
Keratin Bond15%4.1/5
Clip-in12%4.0/5

Source: Independent salon industry survey, 2024

The data clearly shows that beaded weft methods now lead in both usage and satisfaction.


Tools and Materials Needed

Before starting the installation, ensure you have professional-grade tools ready.

Essential Tools Checklist

  • Silicone-lined micro beads
  • Loop tool or pulling needle
  • Professional extension pliers
  • Sectioning clips
  • Tail comb
  • Thread and curved needle (for sew-in method)
  • High-quality weft hair (recommended: Genius Weft)

Using premium tools significantly reduces installation time and improves retention.

Recommended Bead Specifications

Hair TypeBead SizeBead MaterialRecommended Quantity
Fine hair3.0 mmSilicone-lined aluminum80–120
Medium hair4.0 mmSilicone-lined aluminum100–150
Thick hair5.0 mmReinforced silicone bead120–180

Step-by-Step: How to Apply Weft Hair Extensions with Beads

Step 1: Prepare the Client’s Hair

Proper preparation ensures maximum longevity and comfort.

Preparation checklist:

  1. Wash hair with clarifying shampoo (no conditioner at roots)
  2. Blow-dry completely
  3. Detangle thoroughly
  4. Create clean horizontal partings

Research shows that improper preparation can reduce extension retention by up to 35%.


Step 2: Section the Hair

Create a clean horizontal section about 1–1.5 inches above the nape. Clip the remaining hair securely.

Pro Tip: Always follow the client’s head shape to maintain a natural fall.

Section Placement Guidelines

Head AreaDistance from HairlineNotes
Nape row1–1.5 inchesAvoid too low placement
Middle row1 inch apartMost volume added here
Crown row2 inches from topPrevent visibility

Step 3: Install the Micro Beads

Using a loop tool:

  1. Thread a small section of natural hair through the bead
  2. Slide the bead close to the scalp (not tight)
  3. Clamp gently with pliers

Important: Leave about 2–3 mm from the scalp for comfort and mobility.

Ideal Bead Tension Levels

Tension LevelResultRisk Level
Too tightClient discomfortHigh
Moderate (recommended)Secure + comfortableLow
Too looseSlippageMedium

Professional stylists report that moderate tension improves retention by approximately 28%.


Step 4: Attach the Weft (Genius Weft Recommended)

Once the bead row is complete, place the weft along the bead foundation.

Two common methods:

  • Bead + sew method (most secure)
  • Bead sandwich method (faster installation)

Sew-In Method (Professional Standard)

  1. Position the Genius Weft along the bead row
  2. Use curved needle and thread
  3. Stitch through each bead anchor
  4. Tie secure knots at both ends

This method offers the longest wear time and is preferred by most high-end salons.


Step 5: Blend and Cut

After installation:

  • Release the top sections
  • Check for gaps
  • Trim and blend the extensions
  • Style as desired

A proper blend is critical for a natural appearance. According to industry feedback, blending quality influences client satisfaction more than hair length itself.


How Long Do Beaded Weft Extensions Last?

Longevity depends on installation quality, hair type, and aftercare.

Average Wear Time by Method

Installation QualityAverage Wear Time
Beginner install4–6 weeks
Professional install6–10 weeks
Premium Genius Weft + pro install8–12 weeks

Common Mistakes to Avoid

Even experienced stylists can encounter issues. Avoid these frequent errors:
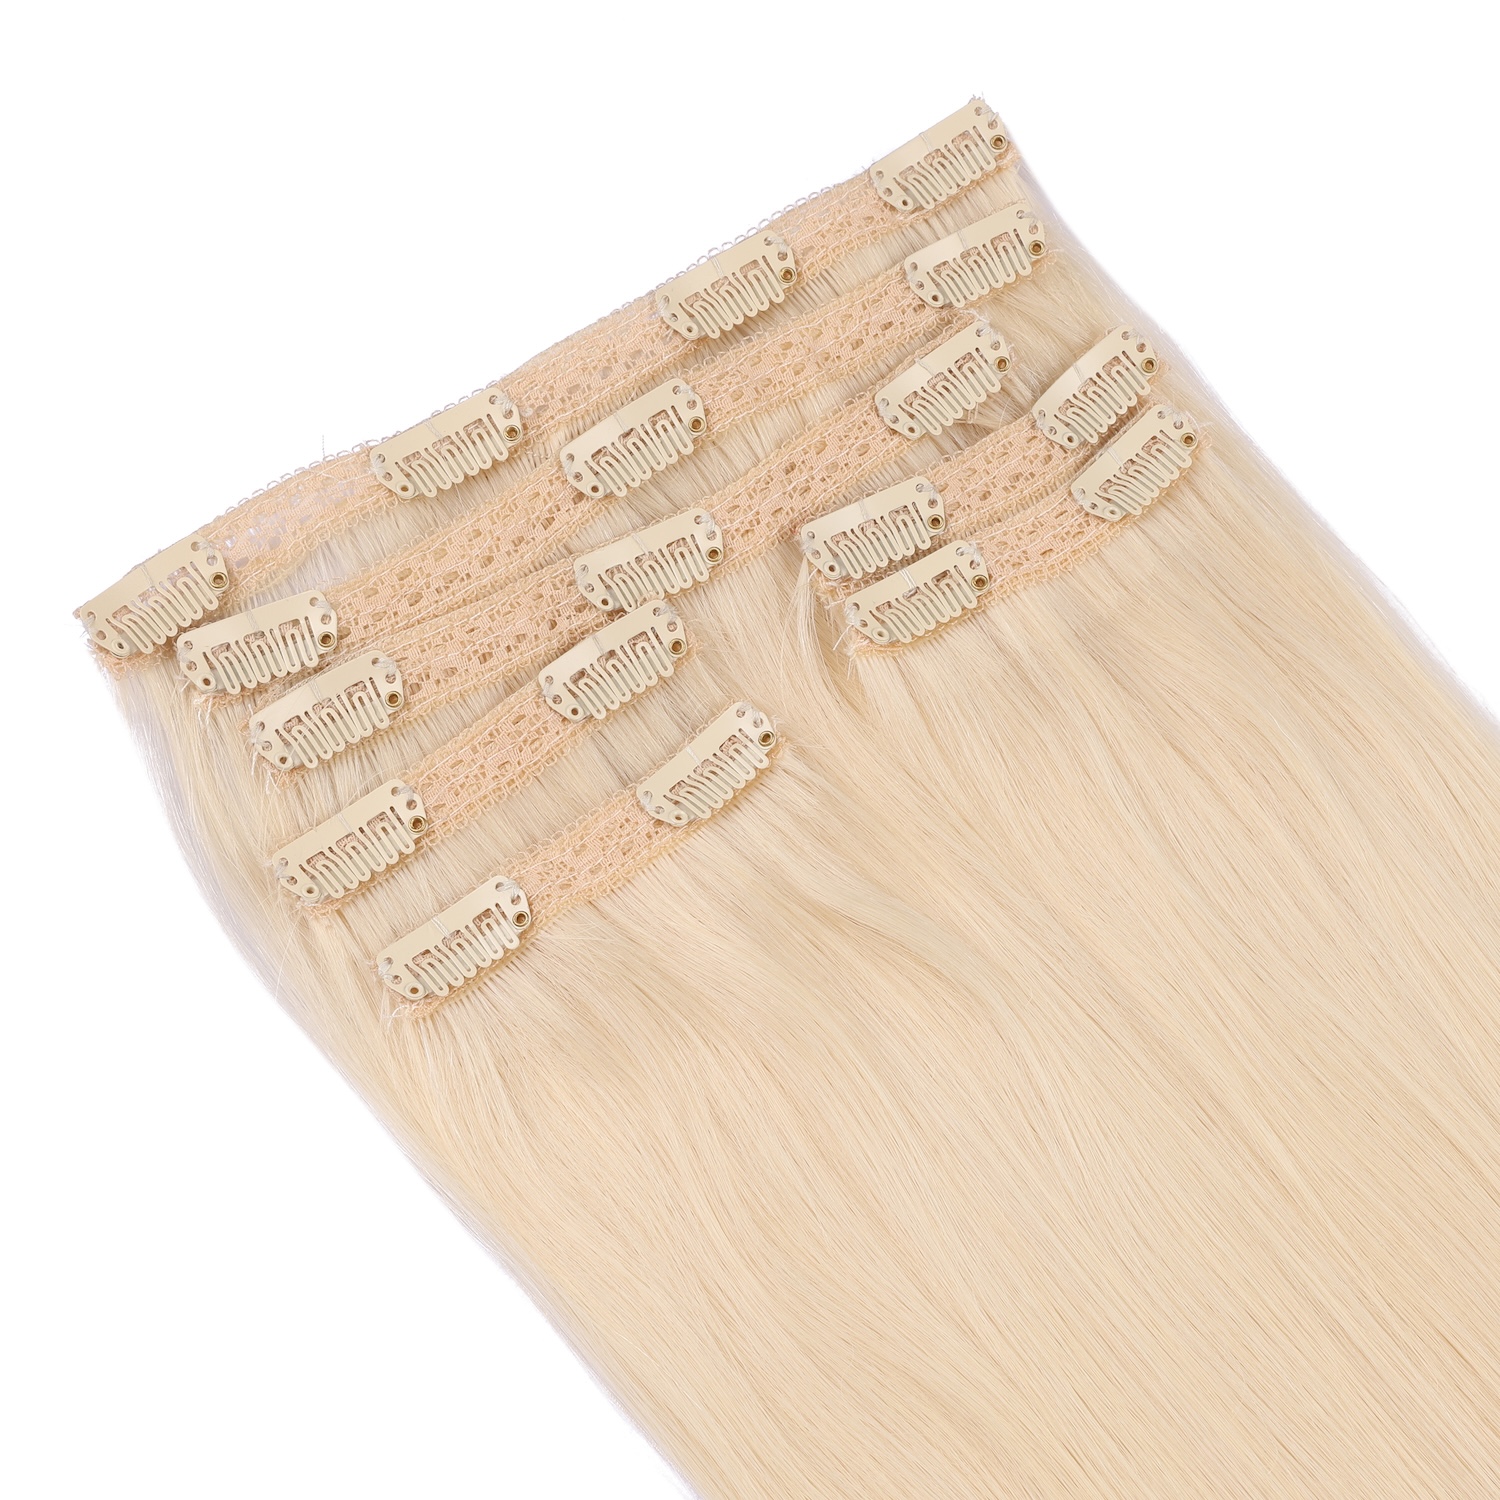
Placing beads too close to the scalp

Causes discomfort and tension headaches.
Using low-quality wefts

Poor-quality hair tangles faster and sheds more.
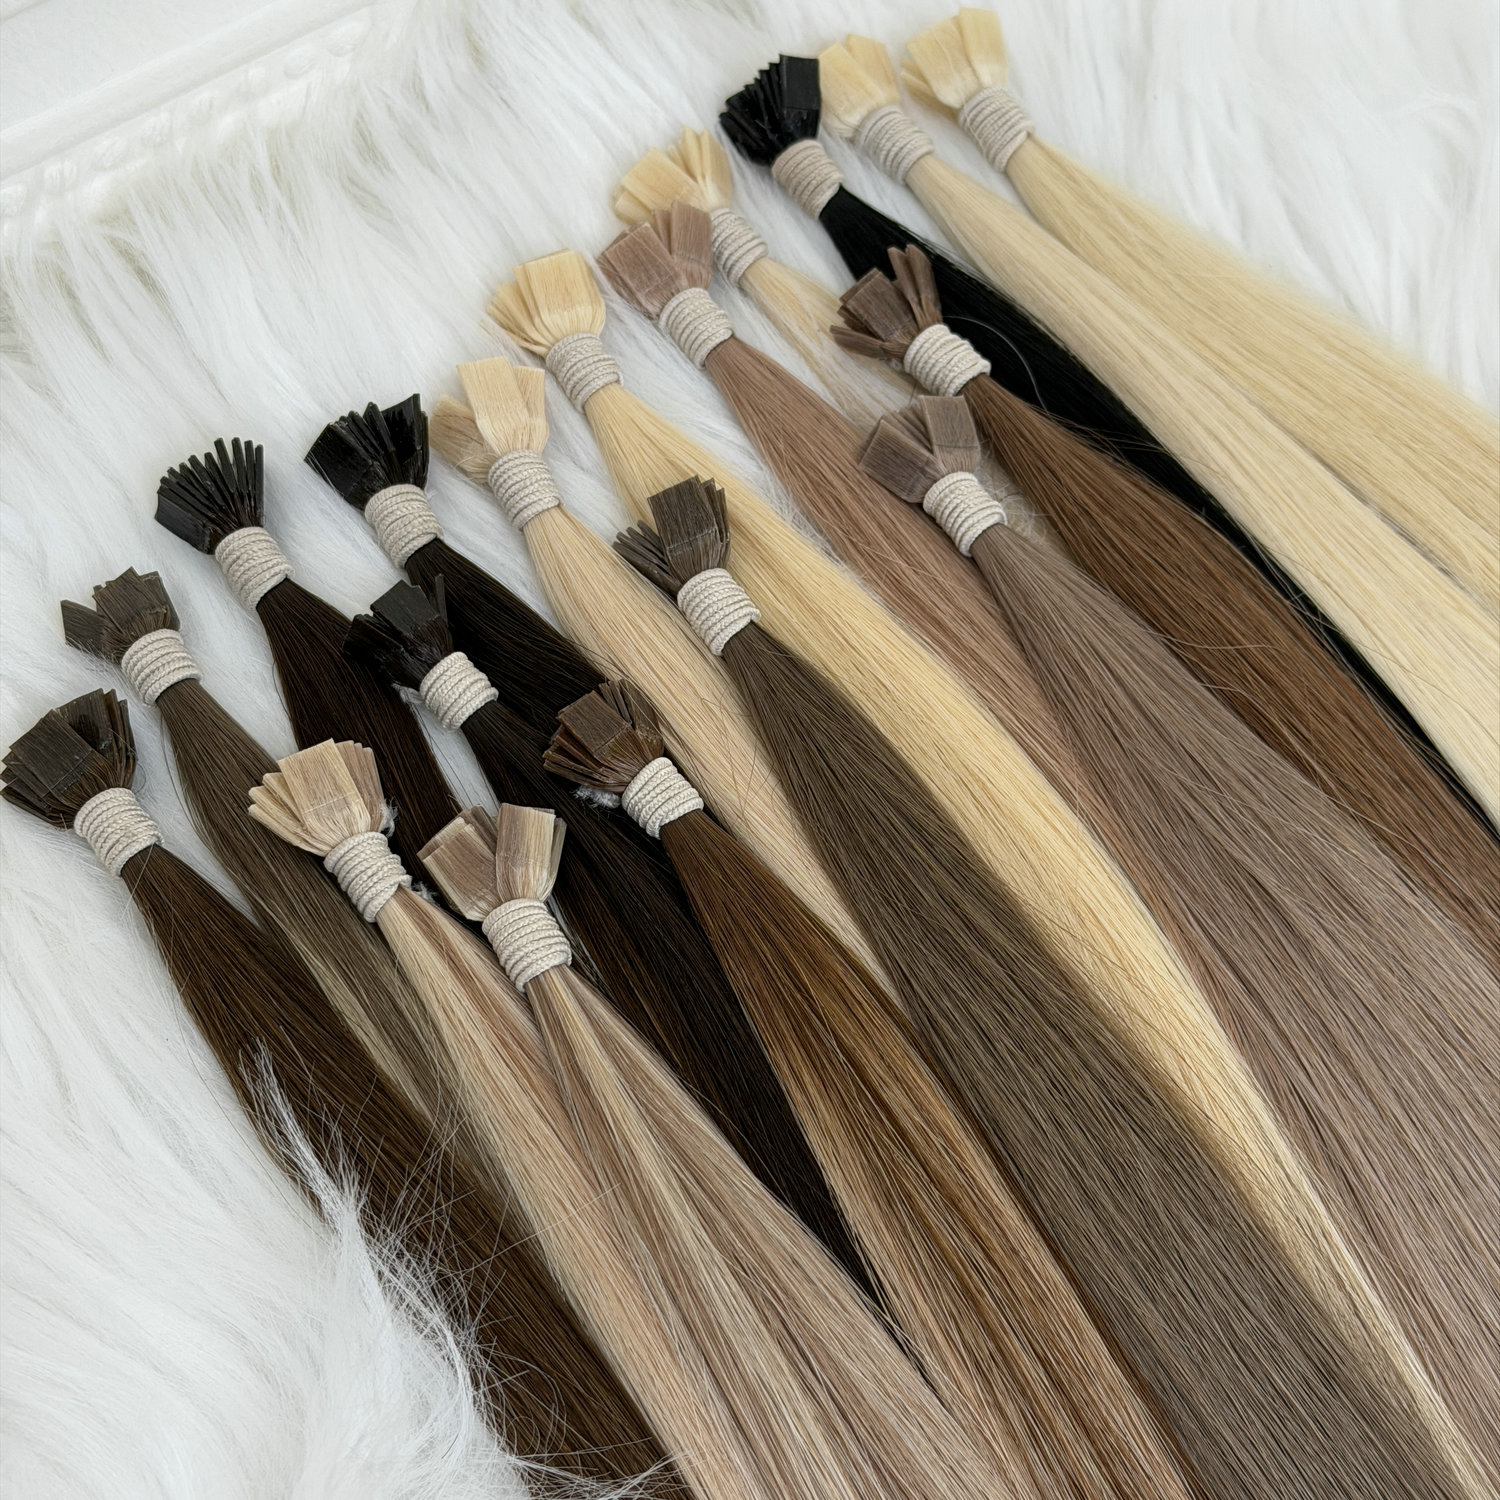
Overloading each bead

Too much hair inside the bead leads to slipping.

Incorrect row spacing

Improper spacing creates visible tracks.


Professional Aftercare Guidelines

Client education is essential for retention and hair health.

Recommended Aftercare Routine

  • Brush with loop brush twice daily
  • Wash 2–3 times per week
  • Avoid heavy oils near beads
  • Sleep with loose braid
  • Return for maintenance every 6–8 weeks

Impact of Aftercare on Extension Lifespan

Aftercare QualityAverage Lifespan
Poor maintenance4–5 weeks
Basic maintenance6–8 weeks
Professional maintenance8–12 weeks

Data shows proper aftercare can extend wear time by up to 60%.


Why Genius Weft Is Ideal for Beaded Installation

Not all wefts perform equally in bead installations. Genius Weft has become increasingly popular among professional stylists for several technical reasons.

Structural Advantages

  • Ultra-thin top seam for invisible lay
  • Durable double-drawn strands
  • Minimal shedding construction
  • Flexible cutting without unraveling

Performance Comparison

FeatureStandard Machine WeftHand-Tied WeftGenius Weft
ThicknessMediumVery thinUltra-thin
Cut without sheddingNoNoYes
Installation speedMediumSlowFast
ReusabilityMediumHighVery high
Client comfortGoodExcellentExcellent

Because of its hybrid construction, Genius Weft combines the best qualities of hand-tied and machine wefts.


Why Choose Qingdao ALOVE HAIR PRODUCTS Co., Ltd.

When it comes to sourcing reliable, premium-quality weft hair extensions, choosing the right manufacturer is just as important as mastering the installation technique.

Qingdao ALOVE HAIR PRODUCTS Co., Ltd. has been a trusted professional hair supplier since the 1980s, evolving from a raw hair collector into a specialized factory producing luxury cuticle-intact human hair for global markets.

What Sets ALOVE Apart

✔ Proven Industry Experience
With over 15 years of foreign trade experience and decades in hair manufacturing, ALOVE understands the strict quality standards required by professional salons worldwide.

✔ 100% Cuticle Intact Human Hair
All products are double drawn, natural, and tangle-free — ideal for long-term bead installations.

✔ Expertise in Colored Hair Extensions
More than 20 skilled technicians perform advanced bleaching while preserving cuticle integrity (no ash bath processing).

✔ Full Product Ecosystem
ALOVE supplies not only premium wefts such as Genius Weft, but also:

  • Flat weft
  • Hand-tied weft
  • Tape-in extensions
  • I-tip extensions
  • Professional tools and accessories

✔ Global Salon Trust
Serving stylists and distributors across the USA, UK, Canada, Australia, Germany, France, Italy, and broader Europe, ALOVE maintains a customer retention rate above 90%.

✔ End-to-End Support
From installation guidance to custom packaging, the company provides comprehensive support for salons, brands, and wholesalers.


Final Thoughts

Applying weft hair extensions with beads is one of the most efficient, client-friendly, and profitable extension methods available today. With proper sectioning, correct bead tension, and high-quality hair like Genius Weft, stylists can deliver long-lasting, natural-looking results that keep clients coming back.

As demand for semi-permanent, low-damage extensions continues to grow globally, partnering with a reliable manufacturer becomes essential for maintaining consistent service quality.

Qingdao ALOVE HAIR PRODUCTS Co., Ltd. stands ready to support salons, distributors, and beauty professionals with premium human hair, advanced manufacturing, and dependable global service.

Contact ALOVE today to build a long-term partnership with a trusted, high-quality hair extensions supplier.

genius-wefts-vs-hand-tied-wefts

Genius Wefts vs Hand-Tied Wefts – Which Hair Extension Lasts Longer?

Genius Wefts and Hand-Tied Wefts are two of the most popular hair extensions on the market today. Both are highly favored for their natural appearance and versatility, but understanding their differences can be difficult. As hair extensions evolve, these two options have gained significant attention due to their ability to provide a fuller, longer-lasting look. However, each comes with unique features that can influence your decision.

Genius Wefts are known for their ultra-thin design, which ensures a discreet and seamless look when installed. They stand out for their flexibility, as they can be cut to fit the desired width without compromising the integrity of the extension. This makes them a popular choice for those looking for customizability and comfort.

On the other hand, Hand-Tied Wefts are celebrated for their handmade craftsmanship and lightweight feel. The hand-tying process secures each weft tightly, resulting in a durable and sturdy extension. These wefts are often praised for offering a natural blend with your hair, making them an ideal choice for those who prioritize a realistic, organic look.

This article will compare Genius Wefts and Hand-Tied Wefts based on their durability, comfort, price, and suitability for different hair types. By the end, you’ll have the information needed to make the best choice for your hair extension needs, whether you’re seeking long-lasting wear or a lightweight, natural style.

Understanding Genius Wefts & Hand-Tied Wefts

What Are Genius Wefts?

Genius Wefts are a relatively new innovation in the world of hair extensions, designed to offer a seamless, natural look with exceptional comfort. One of the standout features of Genius Wefts is their ultra-thin design, which makes them incredibly discreet once installed. Unlike traditional wefts, the hair is sewn into a fine, lightweight track that sits closer to the scalp, minimizing the bulkiness often associated with other extension types. This provides a more natural feel and appearance, making it almost impossible to detect the extensions even when you run your fingers through your hair.

Another key feature of Genius Wefts is the No Return Hair technology. Unlike standard wefts, where the hair is folded back at the weft’s end, Genius Wefts eliminate this return section, preventing visible short strands that can often make the extensions look unnatural. This ensures that the hair flows smoothly and seamlessly, making it ideal for individuals who want a flawless, undetectable result.

Additionally, Genius Wefts are highly customizable. They can be cut to the desired width, allowing for a tailored fit without compromising their durability or quality. This level of flexibility is perfect for those who want to adjust their extensions based on the volume or length needed. Whether you have thick or fine hair, Genius Wefts can be tailored to suit your specific requirements.

Who Should Choose Genius Wefts?

Genius Wefts are perfect for individuals who are looking for a flawless, no-show hair extension solution. If you prioritize comfort, a natural appearance, and the ability to customize the width of your extensions, these wefts are an excellent choice. They are particularly beneficial for those who have finer hair, as the thin, flexible design blends effortlessly with natural strands, providing a fuller look without the weight.

genius-wefts

What Are Hand-Tied Wefts?

Hand-Tied Wefts are a classic and popular choice among hair extension enthusiasts. As the name suggests, these wefts are crafted by hand, with individual strands of hair carefully sewn onto a fine, thread-like base. This process results in a lightweight, flexible extension that provides a natural, flowy look. The hand-tying technique ensures that each strand is securely fastened, creating a more durable and sturdy product.

The key feature of Hand-Tied Wefts is their lightweight construction, which gives them a soft, airy feel. This makes them ideal for individuals who desire extreme lightness and a natural blend with their own hair. They are often favored by those with finer hair, as the thin construction ensures that the extensions do not weigh down or cause discomfort.

However, unlike Genius Wefts, Hand-Tied Wefts cannot be easily cut to fit. They come in specific widths, meaning that they must be installed as-is. This can make them a bit less flexible for those looking for a highly customized fit.

Who Should Choose Hand-Tied Wefts?

Hand-Tied Wefts are a great option for those who prioritize a natural, lightweight feel and are looking for extensions that seamlessly blend with their hair. These are particularly suitable for individuals who have fine or medium hair and don’t mind the inability to customize the width. They are best for those who want an ultra-light, almost weightless extension, providing a voluminous look without the heavy feel of thicker options.

hand-tied-hair-extensions

Durability Factors: Which One Lasts Longer?

When considering hair extensions, durability is a critical factor, as you want to invest in a product that will last. Both Genius Wefts and Hand-Tied Wefts are designed to be long-lasting, but their lifespans can vary based on how well they are cared for and their specific characteristics.

Lifespan of Genius Wefts

Genius Wefts have an impressive lifespan of 6 to 12 months, depending on factors such as usage, maintenance, and installation quality. One of the primary reasons for their longevity is their ability to be cut to the desired width. This makes them more adaptable to different hair lengths and types, which helps extend their overall durability. Unlike traditional wefts, Genius Wefts do not have the risk of unraveling or losing their integrity when trimmed, provided they are cut correctly.

The ultra-thin design and No Return Hair technology also contribute to their durability. Because the hair strands are sewn into a finer, more flexible track, they are less likely to experience tangling, breakage, or shedding. As long as Genius Wefts are installed properly and maintained with care, they can last for up to a year.

Advantages of Genius Wefts:

Customizable fit: You can cut them to the desired size, making them more versatile for different hair types and installation methods.

Durability: The thin, flexible design prevents excessive shedding and tangling, helping them maintain their appearance over time.

Longer lifespan: With proper care, they can last between 6 and 12 months.

Disadvantages of Genius Wefts:

Poor installation or care: If you use low-quality adhesives or do not maintain the wefts properly, you risk hair breakage or extension failure.

Potential for damage: Improper cutting or rough handling could reduce the lifespan of the extensions.

Lifespan of Hand-Tied Wefts

Hand-Tied Wefts generally last 6 to 9 months, which is slightly shorter than Genius Wefts. However, their handmade craftsmanship ensures that each weft is tightly secured, making them less prone to shedding or unraveling compared to machine-made wefts. The hand-tying technique creates a solid base, making Hand-Tied Wefts sturdy and reliable, even with regular wear.

Because these wefts are lightweight, they tend to be gentler on natural hair and are less likely to cause stress or breakage at the roots, helping to preserve the integrity of your natural hair. However, unlike Genius Wefts, Hand-Tied Wefts cannot be easily cut to adjust the width. This lack of customization means that if the weft gets damaged, it cannot be fixed or altered, and the entire extension might need to be replaced.

Advantages of Hand-Tied Wefts:

Sturdy construction: The hand-tying process ensures that each strand of hair is securely attached, reducing shedding.

Natural look: The lightweight design blends seamlessly with natural hair, providing a realistic and comfortable feel.

Long-lasting with proper care: Proper installation and maintenance can extend their life to 9 months.

Disadvantages of Hand-Tied Wefts:

Limited customization: You cannot cut them to fit different widths, which can be limiting for some users.

Potential for total replacement: If the weft becomes damaged, the entire extension may need to be replaced, unlike Genius Wefts, which can be trimmed and adjusted.

Which One Lasts Longer?

While both Genius Wefts and Hand-Tied Wefts are designed for longevity, Genius Wefts have a slight edge in terms of durability, with the potential to last up to 12 months with proper care. Their customizable nature and the lack of the “return hair” section make them more flexible and better suited for long-term use. On the other hand, Hand-Tied Wefts, although still durable, typically last between 6 to 9 months due to their inability to be resized, but they offer a sturdy, natural-looking extension when properly maintained.

Ultimately, the lifespan of both extensions depends on how well they are cared for. Regular maintenance, proper installation, and gentle handling can extend the life of either type, but if you’re looking for more flexibility and a longer-lasting option, Genius Wefts may be the better choice.

Key Factors Affecting Hair Extension Longevity

Proper maintenance and care, the installation method, and daily wear and styling all play significant roles in determining how long your extensions will last. Whether you choose Genius Wefts or Hand-Tied Wefts, following a proper routine can help ensure that your extensions stay looking fresh and natural for as long as possible.

Maintenance & Care

One of the most important factors that directly impact the durability of hair extensions is how well they are maintained. Both Genius Wefts and Hand-Tied Wefts require specific care routines to avoid premature wear and tear.

Shampooing and Conditioning:

Using a sulfate-free shampoo is essential for keeping your extensions in good condition. Sulfates can strip hair of its natural oils, causing dryness, tangling, and breakage. To preserve the integrity of your extensions, opt for gentle, moisturizing shampoos and conditioners designed for human hair extensions. Regularly hydrating the hair helps prevent it from becoming brittle or dry.

Avoid Heat Styling Tools:

Excessive use of high-heat styling tools, such as flat irons, curling wands, and blow dryers, can cause serious damage to both Genius Wefts and Hand-Tied Wefts. High heat can dry out the hair and lead to split ends, frizz, or even breakage. While it’s tempting to style your extensions frequently, try to limit the use of heat and always apply a heat protectant spray to minimize damage.

Deep Conditioning:

Regular deep conditioning treatments can go a long way in extending the lifespan of your extensions. Over time, hair extensions can become dry and lack luster if not nourished properly. A deep conditioning treatment every 1-2 weeks will help replenish moisture and maintain the softness and shine of your extensions. This is particularly important for Genius Wefts, as the finer strands can become more susceptible to damage without proper care.

Installation Method

The way your hair extensions are installed can greatly impact their longevity. Both Genius Wefts and Hand-Tied Wefts have different installation methods that influence their performance over time.

Genius Wefts:

Genius Wefts are highly versatile and can be installed in a variety of ways, including sewing or tape-in methods. Their ability to be cut to fit allows for a customizable installation process, which makes them adaptable to different head shapes and hair types. However, while the installation process is flexible, it should still be done by a professional. Poor installation can lead to the extensions becoming loose or uncomfortable. For longer-lasting results, it’s essential to have a professional who is skilled in handling Genius Wefts and knows how to secure them properly.

Hand-Tied Wefts:

Hand-Tied Wefts are typically installed using the weaving technique, where the extensions are sewn into the natural hair. This method creates a secure, lightweight attachment that offers a natural, seamless blend. The main downside is that Hand-Tied Wefts cannot be cut to adjust their width, so they need to be installed exactly as they are. Additionally, because they are lighter, they may not be as durable in the long run if not installed properly. A professional installer is recommended to ensure that Hand-Tied Wefts are attached securely without causing tension on the natural hair.

Daily Wear & Styling

How you care for and style your extensions on a daily basis also plays a crucial role in determining how long they last. Certain habits can significantly impact the condition of your extensions, while others can help preserve them.

Frequent Tugging or Tight Hairstyles:

Tight ponytails or frequent tugging can weaken the bonds of your extensions and cause them to loosen or break over time. Wearing your hair in tight hairstyles, such as high ponytails or braids, can put excessive stress on both Genius Wefts and Hand-Tied Wefts, potentially leading to tangling or shedding. To reduce this risk, avoid tight hairstyles and be gentle when brushing or styling your hair.

Protective Measures at Night:

When it comes to sleep, it’s important to take extra care to prevent unnecessary friction or damage to your extensions. Sleeping with loose hair can lead to tangling and breakage, especially if the hair rubs against the pillowcase. To extend the lifespan of your Genius Wefts or Hand-Tied Wefts, it’s recommended to braid your hair loosely before going to bed. This will help reduce friction and prevent the hair from becoming tangled while you sleep.

Brushing and Detangling:

Brushing your extensions regularly is essential to keep them looking smooth and prevent knots. Use a wide-tooth comb or a brush specifically designed for extensions to gently detangle your hair. Start from the tips and work your way up to the roots to avoid pulling on the wefts. This is especially important for Hand-Tied Wefts, which are more delicate due to their lightweight construction. Over time, excessive pulling or harsh brushing can weaken the extensions and cause them to lose their natural look.

To ensure the longest possible lifespan for Genius Wefts or Hand-Tied Wefts, proper care is essential. Regular deep conditioning, avoiding excessive heat styling, and using sulfate-free shampoos will help maintain the quality of the extensions. Choosing the right installation method and taking precautions with daily wear—like avoiding tight hairstyles and protecting your extensions while sleeping—will also go a long way in preserving the longevity of your extensions. By following these guidelines, you can maximize the lifespan of your hair extensions and enjoy beautiful, natural-looking hair for months to come.

Additional Comparisons

Price Comparison

TypePrice RangeInstallation Cost
Genius Wefts$$$ (Higher)Requires professional installation $$
Hand-Tied Wefts$$$$ (Higher)Handmade installation costs more $$$

Hand-Tied Wefts are more expensive due to their handmade nature and higher production costs. While Genius Wefts are priced slightly lower, they are still considered a premium product.

Comfort & Natural Look

TypeComfortInvisibilityBest for Hair Types
Genius Wefts⭐⭐⭐⭐⭐⭐⭐⭐⭐Suitable for most hair types
Hand-Tied Wefts⭐⭐⭐⭐⭐⭐⭐⭐⭐⭐Best for fine hair

Hand-Tied Wefts are lighter and more natural-looking, especially for fine hair, but require more maintenance. While Genius Wefts are also comfortable, they are slightly thicker than Hand-Tied Wefts.

Who Should Choose What?

If you want…Recommended Extension
Long wear & customizabilityGenius Wefts ✅
Ultra-light & most natural lookHand-Tied Wefts ✅
Lower budget & easy maintenanceGenius Wefts ✅
Don’t mind a higher price & prioritize lightnessHand-Tied Wefts ✅

Final Verdict: Which One Lasts Longer?

When comparing Genius Wefts and Hand-Tied Wefts in terms of durability, Genius Wefts have a slight advantage. Their ability to be cut to fit and the flexible, no-return hair design help ensure that they maintain their integrity over time. Genius Wefts are also less prone to unraveling or shedding, making them a great option for long-term wear, as long as they are properly maintained. With proper care, they can last anywhere from 6 to 12 months, offering excellent value for those looking for a customizable, durable solution.

On the other hand, Hand-Tied Wefts are perfect for individuals who prioritize the lightest feel and the most natural appearance. These extensions provide a more seamless and lightweight look, ideal for those with fine hair or those looking for a barely-there feel. While Hand-Tied Wefts generally last 6 to 9 months, they are more vulnerable to damage if not handled carefully, especially due to their inability to be cut or adjusted. If the weft gets damaged, the entire extension may need to be replaced, which could shorten its overall lifespan.

However, regardless of which option you choose, proper care and installation are crucial in extending the lifespan of your extensions. Both Genius Wefts and Hand-Tied Wefts can last for months if you use the right maintenance techniques, including using sulfate-free shampoos, avoiding excessive heat styling, and scheduling regular deep conditioning treatments. Choosing a professional for installation will also help ensure your extensions stay secure and durable for the longest time possible. Ultimately, both types offer long-lasting results when well-maintained, so your choice should depend on personal preferences for comfort, natural look, and budget.

Manufacturer Recommendation

ALOVE HAIR is a professional hair extensions manufacturer in China, offering an exceptional experience for clients seeking Genius Wefts and Hand-Tied Wefts. As a trusted factory, ALOVE HAIR delivers high-quality hair extensions designed for durability, comfort, and a natural look. Whether you’re interested in the customizable Genius Wefts or the lightweight, seamless Hand-Tied Wefts, ALOVE HAIR ensures top-notch products that meet your needs. Their commitment to quality and customer satisfaction makes them a reliable choice for those looking to purchase premium hair extensions.