Toupee vs Wig: Cost, Maintenance, and Appearance Compared

Hair loss can affect anyone, and finding the right solution is essential for boosting confidence and improving appearance. Among the most common options are toupees and wigs, two types of hairpieces designed to address different levels of hair loss. A toupee typically covers a smaller area of the scalp, often targeting specific bald spots or thinning regions like the crown or hairline. In contrast, a wig provides full head coverage, suitable for those experiencing more extensive hair loss or seeking a complete change in hairstyle.

Knowing the distinctions between toupees and wigs is crucial because they offer different benefits depending on your needs. Each comes with its own considerations in terms of comfort, cost, upkeep, and natural look. Many people mistakenly use these terms interchangeably, but understanding their unique features can help you choose the most appropriate option that fits your lifestyle and budget.

This article will break down the key differences between toupee vs wig, focusing on cost, maintenance, and appearance. You’ll learn how much each typically costs, what kind of care is required to keep them looking their best, and how natural they appear once worn. With this information, you’ll be better equipped to select the ideal hair replacement solution that matches your personal preferences and restores your self-esteem.

What is a Toupee?

toupee is a small hairpiece or partial wig designed primarily to cover areas of the scalp affected by hair loss, typically where thinning or balding is localized. Unlike full wigs that cover the entire head, toupees are made to blend seamlessly with the wearer’s existing hair, covering only specific spots such as the crown, top, or front hairline. Their main purpose is to restore the appearance of natural hair in these areas, helping individuals regain confidence and improve their overall look.

Toupees are commonly used by men experiencing male pattern baldness, especially those with receding hairlines or bald spots on the crown of the head. However, toupees can also be worn by women facing localized hair thinning or hair loss due to medical conditions or aging. While toupees have been popular for many decades, recent advances in materials and design have greatly improved their comfort, durability, and natural appearance.

The primary users of toupees tend to be men who want to conceal partial hair loss without wearing a full wig. Male pattern baldness typically causes hair to recede from the front or thin on the top, leaving other areas relatively unaffected. A toupee offers a practical solution for these individuals because it can be customized to match their existing hair color, texture, and style. This allows the toupee to blend naturally with their own hair, making it less noticeable to others. Some men prefer toupees because they are less bulky and easier to manage than full wigs, and they can be styled just like real hair.

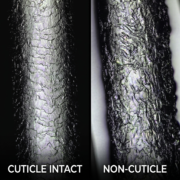
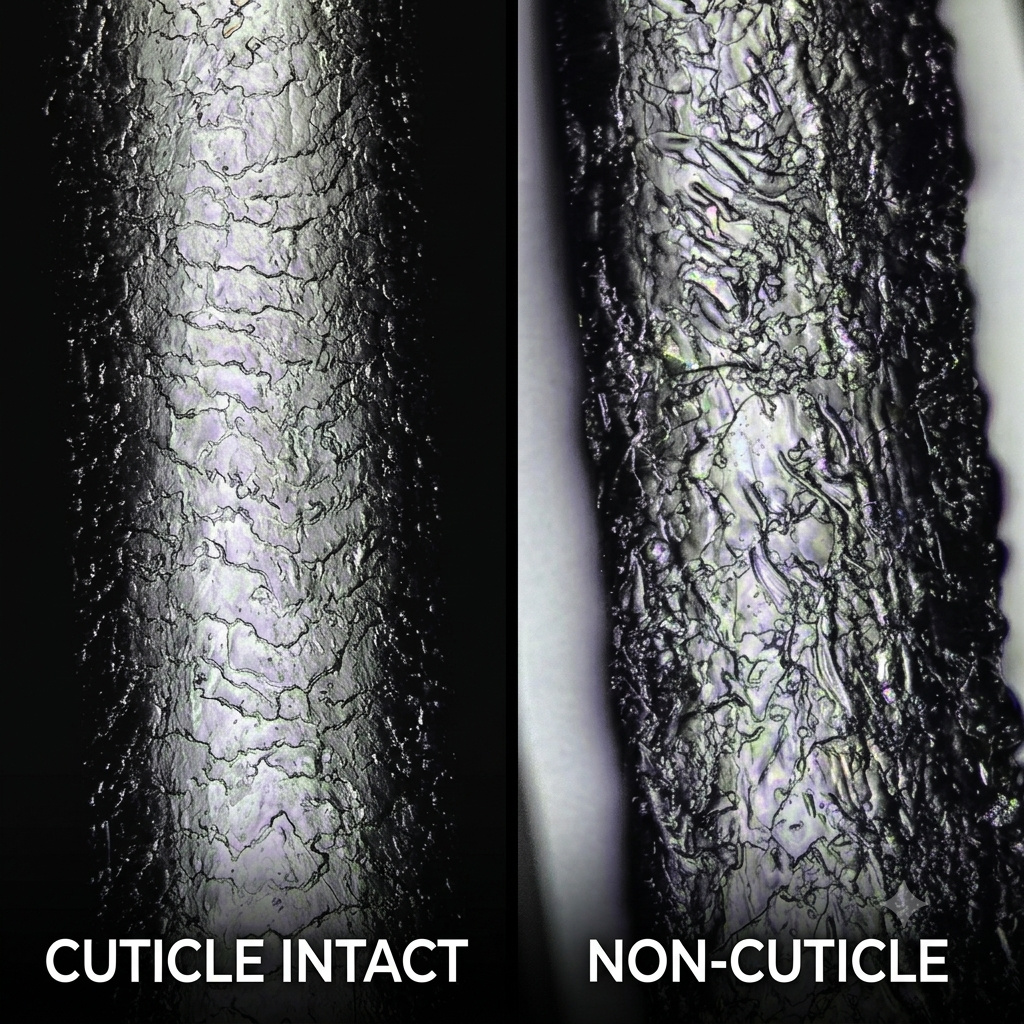
When it comes to materials, toupees can be made from either synthetic fibers or human hair. Synthetic toupees are generally more affordable and easier to maintain, but they may not look or feel as natural as those made from real human hair. Human hair toupees, although more expensive, offer a highly realistic appearance and can be styled with heat tools, dyed, or treated just like natural hair. High-quality toupees often use Remy human hair, where the cuticles are kept intact and aligned, reducing tangling and prolonging the lifespan of the hairpiece.

The design and construction of toupees have also evolved significantly. Modern toupees often feature breathable bases made from materials such as lace, polyurethane, or monofilament. Lace bases offer a lightweight and nearly invisible appearance at the hairline, making the toupee look more natural. Polyurethane bases provide durability and a skin-like finish, allowing toupees to be attached securely with adhesives or tapes. Monofilament bases simulate the scalp and give the illusion of hair growing directly from the scalp, enhancing realism.

Additionally, many toupees include features that improve comfort and fit. Adjustable straps, clips, or adhesive systems ensure the hairpiece stays securely in place during daily activities. Some toupees are also designed to be water-resistant, allowing users to wear them while swimming or exercising.

In summary, a toupee is a specialized hairpiece designed to cover partial hair loss, primarily used by men with receding hairlines or thinning hair. Made from synthetic fibers or real human hair, toupees are crafted with advanced materials and techniques to provide a natural look, comfortable fit, and durable performance. For those experiencing localized hair loss, a well-chosen toupee can be an effective and stylish solution to restore their hair’s appearance and confidence.

What is a Wig?

wig is a full-head hairpiece designed to cover the entire scalp, replacing all of a person’s natural hair. Unlike toupees, which only cover partial hair loss, wigs provide complete hair coverage and are often used for both cosmetic and medical reasons. Wigs come in a wide variety of styles, lengths, colors, and materials, making them a versatile solution for anyone looking to change their appearance, conceal hair loss, or protect their natural hair.

The primary purpose of a wig is to offer full scalp coverage, whether due to hair thinning, alopecia, chemotherapy, or simply a desire for a new look. Wigs can transform a person’s style instantly and provide confidence by restoring the appearance of a full head of hair. They are available in many styles—from natural and subtle to bold and dramatic—catering to diverse personal preferences and needs.

Typical users of wigs include both men and women across various age groups. Women often wear wigs to manage hair loss caused by medical treatments such as chemotherapy, alopecia, or other health conditions. Wigs can also be a fashion accessory, allowing women to experiment with different hairstyles, colors, and lengths without altering their natural hair. Men also use wigs, especially those experiencing significant hair loss or complete baldness, or those interested in changing their style. Additionally, wigs are popular in entertainment industries—actors, performers, and cosplayers frequently use wigs to achieve specific looks or characters.

Wigs are made from two main types of materials: synthetic fibers and human hair. Synthetic wigs are crafted from man-made fibers designed to mimic the look and feel of real hair. These wigs are usually more affordable, require less maintenance, and hold their style well even after washing. However, they can sometimes appear less natural, and their styling options are limited because heat can damage synthetic fibers.

Human hair wigs, on the other hand, are made from real human hair, offering the most natural appearance and texture. They allow for more styling versatility, including heat styling, coloring, and cutting, just like natural hair. Because of their realism and flexibility, human hair wigs tend to be more expensive and require more maintenance to keep them looking their best.

In terms of design, wigs come in a variety of cap constructions to suit different needs and budgets. Some popular types include lace front wigs, which have a sheer lace panel at the front to create a natural-looking hairline; full lace wigs, which are made entirely of lace for maximum styling versatility; and monofilament wigs, where each hair is individually hand-tied to a thin mesh base, giving a realistic scalp appearance. Traditional cap wigs use a machine-made base and are usually more affordable but may offer less natural movement.

Wigs are also available in countless styles, ranging from short pixie cuts and sleek bobs to long curls and waves. Colors span from natural shades like black, brown, and blonde to vibrant hues like red, blue, or purple. This variety allows individuals to express their personality and style preferences easily.

In summary, a wig is a full-head hairpiece designed to cover the entire scalp, providing a complete hair replacement solution for people experiencing hair loss or those wanting a new hairstyle. Made from synthetic or human hair, wigs come in many styles and cap constructions to suit diverse needs. Whether for medical reasons, fashion, or convenience, wigs offer an effective and versatile way to enhance one’s appearance and confidence.

Cost Comparison: Toupee vs Wig

When deciding between a toupee and a wig, one of the most important considerations is cost. The price of these hairpieces can vary widely depending on several factors such as material quality, customization, brand, and additional features. Understanding the typical price ranges and what influences costs can help you make a more informed and budget-friendly decision.

Typical Price Range of Toupees

Toupees generally cover smaller areas of the scalp and tend to be less expensive than full wigs. The typical price for a toupee ranges from $200 to $1,500. Synthetic toupees, which are made from man-made fibers, are on the lower end of this spectrum, often costing between $200 and $600. Human hair toupees, which provide a more natural look and greater styling flexibility, usually range from $600 to $1,500 or more, depending on the quality and customization.

Typical Price Range of Wigs

Wigs cover the entire scalp and are usually more complex to make, which reflects in their price. Synthetic wigs typically range from $100 to $1,000, with many affordable options available for casual or short-term use. High-quality human hair wigs can cost anywhere from $500 to $3,000 or more, especially if they are custom-made or come from luxury brands. The price increases with the length of the hair, density, and the craftsmanship involved in creating the wig cap.

Factors Affecting Cost

Several factors influence the final price of both toupees and wigs:

  • Material Quality: Human hair is more expensive than synthetic fibers. Remy human hair, which preserves the cuticle alignment, costs more but offers better durability and appearance.
  • Customization: Custom-made hairpieces tailored to the individual’s scalp shape, hair color, and style preferences cost significantly more than ready-to-wear options.
  • Brand and Manufacturer: Established brands with a reputation for quality often charge premium prices. Luxury or designer wigs and toupees typically fall into a higher price bracket.
  • Cap Construction: Advanced features like lace fronts, monofilament tops, or breathable bases can increase the price due to the complexity and comfort they offer.
  • Length and Density: Longer and thicker hairpieces require more material and labor, increasing the cost.

Budget Considerations and Value

While toupees are generally less expensive, they may require more frequent replacement due to their smaller size and frequent use, potentially adding to long-term costs. Wigs, particularly high-quality human hair wigs, are an investment that often lasts longer with proper care. It’s essential to balance upfront costs with durability, maintenance expenses, and the desired natural look.

Hairpiece TypeMaterialTypical Price RangeCustomizationDurabilityMaintenance Cost
ToupeeSynthetic$200 – $600Low to MediumModerateLow to Moderate
ToupeeHuman Hair$600 – $1,500+Medium to HighModerate to HighModerate
WigSynthetic$100 – $1,000Low to MediumLow to ModerateLow to Moderate
WigHuman Hair$500 – $3,000+Medium to HighHighModerate to High

The choice between a toupee and a wig often comes down to your budget and specific needs. Toupees can be a cost-effective solution for partial hair loss, while wigs offer comprehensive coverage and styling versatility but at a higher price. Evaluating both upfront costs and long-term value will help you choose the best option that fits your lifestyle and financial plan.

Maintenance Requirements

Proper maintenance is essential to keep both toupees and wigs looking their best and to extend their lifespan. However, the care routines and time commitments for each can differ significantly depending on the type of hairpiece and its materials.

Daily Care of Toupees

Toupees require regular cleaning and careful handling, especially since they are often worn daily to cover partial hair loss. Cleaning a toupee typically involves gentle washing with specialized shampoos and conditioners designed for delicate hairpieces. Depending on usage, toupees should be cleaned every 1 to 2 weeks to remove oils, dirt, and product buildup.

Attachment methods also impact maintenance. Many toupees are secured with tapes, adhesives, clips, or combs, which require regular replacement or adjustment to maintain a secure and comfortable fit. Improper attachment can lead to discomfort, damage to natural hair, or slipping during wear.

The lifespan of a toupee depends on the materials and how well it is cared for. Synthetic toupees generally last about 3 to 6 months with regular use, while human hair toupees can last up to a year or more with proper maintenance. Given the frequent wear and partial coverage, toupees often need more attentive care to keep them looking natural and secure.

Maintenance of Wigs

Wigs, offering full head coverage, also demand consistent care but typically follow a slightly different routine. Washing wigs is recommended every 7 to 14 days depending on frequency of wear and exposure to environmental factors like sweat, dust, or styling products. Like toupees, wigs benefit from specially formulated shampoos and conditioners.

Storage is crucial for wigs to maintain shape and prevent tangling. When not worn, wigs should be placed on wig stands or mannequins to preserve their style and prevent damage. Proper storage also helps extend the wig’s lifespan.

Styling wigs varies based on the material. Synthetic wigs hold their shape well but usually cannot withstand heat styling, while human hair wigs can be styled with curling irons, straighteners, and colored or trimmed to suit personal preferences. This flexibility adds to the wig’s maintenance requirements but also its versatility.

Frequency and Difficulty of Upkeep

Overall, toupees often require more frequent maintenance due to their attachment systems and daily wear in localized areas. Wigs, while requiring regular washing and storage care, may involve less daily attention but can demand more effort if heat styling or color treatments are involved.

Convenience and Time Investment

For many users, toupees are convenient for quick partial coverage but require careful handling to avoid slippage. Wigs provide full coverage and styling versatility but may involve more preparation time each day. Ultimately, choosing between the two depends on personal lifestyle, how much time one can dedicate to upkeep, and desired appearance.

Appearance and Natural Look

One of the most important factors when choosing between a toupee and a wig is how natural they look once worn. Both hairpieces aim to restore a realistic hairline and scalp appearance, but they achieve this in different ways due to their design and coverage.

How Toupees Blend with Natural Hair

Toupees are designed to cover partial hair loss, which means they must seamlessly blend with the wearer’s existing hair. This blending is crucial for maintaining a natural look. Modern toupees often use lace fronts or monofilament bases that mimic the scalp’s appearance, allowing hair to appear as if it is growing directly from the skin. The edges of the toupee are carefully crafted to lay flat against the scalp and merge with natural hair, minimizing visible lines or gaps.

Because toupees cover only part of the scalp, matching the color, texture, and density of the wearer’s natural hair is essential. Skilled stylists often customize toupees by trimming, dyeing, or texturizing the hairpiece to ensure it integrates perfectly with the surrounding hair. When done well, toupees are nearly undetectable, giving a very natural and youthful appearance.

Appearance and Coverage of Wigs

Wigs provide full head coverage, which means they replace all natural hair and can completely transform a person’s look. High-quality wigs with lace fronts or full lace caps offer a realistic hairline and scalp simulation, making the wig appear as natural as possible. Monofilament wigs, where each hair strand is individually hand-tied to a mesh base, offer superior realism by mimicking the natural movement of hair.

Since wigs cover the entire scalp, they can be styled in any fashion, allowing users to experiment with different lengths, colors, and cuts without worrying about matching existing hair. This versatility can enhance the overall natural appearance, especially when the wig is chosen to complement the wearer’s face shape and skin tone.

Comfort and Breathability When Worn

Comfort plays a key role in the natural look of toupees and wigs. Breathable bases such as lace or monofilament allow air to circulate, preventing overheating and scalp irritation. Toupees, being smaller, generally feel lighter and cooler, while wigs may feel warmer due to full head coverage, especially in hot weather.

Advancements in materials have made many modern toupees and wigs lightweight and flexible, improving comfort and wearability. A well-fitted hairpiece also prevents unnatural movement or shifting, which is crucial for maintaining a natural look throughout the day.

Tips for Achieving the Most Natural Look

  • Choose the right base: Opt for lace front or monofilament bases that mimic the scalp.
  • Match hair color and texture: Customize the hairpiece to blend perfectly with natural hair or skin tone.
  • Proper fitting: Ensure the toupee or wig fits snugly without gaps or bulges.
  • Styling: Trim and style the hairpiece to suit your natural hair pattern or desired look.
  • Use minimal adhesives: Avoid excessive glue or tape that can create unnatural edges.
  • Regular maintenance: Keep the hairpiece clean and conditioned to maintain shine and softness.

By focusing on these factors, both toupees and wigs can provide a remarkably natural appearance that boosts confidence and comfort.

Pros and Cons Summary

Advantages of Toupees

  • Natural Blending: Toupees cover only partial hair loss and blend with existing hair, offering a subtle, natural look.
  • Lightweight and Comfortable: Smaller size makes them lighter and often more breathable than full wigs.
  • Easier Daily Use: Quicker to put on and remove for those who want occasional coverage.
  • Cost-Effective: Generally less expensive upfront compared to full wigs.

Disadvantages of Toupees

  • Limited Coverage: Only suitable for localized hair loss, not for complete baldness.
  • Attachment Maintenance: Requires adhesives or clips that need regular upkeep.
  • Potential for Slippage: Risk of moving or lifting if not properly secured.
  • Shorter Lifespan: Often replaced more frequently due to daily wear on small area.

Advantages of Wigs

  • Full Coverage: Ideal for those with extensive hair loss or total baldness.
  • Styling Versatility: Wide variety of lengths, colors, and styles to choose from.
  • High Realism: Advanced cap constructions (lace fronts, monofilament) offer very natural appearances.
  • Protects Natural Hair: Can shield natural hair from damage and environmental factors.

Disadvantages of Wigs

  • Higher Cost: Quality human hair wigs can be quite expensive.
  • More Maintenance: Requires regular washing, styling, and careful storage.
  • Can Feel Warm: Full head coverage may feel less breathable, especially in hot weather.
  • Daily Time Investment: Putting on and styling can take longer than toupees.

Which Option Suits Different Lifestyles and Needs?

  • Toupees are best for:
    Individuals with partial hair loss who want a lightweight, natural-looking option. Ideal for those who prefer minimal daily maintenance and quicker application. Good for men with receding hairlines or thinning crowns who want to blend with existing hair.
  • Wigs are best for:
    People with extensive or complete hair loss, including those undergoing medical treatments like chemotherapy. Also great for anyone seeking a full change in hairstyle or color without altering natural hair. Suitable for those willing to invest time and money in maintenance and styling.

Toupees offer a cost-effective, comfortable solution for partial hair loss, while wigs provide full coverage and greater styling flexibility at a higher cost and care level. Choosing between the two depends on the extent of hair loss, lifestyle preferences, and budget.

Conclusion

Toupees and wigs serve different needs when it comes to hair replacement. Toupees provide partial coverage, blending seamlessly with natural hair and offering a lightweight, cost-effective solution for localized hair loss. Wigs, on the other hand, offer full scalp coverage, greater styling versatility, and a more dramatic transformation but often come with higher costs and maintenance demands.

When considering cost, toupees tend to be more affordable upfront, while wigs, especially human hair ones, require a larger investment but can last longer. Maintenance for toupees involves frequent attachment care, whereas wigs need regular washing, styling, and proper storage. In terms of appearance, both can look natural with the right fit and customization, but wigs allow for more style options.

Ultimately, the best choice depends on your lifestyle, budget, and personal preferences. Take time to evaluate your needs, and select the hairpiece that boosts your confidence and fits your daily routine best.

How to Start Your Own Hair Extension Line?

Starting your own hair extension line isn’t just a trend—it’s a serious business opportunity. The global demand for hair extensions continues to grow as more people look for volume, length, and styling flexibility without waiting months (or years) for natural growth.

But here’s the reality: launching a successful hair extension brand takes more than sourcing bundles and posting on social media. It requires strategy, quality control, branding, and a clear understanding of your market.

This guide walks you through every step—from idea to launch and beyond—so you can build a hair extension line that stands out and actually sells.


Why Start a Hair Extension Business?

Before diving in, let’s address the “why.”

The hair extension industry is attractive because:

  • High profit margins (especially with direct sourcing)
  • Repeat customers (hair needs replacement over time)
  • Strong demand across global markets
  • Low barrier to entry compared to many manufacturing businesses

But it’s also competitive. Which means your success depends on how well you differentiate—not just how quickly you start.


Step 1: Define Your Niche (Don’t Try to Sell to Everyone)

One of the biggest mistakes beginners make is trying to serve everyone. That usually leads to blending in—and blending in doesn’t sell.

Popular Niches in Hair Extensions

  • Luxury virgin hair extensions
  • Affordable everyday wear
  • Extensions for thin or fine hair
  • Curly or textured hair (Afro, kinky, coily)
  • Clip-ins for beginners
  • Professional salon-grade extensions

How to Choose Your Niche

Ask yourself:

  • Who is my target customer?
  • What problem am I solving?
  • What makes my product different?

👉 Example: Instead of “hair extensions,” go for “lightweight hand-tied extensions for fine hair.” Much clearer—and much easier to market.


Step 2: Understand the Product (You Can’t Sell What You Don’t Know)

Hair extensions vary widely in quality, construction, and origin.

Key Product Types

  • Clip-in extensions
  • Tape-in extensions
  • Hand tied wefts
  • Machine wefts
  • Keratin (fusion) extensions
  • Wigs and toppers

Key Quality Factors

  • Hair Type: Remy vs non-Remy
  • Origin: Brazilian, Indian, Vietnamese, etc.
  • Processing: Virgin, dyed, chemically treated
  • Cuticle alignment: Determines longevity and tangling

The better you understand these, the better your product positioning—and pricing—will be.


Step 3: Find a Reliable Supplier (This Is Everything)

Your supplier can make or break your brand. Seriously—this is not the place to cut corners.

Where to Source Hair Extensions

  • Direct manufacturers (often overseas)
  • Wholesale distributors
  • Private label suppliers

What to Look For

  • Consistent quality
  • Transparent sourcing
  • Customization options (length, color, density)
  • Low minimum order quantity (MOQ) for beginners
  • Good communication (underrated but critical)

Pro Tip

Order samples from multiple suppliers. Test:

  • Shedding
  • Tangling
  • Longevity after washing
  • Color consistency

If the sample disappoints, imagine 100 customers having the same experience. Not fun.


Step 4: Build Your Brand Identity

You’re not just selling hair—you’re selling a look, a feeling, a transformation.

Key Branding Elements

1. Brand Name

  • Memorable and easy to spell
  • Relevant to beauty or confidence

2. Logo and Visual Style

  • Clean, professional design
  • Consistent color palette

3. Brand Voice

  • Luxurious? Friendly? Professional? Bold?
  • Pick one and stay consistent

4. Packaging

  • Custom boxes, silk bags, or branded wraps
  • First impressions matter (unboxing is marketing)

Step 5: Create Your Product Line

Start simple. You don’t need 50 SKUs on day one.

Recommended Starter Line

  • 3–5 lengths (e.g., 14”, 18”, 22”, 26”)
  • 3–5 colors (natural black, dark brown, balayage options)
  • 1–2 extension types

This keeps inventory manageable while still offering variety.


Step 6: Set Your Pricing Strategy

Pricing is not just about covering costs—it reflects your brand positioning.

Basic Pricing Formula

Cost (product + shipping + packaging) × markup = retail price

Typical Markup Range

  • 2x to 5x depending on brand positioning

Consider

  • Competitor pricing
  • Target audience budget
  • Perceived value

Cheap pricing may attract customers—but it can also signal low quality.


Step 7: Build an Online Presence (Your Digital Storefront)

If your brand doesn’t exist online, it doesn’t exist (harsh but accurate).

Must-Have Platforms

1. Website

  • Shopify or WooCommerce
  • Clean design
  • Mobile-friendly

2. Social Media

  • Instagram (visual storytelling)
  • TikTok (viral potential)

3. Content Strategy

  • Before-and-after transformations
  • Tutorials
  • Customer testimonials

Step 8: Product Photography & Content Creation

Hair extensions are visual products—your images must sell the experience.

What You Need

  • High-quality product photos
  • Lifestyle images
  • Videos showing installation and styling

Content Ideas

  • “Before and after” transformations
  • Styling tutorials
  • Maintenance tips
  • Influencer collaborations

Step 9: Marketing Your Hair Extension Line

Even the best product won’t sell without visibility.

Key Marketing Channels

1. Influencer Marketing

  • Partner with hairstylists and beauty creators
  • Micro-influencers often have better engagement

2. Social Media Ads

  • Targeted ads on Instagram and TikTok

3. SEO Content

  • Blog posts (like this one)
  • Keywords such as:
    • “best hair extensions for thin hair”
    • “how to install hand tied wefts”

4. Email Marketing

  • Build a customer list
  • Offer discounts, tips, and updates

Step 10: Customer Experience (This Is Your Secret Weapon)

Great products get customers. Great experiences keep them.

Focus Areas

  • Fast shipping
  • Clear communication
  • Easy returns
  • Helpful support

Happy customers = repeat business + word-of-mouth marketing.


Step 11: Legal & Business Setup

Not glamorous, but necessary.

Essentials

  • Register your business
  • Choose a business structure (LLC, etc.)
  • Open a business bank account
  • Understand import regulations (if sourcing internationally)

Step 12: Launch Your Brand

Don’t wait for perfection—it doesn’t exist.

Launch Strategy

  • Pre-launch teaser on social media
  • Offer early-bird discounts
  • Send products to influencers before launch
  • Collect reviews quickly

Step 13: Scale Your Business

Once you gain traction:

  • Expand product range
  • Introduce new colors or textures
  • Collaborate with salons
  • Consider wholesale opportunities

Common Mistakes to Avoid

Let’s save you from expensive lessons:

  • Choosing the cheapest supplier
  • Ignoring branding
  • Overloading inventory too early
  • Skipping quality testing
  • Inconsistent marketing


Final Thoughts

Starting your own hair extension line is absolutely achievable—but success comes from doing the fundamentals well.

Focus on:

  • Quality products
  • Clear branding
  • Smart marketing
  • Strong customer experience

Do that consistently, and your brand won’t just exist—it will grow.

And who knows? One day someone might be wearing your extensions, getting compliments, and casually saying, “Oh this? It’s just my hair.” (Technically true… just with a little help.)

Lace Front vs Full Lace Wigs: Pros, Cons, and Key Differences

Finding the perfect wig isn’t just about looks—it’s about comfort, confidence, and how well the style fits your lifestyle. Whether you wear wigs daily, for special occasions, or as a protective style, choosing the right type of wig can make a significant difference in both appearance and experience. With so many wig options available today, two of the most popular and frequently compared types are lace front wigs and full lace wigs.

Both lace front and full lace wigs offer realistic finishes and styling versatility, but they are built differently, feel different when worn, and require different levels of maintenance and application. A lace front wig features sheer lace along the front hairline only, making it ideal for achieving a natural-looking hairline while keeping the rest of the cap constructed for easy wear. In contrast, a full lace wig has lace covering the entire cap, allowing for more flexible styling—including updos and ponytails—with a scalp-like appearance from every angle.

In this guide—Lace Front vs Full Lace Wigs: Pros, Cons, and Key Differences—we’ll explore what sets these two wig types apart. You’ll learn how each is constructed, their unique benefits and drawbacks, and which one may suit your needs best. Whether you’re a beginner or a wig-wearing pro, this article will help you make an informed decision based on your budget, styling preferences, and comfort level. Let’s dive into the world of lace wigs and uncover which type is the perfect match for you.

What Is a Lace Front Wig?

When it comes to achieving a natural-looking hairline and easy styling, lace front wigs are among the most popular choices. Whether you’re new to wigs or a seasoned wearer, understanding what a lace front wig is—and what makes it unique—can help you determine if it’s the right option for you.

Definition and Structure

lace front wig is a type of wig that features a piece of sheer lace sewn along the front edge of the wig cap. The lace, typically stretching from ear to ear, is designed to mimic the natural hairline. Individual hair strands are hand-tied into the lace section, giving the illusion that the hair is growing directly from your scalp. The rest of the cap is usually made of a more durable, machine-made material, such as wefted tracks or mesh, which provides structure and support.

The lace used can vary in color to match different skin tones, and the density of the hair is carefully distributed to create a realistic transition from the lace front to the rest of the wig. The lace itself is thin and breathable, which makes it comfortable to wear and allows for some airflow to the scalp.

Some lace front wigs come pre-plucked (with a natural-looking hairline already shaped), while others may require some customization. Baby hairs are also often added along the front for a more realistic effect.

How It Looks When Worn

One of the biggest appeals of lace front wigs is how realistic and seamless they appear when worn correctly. Because the lace lies flat against the skin and the hair is hand-tied, the front of the wig blends almost invisibly with the wearer’s natural hairline. This makes it ideal for styles where the hair is worn down or slightly pulled back, such as side parts, middle parts, and soft waves.

However, because the lace is only in the front, you are somewhat limited in how you can style the hair. Updos or high ponytails may expose the non-lace parts of the wig cap, making them less suitable for these looks unless the wig is specially designed with additional lace coverage around the perimeter.

When properly installed—with adhesive, wig tape, or a secure glueless method—a lace front wig can stay in place for hours or even days. The hair appears to be growing naturally from the scalp, and many people find the look indistinguishable from real hair.

Common Uses and Who It’s Best For

Lace front wigs are incredibly versatile and widely used across many groups, including:

Everyday wearers: Thanks to their natural look and relatively easy application, lace front wigs are great for people who wear wigs daily, whether due to hair loss, protective styling, or fashion.

Beginners: Lace front wigs are often recommended for new wig users because they offer a balance between realism and ease of use. They typically require less maintenance and application skill compared to full lace wigs.

Cosplayers and performers: For actors, drag performers, and cosplayers who want a believable hairline for characters, lace front wigs are a go-to option. They hold up well under lights and camera close-ups.

People on a budget: Since lace front wigs are more affordable than full lace wigs, they offer an excellent value without sacrificing appearance. They allow users to experiment with different styles and colors without a major financial commitment.

Those who prefer quick styling: Lace front wigs are ideal for people who want a good-looking wig that doesn’t take hours to install or maintain.

Despite their benefits, lace front wigs aren’t perfect for everyone. If you plan to wear your hair in updos or high ponytails often, the limited lace coverage may be a drawback. Similarly, if you need a wig that mimics scalp appearance from all angles, you might want to consider a full lace wig instead.

A lace front wig offers a natural-looking hairline, ease of wear, and affordability, making it an excellent choice for both beginners and experienced wig wearers alike. With proper installation and care, it can dramatically enhance your look while keeping your styling options open—within reason. It’s a great solution if your priority is a realistic front view, easy maintenance, and a wig that delivers high impact without a high price tag.

What Is a Full Lace Wig?

For those seeking the most natural appearance and maximum styling flexibility, full lace wigs are considered the gold standard in the world of wigs. Though they tend to come at a higher price point and require more skill to install, their seamless look and versatility make them a favorite among professional stylists, celebrities, and experienced wig users.

Definition and Structure

full lace wig is a type of wig where the entire cap is made of lace—usually Swiss or French lace—rather than just the front section. This means that individual hair strands are hand-tied throughout the entire cap, not just along the hairline. The result is a wig that mimics the appearance of natural hair growth from all angles, allowing for a highly realistic, 360-degree look.

Unlike lace front wigs, which only have lace at the front of the cap, full lace wigs provide complete lace coverage. This allows the wig to sit flush against your scalp no matter where the part is placed or how the hair is styled. Since the hair is hand-tied onto lace, it can move freely in all directions, adding to the natural look and feel.

Most full lace wigs also include adjustable straps or small combs inside the cap to help secure the wig in place. While some people opt for glue or wig adhesive for a longer-lasting hold, others prefer glueless full lace wig options for daily wear.

Full Lace Coverage and Styling Flexibility

One of the standout features of a full lace wig is its unmatched styling versatility. Because the lace covers the entire scalp area, you can part the hair anywhere—middle, side, or even a zigzag—without revealing wefts or tracks. This makes full lace wigs ideal for anyone who loves changing up their hairstyle regularly.

You can also confidently wear styles that pull the hair away from the face, such as:

High ponytails

Top knots and buns

Braided updos

Space buns

Half-up, half-down styles

These styles would typically expose the base of a lace front wig, but with a full lace wig, the illusion of hair growing from the scalp remains consistent from every angle. This makes them especially useful for high-impact looks, photo shoots, or stage performances where every angle matters.

In addition to styling, full lace wigs are often lighter and more breathable than other types, making them a more comfortable choice for long-term wear—especially in hot or humid climates.

Popular Among Experienced Wig Users or Stylists

While full lace wigs offer numerous benefits, they do come with a steeper learning curve and are often best suited for those with wig experience or the help of a stylist. Installing a full lace wig typically takes more time and precision, especially if you want a flawless, long-lasting result. It often involves:

Careful placement with adhesive or tape

Blending lace with the scalp

Optional bleaching of the knots to further enhance realism

Strategic styling to maintain the natural look

For this reason, full lace wigs are a favorite among professional stylists who work with clients looking for premium results. Celebrities, influencers, and people in the entertainment industry frequently use full lace wigs for red carpets, television appearances, and film work due to their photorealistic quality.

They are also popular among those experiencing hair loss from medical conditions or treatments, as full lace wigs offer complete coverage and comfort while allowing the scalp to breathe.

However, it’s important to note that full lace wigs do require more maintenance and care than other wig types. Because the lace is delicate and the hair is individually tied, improper handling can shorten the lifespan of the wig. Washing, detangling, and storage should all be done with extra care to preserve the quality and longevity of the unit.

A full lace wig is the ultimate choice for those who prioritize realism, styling freedom, and all-around comfort. With its full-lace construction, it provides a scalp-like appearance no matter how you wear it, offering endless options for parting and updos. While it requires more skill to apply and maintain, the end result is a stunningly natural look that’s hard to beat.

If you’re serious about your wig game—whether for everyday wear, professional styling, or stage-ready glam—a full lace wig is an investment that delivers unmatched quality and versatility.

Key Differences Between Lace Front and Full Lace Wigs

While both lace front wigs and full lace wigs are designed to provide a natural appearance, they differ significantly in their construction, styling potential, comfort, application methods, and price. Understanding these key differences is essential when deciding which type is best suited to your lifestyle, styling needs, and budget.

1. Cap Construction

The most fundamental difference between lace front and full lace wigs lies in how they are built.

Lace Front Wigs have lace only at the front portion of the wig—typically from ear to ear. The rest of the cap is usually made from a stronger, machine-stitched material such as wefts or a stretch cap. The lace section allows for a natural-looking hairline, but the back and sides are not hand-tied or lace-based.

Full Lace Wigs, on the other hand, are constructed entirely with lace. The hair is individually hand-tied throughout the entire cap, not just in the front. This full-lace structure allows for more realistic movement and the illusion of hair growing directly from the scalp all over the head.

Because of this, full lace wigs offer superior realism from every angle, while lace front wigs primarily focus on the front view.

2. Styling Options

Styling flexibility is a major factor in choosing a wig, especially if you enjoy experimenting with different looks.

Lace Front Wigs are best suited for styles where the hair flows downward, such as straight styles, curls, or side parts. While you can pull the hair back slightly, styles like high ponytails or updos may expose the wefted back portion of the wig, which can ruin the illusion of a natural scalp.

Full Lace Wigs are the clear winner in terms of styling versatility. Because the lace covers the entire head, you can part the hair anywhere, wear it in high ponytails, buns, braids, or even cornrows without revealing the base of the wig. These wigs are ideal for updos or styles where the hair is lifted off the face and neck.

If you need maximum styling freedom, especially for formal looks, performances, or frequent changes, a full lace wig is the better choice.

3. Breathability and Comfort

Comfort plays a big role in wig wearability, especially for daily use or extended wear.

Lace Front Wigs offer good breathability at the hairline, but the rest of the cap—often made from thicker materials—can trap heat, making them slightly less breathable. However, they are still relatively lightweight and comfortable for many wearers.

Full Lace Wigs are made entirely of lace, which is a thin, lightweight, and breathable material. This means your scalp can “breathe” more easily, reducing sweat buildup and making the wig more comfortable for all-day wear—even in warmer climates.

If scalp comfort and airflow are important to you, full lace wigs have the advantage.

4. Application Process

The ease of applying and securing your wig can influence how often and comfortably you wear it.

Lace Front Wigs are generally easier to apply, especially for beginners. Many come with pre-cut lace, combs, and adjustable straps, and can be worn glueless. While some users prefer adhesive for a firmer hold, lace front wigs typically require less time and skill to install.

Full Lace Wigs demand a bit more expertise. Because they offer 360-degree lace coverage, they often require adhesive or wig tape around the entire perimeter to ensure a seamless, natural finish—especially if worn in updos. This makes the application process longer and more involved, which may be challenging for first-time users.

If you’re looking for quick and beginner-friendly application, lace front wigs are a great place to start.

5. Price Range

Cost is often one of the most important considerations when purchasing a wig.

Lace Front Wigs are generally more affordable. Because the lace is limited to the front of the wig and the rest is machine-made, the production cost is lower. This makes lace front wigs ideal for budget-conscious buyers or those who like to own multiple styles.

Full Lace Wigs are more expensive due to the labor-intensive hand-tying process and the full lace construction. However, the price reflects the added realism, styling flexibility, and craftsmanship.

If you’re seeking a budget-friendly option, a lace front wig is a smart choice. But if you’re ready to invest in top-tier quality and freedom, a full lace wig is worth the price.

The key differences between lace front wigs and full lace wigs come down to cap construction, styling freedom, comfort, ease of use, and price. Lace front wigs are a great starting point for those who want a natural look with simpler maintenance, while full lace wigs are perfect for experienced users who want complete control over their hairstyle and a flawless finish from every angle.

Knowing your lifestyle, experience level, and styling goals will help you choose the right wig type with confidence.

Pros and Cons of Lace Front Wigs

Lace front wigs have become a go-to choice for many wig wearers due to their blend of natural appearance, ease of use, and affordability. But like any beauty product, they come with their own set of advantages and limitations. In this section, we’ll break down the pros and cons of lace front wigs to help you decide if they’re the right choice for your needs.

Pros of Lace Front Wigs

1. More Affordable

One of the biggest benefits of lace front wigs is their cost-effectiveness. Compared to full lace wigs, lace front wigs are significantly more affordable while still offering a realistic look. This makes them a great option for those who are just starting out with wigs, experimenting with new styles, or looking to expand their collection without spending too much.

The reduced cost is mainly due to their construction. Only the front portion of the cap contains hand-tied lace, while the rest of the wig is made with machine-sewn tracks or wefts. This allows manufacturers to offer a high-quality appearance without the labor-intensive production of full lace units.

2. Natural Hairline Appearance

Perhaps the most celebrated feature of lace front wigs is their ability to mimic a natural hairline. The sheer lace at the front blends seamlessly with your skin, creating the illusion that hair is growing directly from your scalp. When properly applied, the lace front can be nearly invisible, especially if it matches your skin tone and is installed with precision.

This makes lace front wigs ideal for styles that show off the front of the hairline—such as center parts, side parts, or slicked-back looks—providing a polished and natural appearance.

3. Easier to Apply for Beginners

If you’re new to wearing wigs, lace front styles are often the best place to start. They are typically easier to apply and manage than full lace wigs. Many lace front wigs come pre-plucked and with baby hairs, saving you time on customization. Some versions are glueless and include adjustable straps and combs, allowing for a secure fit without adhesive.

The simpler application process makes lace front wigs a practical choice for everyday wear, especially for users who want a natural look without spending a lot of time on installation.

Cons of Lace Front Wigs

1. Limited Styling Flexibility

While lace front wigs offer a beautiful, natural hairline, they do come with styling limitations. Since the lace is only at the front, you can’t part the hair freely across the scalp. Deep side parts are possible, but styles like high ponytails, buns, or braided updos may expose the wefted back or sides of the wig cap.

If you enjoy frequently switching up your hairstyle or wearing looks that pull hair away from the face and neck, a lace front wig might not provide the full flexibility you need.

2. Less Breathable in the Back

Another drawback of lace front wigs is that they are typically less breathable than full lace wigs, especially in the back. The cap construction behind the lace front usually consists of thicker, machine-sewn wefts that don’t allow as much airflow to the scalp.

For most users, this isn’t a major issue, especially if the wig is worn for a few hours at a time. However, in warmer climates or for long-term daily wear, this reduced breathability may cause slight discomfort or increased sweating, particularly in the summer.

Lace front wigs strike a strong balance between natural appearance, ease of use, and affordability. They’re especially well-suited for beginners or anyone who wants a high-quality, low-maintenance wig that still delivers a polished, realistic look. While they don’t offer the same level of styling freedom or breathability as full lace wigs, the pros often outweigh the cons—especially for everyday wear or special occasions.

If you’re looking for a wig that offers a beautiful hairline and is easy to work with, lace front wigs are an excellent choice.

Pros and Cons of Full Lace Wigs

Full lace wigs are considered the premium choice among wig types, offering unmatched realism and styling versatility. However, this high-end option comes with certain challenges that may not suit every wearer. Below, we break down the main pros and cons of full lace wigs to help you understand whether they’re the right fit for your hair goals and lifestyle.

Pros of Full Lace Wigs

1. Full Styling Freedom

One of the most significant advantages of a full lace wig is its complete styling flexibility. Because the entire cap is made of lace and the hair is hand-tied, you can part the hair anywhere on the scalp. This allows for a wide range of hairstyles—middle parts, deep side parts, braids, buns, space buns, cornrows, and especially high ponytails and updos.

This 360-degree realism makes full lace wigs ideal for anyone who likes to change their hairstyle frequently or needs a wig that looks natural from every angle.

2. More Natural-Looking from All Angles

Full lace wigs provide the most realistic appearance available. Since the lace covers the entire head and each strand of hair is individually tied, the result is a look that closely mimics natural hair growth, no matter where you’re looking from.

This makes full lace wigs a top choice for professional settings, photography, or performance environments where attention to detail matters—especially around the edges, parting, and nape of the neck.

3. Lightweight and Breathable

Despite their intricate design, full lace wigs are actually lightweight and highly breathable. The lace material allows airflow throughout the scalp, reducing heat buildup and sweat during extended wear. This makes them especially comfortable in warm climates or for users who wear wigs all day long.

Compared to traditional machine-made or lace front wigs, full lace units offer better ventilation and a lighter feel on the head.

Cons of Full Lace Wigs

1. More Expensive

Full lace wigs are typically more expensive than lace front wigs due to their complex construction. Each strand of hair is individually hand-tied into lace, which is a labor-intensive process. The full lace cap adds both realism and versatility—but at a cost.

While the investment may be worth it for serious wig wearers or professionals, the higher price point can be a barrier for those on a budget or just starting out.

2. Requires More Skill to Install

Another drawback is that full lace wigs require more skill and time to apply correctly. Because the lace extends all around the head, most users opt for adhesive or wig tape to secure the wig, particularly when styling in updos or exposing the nape area.

Incorrect application can lead to lifting or visible lace, which compromises the natural appearance. Beginners may find this process intimidating and may need help from a stylist.

3. Longer Application Time

Compared to lace front wigs, full lace wigs generally take more time to apply and style. The process often includes aligning and gluing the lace along all edges, blending it into the skin, and carefully styling the hair. For daily use, this extended prep time may not be practical for everyone.

A full lace wig offers luxury, realism, and styling freedom that few other wigs can match. However, it also demands more in terms of investment, skill, and time. If you’re looking for maximum versatility and a flawless look from every angle—and you’re comfortable with the application process—then a full lace wig is a worthwhile investment.

Which Wig Is Best for You?

Choosing between a lace front wig and a full lace wig ultimately depends on your budget, styling preferences, experience level, and how often you plan to wear the wig. Each type has its strengths, and the best choice will align with your personal needs and lifestyle.

Consider Your Budget

If you’re working with a limited budget or just starting your wig journey, a lace front wig offers excellent value. It provides a natural-looking hairline at a more affordable price. On the other hand, if you’re ready to invest in a premium wig with all the styling flexibility and realism possible, a full lace wig is worth the higher cost.

Think About Styling Needs

Your typical hairstyles will play a big role in your decision. If you prefer simple styles with the hair worn down or parted in front, a lace front wig will serve you well. But if you love high ponytails, buns, braids, or versatile parting, a full lace wig is the better fit due to its 360-degree lace coverage.

Evaluate Your Experience Level

New to wigs? A lace front wig is often easier to apply and manage. It usually comes ready to wear with adjustable straps and minimal adhesive needed. If you’re more experienced or plan to work with a stylist, the full lace wig gives you the freedom and professional-level finish you may want.

Daily Wear vs Special Occasions

For everyday use, lace front wigs are lightweight, quick to apply, and budget-friendly. For special events, performances, or long-term use, full lace wigs provide superior realism and comfort, especially for extended wear.

In the end, the right wig is the one that meets your needs—both practically and stylistically.

Tips for Choosing the Right Wig

Selecting the perfect wig involves more than just style—it’s about fit, comfort, and maintenance. Here are some helpful tips to ensure you choose a wig that looks natural and lasts longer.

How to Measure Your Head Size

Accurate measurement is key to a comfortable wig fit. Use a soft measuring tape and measure:

Around your head: Start at your natural hairline on the forehead, wrap the tape around just above your ears, and back to the starting point.

Front to back: Measure from your hairline at the center of your forehead to the nape of your neck.

Ear to ear: Measure from the top of one ear across your scalp to the other ear.

Compare your measurements with the wig’s sizing chart to find the best fit—common sizes are small, medium, and large. A properly sized wig reduces slipping and ensures a natural look.

Importance of Lace Color and Wig Density

Choosing the right lace color is crucial for blending the wig with your skin tone. Lace comes in shades like light, medium, and dark—select one closest to your complexion for a seamless hairline.

Wig density refers to how thick or full the hair looks. Typical densities range from 130% (light) to 180% (full). If you want a natural everyday look, lighter densities are ideal. For a voluminous style or special occasions, higher densities work better.

Maintenance Tips for Both Wig Types

Proper care extends the life of your wig:

Wash gently with sulfate-free shampoo and conditioner designed for wigs.

Detangle carefully using a wide-tooth comb or fingers.

Store properly on a wig stand or mannequin head to maintain shape.

Avoid excessive heat styling unless the wig is heat-resistant.

Following these tips ensures your lace front or full lace wig stays beautiful, comfortable, and natural-looking for longer.

Conclusion

Choosing between a lace front wig and a full lace wig ultimately comes down to your individual needs and preferences. Lace front wigs offer an affordable, beginner-friendly option with a natural hairline, making them ideal for everyday wear and simpler styles. On the other hand, full lace wigs provide unmatched styling freedom, all-around realism, and superior breathability, though they require more skill to apply and come at a higher price.

Before making your decision, consider your budget, how you like to style your hair, your experience level with wigs, and whether you plan to wear your wig daily or for special occasions. Both types have unique benefits that can suit different lifestyles and preferences.

Taking time to assess what matters most to you will help you find a wig that boosts your confidence, fits comfortably, and enhances your natural beauty. We are a professional wig manufacturer in China, we have both Lace Front and Full Lace Wigs for sale. Bulk orders are welcome!

Hand Tied Weft Extensions Before and After

If you’ve ever looked at those dramatic “before and after” hair transformations and wondered how they go from thin, flat, or uneven hair to full, flowing, glossy perfection—there’s a good chance hand tied weft extensions are behind the magic.

But here’s the truth: the difference between a flawless transformation and a noticeable, uncomfortable one isn’t just the extensions—it’s the method, placement, care routine, and customization.

This guide breaks everything down in detail: what hand tied weft extensions are, what realistic “before and after” results look like, the full installation process, maintenance steps, and how to achieve salon-quality results at home (or at least understand what your stylist should be doing).


What Are Hand Tied Weft Extensions?

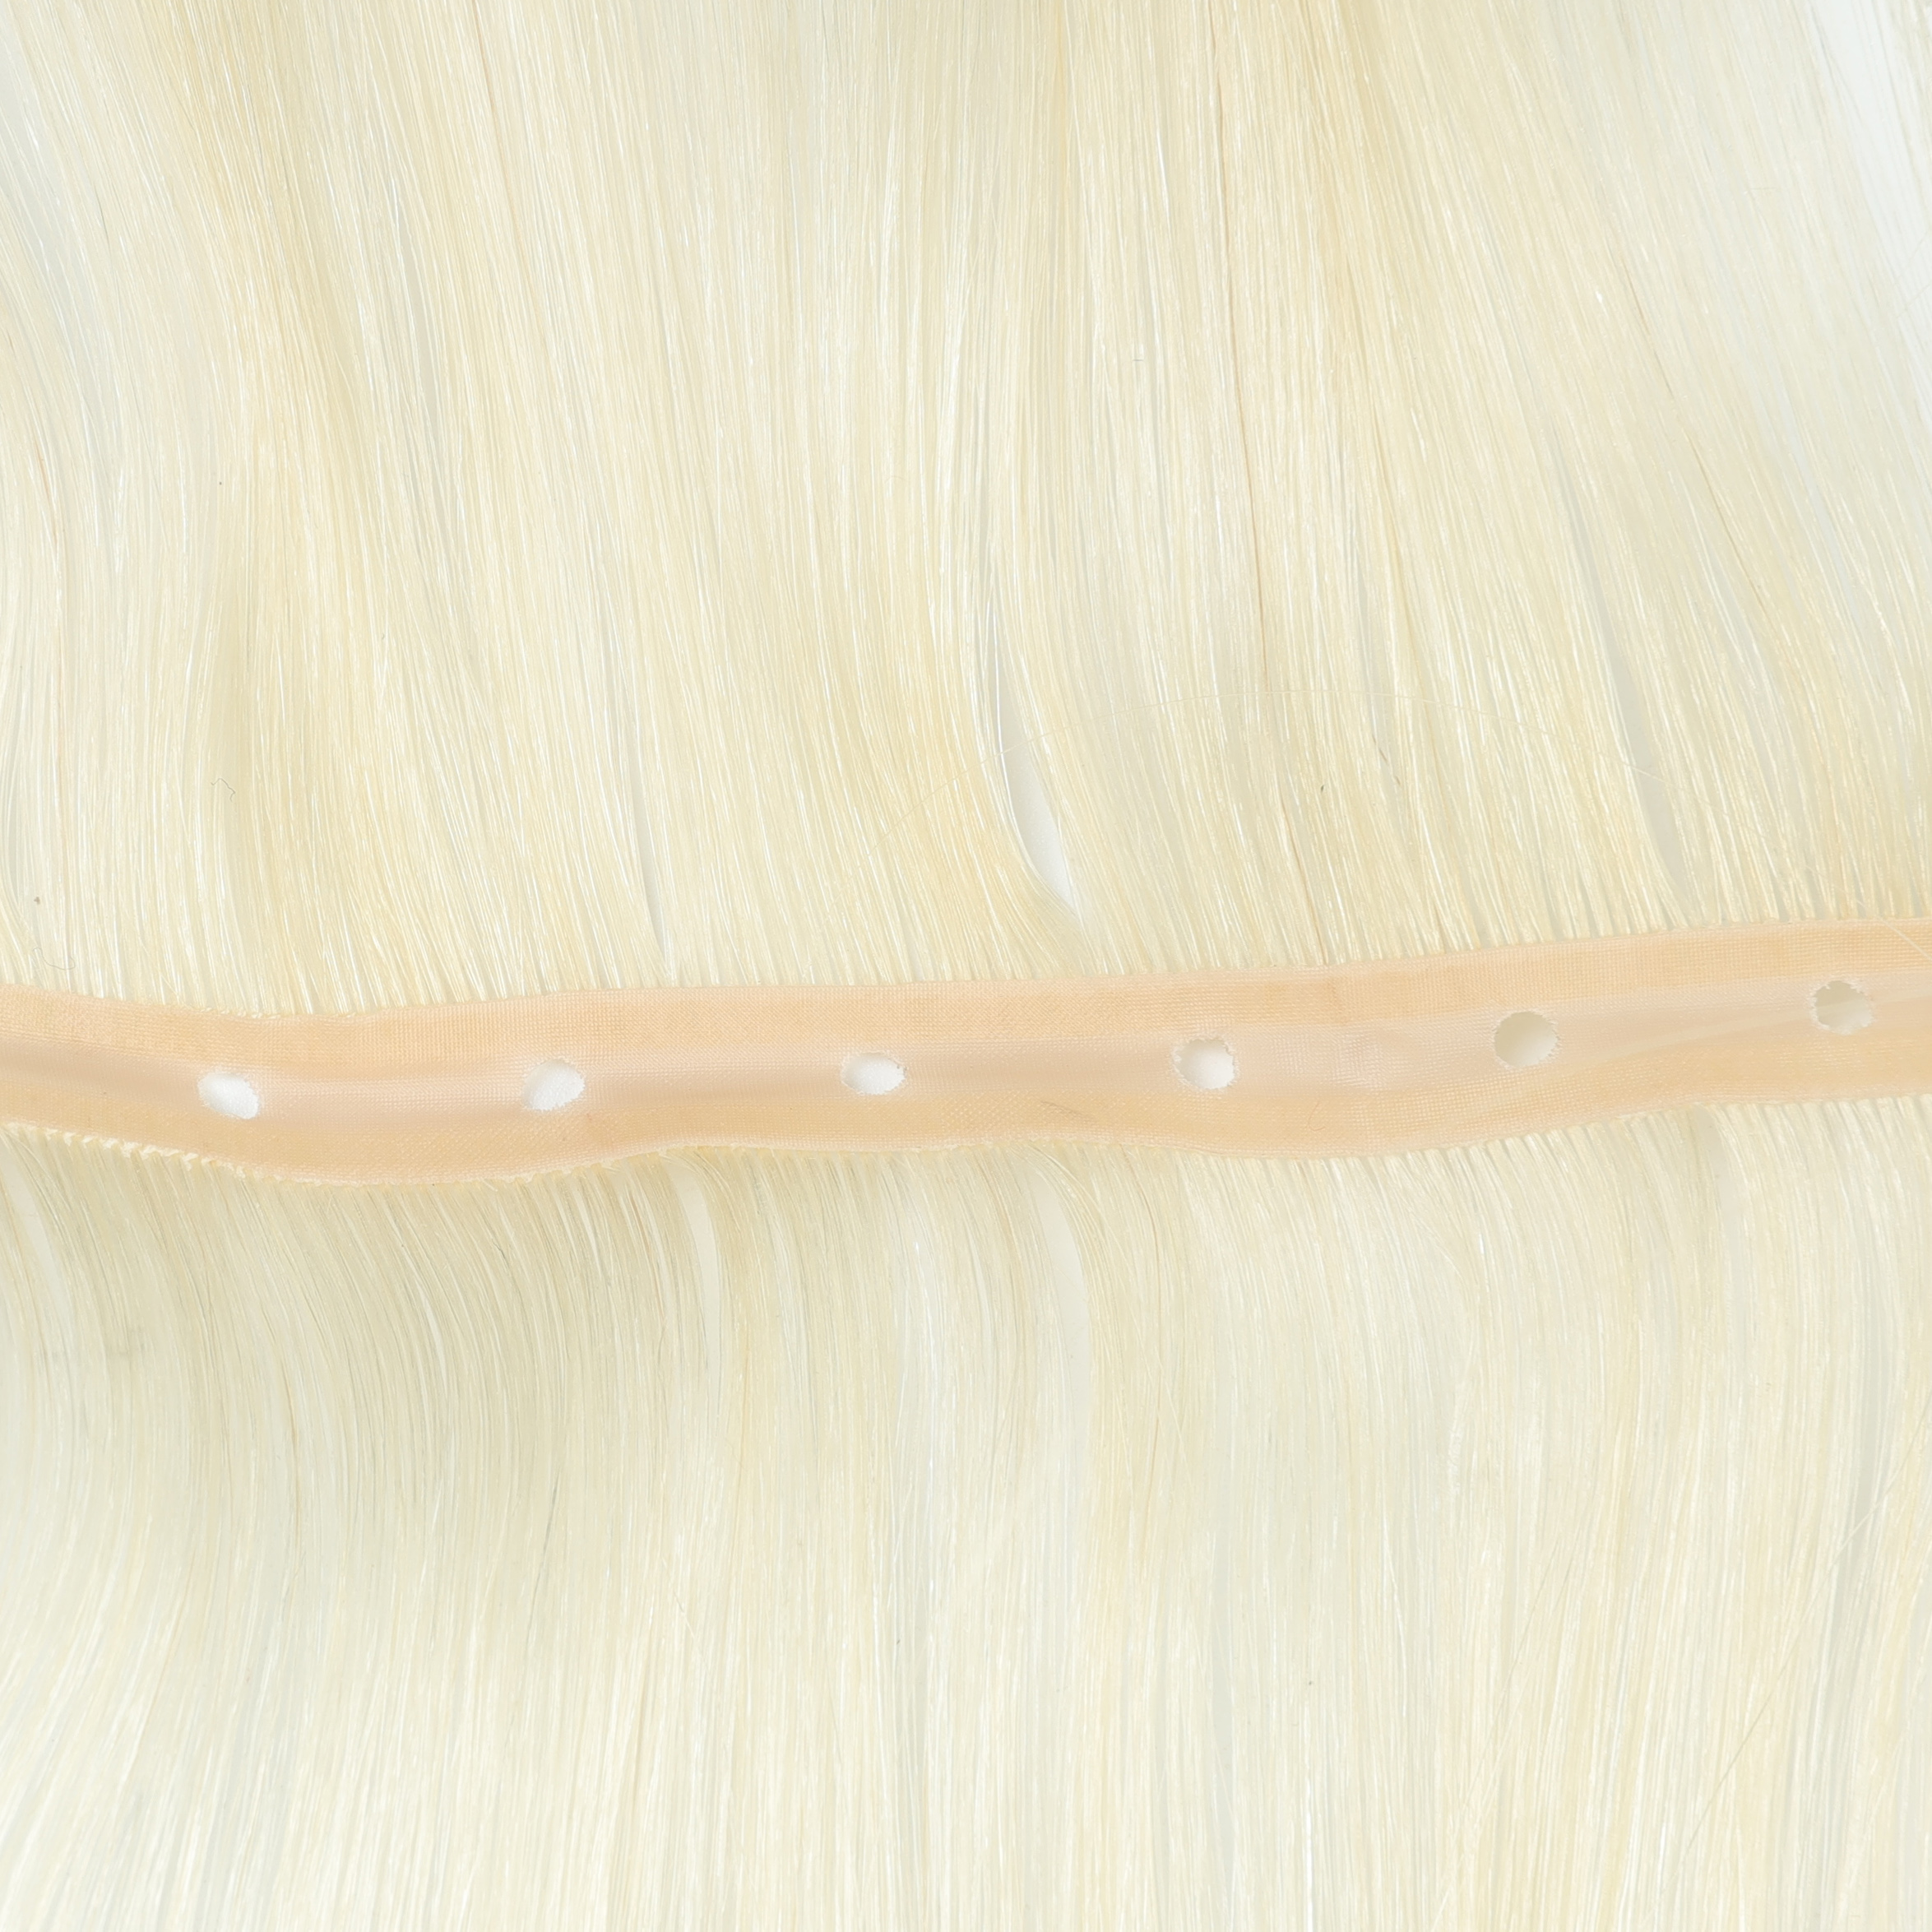
Hand tied weft extensions are thin, flexible hair wefts that are carefully sewn by hand into a fine, flat strip. Unlike machine wefts, they’re lightweight, lie closer to the scalp, and are designed to blend seamlessly with natural hair.

They are typically installed using a bead-and-sew method:

  • Small silicone-lined beads are placed along a row
  • A track is created using your natural hair
  • The wefts are then sewn onto this base

The result? A natural, flat, comfortable finish that doesn’t scream “extensions.”


Before and After: What Changes Can You Expect?

Let’s get realistic—this isn’t a magic spell, but it can feel close.

Before: Common Hair Concerns

  • Thin or fine hair lacking volume
  • Uneven lengths from previous cuts
  • Hair breakage or damage
  • Slow hair growth frustration
  • Flat, lifeless appearance

After: Typical Results

  • Instantly fuller, thicker hair
  • Increased length (often 4–10+ inches)
  • Better shape and layering
  • Improved styling versatility
  • Enhanced overall confidence

The transformation is not just visual—it changes how your hair behaves. Styling becomes easier, and volume holds longer.


Why Choose Hand Tied Wefts Over Other Extensions?

There are plenty of extension types out there—tape-ins, clip-ins, fusion bonds—but hand tied wefts stand out for a few key reasons.

Key Advantages

1. Natural Look
The wefts are ultra-thin, making them nearly invisible when installed correctly.

2. Lightweight Feel
You won’t feel like you’re carrying extra weight on your head all day.

3. Less Damage (When Done Properly)
No glue, no heat—just beads and thread.

4. Long-Term Wear
Typically lasts 6–8 weeks before needing adjustment.

5. Reusable Hair
High-quality wefts can be reused multiple times.


Step-by-Step: How Hand Tied Weft Extensions Are Installed

Here’s where things get technical—but understanding this helps you get better results.

Step 1: Consultation and Hair Matching

Before anything touches your hair:

  • Match color precisely (including highlights/lowlights)
  • Determine length and volume needed
  • Evaluate hair density and scalp condition

Skipping this step is like ordering clothes without checking size—possible, but risky.


Step 2: Sectioning the Hair

Hair is divided into clean horizontal sections:

  • Usually 1–3 rows depending on desired volume
  • Lower rows = length
  • Upper rows = volume and blending

Precision here ensures the extensions remain hidden.


Step 3: Creating the Beaded Foundation

  • Small beads are attached to sections of your natural hair
  • Beads are aligned in a row along the scalp
  • Spacing must be even to distribute weight

This creates a “track” that supports the wefts.


Step 4: Sewing the Wefts

  • The hand tied wefts are placed along the bead row
  • A thread is used to sew the weft securely onto the beads
  • Multiple wefts can be layered for more volume

The key here is tension—too tight causes discomfort, too loose leads to slipping.


Step 5: Blending and Cutting

After installation:

  • Hair is trimmed and layered
  • Extensions are blended with natural hair
  • Face-framing pieces are customized

This step is what separates “nice extensions” from “wow, is that all your hair?”


Step 6: Styling the Final Look

The stylist typically:

  • Blow-dries
  • Curls or straightens
  • Shows the final transformation

This is your “after” moment—and yes, it’s usually very satisfying.


Before and After Timeline: What Happens Over Time?

The transformation isn’t just instant—it evolves.

Immediately After Installation

  • Hair looks fuller and longer
  • Slight tightness may be felt (normal for 1–2 days)

After 1–2 Weeks

  • Hair settles naturally
  • Styling becomes easier

After 4–6 Weeks

  • Natural hair growth loosens the beads
  • Extensions may feel lower

After 6–8 Weeks

  • Time for maintenance (move-up appointment)

How to Care for Hand Tied Weft Extensions at Home

If you want your “after” to stay looking like day one, maintenance is everything.

Washing Routine

Frequency: 2–3 times per week

Steps:

  1. Brush before washing
  2. Use sulfate-free shampoo
  3. Wash gently (no aggressive scrubbing)
  4. Condition mid-lengths to ends
  5. Rinse thoroughly

Drying Tips

  • Pat dry with a towel (no rubbing)
  • Air dry when possible
  • If blow-drying, use heat protectant

Never sleep with wet extensions—it can cause tangling and tension damage.


Brushing Technique

  • Use a loop brush or extension-friendly brush
  • Hold the roots while brushing to avoid pulling
  • Start from ends → move upward

Sleeping Care

  • Tie hair in a loose braid or ponytail
  • Use a silk or satin pillowcase

This reduces friction and tangling overnight.


Styling Tips

  • Limit high heat
  • Avoid oils near the bead area
  • Use lightweight products

Heavy products can cause buildup and slipping.


Common Mistakes That Ruin Before-and-After Results

Let’s avoid the extension horror stories.

1. Poor Installation

  • Uneven beads
  • Visible wefts
  • Incorrect tension

2. Wrong Hair Match

  • Color mismatch
  • Texture mismatch

3. Skipping Maintenance

  • Leads to tangling and matting

4. Overloading with Too Many Wefts

  • Causes strain on natural hair

5. Improper Home Care

  • Product buildup
  • Excessive heat damage

Who Are Hand Tied Weft Extensions Best For?

They’re ideal if you have:

  • Fine to medium hair
  • Medium to long natural hair
  • Desire for natural-looking volume and length

They may not be ideal if:

  • Hair is extremely short
  • Scalp is very sensitive
  • Severe hair loss is present

Cost vs Value: Are They Worth It?

Let’s talk numbers (rough estimates):

  • Installation: $200–$800
  • Hair: $300–$1000+
  • Maintenance: $100–$300 every 6–8 weeks

Yes, it’s an investment. But compared to daily frustration with thin or uneven hair, many people find it worth every dollar.


Realistic Before and After Expectations

A quick reality check:

  • Extensions don’t fix damaged natural hair—they enhance appearance
  • Maintenance is required
  • Results depend heavily on the stylist’s skill

That said, when done correctly, the transformation is one of the most natural-looking in the extension world.


Final Thoughts

Hand tied weft extensions are one of the most effective ways to achieve a natural, seamless hair transformation. The “before and after” results can be dramatic—but they’re built on technique, proper installation, and consistent care.

If you:

  • Choose the right hair
  • Work with a skilled stylist
  • Follow a solid maintenance routine

You’ll get results that look effortless—even though there’s quite a bit going on behind the scenes.

And honestly, that’s the goal: hair that looks so good people assume you just “woke up like this”… even if your morning routine tells a slightly different story.

How to Do Hair Care at Home

Healthy hair doesn’t come from expensive salon visits alone—it’s built through consistent, thoughtful care at home. Whether your goal is smoother strands, reduced hair fall, faster growth, or simply shinier hair, a well-structured home hair care routine can deliver impressive results.

This guide walks you through everything: understanding your hair type, building a personalized routine, and mastering step-by-step techniques that actually work. No fluff—just practical, detailed guidance you can start using today.


Why Home Hair Care Matters More Than You Think

Hair is constantly exposed to stress—heat styling, pollution, UV rays, and chemical treatments. Over time, these factors weaken the hair shaft, strip natural oils, and damage the scalp environment.

A proper home routine helps you:

  • Maintain scalp health (the foundation of hair growth)
  • Preserve natural moisture balance
  • Prevent breakage and split ends
  • Extend the life of treatments (color, extensions, etc.)
  • Save money (your wallet will quietly thank you)


Step 1: Identify Your Hair Type (Don’t Skip This)

Before choosing products or routines, you need to understand your hair type. Otherwise, it’s like using winter tires in summer—technically possible, but not smart.

1. Hair Texture

  • Straight (Type 1): Prone to oiliness
  • Wavy (Type 2): Moderate frizz
  • Curly (Type 3): Needs moisture
  • Coily (Type 4): Very dry, fragile

2. Hair Thickness

  • Fine
  • Medium
  • Thick

3. Scalp Type

  • Oily
  • Dry
  • Normal
  • Sensitive

4. Condition

  • Damaged (bleached, heat-styled)
  • Natural/untreated
  • Thinning or hair loss

👉 Once you know this, every step below becomes 10x more effective.


Step 2: Build a Weekly Hair Care Routine

Consistency beats intensity. Here’s a balanced weekly routine:

Daily

  • Gentle brushing
  • Scalp-friendly styling
  • Minimal heat exposure

2–3 times per week

  • Shampoo + conditioner

1–2 times per week

  • Deep conditioning or hair mask

1 time per week

  • Scalp treatment (oil or exfoliation)

Step 3: Proper Hair Washing Technique (Most People Get This Wrong)

Washing your hair is not just about “cleaning.” It’s about protecting the scalp and hair structure.

How to Wash Hair Correctly

1. Detangle Before Washing

  • Use a wide-tooth comb
  • Start from the ends and work upward

2. Use Lukewarm Water

  • Hot water strips natural oils
  • Cold water alone doesn’t clean effectively

3. Apply Shampoo to the Scalp Only

  • Focus on roots
  • Let the foam clean the lengths naturally

4. Massage Gently (30–60 seconds)

  • Use fingertips, not nails
  • Improves blood circulation

5. Rinse Thoroughly

  • Residue = dull, lifeless hair

6. Apply Conditioner to Mid-Lengths and Ends

  • Avoid the scalp (unless it’s a scalp-safe formula)

7. Leave Conditioner for 2–5 Minutes

8. Final Rinse (Cool Water)

  • Helps seal the cuticle → shinier hair

Step 4: Deep Conditioning & Hair Masks (The Game Changer)

If regular conditioner is like daily skincare, a hair mask is your weekly facial.

How to Use a Hair Mask Properly

  1. Apply on damp (not soaking wet) hair
  2. Focus on damaged areas
  3. Comb through for even distribution
  4. Leave for 10–30 minutes
  5. Rinse thoroughly

DIY Hair Mask Ideas

  • Dry Hair: Coconut oil + honey
  • Damaged Hair: Egg + olive oil
  • Dull Hair: Yogurt + aloe vera

Pro tip: Wrap your hair in a warm towel to boost absorption.


Step 5: Scalp Care (Where Real Hair Growth Happens)

Ignoring your scalp is like watering leaves but not roots.

Weekly Scalp Routine

1. Scalp Massage (5–10 minutes)

  • Use natural oils like:
    • Coconut oil
    • Argan oil
    • Castor oil

Benefits:

  • Stimulates blood flow
  • Encourages hair growth
  • Reduces stress (bonus perk)

2. Scalp Exfoliation (Once a week)

  • Removes product buildup
  • Prevents clogged follicles

DIY scrub:

  • Sugar + oil + a few drops of lemon juice

Step 6: Drying Your Hair the Right Way

Rough drying is one of the biggest causes of damage.

What to Do Instead

  • Gently squeeze out water (don’t twist)
  • Use a microfiber towel or cotton T-shirt
  • Avoid aggressive rubbing

Blow-Drying Tips

  • Always use heat protectant
  • Keep dryer 6–8 inches away
  • Use medium heat, not max (your hair isn’t a steak)

Step 7: Daily Hair Protection Habits

Small habits = big difference over time.

1. Brush Smart

  • Use a wide-tooth comb for wet hair
  • Use a soft brush for dry hair

2. Avoid Tight Hairstyles

  • Reduces tension → prevents hair loss

3. Protect While Sleeping

  • Use silk or satin pillowcases
  • Tie hair loosely or braid

4. Limit Heat Styling

  • Flat irons and curling wands weaken protein structure

Step 8: Nutrition & Hydration (Yes, It Shows in Your Hair)

Hair health isn’t just external—it reflects internal health.

Key Nutrients for Hair

  • Protein → hair structure
  • Biotin (Vitamin B7) → growth support
  • Iron → prevents hair thinning
  • Omega-3 fatty acids → shine and hydration

What to Eat

  • Eggs
  • Salmon
  • Nuts and seeds
  • Leafy greens
  • Avocados

And yes—drink enough water. Dehydrated hair is just your body asking for help in a quieter way.


Step 9: Customize Based on Hair Goals

For Hair Growth

  • Regular scalp massage
  • Use lightweight oils
  • Avoid excessive heat

For Damaged Hair

  • Weekly protein + moisture balance treatments
  • Reduce chemical processing

For Oily Hair

  • Wash more frequently (but gently)
  • Use lightweight conditioners

For Dry Hair

  • Reduce shampoo frequency
  • Use leave-in conditioners

Step 10: Common Mistakes to Avoid

Let’s save you from the classics:

  • Overwashing → strips natural oils
  • Using too much product → buildup
  • Skipping conditioner → dryness and breakage
  • Ignoring scalp care → slow growth
  • Heat styling without protection → long-term damage


Bonus: Simple 7-Day Hair Care Plan

Day 1: Oil massage + wash + condition
Day 2: Leave-in care + minimal styling
Day 3: Light scalp massage
Day 4: Wash + conditioner
Day 5: Rest (protective styling)
Day 6: Hair mask treatment
Day 7: Gentle wash + air dry

Repeat weekly and adjust based on your hair response.


Final Thoughts

Great hair isn’t about luck or genetics alone—it’s about habits. A consistent, well-designed home hair care routine can transform your hair over time, no salon required.

Start simple:

  • Wash correctly
  • Treat your scalp well
  • Moisturize consistently
  • Protect daily

Stick with it for a few weeks, and you’ll notice stronger, shinier, healthier hair. And once you see the results, skipping your routine will feel about as appealing as skipping sleep—technically possible, but not worth it.

Top 10 Benefits of Nano Ring Hair Extensions You Need to Know

Nano ring hair extensions are a modern, innovative type of hair extension that use tiny metal rings to attach individual strands of extension hair to your natural hair. Unlike traditional methods that rely on glue, heat, or sewing, nano rings are applied using a small, clamp-like tool—making them one of the safest and least damaging options available. Their discreet size (90% smaller than micro rings) allows them to blend seamlessly into natural hair, especially for people with fine or thin textures.

In recent years, nano ring hair extensions have surged in popularity among both salon professionals and everyday users. Their near-invisible finish, long-lasting wear, and gentle installation make them a favorite choice for those seeking volume, length, or a total hair transformation without compromising hair health.

As the market continues to shift toward safer and more natural-looking hair solutions, understanding the unique benefits of nano ring extensions has never been more important. Whether you’re new to extensions or considering switching methods, knowing what sets nano rings apart can help you make a confident, informed decision about your hair goals. In this article, we’ll explore the top 10 reasons why nano ring hair extensions might be the perfect fit for you.

Nano Ring Extensions

1. Virtually Invisible

One of the standout features of nano ring hair extensions is their incredibly discreet appearance. The “nano” in their name refers to the size of the tiny metal rings used to attach the extensions to your natural hair—these rings are about 90% smaller than traditional micro rings. Because of their compact size and natural color options, they sit close to the scalp and blend seamlessly with your own hair, making them nearly undetectable even up close.

This makes nano ring extensions an ideal solution for people with thin or fine hair, where bulkier extension methods can be more obvious or harder to conceal. The lightweight design of nano rings ensures that the extensions lay flat against the head, maintaining a natural look and feel from every angle. Unlike tape-ins or clip-ins, there’s no visible adhesive, bulky wefts, or awkward bumps to worry about.

For anyone concerned about the extensions being noticeable—whether in bright light, updos, or windy conditions—nano rings provide a high level of confidence and discretion. Whether you’re going for subtle volume or a dramatic transformation, the virtually invisible nature of nano ring hair extensions makes them a top choice for achieving a flawless, undetectable finish.

2. No Heat or Glue Required

One of the biggest advantages of nano ring hair extensions is their gentle, non-damaging application process. Unlike other types of extensions that rely on heat, glue, or harsh adhesives, nano rings are applied using a simple, mechanical method that’s safe for your natural hair.

During installation, a small section of your natural hair is threaded through a tiny metal ring (the nano ring), and a strand of extension hair is inserted into the same ring. The ring is then clamped shut with a special tool, securing the extension in place without the need for any bonding agents or thermal tools. The process is precise and customizable, allowing professional stylists to strategically place extensions where needed for the most natural blend and volume.

Because no glue or heat is involved, there’s no risk of chemical damage, burns, or sticky residue. This makes nano ring extensions a much healthier option for your hair in the long term—especially for individuals who have previously experienced breakage, thinning, or scalp sensitivity from other extension methods. Additionally, the absence of adhesives means the extensions are easier to remove and reposition with minimal disruption to your own hair.

For those looking for a semi-permanent solution that prioritizes hair health and minimizes risk, nano rings offer the perfect balance of beauty and safety. You get gorgeous, long-lasting results without compromising the condition of your natural hair.

3. Reusable and Long-Lasting

Another major benefit of nano ring hair extensions is their excellent durability and reusability. Unlike some types of extensions that are designed for single use or short-term wear, nano ring extensions can be reused multiple times, making them a smart investment for anyone looking for long-term results.

With proper care and professional maintenance, nano ring extensions can last anywhere from 6 to 9 months, or even longer in some cases. The actual hair strands used are typically 100% human Remy hair, which means the cuticles are aligned and intact, allowing for a more natural look and greater longevity. Because there’s no glue or adhesive residue involved, the extensions can be easily removed and reinstalled without damaging the hair strands or the nano rings themselves.

Most wearers will need maintenance every 6 to 8 weeks, depending on how fast their natural hair grows. During these appointments, a stylist will remove the extensions, reposition them closer to the scalp, and re-secure the nano rings. Since the same hair can be used again and again, you’re not constantly replacing expensive bundles or paying for new sets each time.

This reusability not only saves money over time but also reduces waste—making nano ring extensions a more sustainable option compared to disposable or glue-based alternatives. With consistent brushing, moisturizing, and proper washing techniques, you can extend the life of your extensions and keep them looking fresh and silky.

For anyone seeking a long-lasting solution that offers both value and beauty, nano ring extensions are a top-tier choice.

4. Comfortable to Wear

Comfort is a key factor when choosing the right type of hair extensions, and nano ring hair extensions are known for their exceptionally lightweight and discreet feel. Because the rings used are extremely small—significantly smaller than traditional micro rings—they sit flat against the scalp and don’t create bulk or pressure on the roots. This makes them one of the most comfortable semi-permanent extension options available today.

Many users report that after the initial installation and adjustment period, they barely notice the extensions at all. Unlike clip-ins, which can tug or shift throughout the day, or glue-ins that may cause itching or tightness, nano rings offer a more seamless experience. The weight is evenly distributed across small sections of natural hair, minimizing strain and reducing the risk of breakage or discomfort.

This comfortable fit is especially beneficial for those with sensitive scalps or fine hair, who may find other types of extensions irritating or too heavy. As long as the extensions are installed correctly by a trained stylist and maintained regularly, nano rings remain secure and unobtrusive throughout daily activities—even during sleep.

For a beautiful transformation without the heavy, tight feeling, nano ring extensions are a clear winner.

5. Minimal Damage to Natural Hair

One of the most important concerns when choosing hair extensions is how they affect your natural hair. Nano ring hair extensions stand out as one of the least damaging methods available, thanks to their non-invasive, glue-free, and heat-free application process.

Unlike glue-in extensions, which use strong adhesives that can pull and break the hair during both wear and removal, or sew-in weaves that require tightly braided bases and tension on the scalp, nano rings are applied strand by strand using small metal loops. These loops gently clamp the extension to a tiny section of your natural hair without chemicals or tight pulling, significantly reducing the risk of stress, breakage, or scalp irritation.

Since there is no glue or heat involved, there’s also no leftover residue or risk of hair being burned during installation or removal. The process is clean and simple—and with proper maintenance every 6–8 weeks, the extensions can be adjusted and reused without harming your natural hair structure.

For people who are trying to grow out their hair, preserve scalp health, or recover from previous hair damage, nano ring extensions offer a safe, semi-permanent solution that protects rather than compromises hair integrity.

If you want fuller, longer hair without sacrificing the health of your own, nano rings are one of the most hair-friendly options available today.

6. Natural Look and Movement

One of the standout qualities of nano ring hair extensions is how effortlessly they blend with your natural hair, both in appearance and movement. Because they are applied in small, individual strands, nano rings allow for a full range of natural motion—whether your hair is straight, wavy, or curly. There are no bulky wefts, tapes, or stiff bonds to interfere with how your hair flows.

The extensions are typically made from high-quality 100% Remy human hair, which means the cuticle remains intact and aligned in the same direction. This ensures a soft, silky texture that closely matches the feel and shine of your own hair. Once installed correctly by a professional, the nano rings are nearly invisible, and the extensions blend seamlessly—making it almost impossible to tell where your hair ends and the extensions begin.

This natural look is especially important if you want your hair to appear effortless in a variety of styles, from ponytails to beach waves. Whether you’re wearing your hair down or up, the discreet application and realistic movement of nano ring extensions make them a flawless match for real hair.

If you’re after length and volume that looks completely natural, nano rings deliver stunning, believable results.

7. Customizable Color and Length

One of the greatest advantages of nano ring hair extensions is their versatility in color and length, making them suitable for almost any hair type or style preference. Nano rings come in a wide range of shades—from natural tones like blonde, brunette, and black to vibrant, fashion-forward colors like pastel pinks or deep reds. This diversity allows you to find a perfect match for your natural hair or even experiment with a new hue.

For those looking for dramatic length, nano ring extensions are available in various lengths, from short-medium styles to ultra-long locks. You can add volume, length, or even a little extra thickness to your hair, depending on your desired result. Whether you’re looking to subtly enhance your current hair or create a bold transformation, there are plenty of options to choose from.

Another great feature is that nano ring extensions can be dyed and styled just like your own hair. Since they are made from high-quality human hair, you have the freedom to color them, curl them, straighten them, and treat them just like your natural strands. This means you can match your extensions to the exact shade you desire or style them to suit any occasion. Whether you want sleek, straight hair or voluminous curls, nano ring extensions can be tailored to your personal style.

For a customizable, natural-looking hair enhancement, nano rings are the perfect solution.

8. Low Maintenance Once Installed

Once your nano ring hair extensions are installed, one of the key benefits is how easy they are to maintain. Compared to other extension methods that require regular upkeep or frequent adjustments, nano rings allow for a much simpler and more convenient care routine.

The first step in maintenance is basic washing and conditioning. Just like natural hair, nano ring extensions need to be kept clean and moisturized to maintain their shine and texture. Use sulfate-free shampoos and conditioners to avoid drying out the extensions, and be gentle when washing to prevent tangling. It’s also essential to brush your extensions regularly with a wide-tooth comb or a special extension brush to keep them tangle-free and looking smooth.

The nano rings themselves don’t require much attention, as they are designed to stay securely in place. However, it’s important to visit a professional stylist every 6-8 weeks for a routine check-up, where they will reposition the extensions closer to your scalp as your natural hair grows. This ensures the extensions continue to blend seamlessly with your hair and remain comfortable.

For busy individuals, the low-maintenance nature of nano rings is a huge advantage. Once installed, you don’t have to worry about constant styling, adhesive messes, or frequent salon visits. You can focus on your day-to-day activities while still enjoying beautiful, voluminous hair that requires minimal upkeep.

9. Suitable for All Hair Types

One of the standout features of nano ring hair extensions is their versatility, making them a great option for nearly every hair type. Whether you have thin, thick, straight, or curly hair, nano rings can be customized to suit your natural texture and desired look.

For those with thin or fine hair, nano rings are particularly beneficial. The small, discreet rings apply minimal weight to the natural hair, preventing any additional strain or breakage. Since the rings sit flat against the scalp, they create a more natural blend with your fine hair, offering added volume without the bulk that might come with other extension types. The lightweight nature of the extensions ensures that they won’t overwhelm finer strands.

On the other hand, if you have thicker hair, nano rings can help you achieve the volume or length you desire without feeling too heavy. The extension strands are usually applied in smaller sections, which helps evenly distribute the weight and prevents tension on your natural hair.

For curly hair types, nano ring extensions work wonderfully to add both length and volume, seamlessly blending with the natural texture. A stylist can match the curl pattern and even use slightly textured extensions to ensure the best fit and flow.

The role of a skilled stylist is crucial to ensuring that your nano rings are a perfect match. They’ll carefully assess your hair type, texture, and desired result to determine the right length, color, and installation method, making sure the extensions look natural and feel comfortable.

10. Salon or DIY Friendly

While it’s always ideal to have your nano ring hair extensions installed by a professional stylist, the method is also flexible enough to allow for at-home application for those who are more experienced or prefer a DIY approach.

Professional installation ensures the best results, as a stylist has the expertise to select the right color, length, and placement for the most natural blend. They can also ensure that the nano rings are applied securely and with the right amount of tension, preventing damage to your natural hair. A professional can also check the position of the rings every few weeks, ensuring your extensions stay looking fresh and comfortable as your hair grows.

However, for experienced users, nano ring extensions can be applied at home with the right tools and knowledge. There are numerous guides and video tutorials available for those who feel confident in their ability to apply the extensions themselves. If you choose this route, it’s important to invest in high-quality tools (like the clamping tool for nano rings) and ensure you’re using the right technique to avoid causing any damage.

Safety and precision are paramount when applying nano rings, whether in a salon or at home. Improper placement or too much tension can cause breakage or discomfort, so it’s crucial to follow proper instructions. For those who are new to hair extensions, professional application is the safest route to ensure the best results without causing harm to your natural hair.

Conclusion

In conclusion, nano ring hair extensions offer a multitude of benefits, making them a top choice for anyone seeking long-lasting, natural-looking hair enhancements. From their virtually invisible appearance to the minimal damage they cause to natural hair, nano rings stand out as a safer, more comfortable alternative to traditional extension methods. The ability to reuse them, along with their customizable color and length, makes them a versatile and cost-effective solution for various hair types and personal styles.

The low-maintenance nature of nano rings is also a huge plus, especially for busy individuals looking for a beautiful, effortless look. And with their adaptability to different hair textures—whether thin, thick, straight, or curly—nano ring extensions are a perfect fit for just about everyone.

If you’re considering a hair transformation, whether for added volume, length, or a completely new style, nano rings offer a natural, damage-free way to achieve your goals. For the best results, it’s always recommended to consult with a professional stylist who can guide you through the installation process and help you choose the right match for your hair. Alternatively, if you feel confident, you can give DIY application a try, but always prioritize safety and precision.

Nano rings provide an excellent solution for beautiful, healthy hair without compromise.

Nano ring hair extensions manufacturer – Alove Hair

Alove Hair is a leading manufacturer specializing in high-quality nano ring hair extensions at competitive prices. Our products are crafted from 100% full cuticle human hair, ensuring a natural look, smooth texture, and long-lasting wear. With a focus on quality and affordability, we provide premium extensions that are perfect for both hair salons and professional stylists around the world.

Our main markets include the USA, UK, Canada, Australia, Germany, France, Italy, and the broader European market, where we have built a strong reputation for reliability and excellence. We understand the needs of the modern beauty industry, which is why our extensions are designed to be lightweight, easy to apply, and virtually undetectable, offering a seamless, natural blend with clients’ natural hair.

At Alove Hair, we are committed to providing top-tier products without compromising on cost, making our extensions accessible to both professionals and individuals seeking premium quality. Whether you’re a salon owner looking to stock the best products or a stylist in need of high-performance hair extensions for clients, Alove Hair has you covered. We pride ourselves on customer satisfaction, ensuring that every order is fulfilled with attention to detail and care.

I-Tip Hair Extensions vs Microlinks: Pros, Cons, Cost & Maintenance Compared

Hair extensions have become a mainstream beauty trend, offering an easy way to achieve longer, fuller hair without waiting for natural growth. As styling techniques evolve, more people are seeking methods that provide seamless results without causing damage. Two popular techniques that have gained attention are I-Tip Hair Extensions and Microlink Hair Extensions. These two methods are both designed to add length and volume, but they differ in installation, maintenance, and overall impact on hair health.I-Tip Hair Extensions involve small, individual strands of hair that are secured to your natural hair using a small metal bead or cylinder. The “I” shape refers to the tip of the extension that is inserted into the bead, making the method non-damaging, as it doesn’t rely on heat or chemicals. This technique is best for those looking for a natural look and feel.On the other hand, Microlink Hair Extensions also use beads to secure the extensions, but the application process differs slightly. The hair is pulled through a small ring, and the extension is clamped in place. This technique offers a similar result in terms of length and volume but is often preferred for its quicker application and versatility in adjusting to various hair textures.

This article aims to compare I-Tip Hair Extensions vs Microlinks: Pros, Cons, Cost & Maintenance Compared, giving you a comprehensive look at the advantages and disadvantages of each method. Whether you’re considering hair extensions for the first time or are looking to switch up your current method, understanding the differences in cost, maintenance, and suitability for different hair types will help you make an informed decision. By exploring these factors, you’ll be better equipped to choose the best hair extension technique to meet your needs.

What Are I-Tip Hair Extensions?

I-Tip Hair Extensions are a popular, non-permanent method of adding length and volume to natural hair. This extension technique involves individual strands of hair, which are securely attached to your natural hair using a small metal bead or cylinder. The “I” in I-Tip refers to the shape of the hair extension’s tip, which is inserted into the bead before being clamped down. This method is highly favored for its natural look and damage-free approach, as it doesn’t involve heat or glue, which can harm natural hair.

The extensions used in I-Tip applications are made from high-quality human hair, which can be treated, styled, and colored just like natural hair. The extensions are small, individual pieces that blend seamlessly with your natural hair, giving you a voluminous and more natural look. The “I-Tip” name comes from the tiny, thin tips of the extension strands that are inserted into the bead during installation.

Installation Method: Tools and Process

Installing I-Tip Hair Extensions requires specialized tools and careful application. The process involves the following steps:

  1. Preparation: The natural hair is sectioned into small, manageable parts, allowing the stylist to work one section at a time. This step is crucial for even distribution and blending of the extensions with your natural hair.
  2. Insertion of Extensions: Using a small hook tool or needle, the stylist will pull a small section of your natural hair through a small metal bead. The “I-Tip” hair extension is then placed into the bead.
  3. Securing with Bead: The stylist uses a set of specialized pliers to clamp the bead tightly around the natural hair and extension, securing the two together. This bond is firm yet gentle on the natural hair, preventing unnecessary breakage or damage.
  4. Blending and Finishing: After the extensions are applied, the stylist will blend and style the hair to ensure the extensions mix naturally with your own hair. The process is repeated throughout the head, row by row, until the desired length and volume are achieved.

Unlike other extension methods that may require adhesives or glue, I-Tip extensions are highly versatile, allowing users to maintain their natural hair health while achieving a full, voluminous look. The installation process typically takes 2 to 4 hours, depending on the amount of hair being added.

Who Is Best Suited for I-Tip Hair Extensions?

I-Tip extensions are suitable for a wide variety of individuals, though certain hair types and lifestyle factors may make them an even better choice. Here’s a breakdown of who might benefit most from I-Tip extensions:

  1. People with Fine or Thinning Hair: I-Tip extensions are ideal for those with fine or thinning hair because the small, discreet beads don’t add excessive weight to the hair, reducing the risk of damage. The individual strands of extensions blend seamlessly with natural hair, giving the appearance of thicker, fuller locks without looking bulky or obvious.
  2. Individuals Seeking a Natural Look: If you’re looking for a natural, undetectable result, I-Tip extensions are a great option. The individual strands are lighter and more flexible than tape-in or clip-in extensions, allowing them to move and behave like natural hair.
  3. People Who Want Long-Term Extensions Without Heat or Chemicals: Since I-Tip extensions do not require the use of heat or glue, they are an excellent choice for those who are concerned about heat damage or the long-term effects of adhesive-based extensions. This makes them a gentler alternative compared to other methods.
  4. Those with Medium to Long Hair: While I-Tip extensions can be used on short hair, they are typically better suited for individuals with medium to long hair, as the extensions can blend more naturally with longer natural hair.
  5. Active Lifestyles: If you lead an active lifestyle and prefer a secure, long-lasting hair extension method, I-Tip extensions are a good choice. They are durable and stay in place without needing constant adjustments. However, regular maintenance is required to ensure the beads remain securely in place.

I-Tip extensions are a fantastic choice for those looking to enhance their hair without compromising its health. The application is simple, the result is natural, and the extensions can last several months with proper care and maintenance.

What Are Microlink Hair Extensions?

Microlink Hair Extensions are a popular method of adding length and volume to natural hair without the need for heat, glue, or tape. These extensions are attached using small metal beads or rings that secure individual strands of hair to the natural hair. The process involves threading a small section of natural hair through the bead, then attaching a microlink extension and clamping the bead tightly to hold everything in place. This technique is praised for its natural, seamless look and long-lasting results.

Microlink extensions are typically made from high-quality human hair, ensuring that they can be styled, colored, and treated just like natural hair. The individual strands of hair used for microlinks are smaller and more discreet compared to other methods, which helps create a smooth, natural blend with the natural hair.

Installation Method: Tools and Process

The installation of Microlink Hair Extensions involves a few simple steps and requires some specialized tools:

  1. Sectioning the Hair: The natural hair is sectioned into small, manageable parts to make the process easier and more precise. This is important to ensure that the extensions are evenly distributed throughout the scalp.
  2. Inserting the Beads: Using a special loop tool, a small section of natural hair is pulled through a small metal bead. The bead is typically very tiny, about the size of a grain of rice, allowing it to stay discreet and close to the scalp.
  3. Attaching the Extensions: A microlink extension is then threaded into the bead along with the natural hair. Once the extension is in place, the stylist uses specialized pliers to clamp the bead tightly, securing the extension to the natural hair. The bead ensures the extension stays in place without slipping or shifting.
  4. Blending and Styling: After the extensions are installed, the stylist will blend and style the hair to make sure the extensions mix naturally with the natural hair. This may include trimming and shaping the hair to ensure a seamless, cohesive look.

The process typically takes about 2 to 3 hours, depending on the amount of hair being added. It’s a great option for those who want a longer-lasting, more natural-looking hair extension solution.

Who Is Best Suited for Microlink Hair Extensions?

Microlink hair extensions are suitable for a variety of hair types and personal preferences. Here’s a breakdown of who might benefit most from this method:

  1. People with Medium to Thick Hair: Microlinks work best on medium to thick hair, as the method requires a bit more hair volume to secure the beads properly. People with very fine or thin hair may still be able to use microlinks, but it’s essential to ensure that the extensions don’t put too much strain on the natural hair.
  2. Individuals Seeking Versatility: Microlink extensions are highly versatile because they can be removed, adjusted, and reinstalled. This makes them a great option for people who may want to change their hair length, volume, or style over time.
  3. Those Avoiding Heat or Glue: Microlink extensions are perfect for individuals who want to avoid the damaging effects of heat, chemicals, or adhesives. Since microlinks use beads to secure the extensions, they are a gentler alternative to methods like glue-in or tape-in extensions.
  4. Active Lifestyles: If you lead an active lifestyle and are concerned about your extensions slipping or becoming loose, microlinks are a durable choice. Once the beads are clamped, they stay securely in place, even during physical activities. However, regular maintenance is required to ensure they stay intact.
  5. People Seeking a Natural Look: For those who want a subtle, natural look, microlinks are ideal. The individual beads are small and discreet, so the extensions blend seamlessly with the natural hair, offering a more invisible result compared to bulkier extension methods.

Microlink Hair Extensions are an excellent choice for individuals looking for a long-term, natural-looking solution to enhance the length and volume of their hair without the need for glue, tape, or heat.

I-Tip vs Microlinks: Pros & Cons

When it comes to enhancing your natural hair with extensions, I-Tip and Microlink hair extensions are two of the most popular and non-damaging methods. Each technique offers its own unique benefits and some potential drawbacks, making it important to weigh the pros and cons before deciding which method is right for you. Below, we will compare the advantages and disadvantages of I-Tip Hair Extensions and Microlink Hair Extensions to help you make an informed choice.

A. I-Tip Hair Extensions

Pros:

  1. No Heat or Chemicals Used – Less Damage:
    One of the biggest advantages of I-Tip Hair Extensions is that they don’t require the use of heat, glue, or chemicals during the installation process. Unlike methods such as fusion or tape-in extensions, which may cause damage over time due to adhesives or heat application, I-Tip extensions rely on small metal beads to secure the hair. This makes the process gentler on your natural strands, reducing the risk of breakage and maintaining the health of your hair.
  2. Reusable and Eco-Friendly:
    I-Tip extensions can be reused multiple times, which is a major plus for both your wallet and the environment. Since the beads are simply clamped onto the natural hair, they can be removed and reinstalled without causing any harm to the extensions or your hair. This sustainability factor makes I-Tip extensions a great long-term investment, as they last much longer than some other extension methods.
  3. Perfect for Fine or Thin Hair – Natural Appearance:
    I-Tip extensions are especially suitable for those with fine or thin hair. The individual strands blend seamlessly with your natural hair, making them almost invisible. The lightness of the extensions ensures that they don’t add bulk, offering a very natural look. If you’re looking to add volume without sacrificing the authenticity of your hairstyle, I-Tip extensions are a great choice.

Cons:

  1. Installation Process Takes Longer:
    One downside of I-Tip extensions is that the installation process can be time-consuming. Depending on how much hair is being added, the process typically takes 2 to 4 hours to complete. This is longer than other methods like clip-ins or tape-ins, so it might not be ideal for someone who is looking for a quick solution.
  2. Regular Adjustments May Be Necessary:
    I-Tip extensions need to be adjusted every few weeks as the natural hair grows out. The beads that hold the extensions in place gradually move away from the scalp as hair growth occurs. This means that regular touch-ups or maintenance visits are required to ensure that the extensions stay secure and look natural. For those with a busy lifestyle, this might be a downside.
  3. Not Ideal for Extremely Short or Damaged Hair:
    I-Tip extensions are not recommended for individuals with very short or damaged hair. The small beads used to secure the extensions need enough natural hair to hold onto. If your hair is too short or weakened by damage, the beads may not be able to securely fasten the extensions, making the method less effective.

B. Microlink Hair Extensions

Pros:

  1. Works for All Hair Types, Especially Thick Hair:
    One of the most significant advantages of Microlink Hair Extensions is their versatility in accommodating all hair types. They work particularly well for those with thick or coarse hair, as the method can hold up well against the weight of thicker hair textures. Whether you have straight, wavy, or curly hair, microlinks can be customized to fit your needs. For people with naturally thicker hair, microlinks provide a secure and lasting solution.
  2. Faster Installation Time:
    Compared to I-Tip extensions, the installation process for Microlink Hair Extensions is typically faster. Microlinks require less time to install because the beads are slightly larger, and the application process is streamlined. The method typically takes 1 to 2 hours, making it a faster choice for those looking for quicker results. This makes it ideal for people who need extensions but are pressed for time.
  3. No Heat Tools or Chemicals Required:
    Like I-Tip extensions, Microlink Hair Extensions do not rely on any heat or chemicals for installation. The extensions are secured using small beads, so they are considered a safer alternative to methods that require heat fusion or adhesive. This makes microlinks a gentle and non-damaging option for anyone looking to enhance their hair without compromising its health.

Cons:

  1. Regular Maintenance is Required:
    While Microlink Extensions are known for being durable, they still require regular maintenance. As with any extension method, the beads may loosen over time as natural hair grows out. This means the beads need to be tightened, and adjustments may be necessary every 6 to 8 weeks. For people who want a low-maintenance option, this could be a disadvantage.
  2. Metal Beads May Cause Discomfort:
    The small metal beads used to secure the extensions may cause some discomfort, particularly in the early days after installation. As the beads sit close to the scalp, some people might experience mild irritation or tightness. Though this sensation usually subsides after a few days, those with sensitive scalps might find the initial discomfort uncomfortable.
  3. Long-Term Use May Cause Hair Breakage:
    Over time, the constant pressure exerted by the metal beads on the natural hair can lead to hair breakage, especially if the beads are too tight or improperly maintained. For individuals with fine or weak hair, this could be a concern. It’s important to ensure that the beads are properly fitted and that regular adjustments are made to avoid any damage.

Both I-Tip Hair Extensions and Microlink Hair Extensions offer unique benefits and some potential drawbacks, depending on your hair type, lifestyle, and preferences.

  • If you’re looking for a natural look, less damage, and long-term sustainability, I-Tip extensions might be the ideal choice, particularly for those with fine or thin hair. However, the process takes longer and may require more frequent maintenance.
  • On the other hand, Microlinks provide faster application, work well for thicker hair, and also avoid heat or chemicals. They might require regular maintenance and could cause discomfort due to the metal beads, but they are a great option for those seeking a quicker and versatile extension method.

Ultimately, the best choice depends on your hair type, how much time you can dedicate to maintenance, and your desired outcome.

Cost Comparison: I-Tip vs Microlinks

When considering hair extensions, the cost is an essential factor. Both I-Tip and Microlink extensions come with their initial installation costs, along with long-term maintenance expenses. Understanding these costs will help you make an informed decision based on your budget and the longevity of the extensions. Let’s break down the pricing for both methods.

I-Tip Hair Extensions Costs

Initial Costs: Materials and Installation Fee

The initial cost of I-Tip extensions includes both the price of the extensions themselves and the installation fee.

  1. Extension Costs:
    The price of I-Tip hair extensions typically ranges from $200 to $500 or more, depending on the length, quality, and volume of the extensions. High-quality 100% human hair extensions, which are more durable and blend naturally with your natural hair, will generally cost on the higher end. The longer and thicker the hair, the more expensive the extensions will be.
  2. Installation Fees:
    The installation of I-Tip extensions requires a skilled stylist to apply each individual strand of hair to your natural hair using metal beads. This process can take 2 to 4 hours, and installation fees generally range from $150 to $400 depending on the stylist’s experience, location, and the amount of hair being applied. The process is labor-intensive, which can lead to higher installation costs.

Regular Maintenance Costs

Although I-Tip extensions don’t require much upkeep, they do need to be maintained every 6 to 8 weeks to keep them looking fresh. Maintenance involves repositioning the beads as your natural hair grows, which may require removing and reinstalling the extensions.

  • The maintenance fee can range from $100 to $250 depending on how much hair needs to be moved and the stylist’s rates.
  • Since I-Tip extensions are reusable, this maintenance cost is much lower than the initial installation fee.

Microlink Hair Extensions Costs

Initial Costs: Price and Installation Fee

The initial cost for Microlink extensions includes both the price of the hair and the installation service.

  1. Extension Costs:
    Microlink extensions are generally priced similarly to I-Tip extensions, with high-quality human hair extensions costing between $200 to $500 or more, depending on the length, thickness, and quality of the hair. Because Microlinks use individual strands of hair like I-Tip extensions, the cost can vary based on the volume and desired look.
  2. Installation Fees:
    The installation of Microlink extensions typically takes 1 to 2 hours, making it a quicker process than I-Tip extensions. Installation fees are generally in the range of $150 to $300, depending on the stylist and how much hair is being added.

While Microlinks may have slightly lower installation fees due to the faster application time, the difference in cost is not vast when compared to I-Tip extensions.

Regular Adjustment Costs

Like I-Tip extensions, Microlinks need regular adjustments as your natural hair grows. This typically involves tightening the beads to keep the extensions secure and repositioning them.

  • The adjustment cost for Microlinks is usually $100 to $200 per session.
  • Since the extensions need to be adjusted every 6 to 8 weeks, the long-term cost for Microlinks is similar to I-Tip extensions in terms of maintenance.

Long-Term Costs: Comparing I-Tip vs Microlinks

The long-term costs for both I-Tip and Microlink extensions are influenced by the reusability of the extensions, the maintenance schedule, and the type of hair used. Both methods offer reusable hair, which reduces the need to purchase new extensions for each maintenance session. However, both still require regular upkeep, such as repositioning beads and ensuring the extensions stay in place.

  1. I-Tip Hair Extensions Long-Term Costs:Estimated Long-Term Cost (over 12 months):
    • Extensions: $200 – $500
    • Maintenance: $100 – $250 every 6-8 weeks (3-6 maintenance sessions in a year)
    • Total Estimated Yearly Cost: $500 – $1,500
    • Initial Installation: $200 – $500 (depending on hair quality and length)
    • Maintenance: $100 – $250 every 6-8 weeks
    • Reusability: Since I-Tip extensions can last 6-12 months or longer, depending on how well they are maintained, you can continue to use the same hair during this period. This makes I-Tip extensions more cost-effective over time compared to methods that require frequent replacement.
  2. Microlink Hair Extensions Long-Term Costs:Estimated Long-Term Cost (over 12 months):
    • Extensions: $200 – $500
    • Maintenance: $100 – $200 every 6-8 weeks (3-6 maintenance sessions in a year)
    • Total Estimated Yearly Cost: $500 – $1,500
    • Initial Installation: $200 – $500
    • Maintenance: $100 – $200 every 6-8 weeks
    • Reusability: Like I-Tip extensions, Microlink hair extensions can last anywhere from 6 months to a year, depending on how well they are cared for. Reusing the same hair helps lower costs, but the beads may need to be replaced if they become loose or damaged.

Both I-Tip and Microlink hair extensions come with similar initial costs and long-term maintenance expenses. The primary differences lie in the installation process and the duration between maintenance visits.

  • I-Tip extensions may be a bit more costly due to the longer installation time, but they can last longer, making them a good investment for those looking for a more sustainable option.
  • Microlink extensions, on the other hand, are typically quicker to install and may be more suitable for people with thicker hair, though they require similar maintenance and adjustment costs.

The long-term cost for both methods will depend on the quality of the hair, how often you maintain them, and the maintenance required to keep your extensions looking fresh. Both offer a range of costs that can be tailored to fit your budget and desired look.

Maintenance: How to Care for I-Tip and Microlink Extensions

Proper care and maintenance are crucial for keeping I-Tip and Microlink extensions looking fresh and long-lasting. Both methods require specific attention to ensure the extensions remain secure, healthy, and blend seamlessly with natural hair. Below, we’ll discuss how to properly care for each type of extension, including essential maintenance tips.

A. Maintenance for I-Tip Extensions

1. Hair Care and Washing Tips

Proper washing and conditioning techniques are essential for maintaining I-Tip extensions. Here’s how to care for your hair when wearing I-Tip extensions:

  • Gentle Shampooing: Use a sulfate-free shampoo to avoid stripping the hair of its natural oils. When washing, focus on cleaning your scalp rather than scrubbing the extensions directly. This helps prevent tangling and ensures the extensions stay in place.
  • Conditioning: Apply conditioner to the ends of your hair, avoiding the beads where the extensions are attached. Heavy conditioners or oils near the bead area can cause slippage or loosen the extensions.
  • Drying: After washing, pat your hair dry with a towel and avoid rubbing the extensions. Let the hair air-dry or use a blow dryer on a low heat setting. Avoid using high heat on the extension beads as it can cause them to weaken or loosen.
  • Combing: Always use a wide-tooth comb or a brush with soft bristles to detangle the hair, starting from the ends and working your way up. This helps prevent unnecessary pressure on the extensions and reduces the risk of breakage.

2. Tips for Maintaining I-Tip Extension Stability

To ensure the stability of your I-Tip extensions, follow these tips:

  • Avoid Excessive Heat: I-Tip extensions can withstand heat styling, but it’s essential to avoid using high-heat tools directly on the beads or roots of your hair. Always apply a heat protectant before using any styling tools to reduce the risk of damage.
  • Sleeping Care: Tie your hair loosely in a braid or ponytail before bed to prevent tangling or breakage. You may also consider using a silk or satin pillowcase to reduce friction and protect both your natural hair and extensions.
  • Be Gentle with Hair: When brushing or styling, be gentle near the roots where the beads are attached. Pulling or tugging at the beads can cause them to loosen or the natural hair to break.

3. Regular Checks and Adjustments

I-Tip extensions require regular checks to ensure they remain secure and properly positioned. As your natural hair grows, the beads may gradually shift away from the scalp. It’s important to have your stylist check your extensions every 6-8 weeks to ensure they are not too loose. They may need to be repositioned or adjusted to prevent any slippage or discomfort.

Regular adjustments and maintenance appointments are key to keeping your extensions looking their best and maintaining their longevity.

B. Maintenance for Microlink Extensions

1. Avoiding Bead Slippage or Damage

One of the primary concerns with Microlink extensions is ensuring that the metal beads remain secure and do not cause discomfort. To prevent slippage or damage:

  • Avoid Over-tightening: While it’s important that the beads are clamped tightly enough to secure the extensions, over-tightening can cause discomfort and even damage to your natural hair. Make sure the beads are snug, but not too tight.
  • Avoid Excessive Pulling: Just like with I-Tip extensions, avoid pulling or tugging on the hair, as this can loosen the beads or cause them to shift. Be mindful when brushing or styling your hair, and always be gentle near the bead area.
  • Use the Right Products: Certain hair products like oils or serums can cause the beads to slip if applied near the roots. Use lightweight products that don’t build up at the scalp and avoid applying heavy products directly to the bead area.

2. Cleaning and Hair Care Recommendations

Caring for your natural hair and extensions is essential for longevity:

  • Gentle Shampooing: Use a sulfate-free shampoo to cleanse both your natural hair and extensions. Make sure to focus on the scalp and roots where the beads are attached, but avoid massaging or rubbing the bead area directly, as it could weaken or loosen the beads.
  • Conditioning: Apply conditioner to the mid-lengths and ends of your hair, avoiding the bead area to prevent product buildup. You can also use a leave-in conditioner to maintain moisture and shine. Be careful not to use too much conditioner, as it may weigh down the extensions or cause slipping.
  • Drying: After washing, gently towel-dry your hair. Use a blow dryer on a low heat setting to dry your hair, or allow it to air dry. Avoid applying excessive heat directly to the beads, as it may weaken them over time.
  • Brushing: Detangle your hair using a wide-tooth comb or a brush designed for extensions. Start at the ends and work your way upward, being cautious around the bead area to prevent damage.

3. Regular Maintenance Frequency

Like I-Tip extensions, Microlink extensions require regular maintenance to keep them looking their best.

  • It’s recommended that you visit your stylist every 6-8 weeks for a maintenance appointment. This will allow the stylist to check the beads, adjust any loose extensions, and ensure that the natural hair is not experiencing any breakage or stress.
  • During maintenance, the beads will often need to be adjusted or tightened as your natural hair grows. This is a routine part of keeping the extensions secure and ensuring that they remain comfortable.

Proper care and maintenance are essential for the longevity and comfort of both I-Tip and Microlink extensions. Here are the key takeaways:

  • I-Tip extensions require gentle hair care techniques, especially when washing, conditioning, and detangling. Regular adjustments are necessary every 6-8 weeks to maintain the integrity of the beads.
  • Microlink extensions require careful attention to avoid bead slippage and product buildup. Regular visits every 6-8 weeks will help ensure that the beads are secure and the extensions stay comfortable.

By following these maintenance tips and scheduling regular check-ups with your stylist, you can enjoy long-lasting, beautiful extensions that keep your hair looking flawless.

Which One is Right for You?

When deciding between I-Tip and Microlink hair extensions, it’s important to consider your specific needs, hair type, and the results you’re hoping to achieve. Below is a breakdown of which type of extension is best suited for different individuals based on their preferences and lifestyle.

I-Tip Hair Extensions: Best for Those Who Want a Natural Look and Long-Lasting Results

I-Tip extensions are ideal for individuals who are looking to enhance their natural hair with a more subtle and seamless look. This method is especially suitable for:

  • People with Fine or Thin Hair: I-Tip extensions blend well with finer hair textures, as the individual strands are lightweight and can add volume without looking bulky. The result is a natural, fuller appearance that doesn’t weigh down the hair.
  • Those Seeking a Natural Look: If you prefer extensions that blend seamlessly into your natural hair without being too noticeable, I-Tip extensions are the way to go. The beads are discreet, and the application process results in a very natural finish.
  • Those Who Don’t Mind Regular Maintenance: I-Tip extensions require regular adjustments every 6-8 weeks to keep them in place as your natural hair grows. If you don’t mind committing to regular salon visits, this method can provide long-term, stunning results.
  • People Looking for Long-Lasting Extensions: I-Tip extensions are known for their durability. They can be reused and last up to 12 months with proper care, making them a good investment for those who want long-term extensions.

Microlink Hair Extensions: Ideal for Those Seeking a Quicker Solution and Less Frequent Maintenance

Microlink extensions are perfect for individuals who are looking for a faster application process and those who prefer a little less upkeep in terms of maintenance. This method works well for:

  • People with Thicker Hair: Microlinks are versatile and work well with all hair types, especially thicker or coarser hair. The beads are strong enough to hold up against heavier textures, and they blend easily.
  • Those Seeking Quick Length: If you want to add length quickly without the longer installation process, Microlink extensions are a great choice. The installation is faster than I-Tip, typically taking only 1 to 2 hours.
  • Those Who Prefer Less Frequent Maintenance: Microlink extensions may require maintenance every 6-8 weeks, but the installation process tends to be quicker, so you won’t need to spend as much time in the salon. If you want a low-maintenance option that still delivers beautiful results, Microlinks are a good fit.
  • People Seeking Versatility: Microlinks offer more flexibility when it comes to styling, and they can be a better option for those who like to experiment with different looks while maintaining a natural feel.

The choice between I-Tip and Microlink extensions comes down to your specific goals and lifestyle:

  • Choose I-Tip extensions if you want a more natural, seamless look with long-lasting results, and if you’re willing to commit to regular salon visits for maintenance.
  • Opt for Microlink extensions if you’re looking for a quicker, less frequent maintenance solution that works well for thicker hair and offers versatile styling options.

By considering your hair type, maintenance preferences, and desired look, you can determine which extension method will best suit your needs.

Conclusion

Both I-Tip and Microlink extensions offer distinct advantages and are ideal for different types of individuals.

I-Tip extensions are known for their natural, seamless look and are perfect for individuals with fine or thin hair. They are durable and reusable, providing a long-term solution, but require regular maintenance every 6-8 weeks. The process of installing I-Tip extensions can take longer, and while they are environmentally friendly, they may require a higher initial investment.

On the other hand, Microlink extensions are faster to install, making them suitable for people looking for quick length and volume. They are versatile and can be used on all hair types, especially thicker hair. However, they require periodic maintenance to ensure the beads stay in place. The installation process is shorter than I-Tip, and the cost of maintenance is similar.

Choosing the Right Option

  • Budget: If you’re on a tight budget, Microlinks may be a more affordable option due to their quicker installation time, while I-Tips may have a higher initial cost but are a longer-term investment.
  • Hair Type & Desired Look: Consider your natural hair texture and the kind of result you want. I-Tip extensions offer a more natural, long-lasting appearance, while Microlinks offer quick length and volume.
  • Maintenance Time: If you have limited time for regular maintenance, Microlinks may be a better fit due to the less frequent adjustments.

Ultimately, your choice will depend on your personal needs, budget, and hair goals.

V Tip Hair Extensions vs. Tape-in Extensions: The Ultimate Comparison

Hair extensions have become a staple in the beauty industry, providing a quick and effective way to transform one’s hair. Whether you’re looking to add length, volume, or color, extensions offer endless possibilities to enhance your look. They allow individuals to experiment with different styles without making permanent changes, offering versatility and flexibility. The rise in popularity of hair extensions has given way to various methods and techniques, making it important for consumers to choose the right option for their specific needs and goals.

When considering hair extensions, it’s crucial to select the right method based on factors such as hair type, lifestyle, and desired outcome. With so many options available, the decision can be overwhelming, but two of the most commonly used methods are V Tip Hair Extensions and Tape-in Extensions. Both are effective, but they differ in their application, durability, comfort, and maintenance.

V Tip Hair Extensions use a keratin bond at the tip of the hair strands, which is fused to natural hair with heat. These extensions provide a more seamless look and feel, allowing for greater flexibility in styling. They’re ideal for those looking for a long-term solution, as they can last for several months with proper care.

On the other hand, Tape-in Extensions use a different approach: strips of adhesive are placed between sections of natural hair. These extensions are known for their relatively quick application time and lighter feel. Tape-ins are a great choice for those seeking a less permanent and more budget-friendly option.

In this article, we will explore the differences between V Tip Hair Extensions and Tape-in Extensions, comparing their application processes, longevity, comfort, and costs to help you make the best decision for your hair transformation. Whether you want a natural, long-lasting solution or a lighter, temporary option, we’ve got you covered.

What Are V Tip Hair Extensions?

V Tip Hair Extensions are a popular method of hair extensions that use a keratin bond at the end of each strand to attach the extensions to natural hair. These extensions are named for their unique V-shaped tips, which are designed to make the application process smoother and more seamless. V Tip extensions are part of the fusion hair extension family, and they are known for their natural look and long-lasting results. The keratin bond used to attach the extensions is heat-activated, allowing the strands to fuse together securely and blend effortlessly with your natural hair.

V Tip extensions are crafted from 100% human hair, making them ideal for those who want a realistic, natural-looking result. Since the hair is sourced from natural human strands, the extensions can be styled, dyed, and treated like your own hair, offering versatility in terms of customization. This method is highly favored by individuals who desire a long-term solution to enhance their hair’s volume or length.

How V Tip Extensions Are Applied

The application of V Tip Hair Extensions involves a professional stylist who uses a fusion method to attach the extensions. Here’s a breakdown of the process:

Sectioning the Hair: The stylist begins by sectioning your natural hair into small, manageable pieces to ensure a precise application.

Heat Activation: Each V Tip extension has a keratin bond at the end. The stylist uses a heat tool to soften the keratin bond, which allows it to fuse securely with the natural hair. The heat is carefully controlled to avoid damage to both the natural hair and the extensions.

Attachment: The keratin bond is then pressed around a small section of natural hair. Once the bond cools and hardens, the extension is securely attached, creating a seamless blend between the natural hair and the extension.

Blending and Styling: After the application, the stylist will trim, layer, and style the extensions to ensure they blend perfectly with your natural hair. This step is crucial for achieving a uniform, natural look.

While the process requires a professional, the results are often worth the investment due to the long-lasting and natural finish.

Suitable Hair Types for V Tip Extensions

V Tip Hair Extensions are versatile and can be used on a variety of hair types. However, some factors can affect how well the extensions perform and how comfortable they are:

Fine to Medium Hair: V Tip extensions work best on fine to medium hair, as the keratin bond can blend easily without creating too much bulk. If you have fine hair, it’s important to make sure your stylist uses an appropriate amount of extensions to avoid weighing down your natural hair.

Thick Hair: V Tip extensions can also work well for individuals with thick hair, as the bond can support heavier extensions. The key is to use more extension strands to ensure a balanced and seamless look.

Straight to Wavy Hair: These extensions tend to blend best with straight to slightly wavy hair. If you have very curly hair, it may require more careful blending to achieve a natural look, and you may need a stylist with experience in managing textured hair.

Hair Condition: For V Tip extensions to adhere properly, it’s important that your natural hair is healthy and not excessively damaged. Individuals with brittle or very damaged hair might need to address these issues before getting V Tip extensions.

Average Lifespan and Maintenance Required

One of the standout features of V Tip Hair Extensions is their long lifespan, especially when compared to other methods. When applied correctly and maintained properly, these extensions can last between 3 to 6 months. Their durability is largely due to the strong keratin bond, which can withstand daily activities like washing, brushing, and styling.

However, proper maintenance is key to ensuring they last as long as possible:

Regular Maintenance Appointments: Over time, your natural hair will grow, causing the bonds to shift away from the roots. As a result, regular touch-ups every 6 to 8 weeks are recommended to maintain a seamless look.

Gentle Washing: When washing hair with V Tip extensions, it’s important to be gentle. Use sulfate-free shampoos and conditioners to avoid weakening the keratin bond. Avoid applying conditioner directly to the roots where the extensions are attached.

Heat Protection: Since V Tip extensions are made from human hair, they can be styled with heat tools. However, using a heat protectant spray is essential to prevent damage to both the extensions and your natural hair.

Avoiding Tugging: When brushing or styling, be sure to handle the extensions with care. Using a wide-toothed comb or a special brush designed for extensions helps minimize stress on the bonds.

Proper Removal: It’s crucial to have a professional remove the V Tip extensions when their lifespan is over. Attempting to remove them at home can cause damage to your natural hair.

In summary, V Tip Hair Extensions provide a durable, natural-looking solution for adding volume and length to your hair. While the application process requires professional assistance, the long lifespan and low-maintenance care make them a worthwhile investment for many individuals seeking a high-quality extension method.

What Are Tape-in Hair Extensions?

Tape-in Hair Extensions are a popular, semi-permanent method of adding length, volume, or color to your natural hair. They are widely favored for their quick application and lightweight feel. As the name suggests, tape-in extensions use a unique adhesive tape to attach small sections of extension hair to natural hair. Unlike other hair extension methods that require heat or fusion, tape-ins are applied using a gentle adhesive that bonds the extensions to the natural hair, making them a less invasive option for individuals looking for a non-permanent, yet long-lasting solution to enhance their hairstyle.

Tape-in extensions are typically made from high-quality, 100% human hair, which allows them to be styled and treated just like your own hair. These extensions offer a natural look because they lay flat against the scalp, creating a seamless blend between the extension hair and your natural hair. Due to their relatively discreet appearance and ease of application, tape-in extensions have become a popular choice for individuals seeking a low-maintenance way to achieve fuller, longer hair.

How Tape-in Extensions Are Applied

The process of applying Tape-in Hair Extensions is relatively quick and easy compared to other methods, such as V Tip extensions or microbead extensions. Here’s an overview of how the application works:

Sectioning the Hair: The stylist starts by sectioning your natural hair into small, manageable pieces. This allows for precise placement of the tape-in extensions and ensures a uniform result.

Application of Adhesive Tape: Each tape-in extension has a layer of adhesive on both sides. The stylist will place a thin section of natural hair between two strips of extension hair. The adhesive side of the extension will bond with your natural hair, securing the extension in place.

Pressing and Sealing: Once the tape is in place, the stylist will press down on the extension to ensure a strong bond. Some stylists use a special tool to seal the tape more firmly, ensuring that it stays in place even with regular movement and styling.

Blending and Cutting: After the extensions are applied, the stylist will blend them into your natural hair. This may involve trimming the extensions to match your hair length and texture, ensuring that the extensions look as natural as possible.

The application process for tape-in extensions is quick—typically taking about 1 to 2 hours, depending on the number of extensions being applied. The extensions can be removed and re-applied easily, making them a popular choice for those who like to change up their look periodically.

Suitable Hair Types for Tape-in Extensions

Tape-in extensions are suitable for a wide range of hair types and textures, but they tend to work best for individuals with fine to medium hair. Here’s a breakdown of the ideal hair types for tape-ins:

Fine to Medium Hair: Tape-in extensions are ideal for individuals with fine or medium-density hair, as the adhesive strips can bond seamlessly without adding too much bulk. The thin strips of tape provide a flat, natural look that blends well with fine hair, offering volume and length without overwhelming the hair.

Thick Hair: Tape-in extensions can also work for individuals with thick hair. However, more extension strips may be required to create a full, blended look. Thick hair may require some extra care to ensure the tapes stay secure, as heavier hair may put more strain on the adhesive.

Straight to Wavy Hair: Tape-in extensions generally work best with straight to slightly wavy hair. They blend well with these textures, creating a smooth and seamless transition. For individuals with very curly hair, additional blending and possibly a different method may be necessary for a natural look.

Healthy Hair: For tape-in extensions to bond properly, your natural hair should be in healthy condition. Extremely damaged or overly oily hair may cause the adhesive to lose its grip. It’s important to ensure your natural hair is clean and free from excess product buildup before applying tape-ins.

Average Lifespan and Maintenance Required

One of the reasons Tape-in Hair Extensions are so popular is their moderate lifespan and relatively low maintenance compared to other methods. On average, tape-in extensions last around 6 to 8 weeks before they need to be moved up or replaced. The lifespan of tape-in extensions depends largely on how well they are cared for and the rate of natural hair growth.

Here’s a breakdown of the average lifespan and maintenance required for tape-in extensions:

Regular Maintenance Appointments: Since your natural hair grows and the adhesive weakens over time, it’s important to schedule maintenance appointments every 6 to 8 weeks to reposition the extensions. During these appointments, the extensions are carefully removed, re-taped, and applied closer to the roots to ensure a seamless look.

Gentle Washing and Care: To prolong the lifespan of your tape-in extensions, it’s important to wash your hair gently. Avoid applying conditioner directly to the roots where the tape is located, as this can weaken the adhesive. Use sulfate-free shampoos to prevent drying out the adhesive.

Avoid Excessive Heat: While tape-in extensions can be styled with heat tools, it’s important to use a heat protectant to prevent damage. Excessive heat can cause the adhesive to weaken or cause the hair to become dry and brittle.

Combing and Brushing: When brushing or combing, always use a wide-tooth comb or a brush designed specifically for hair extensions. Start from the tips and work your way up to avoid pulling or tugging at the adhesive.

Professional Removal: When the tape-in extensions reach the end of their lifespan, it’s essential to have a professional stylist remove them. Improper removal can damage your natural hair and cause breakage.

In conclusion, Tape-in Hair Extensions offer a semi-permanent solution for individuals seeking a quick, natural-looking hair transformation. While they are easy to apply and provide great flexibility in styling, maintaining them properly is key to ensuring they last for the full 6 to 8 weeks. With proper care, tape-in extensions can provide an effortless way to add length, volume, or even color to your hair without the commitment of permanent changes.

Application Process: V Tip vs. Tape-in

The application process is one of the most important factors when choosing between V Tip Hair Extensions and Tape-in Hair Extensions. Both methods offer unique benefits and cater to different preferences, so understanding the steps involved and the overall ease of application is crucial in making an informed decision.

V Tip Hair Extensions

Step-by-Step Application Process:

Sectioning the Hair: The stylist will begin by sectioning your natural hair into small, manageable layers. This step ensures the extensions are applied precisely and evenly throughout your hair, resulting in a seamless blend.

Preparing the V Tip Extensions: V Tip extensions come with keratin tips that need to be softened with heat before being attached to your natural hair. A special heating tool, usually a fusion iron, is used to warm the keratin bond.

Applying the Extension: The softened keratin tip is then wrapped around a small section of your natural hair. The stylist will press the bond to ensure the keratin fuses to your hair. This process requires care to ensure the bond is properly sealed, which will result in a longer-lasting extension.

Allowing the Bond to Cool: Once the bond is pressed and applied, the keratin hardens and cools down, securing the extension in place.

Blending and Trimming: After the extensions are applied, the stylist will trim and blend the extensions with your natural hair to create a uniform look. This ensures that the extensions seamlessly integrate with your natural hair.

Duration of Application:

The application process for V Tip Hair Extensions is more time-consuming compared to some other methods. Typically, it can take anywhere from 2 to 4 hours to apply a full set of extensions, depending on the number of extensions being used and the thickness of your hair. The stylist needs to carefully apply each extension one by one, making sure the bonds are properly fused and blended.

Professional vs. DIY Application:

Professional Application: Because the application process involves using heat tools and working with keratin bonds, V Tip Hair Extensions should be applied by a trained professional. An experienced stylist will know how to use the fusion tool safely and ensure the bonds are secure. Attempting a DIY application could result in improperly placed extensions, uneven blending, or even damage to your natural hair.

DIY Application: While DIY kits for V Tip extensions are available, it’s generally not recommended. The fusion technique requires precision and expertise to ensure the bonds are applied correctly without causing damage. Even if you’re confident in your ability to follow instructions, the risk of improper application or damage is high.

Tape-in Hair Extensions

Step-by-Step Application Process:

Sectioning the Hair: Similar to V Tip extensions, the stylist will begin by sectioning your hair into small layers. This allows for precise placement of the tape extensions and ensures a seamless application.

Placing the Tape-In Extensions: Tape-in extensions come with a pre-applied adhesive strip. The stylist will carefully place the extensions on either side of a small section of your natural hair. The adhesive strips are pressed onto the hair and then sealed in place.

Pressing the Tape-In Extensions: To ensure a secure bond, the stylist will press down firmly on the adhesive. In some cases, a special tool may be used to press and secure the tape more effectively, ensuring it stays in place even with regular styling.

Blending and Cutting: After the tape-in extensions are applied, the stylist will blend them with your natural hair by trimming and styling as needed. This ensures the extensions integrate seamlessly into your hair, giving you a natural look.

Styling: Once the extensions are applied and blended, you can style them just like your natural hair, whether you want to curl, straighten, or leave it as is. The application process is designed to allow for a lot of versatility.

Duration of Application:

Tape-in extensions are much quicker to apply than V Tip extensions. The entire process typically takes about 1 to 2 hours to complete, depending on the number of extensions being applied and the thickness of your hair. This makes tape-ins a faster option, especially if you’re looking for a quick transformation.

Professional vs. DIY Application:

Professional Application: While the application of tape-in extensions is simpler than V Tip extensions, it’s still recommended to have them applied by a professional. A stylist will ensure the extensions are applied correctly, the adhesive is properly secured, and the extensions blend naturally with your hair. The advantage of professional application is that the stylist has the skill to ensure a smooth, flawless result.

DIY Application: Unlike V Tip extensions, Tape-in extensions can be applied at home with a DIY kit, making them a more budget-friendly option for those who prefer a more hands-on approach. The application process is relatively simple, involving the placement of the adhesive strips and pressing them into place. However, if done incorrectly, it can result in the extensions not adhering properly, causing discomfort or an unnatural appearance. For best results, some people prefer to visit a stylist for the application.

Comparison of Ease, Time, and Comfort

Ease of Application:

V Tip Hair Extensions: The application of V Tip extensions is more complex and requires professional training. The fusion method involves the use of heat tools to apply keratin bonds, which requires precision. This makes the process more challenging for DIY applications.

Tape-in Hair Extensions: Tape-in extensions are easier to apply compared to V Tip extensions, especially for those who choose the DIY route. The adhesive strips simplify the process, and the application time is significantly shorter. However, for the best results, professional application is still recommended.

Time of Application:

V Tip Hair Extensions: The application of V Tip extensions can take 2 to 4 hours, depending on the number of extensions and hair thickness.

Tape-in Hair Extensions: Tape-in extensions are much quicker to apply, with an average application time of 1 to 2 hours.

Comfort:

V Tip Hair Extensions: The keratin bonds used in V Tip extensions are small, but they can feel heavier and may cause some discomfort, especially during the first few days after application as your scalp adjusts to the added weight. Over time, the extensions should feel natural, but the application process requires more meticulous attention to avoid discomfort.

Tape-in Hair Extensions: Tape-in extensions are generally lighter and feel more comfortable compared to V Tip extensions. The flat adhesive strips lie close to the scalp, reducing any bulk or weight that may cause discomfort. However, if the tape is not properly applied, it may cause slight irritation or discomfort, especially at the roots.

Both V Tip Hair Extensions and Tape-in Hair Extensions offer distinct benefits, and the choice between them depends largely on your preferences for application time, ease, and comfort. V Tip extensions provide a more natural, long-lasting result, but they require a more complex application process and professional expertise. Tape-in extensions, on the other hand, are faster, easier to apply, and more suited for DIY enthusiasts, although professional application can ensure a better outcome.

If you have limited time or prefer a less-invasive option, Tape-in extensions are the way to go. However, if you’re looking for a more durable, seamless solution and don’t mind spending extra time and money, V Tip extensions are an excellent choice.

Durability and Longevity: V Tip vs. Tape-in Hair Extensions

When choosing between V Tip Hair Extensions and Tape-in Hair Extensions, the longevity and durability of each method are key factors to consider. Both extension types have their unique lifespan, maintenance requirements, and potential issues. Understanding these differences can help you determine which method will best suit your needs and lifestyle.

V Tip Hair Extensions

How Long They Last with Proper Care:

V Tip Hair Extensions are known for their longevity, often lasting anywhere from 3 to 6 months with proper care. This long lifespan is mainly due to the keratin bonding method used to secure the extensions to your natural hair. When applied professionally and cared for correctly, V Tip extensions can withstand daily styling, washing, and the normal wear and tear of daily life. However, the lifespan of V Tip extensions can vary depending on how well they are maintained and the rate at which your natural hair grows.

The extensions remain securely attached for months because the keratin bond, once cooled and hardened, creates a strong hold that can endure daily activities, including brushing, washing, and even using heat tools. To extend the life of V Tip extensions, it’s important to follow a good maintenance routine and schedule regular appointments for adjustments.

Potential Issues (e.g., Damage to Natural Hair):

While V Tip extensions are durable, there are potential issues to be aware of:

Damage to Natural Hair: If the extensions are not applied or removed properly, they can cause damage to your natural hair. Over time, the added weight of the extensions can put strain on your hair, leading to breakage or thinning. Additionally, if the keratin bond isn’t applied correctly or the fusion tool is too hot, it may cause damage to the natural hair at the point of attachment.

Bond Wear and Tear: As your natural hair grows, the bonds may shift or loosen, leading to noticeable gaps or discomfort. This necessitates professional adjustments every few months to ensure the extensions stay secure and natural-looking.

Difficulty of Removal: The removal process for V Tip extensions is also a potential issue. The keratin bonds require a special removal solution and a professional to avoid causing damage to the natural hair. Improper removal can lead to tangling or breakage.

With proper application and regular maintenance, however, these issues can be minimized.

Tape-in Hair Extensions

How Long They Last with Proper Care:

Tape-in Hair Extensions typically last between 6 to 8 weeks with proper care, making them a slightly more temporary option than V Tip extensions. The longevity of tape-ins is affected by factors like the natural growth of your hair, the adhesive’s durability, and the care regimen followed.

Since tape-in extensions are applied using an adhesive strip, they can remain secure for several weeks before the tape begins to weaken, especially with frequent washing and styling. Regular maintenance and reapplication are required every 6 to 8 weeks to ensure the extensions stay secure and continue to blend seamlessly with your natural hair. This reapplication process involves removing the extensions, cleaning the adhesive, and reapplying them closer to the roots.

Potential Issues (e.g., Wear and Tear of Adhesive):

Despite being a popular choice for ease and comfort, Tape-in extensions come with a few potential issues:

Adhesive Wear and Tear: The adhesive used in tape-in extensions can wear down over time due to frequent washing, heat styling, and exposure to products like hairspray or conditioners. As the adhesive weakens, the extensions may start to slide or feel loose. If this happens, they will need to be re-taped or replaced. In some cases, if the adhesive is exposed to too much moisture or heat, it can lose its grip more quickly.

Risk of Scalp Irritation: Some people may experience mild irritation or discomfort due to the adhesive, especially if it comes into contact with the scalp. This can happen if the extensions are too tightly applied or if the adhesive is not applied properly.

Shorter Lifespan: Compared to V Tip extensions, tape-ins generally have a shorter lifespan. This is due to the nature of the adhesive used and the fact that they are re-applied more frequently. While the extensions themselves may last longer with proper care, the adhesive’s wear-and-tear means the extensions will need to be replaced more often.

Hair Growth and Reapplication: As your natural hair grows, the extensions may start to look less natural, especially at the roots. Regular reapplication appointments are necessary to maintain the look, which can add to the overall cost and effort of using tape-in extensions.

Side-by-Side Comparison of Durability and Maintenance

FeatureV Tip Hair ExtensionsTape-in Hair Extensions
Average Lifespan3 to 6 months6 to 8 weeks
Maintenance FrequencyRequires reapplication every 3 to 6 months.Requires reapplication every 6 to 8 weeks.
DurabilityVery durable with proper care, can withstand regular styling.Durable for a shorter period, dependent on adhesive strength.
Risk of Natural Hair DamagePossible damage due to weight, improper application/removal.Less damage risk, but can cause scalp irritation or product buildup.
Reapplication ProcessKeratin bond needs to be professionally removed and replaced.Tape is removed, cleaned, and reapplied professionally.
ComfortCan feel heavier, especially in the beginning.Generally lighter and more comfortable, no bulk or pressure.
Adhesive IssuesNo adhesive, bond can loosen with time.Adhesive can wear down, causing the extensions to loosen.
Time Between ReapplicationsLonger between reapplications (3-6 months).Shorter reapplication intervals (every 6-8 weeks).
CostTypically more expensive due to longer-lasting results.Lower initial cost but requires more frequent reapplication.

Durability and Longevity: Which is Better?

V Tip Extensions are more durable in the long run, offering a lifespan of several months before needing reapplication. If you’re looking for an option that will last longer and require fewer touch-ups, V Tip extensions are a great choice. They are ideal for those who want a more long-term solution with minimal reapplication. However, they may require more careful attention to avoid damage to your natural hair due to the weight of the extensions.

Tape-in Extensions, while offering a more budget-friendly and easier-to-apply option, require more frequent maintenance and replacement due to the adhesive wear. They are better suited for those looking for a temporary or semi-permanent solution. Tape-ins are perfect for individuals who want flexibility and easy removal or reapplication but may not want to commit to the longer duration that V Tip extensions offer.

Both V Tip Hair Extensions and Tape-in Hair Extensions offer durable and long-lasting results when properly maintained. V Tip extensions last longer overall, but they require more careful maintenance to avoid damaging natural hair. On the other hand, Tape-in extensions are quicker to apply, lighter in feel, and more affordable but need more frequent maintenance and reapplication.

Ultimately, the choice between V Tip and Tape-in extensions depends on your specific needs, lifestyle, and how much time you’re willing to invest in maintaining your hair extensions. If you prefer a more long-term, low-maintenance option, V Tip extensions may be the way to go. If you’re looking for a temporary, easy-to-apply solution, Tape-in extensions could be a better fit.

Comfort and Wearability: V Tip vs. Tape-in Hair Extensions

When it comes to choosing between V Tip Hair Extensions and Tape-in Hair Extensions, comfort and wearability are critical factors. Both methods have their own unique characteristics that affect how comfortable they are during daily activities and how the extensions feel over time. Let’s compare the comfort levels of each method to help you make a more informed decision.

V Tip Hair Extensions

Comfort During Daily Activities:

V Tip Hair Extensions are applied using a keratin bond, which is fused to your natural hair. These extensions can initially feel a bit heavier or bulkier compared to other methods because of the keratin bond and the weight of the extensions themselves. In the early days after application, you might notice some discomfort as your scalp adjusts to the added weight.

However, after the first few days, the extensions should feel much more natural as your scalp and hair get accustomed to them. V Tip extensions don’t require adhesive, so there’s no risk of stickiness or irritation from glue or tape, which can be a concern with other extension types.

How the Bond Feels Over Time:

The keratin bond used in V Tip extensions is relatively small and discreet, but it can feel more noticeable at the roots, especially during the first few days after application. Over time, as the bond naturally loosens due to hair growth, the extensions may feel more comfortable. However, if the extensions are applied too tightly, they can cause scalp tension, leading to discomfort.

Additionally, because V Tip extensions are attached to your natural hair with keratin bonds, they require some maintenance to keep the bonds from becoming too loose or causing tangling. If the bonds are not adjusted or replaced regularly, they can become uncomfortable over time. When well-maintained, though, V Tip extensions tend to remain relatively comfortable.

Tape-in Hair Extensions

Comfort During Daily Activities:

Tape-in Hair Extensions are applied using adhesive strips that bond to your natural hair. Because they are lightweight and have flat adhesive strips, they generally feel lighter and more comfortable compared to V Tip extensions, especially when first applied. Tape-ins lie flat against the scalp, which makes them feel more natural and less noticeable during everyday activities like brushing, running your fingers through your hair, or styling.

However, as the adhesive starts to weaken after a few weeks of wear, you may notice the extensions starting to feel less secure, which can lead to slight discomfort, particularly if they are not properly maintained. If the tape begins to shift or loosen, it can feel like your hair is tugging or pulling at the roots, especially when brushing or styling.

How the Adhesive Feels Over Time:

When Tape-in extensions are first applied, the adhesive feels secure and comfortable. The strips are thin and flexible, so they don’t cause bulk or discomfort around the roots. For many people, the initial feeling is very smooth and easy to get used to, with no heavy pressure at the scalp.

However, over time, as the adhesive weakens or the hair grows out, the extensions may begin to feel a little uncomfortable. If the adhesive becomes less effective, the tape-in extensions may start to feel looser and may not lie as flat against the scalp, which can cause them to move around or even slide out slightly. Some people also experience mild irritation or sensitivity if the adhesive comes into direct contact with the scalp after wearing the extensions for a while.

Comparison of Comfort Levels

FeatureV Tip Hair ExtensionsTape-in Hair Extensions
Initial ComfortCan feel heavier at the roots due to keratin bonds, causing mild discomfort in the first few days.Generally lightweight and comfortable right away due to the flat adhesive strips.
Comfort During Daily ActivitiesAfter initial adjustment, V Tip extensions feel natural, though some people may still feel the bonds at the roots.Very comfortable for daily activities due to the lightweight feel and the flat nature of the tape.
Scalp Discomfort Over TimeIf the bonds loosen or the extensions are applied too tightly, they can cause scalp tension or irritation.As the adhesive weakens, the extensions may feel loose or cause slight irritation around the roots.
Hair Growth EffectsAs natural hair grows, the bonds may start to feel tighter or pull slightly, requiring maintenance.As hair grows, the tape may shift, leading to a less natural feel and possible discomfort if not reapplied.
Overall ComfortCan be less comfortable in the first few days but becomes more natural with time.Generally more comfortable throughout, but may require adjustments due to adhesive wear.

Which is More Comfortable?

V Tip Hair Extensions tend to feel more natural as they blend into the hair with minimal visible attachments, but they can feel heavier at first due to the keratin bond. Over time, they generally become more comfortable, though there’s a risk of discomfort if the extensions are applied too tightly or not maintained properly.

Tape-in Hair Extensions are lighter and usually more comfortable from the start because the flat adhesive strips don’t create as much bulk around the roots. They are ideal for those seeking a lightweight, hassle-free extension method. However, over time, the adhesive can weaken, leading to potential discomfort or irritation. With regular maintenance and reapplication, tape-ins can remain comfortable and wearable for the duration of their lifespan.

In conclusion, if you prioritize immediate comfort and a lightweight feel, Tape-in extensions are likely the better choice. If you prefer long-term wear and don’t mind occasional maintenance, V Tip extensions might offer a more seamless solution, though they may feel slightly bulkier at first. Your personal comfort will ultimately depend on your hair texture, extension application, and maintenance routine.

Cost Comparison: V Tip vs. Tape-in Hair Extensions

The cost of hair extensions is an important consideration when deciding between V Tip Hair Extensions and Tape-in Hair Extensions. Both methods come with their own price range for the extensions themselves, installation, maintenance, and other associated costs. Below is a detailed comparison of the costs, along with an analysis of which method offers more value for money in the long run.

V Tip Hair Extensions

Price Range for V Tip Hair Extensions:

The price of V Tip Hair Extensions can vary based on the length, quality of hair, and whether they are purchased as pre-bonded extensions or in bulk to be bonded by a stylist. On average, you can expect to pay:

Extensions Cost: The price for V Tip Hair Extensions typically ranges from $300 to $800 for a full set, depending on the quality of the hair (synthetic vs. human hair) and the length. Premium, high-quality human hair extensions can be significantly more expensive.

Installation Costs: Professional installation for V Tip extensions is more labor-intensive due to the bonding process. You can expect to pay anywhere from $150 to $400 for installation, depending on your location, the salon’s pricing, and the number of extensions being applied.

Thus, the total initial cost (for both the extensions and installation) can range from $450 to $1,200 or more.

Maintenance and Removal Costs:

Maintenance: To maintain V Tip extensions, you’ll need to schedule regular salon visits for reapplication and adjustment. Typically, you’ll need to visit every 3 to 6 months. Maintenance costs can range from $100 to $300 per visit, depending on the salon and how many extensions need to be adjusted.

Removal Costs: The removal process requires a professional who uses a special solution to break down the keratin bond and remove the extensions without damaging your natural hair. Removal typically costs between $50 to $150, depending on your stylist and the complexity of the process.

Hidden Costs:

Special Care Products: To extend the lifespan of V Tip extensions, you may need to invest in special shampoos, conditioners, and hair oils that are designed for keratin-treated hair. These can cost anywhere from $20 to $50 for quality products.

Heat Styling Tools: If you plan to use heat styling tools, you may need to buy a heat protectant or a lower-temperature styling tool, which can add to your cost.

Tape-in Hair Extensions

Price Range for Tape-in Hair Extensions:

Tape-in Hair Extensions are typically more affordable upfront than V Tip extensions, but they come with their own pricing structure. The costs for tape-ins depend on the brand, hair quality, and length.

Extensions Cost: The price for Tape-in Hair Extensions generally ranges from $100 to $500 for a full set. As with V Tip extensions, the price will increase with longer lengths and higher-quality human hair.

Installation Costs: Tape-in extensions are easier and quicker to apply than V Tip extensions, so the installation cost tends to be lower. Professional installation usually ranges from $100 to $250, depending on the salon and the number of extensions being applied.

Thus, the total initial cost (extensions + installation) typically falls between $200 and $750, depending on the hair quality and salon pricing.

Maintenance and Removal Costs:

Maintenance: Tape-in extensions generally require maintenance every 6 to 8 weeks due to the natural growth of your hair, which causes the adhesive to loosen. Reapplication typically costs between $100 and $250, as the tape is cleaned and reapplied to a new section of your hair.

Removal Costs: Tape-in extensions are easier to remove than V Tip extensions, and most salons charge around $50 to $100 for removal.

Hidden Costs:

Special Care Products: Like V Tip extensions, you will need specific care products to maintain the quality of the hair and the adhesive, including sulfate-free shampoos and conditioners. These can cost around $20 to $50.

Additional Tape: Depending on the wear of your extensions, you might need to replace the tape used for application every few months. Tape refills typically cost around $30 to $80.

Which One Offers More Value for Money in the Long Run?

The decision of which type of extension offers better value for money depends on your preferences for durability, longevity, and how much time and money you’re willing to invest in maintenance.

V Tip Hair Extensions have a higher upfront cost and require more frequent maintenance, but they can last longer (up to 6 months with proper care). If you are looking for a long-lasting solution and are okay with spending more initially, V Tip extensions can be a good investment. However, the maintenance costs add up, and there is the potential for damage if not handled properly.

Tape-in Hair Extensions are less expensive upfront and have a shorter lifespan (6 to 8 weeks between reapplications). However, because they are more affordable and quicker to apply, they can be a great option if you’re looking for flexibility, a more temporary solution, or lower maintenance costs. While you’ll need to reapply them every couple of months, the overall cost of tape-in extensions (including installation and maintenance) can add up to a lower total long-term investment compared to V Tip extensions.

Summary of Costs:

Cost FactorV Tip Hair ExtensionsTape-in Hair Extensions
Initial Cost (Extensions + Installation)$450 – $1,200$200 – $750
Maintenance Cost (Every 3-6 Months)$100 – $300$100 – $250
Removal Cost$50 – $150$50 – $100
Hidden Costs (Care Products, etc.)$20 – $50 for special hair care products, tools$20 – $50 for care products, $30 – $80 for tape refills
Longevity3 – 6 months6 – 8 weeks

If you’re looking for a long-term, durable solution and are willing to invest more upfront, V Tip Hair Extensions offer a longer-lasting result, making them a better value for money in the long run for people who want a more permanent extension option. However, they do require higher maintenance and can result in more frequent costs over time.

On the other hand, Tape-in Hair Extensions are more affordable and offer flexibility. They are ideal for those who want a less expensive, temporary solution and are okay with more frequent reapplication. Overall, tape-ins provide better value for those who prefer a budget-friendly option with less commitment and lower overall maintenance costs.

Ultimately, your decision will depend on your desired hair goals, budget, and how much time and effort you’re willing to invest in upkeep.

Pros and Cons: V Tip vs. Tape-in Hair Extensions

Choosing between V Tip Hair Extensions and Tape-in Hair Extensions depends on what you prioritize in terms of longevity, cost, maintenance, and overall experience. Both methods have their strengths and drawbacks. Below is a detailed breakdown of the pros and cons of each type to help you make an informed decision.

V Tip Hair Extensions

Pros:

Long-Lasting:

V Tip Hair Extensions can last 3 to 6 months with proper care, making them a great long-term solution for people looking for extended wear. The keratin bonds remain securely attached to the natural hair for months, making it ideal for individuals seeking a semi-permanent extension solution.

Natural Look:

The small, discreet keratin bond provides a seamless and natural-looking result. The extensions blend well with your natural hair, offering a soft and smooth transition without visible attachment points, making them look more like your real hair.

Versatile Styling Options:

Because V Tip extensions are fixed with keratin bonds, they offer flexibility in styling. You can curl, straighten, or style them just like natural hair. The bonds don’t interfere with your styling tools, so you have full freedom to experiment with different looks.

Suitable for Various Hair Types:

V Tip extensions work well with different hair types, including thick, fine, or textured hair, as they are available in multiple lengths and colors to match your natural hair. They also don’t require any adhesive, reducing the chance of irritation or scalp sensitivity.

Cons:

More Time-Consuming Application:

The application of V Tip Hair Extensions is more time-consuming and intricate. Each bond needs to be carefully applied using a heated fusion tool, which can take several hours, especially for full coverage. This makes the process longer compared to other extension methods like Tape-ins.

Higher Cost:

The initial cost of V Tip extensions is higher due to the labor-intensive application and the higher quality of the hair. Prices can range from $450 to $1,200 for the full set, including the installation, making it a more expensive option upfront. Additionally, maintenance costs can add up, as the bonds need to be adjusted every 3 to 6 months.

Risk of Damage to Natural Hair:

If not applied or maintained correctly, the weight of the extensions or improper removal can cause strain on natural hair, leading to breakage or thinning. Additionally, the heat fusion process can cause potential damage to natural hair if done incorrectly.

Tape-in Hair Extensions

Pros:

Quicker Application:

Tape-in Hair Extensions offer a much quicker application process compared to V Tip extensions. The adhesive strips are applied directly to the natural hair, and the installation typically takes only 1 to 2 hours, making them a great option for people with a busy schedule.

More Affordable:

Tape-in extensions are generally more budget-friendly, with an initial cost ranging from $200 to $750, including installation. This makes them a more accessible option for individuals who want to add volume and length without a huge financial investment.

Lightweight and Comfortable:

Tape-ins are very lightweight compared to V Tip extensions, and the flat adhesive strips feel comfortable against the scalp. This makes them a great choice for individuals who are concerned about the weight or bulkiness of traditional extensions.

Natural Movement:

Because the adhesive strips are thin and flexible, Tape-in extensions move naturally with your hair. This offers a smooth, soft finish and allows for a more natural-looking flow and movement of the hair.

Cons:

Shorter Lifespan:

Tape-in extensions typically last 6 to 8 weeks before needing reapplication, which is shorter than V Tip extensions. The adhesive strips weaken over time due to washing and styling, leading to more frequent maintenance and reapplication. This can be a hassle if you’re looking for a long-term solution.

Potential Adhesive Issues:

One of the major drawbacks of tape-ins is the potential for adhesive wear and tear. The tape can weaken or loosen over time, especially with frequent washing, heat styling, or exposure to humidity. This can cause the extensions to slide or feel less secure, leading to discomfort.

Not Suitable for All Hair Types:

Tape-in extensions may not work as well for individuals with very thick, coarse, or textured hair. The adhesive strips may struggle to hold securely, especially in hair that is very thick or oily, requiring more frequent adjustments or reapplications.

Potential for Scalp Irritation:

The adhesive used in tape-ins can cause mild irritation or sensitivity on the scalp for some people, especially if the extensions are applied too tightly or the adhesive is exposed to excessive heat or moisture. This can result in itching or discomfort.

Summary of Pros and Cons

FeatureV Tip Hair ExtensionsTape-in Hair Extensions
Pros– Long-lasting (3 to 6 months)– Quicker application (1-2 hours)
– Natural, seamless look– More affordable than V Tip extensions
– Versatile styling options (curling, straightening)– Lightweight and comfortable
– Suitable for different hair types– Natural movement and flow
Cons– Time-consuming application process (several hours)– Shorter lifespan (6-8 weeks)
– Higher initial cost (up to $1,200)– Potential adhesive issues (slipping or loosening over time)
– Risk of natural hair damage if not applied/removed correctly– May not be suitable for very thick or coarse hair
– Potential for scalp irritation or discomfort with adhesive contact

V Tip Hair Extensions offer a long-lasting, natural look with great versatility and styling options, making them ideal for people looking for a more permanent extension solution. However, they are more time-consuming to apply and have a higher cost, both initially and for maintenance.

Tape-in Hair Extensions, on the other hand, are more affordable, quicker to apply, and lighter on the scalp, making them a more comfortable and budget-friendly option for those who want temporary extensions. However, they have a shorter lifespan and may require more frequent maintenance due to potential adhesive issues.

Ultimately, your choice will depend on your personal preferences, budget, and how much time and effort you’re willing to invest in maintenance. If you’re looking for a long-term solution with more styling flexibility, V Tip extensions are the better choice. If you’re after a quick, affordable, and comfortable option, Tape-in extensions might be the way to go.

Which One Should You Choose?

When deciding between V Tip Hair Extensions and Tape-in Hair Extensions, it’s important to consider several factors such as your hair type, lifestyle, budget, and maintenance preferences. Both types of extensions have their own advantages and drawbacks, so understanding your individual needs will help you make the best decision for your hair goals.

Who is Best Suited for V Tip Hair Extensions?

V Tip Hair Extensions are a great option for people who are looking for a long-lasting, seamless, and natural-looking extension that will hold up for several months. Here are the ideal candidates for V Tip extensions:

1. Individuals with Medium to Fine Hair:

V Tip extensions are ideal for those with fine or medium hair because they can blend well and provide volume without adding too much weight. They add natural-looking fullness and length, which is perfect for fine hair that doesn’t have as much volume.

For thicker hair, V Tip extensions are also suitable, but it may require more bonds to ensure a full, balanced look. It’s important to have the extensions applied by a professional to avoid excessive tension on the natural hair.

2. Those Seeking a Long-Term Solution:

If you are looking for long-lasting results and are willing to invest in a more permanent solution (lasting 3-6 months), V Tip Hair Extensions are a good choice. They require fewer touch-ups and can withstand daily styling and wear for a longer period.

They’re particularly beneficial for people who prefer low-maintenance options once installed, as they don’t require frequent reapplication.

3. People with Time for Maintenance:

While V Tip extensions have a longer lifespan, they do require professional maintenance every few months. This includes adjustments or reapplication to keep the keratin bonds secure.

If you don’t mind scheduling regular salon visits to maintain the extensions, V Tip extensions are ideal.

4. Those Who Prioritize a Natural Look:

If your goal is to have seamless, natural-looking hair that blends well with your own, V Tip extensions are a great choice. The small keratin bonds are discreet, offering a more natural appearance without visible attachment points.

5. Those with a Higher Budget:

Since V Tip Hair Extensions involve a more complex and time-consuming application, they tend to be more expensive. Therefore, individuals who are comfortable investing in higher-quality extensions and are willing to spend more for long-term wear will benefit from V Tip extensions.

Who is Best Suited for Tape-in Hair Extensions?

Tape-in Hair Extensions are a more affordable and quick solution for those who need temporary or medium-term extensions. They offer a lightweight and comfortable feel, making them ideal for individuals with different needs. Here are the ideal candidates for Tape-in extensions:

1. Those with Fine to Medium Hair:

Tape-ins are great for people with fine to medium hair as they provide volume without being too heavy. The flat adhesive strips are perfect for blending seamlessly with natural hair, creating a fuller, more voluminous look.

People with thick hair may also use tape-ins, but they may need more sections for the extensions to blend naturally. However, tape-ins may not be ideal for extremely coarse or thick hair, as the adhesive may not hold as securely.

2. Those Looking for an Affordable Option:

Tape-in extensions are generally more affordable than V Tip extensions, both in terms of the upfront cost and the maintenance. This makes them a great choice for individuals on a budget who want to add length and volume without committing to the higher costs of V Tip extensions.

They are also less expensive to maintain, as the installation process is quicker and the reapplication is simpler compared to keratin bonding.

3. People Seeking a Shorter-Term Solution:

Tape-in extensions are perfect for people who want a temporary extension solution or who like to change their look frequently. They last 6-8 weeks before needing reapplication, which is ideal for those who want a more flexible, short-term option.

Tape-ins are a great choice for people who like to change their look based on seasons or events without committing to something permanent.

4. Individuals with a Busy Lifestyle:

The application of Tape-in extensions is faster, typically taking 1-2 hours. This makes them an ideal choice for people with busy schedules who don’t have several hours to spend in the salon.

They also require less maintenance compared to V Tip extensions, as the reapplication process is less time-consuming. This can be appealing to those who want a beautiful, low-maintenance look.

5. Those Who Prefer Comfort:

Tape-in extensions are known for being lightweight and comfortable against the scalp. The adhesive strips lie flat, which reduces any potential discomfort caused by bulkier bonds, making them more comfortable for those who prioritize comfort in their hair extensions.

6. Those with a Lower Maintenance Preference:

Since Tape-in extensions only need to be re-applied every 6 to 8 weeks, they are a better option for individuals who prefer less frequent maintenance. However, keep in mind that the adhesive will weaken over time, and you will need to reapply them more often than V Tip extensions.

Factors to Consider When Choosing Between V Tip and Tape-in Hair Extensions

1. Hair Type:

If you have fine or medium hair, both V Tip and Tape-in extensions can work well, but V Tip extensions might provide more volume and length over the long term. For thicker hair, V Tip extensions are often better suited since they can support the weight of the extensions more securely.

Tape-in extensions work best for fine to medium hair and may not adhere as well to very thick or coarse hair.

2. Lifestyle:

If you’re someone with a busy schedule and need something that’s quick and easy to manage, Tape-in extensions are the better choice. They’re quick to apply and easy to maintain.

If you prefer a long-term commitment and don’t mind visiting the salon every few months, V Tip extensions may be a better fit.

3. Budget:

V Tip extensions tend to be more expensive both in terms of initial cost and maintenance. If you have a higher budget and want something long-lasting, they could be the right choice.

Tape-in extensions are more affordable, making them a great option for those who want quality extensions without breaking the bank.

4. Maintenance Preferences:

If you want low-maintenance extensions that require fewer visits to the salon, V Tip extensions are better, as they can last 3 to 6 months between appointments.

If you prefer a more flexible, temporary solution, Tape-in extensions are ideal. They need to be reapplied more frequently (every 6 to 8 weeks), but they are less involved in terms of maintenance overall.

V Tip Hair Extensions are best suited for those looking for a long-term solution with a natural look and are willing to invest in more expensive and time-consuming maintenance. They’re perfect for people who prioritize longevity and natural blending and have the budget to support the investment.

Tape-in Hair Extensions are perfect for those who need a quick, affordable solution with low maintenance and flexibility. If you prefer a more temporary option with less upkeep and are on a budget, tape-ins provide great value.

Ultimately, your decision should be based on your personal hair type, lifestyle, budget, and how much effort you want to dedicate to maintenance. Each method has its own strengths, so choose the one that best aligns with your goals and needs.

Conclusion

In summary, V Tip Hair Extensions offer a long-lasting, natural look with versatile styling options, making them ideal for individuals seeking a more permanent solution and who are willing to invest in maintenance. They provide a seamless blend and are suited for those with medium to fine hair. However, the application process is time-consuming and the cost is higher.

On the other hand, Tape-in Hair Extensions are quicker to apply, more affordable, and lightweight, making them a great choice for people on a budget or those looking for a temporary extension option. While they have a shorter lifespan, they require less maintenance and are perfect for those with a busy lifestyle.

Ultimately, the choice depends on your hair goals, budget, and lifestyle. It’s always a good idea to consult a professional stylist to get personalized recommendations and ensure the best results for your hair type and needs.

Step-by-Step Guide to Installing & Removing Invisible Tape Extensions

Invisible tape extensions are a modern hair enhancement solution featuring ultra-thin wefts with medical-grade adhesive tabs that create seamless, undetectable volume and length. Unlike traditional methods, these extensions use a unique sandwich technique where natural hair is secured between two adhesive strips, offering a flawless blend and comfortable wear. Their innovative design makes them virtually invisible when applied correctly, providing instant transformation without bulky clips or obvious attachment points.

The growing popularity of invisible tape extensions stems from their unbeatable combination of natural appearance, easy application, and reusability. They deliver the most undetectable results among all extension types, with no visible tracks or bulky seams. Application is quick and straightforward – often completed in under an hour by professionals – while their semi-permanent nature allows for weeks of continuous wear. With proper care, high-quality invisible tape extensions can be reused multiple times, offering excellent value compared to temporary alternatives.

Ideal for those with fine to medium hair textures, invisible tape extensions provide weightless volume without stressing delicate strands. They’re perfect for adding length (typically 14-22 inches), thickness, or dimensional color with minimal commitment. While suitable for most hair types, individuals with very short hair (under 3 inches) or excessively oily scalps should consult a stylist first. When properly installed and maintained, invisible tape extensions offer a comfortable, long-lasting solution for achieving gorgeous, salon-quality hair at home or professionally.


Pre-Installation Preparation for Invisible Tape Extensions

Proper preparation is essential for achieving flawless, long-lasting results with your invisible tape extensions. Follow these detailed steps to ensure your hair and tools are ready for application.

Tools You’ll Need:

Invisible Tape Extensions

Choose high-quality human hair extensions or synthetic extensions that match your hair color, texture, and desired length.

Ensure the adhesive tabs are fresh and sticky (not dried out).

Alcohol-Based Scalp Cleanser

Removes oils, dirt, and product buildup to help the adhesive bond securely.

Look for a gentle, non-drying formula to avoid scalp irritation.

Tail Comb & Sectioning Clips

A fine-tail comb helps create clean, precise sections for even placement.

Sectioning clips keep hair organized and out of the way during installation.

Hair Adhesive Remover (For Later Removal)

A specialized solvent to safely dissolve the adhesive when removing extensions.

Avoid harsh chemicals that could damage your natural hair.

Flat Iron (Optional for Sealing Bonds)

Some stylists recommend lightly heating the adhesive tabs with a flat iron (low heat) to strengthen the bond.

Use a heat protectant spray if applying heat.

Hair Preparation:

Wash Hair 24 Hours Before Application

Shampoo with a clarifying or sulfate-free shampoo to remove oils and residue.

Avoid conditioners, serums, or styling products, as they can weaken the adhesive.

Let hair air-dry or blow-dry completely—no moisture should remain.

Blow-Dry Thoroughly

Use a blow dryer on a medium heat setting to ensure hair is 100% dry.

Damp or oily hair will prevent the tape from adhering properly.

Avoid Styling Products

Skip leave-in conditioners, oils, or dry shampoo before application.

These can create a barrier between the tape and your natural hair.

Brush Hair Smoothly

Detangle gently with a wide-tooth comb or soft bristle brush.

Ensure no knots or tangles are present where extensions will be placed.

Pro Tips for Best Results:

✔ Work in a Clean, Well-Lit Space – Good visibility ensures precise placement.
✔ Do a Strand Test – Apply one weft first to check adhesion and comfort.
✔ Have a Mirror Handy – Helps with self-application if doing it at home.

By following these steps, your invisible tape extensions will adhere better, last longer, and look more natural.

How to Install Invisible Tape Extensions: Step-by-Step Guide

Achieving salon-perfect hair at home is easy with this detailed, professional installation method for invisible tape extensions. Follow these steps carefully for seamless, long-lasting results.

Step 1: Section Your Hair

Start at the Nape

Use a tail comb to create a horizontal parting about 1 inch above your neckline.

This will be your first row of hair extensions.

Clip Away Upper Layers

Secure the top section of your hair with sectioning clips to keep it out of the way.

Work with small, manageable sections (about 1-2 inches wide) for precision.

Step 2: Prepare the Tape

Peel the Backing

Take one weft and gently peel the protective backing off one side of the adhesive tape.

Avoid touching the sticky surface to maintain maximum adhesion.

Keep the Other Side Protected

Leave the backing on the opposite side until you’re ready to sandwich your natural hair.

Step 3: Apply the Weft

Sandwich Your Natural Hair

Take a thin section of your natural hair (about the same width as the weft).

Place the sticky side of the weft underneath your natural hair, close to the scalp but not touching it.

Press to Bond

Remove the second backing and fold down the top weft, sandwiching your hair in between.

Press firmly along the entire strip for 10 seconds to activate the adhesive.

Step 4: Repeat & Layer

Work Upward in Rows

Move upward in horizontal sections, leaving a 1 cm (0.5 inch) gap between each row.

This ensures even distribution and prevents tension on your scalp.

Avoid the Roots

Place extensions at least 1 cm away from your roots to prevent discomfort and visible lifting.

For a natural look, stagger wefts slightly instead of aligning them perfectly.

Final Checks & Styling

✔ Blend the Extensions

Lightly tease the roots of your natural hair at the crown for seamless blending.

Trim or layer if needed for a cohesive look.

✔ Wait Before Washing

Avoid washing or styling with heavy products for 24-48 hours to let the adhesive set fully.

✔ Brush Gently

Use a soft-bristle brush, starting from the ends and working upward to prevent tugging.

Pro Tip: For first-timers, practice with 2-3 wefts before doing a full head. If unsure, consult a stylist!

Styling & Caring for Your Invisible Tape Extensions After Installation

Now that your invisible tape extensions are perfectly installed, proper aftercare is crucial to maintain their flawless appearance and longevity. Follow these professional styling guidelines to keep your extensions looking fresh and beautiful for weeks to come.

Immediate Aftercare (First 48 Hours)

The first two days after installation are critical for ensuring your extensions bond securely:

Avoid washing your hair for at least 24-48 hours post-installation to allow the adhesive to fully set

Skip vigorous exercise or activities that cause excessive sweating

Sleep with your hair loosely braided or in a low ponytail to prevent tangling

Use a silk or satin pillowcase to reduce friction while sleeping

Washing Your Extensions

When it’s time for your first wash:

Use sulfate-free shampoo (sulfates can break down the adhesive)

Lukewarm water only – hot water weakens the tape bonds

Wash gently in downward motions – never scrub or rub the tape areas

Apply conditioner from mid-lengths to ends – keep it away from the bonds

Rinse thoroughly to remove all product residue

Styling Do’s and Don’ts

Do:

Use heat protectant sprays before styling

Blow-dry on medium heat, directing airflow downward

Style with ceramic tools at moderate temperatures (under 350°F/175°C)

Brush gently with a loop brush or extension-specific brush

Apply products sparingly and avoid the bonded areas

Don’t:

Use oil-based products near the tape bonds

Apply heavy styling creams or waxes near roots

Sleep with wet hair

Tie hair too tightly or use elastic bands directly on bonds

Swim without protecting hair (chlorine and saltwater damage adhesive)

Maintenance Routine

For optimal results:

Wash hair 2-3 times weekly – over-washing shortens lifespan

Use dry shampoo between washes to absorb oils at roots

Schedule maintenance appointments every 6-8 weeks

Inspect bonds weekly for any lifting or slippage

Troubleshooting Common Issues

If bonds feel loose: Avoid getting them wet and consult your stylist

For product buildup: Use a clarifying shampoo (avoiding bond areas)

When tangles occur: Always detangle from ends upward

By following these care instructions, your invisible tape extensions will maintain their beautiful, natural appearance throughout their lifespan. Remember that proper maintenance not only keeps your extensions looking great but also protects your natural hair underneath.

How to Remove Invisible Tape Extensions Safely Without Damage

Proper removal is just as important as installation when it comes to protecting your natural hair. Follow this detailed, professional technique to remove your tape-in extensions without breakage or discomfort.

Step 1: Apply Adhesive Remover

What You’ll Need:

Professional-grade tape extension remover (oil-free formula)

Spray bottle or small applicator brush

Timer (phone or clock)

Process:

Section Your Hair

Clip hair into 4-6 sections using sectioning clips

Start with the bottom-most row of extensions

Apply Remover Precisely

For spray formulas: Hold 2-3 inches from bonds and mist lightly

For liquid formulas: Dab carefully with cotton swabs or brush

Focus only on the adhesive tabs – avoid soaking your natural hair

Wait 2-3 Minutes

Set a timer for exactly 2-3 minutes (longer can dry out hair)

You’ll see the adhesive turn clear when ready

Step 2: Gently Release the Wefts

Proper Technique:

Start at the Outer Edge

Place thumb and forefinger on either side of the weft

Gently pinch the top and bottom tabs together

Slide Downward Slowly

Maintain steady pressure as you glide the weft down hair shaft

If resistance occurs, apply more remover and wait 1 additional minute

Never Pull Upward

Always move in the direction of hair growth

For stubborn bonds: Use a tail comb to help separate (never yank)

Step 3: Cleanse and Restore

Post-Removal Care:

Residue Removal

Soak a cotton pad with remover

Wipe each attachment area until no sticky residue remains

Cleansing Wash

Use clarifying shampoo to remove all adhesive traces

Follow with deep conditioner (avoiding roots)

Hair Recovery

Apply protein treatment if hair feels weak

Let hair rest 1-2 weeks before reapplication

Pro Tips for Perfect Removal

✔ Best Time to Remove: When bonds start lifting (typically 6-8 weeks)
✔ Never Use: Household oils or alcohol – these can damage hair
✔ Storage Tip: Clean removed wefts with remover before re-taping

Warning Signs to Stop:

If hair stretches or snaps during removal

If scalp feels irritated from remover

If excessive force is needed

Aftercare Essentials:
→ Use wide-tooth comb for first 3 days post-removal
→ Avoid heat styling while hair recovers
→ Schedule trim to remove any dry ends

The Complete Guide to Maintaining & Reusing Invisible Tape Extensions

Proper maintenance can double the lifespan of your tape extensions while keeping your natural hair healthy. Follow these professional care techniques to get the most value from your investment.

Cleaning & Re-Taping for Reuse

Step-by-Step Refresh Process:

Remove Old Adhesive

Lay wefts on clean towel, sticky side up

Spray with 99% isopropyl alcohol or specialized adhesive remover

Let sit 3 minutes until glue becomes rubbery

Scrub Gently

Use soft toothbrush to roll away old adhesive

Work in downward motions to prevent hair damage

Repeat until no sticky residue remains

Deep Clean Wefts

Fill basin with cool water and sulfate-free shampoo

Swish wefts gently (never rub or twist)

Rinse under running water until water runs clear

Re-Taping Procedure

Purchase professional-grade tape tabs (1mm thickness recommended)

Align new tape precisely with original placement lines

Press firmly for 30 seconds to ensure proper adhesion

Smart Storage Solutions

Between Uses:
✔ Climate Control

Store in breathable mesh bag (included with quality extensions)

Keep in dry area with stable temperature (60-75°F / 15-24°C)

✔ Moisture Prevention

Include silica gel packet in storage container

Never store in bathroom (humidity damages adhesive)

✔ Tangle Prevention

Lightly braid or loop wefts before storing

Use acid-free tissue paper to separate layers

Repositioning Schedule

Professional Timeline:

First Adjustment: 4 weeks after installation

Standard Reapplication: Every 6-8 weeks maximum

Emergency Situations:

If bonds start lifting prematurely

After excessive swimming/sweating

When natural hair grows >1.5 inches

Signs You Need Earlier Maintenance:
→ Visible adhesive when hair moves
→ Increased tangling at attachment points
→ Discomfort when brushing near roots

Extending Your Extensions’ Lifespan

Care Routine:

Weekly Bond Checks

Adhesive yellowing

Hair slippage

Thinning at bonds

Inspect 2-3 wefts randomly each week

Look for:

Professional Upkeep

Precision re-taping

Custom blending cuts

Bond realignment

Schedule salon visits for:

At-Home Care

Use extension-safe dry shampoo

Sleep in loose braid with silk scrunchie

Avoid alcohol-based products near tapes

Expected Lifespan:

Human Hair: 3-5 reuses with proper care

Synthetic: 1-2 reuses maximum

When to Retire Extensions:
✖ More than 30% hair loss from wefts
✖ Fraying or matting at tape points
✖ After 6 months total use

Troubleshooting Guide for Invisible Tape Extensions: Fixing Common Problems

Even with proper care, you may encounter some issues with your tape extensions. Here’s a detailed breakdown of solutions to the most common problems:

1. Extensions Slipping or Falling Out

Causes & Solutions:
✔ Oily Scalp/Skipped Prep

Fix: Wash hair with clarifying shampoo 24hrs before reapplication

Prevent: Use oil-absorbing dry shampoo between washes

✔ Improper Application

Fix: Ensure hair is 100% dry before installation

Prevent: Have a pro stylist do initial application

✔ Weak Adhesive

Fix: Use alcohol wipe on tabs before re-sticking

Prevent: Replace old tape (adhesive lasts 3-6 months unopened)

✔ Fine Hair Type

Solution: Use narrower wefts (1″ instead of 1.5″) for better hold

2. Tangled or Matted Extensions

Step-by-Step Detangling:

Pre-Treatment

Spray detangling solution (water + leave-in conditioner mix)

Let sit 5 minutes

Brushing Technique

Use loop brush or wide-tooth comb

Start at ends, work upward in small sections

Hold bonds steady while brushing

Deep Conditioning

Apply mask to mid-lengths/ends

Rinse with cool water to seal cuticles

Prevention Tips:

Braid hair before sleeping

Avoid chlorine/ocean water

Trim ends every 8 weeks

3. Visible Tabs or Bulky Appearance

Professional Solutions:

For Thin Hair:
→ Use 0.5mm ultra-thin tape
→ Install in zig-zag pattern instead of straight rows
→ Place wefts 1.5cm below part line

For Thick Hair:
→ Request “V-shaped” taping at salon
→ Use 2-3 thinner wefts layered together
→ Tease roots slightly before application

Color-Matching Hack:

Dust translucent powder on visible tabs

Use colored dry shampoo at roots

4. Discomfort or Tension

Immediate Relief:

Hot Compress

Soak washcloth in warm water

Hold on tight bonds for 60 seconds

Massage Technique

Use fingertips to gently loosen edges

Apply peppermint oil (diluted) for soothing effect

When to Remove:

If pain persists >24 hours

When redness/irritation appears

If headaches develop

5. Adhesive Residue in Hair

Removal Process:

Oil Treatment

Apply coconut/argan oil to residue

Let sit 15 minutes

Comb Out

Use fine-tooth comb in downward strokes

Wipe comb frequently with alcohol wipe

Final Wash

Use dawn dish soap (one-time only)

Follow with deep conditioner

Prevention Checklist

✅ Wash hair every 3-4 days max
✅ Avoid silicone-based products
✅ Schedule 6-week maintenance
✅ Use sulfate-free shampoo only
✅ Sleep on silk pillowcase

When to See a Professional:

If >3 wefts come loose in one week

When hair loss occurs at bonds

If allergic reaction develops

Conclusion

By following this comprehensive guide, you now understand how to properly install, maintain, and troubleshoot your invisible tape extensions for flawless, long-lasting results. Remember these key points:

Proper preparation ensures optimal adhesion

Gentle care extends your extensions’ lifespan

Timely maintenance prevents common issues

For first-time users, we strongly recommend consulting a professional stylist for initial application. This guarantees correct placement and helps you learn proper techniques. With the right care, your tape extensions can provide beautiful, natural-looking volume and length for months.

Ready to transform your hair? Book a consultation with a certified extension specialist or explore our recommended at-home kits for experienced users. Your perfect hair awaits!

How Much Do Hand Tied Weft Extensions Cost?

Hair extensions have dramatically evolved over the years, offering individuals the opportunity to transform their looks effortlessly. Among the most sought-after types today are hand tied weft extensions. Known for their natural appearance, comfort, and versatility, hand tied extensions are often considered a luxury option in the world of hair enhancement. However, with luxury comes a cost — and if you’re considering investing in hand tied wefts, it’s essential to understand exactly what you’re paying for.
In this article, we will explore the costs associated with hand tied weft extensions in depth, covering installation fees, maintenance costs, factors that influence pricing, regional variations, and whether the investment is worth it.

What Are Hand Tied Weft Extensions?

Hand tied weft extensions are a type of hair extension where small, delicate wefts of hair are sewn onto a foundation of beaded rows that are placed close to the scalp. Unlike machine-tied wefts, hand tied wefts are thinner, lighter, and create a flatter lay against the scalp, making them more natural-looking and less damaging to natural hair.

They are a popular choice for those seeking added volume, length, or color variation without the use of adhesives, heat, or harsh chemicals. However, because the process is labor-intensive and requires a high level of skill, the cost tends to be higher compared to other methods.

How Much Do Hand Tied Weft Extensions Cost?

Initial Installation Cost

The initial installation for hand tied weft hair extensions can range significantly based on several variables. On average, you can expect to pay anywhere from $600 to $2,500 or more for the first appointment. This price usually includes the cost of the hair itself and the stylist’s labor.

Basic Installation (1-2 rows, minimal length/volume): $600 – $1,200

Full Head Installation (2-4 rows for full volume and length): $1,200 – $2,500+

Luxury salons in metropolitan areas like Los Angeles, New York City, or Miami can charge well beyond $3,000, especially if you’re seeking premium, ethically sourced hair or a celebrity stylist.

Cost of the Hair

If you are purchasing the hair separately (some stylists require this), the cost of the hand tied wefts alone can range from $200 to $600 per bundle. Typically, multiple bundles are needed for a full installation — anywhere from 2 to 6 bundles, depending on your desired volume and length.

Standard Quality Hair: $200 – $350 per bundle

Premium/Remy Hair: $350 – $600 per bundle

Premium hair tends to last longer, look more natural, and require less frequent replacement, which may justify the upfront investment.

Factors That Influence the Cost

1. Quality of Hair

Hair quality is the most significant factor affecting the price. High-quality Remy hair (hair where the cuticles are aligned) or virgin hair (unprocessed and from a single donor) will cost considerably more than lower-quality, processed hair.

2. Stylist Expertise

Not all stylists are created equal. Those who specialize in hand tied extensions often undergo specific training and certification. A master stylist with years of experience and a strong reputation will charge higher fees.

3. Salon Location

Geographic location heavily influences cost. Salons in urban centers with high overhead costs typically charge more than rural or suburban salons.

CityAverage Cost for Full Installation
New York City$2,000 – $3,500+
Los Angeles$2,200 – $3,800+
Dallas$1,500 – $2,800
Miami$1,800 – $3,200
Chicago$1,600 – $2,700

4. Amount of Hair Needed

Thicker hair requires more rows and more hair bundles, driving up the total cost. Someone adding just a little volume will pay far less than someone adding 18 inches of length.

5. Hair Length and Color

Longer wefts cost more. Likewise, custom-colored or highlighted wefts (especially balayage or ombré) also come with a premium price tag.

Ongoing Maintenance Costs

Hand tied extensions aren’t a one-time investment. They require consistent upkeep to maintain their appearance and protect the integrity of your natural hair.

Move-Up Appointments

As your natural hair grows, the wefts will move farther down from the scalp. Typically, maintenance appointments are needed every 6 to 8 weeks.

  • Move-up appointments usually cost $150 to $400 per session.

If multiple rows are involved, the cost will be higher. Some stylists also charge per row, for instance, $75-$150 per row.

Replacement of Hair

While high-quality hair can last 6 to 12 months, it will eventually need to be replaced. Lower-quality hair might only last 3 to 6 months before looking dry, tangled, or worn out.

Expect to reinvest in new hair once a year, at a cost similar to your initial hair purchase ($400 – $2,000).

Hidden Costs to Consider

  • Specialized Products: Hand tied extensions require sulfate-free, extension-safe shampoos and conditioners, which can cost $20 – $50 per product.

  • Styling Tools: Heat protectants, wide-tooth combs, silk pillowcases, and special brushes add up to $100+.

  • Color Matching and Touch-Ups: If you dye your natural hair, regular color matching may be needed to ensure seamless blending.

  • Emergency Fixes: If wefts slip or beads loosen, a mini repair visit might cost $50 – $150.

Pros and Cons of Hand Tied Weft Extensions

Pros

  • Natural Appearance: Virtually undetectable when properly installed.

  • Less Damage: No heat, glue, or tape involved.

  • Comfortable: Lighter and more breathable than other extension types.

  • Longevity: High-quality hair can last up to a year with good care.

  • Styling Flexibility: Easy to wear in updos, braids, and ponytails.

Cons

  • High Upfront Cost: Significant initial investment.

  • Maintenance Requirements: Regular salon visits add ongoing costs.

  • Time-Consuming: Installations can take 3-6 hours.

  • Not DIY-Friendly: Requires professional installation and maintenance.

  • Potential for Breakage: If not maintained properly, the weight can stress natural hair.

Are Hand Tied Weft Extensions Worth It?

Whether hand tied extensions are “worth it” depends on your personal priorities. If you highly value a natural, full-bodied look, minimal damage to your natural hair, and the ability to style your hair flexibly, then the benefits often outweigh the cost. Many users report a huge boost in confidence and satisfaction with their appearance, finding that the investment pays off in how they feel daily.

However, if your budget is tight, or if you prefer low-maintenance beauty routines, you might want to consider alternative methods like clip-instape-ins, or halo extensions.

Tips for Getting the Best Value

  1. Choose a Certified Stylist: Verify their training in hand tied techniques to avoid poor installations.

  2. Invest in Premium Hair: It lasts longer and looks better, saving you money in the long run.

  3. Stick to a Maintenance Schedule: Prevents larger, costlier issues later.

  4. Use the Right Products: Protect your investment by using salon-recommended, extension-safe haircare products.

  5. Ask About Package Deals: Some salons offer discounts for bundling installation and maintenance services.
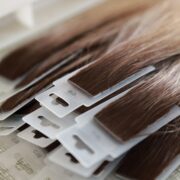
Final Thoughts

Hand tied weft extensions are a luxurious, beautiful way to achieve long, voluminous hair. While the cost can be significant — often totaling several thousand dollars over the course of a year — many people find the investment well worth the beauty, confidence, and versatility they gain.

Understanding the full scope of costs — from initial installation to regular maintenance — ensures you make an informed decision. If you prioritize working with an experienced stylist, using premium hair, and adhering to proper care routines, your hand tied extensions can be a seamless, rewarding part of your beauty journey for months to come.