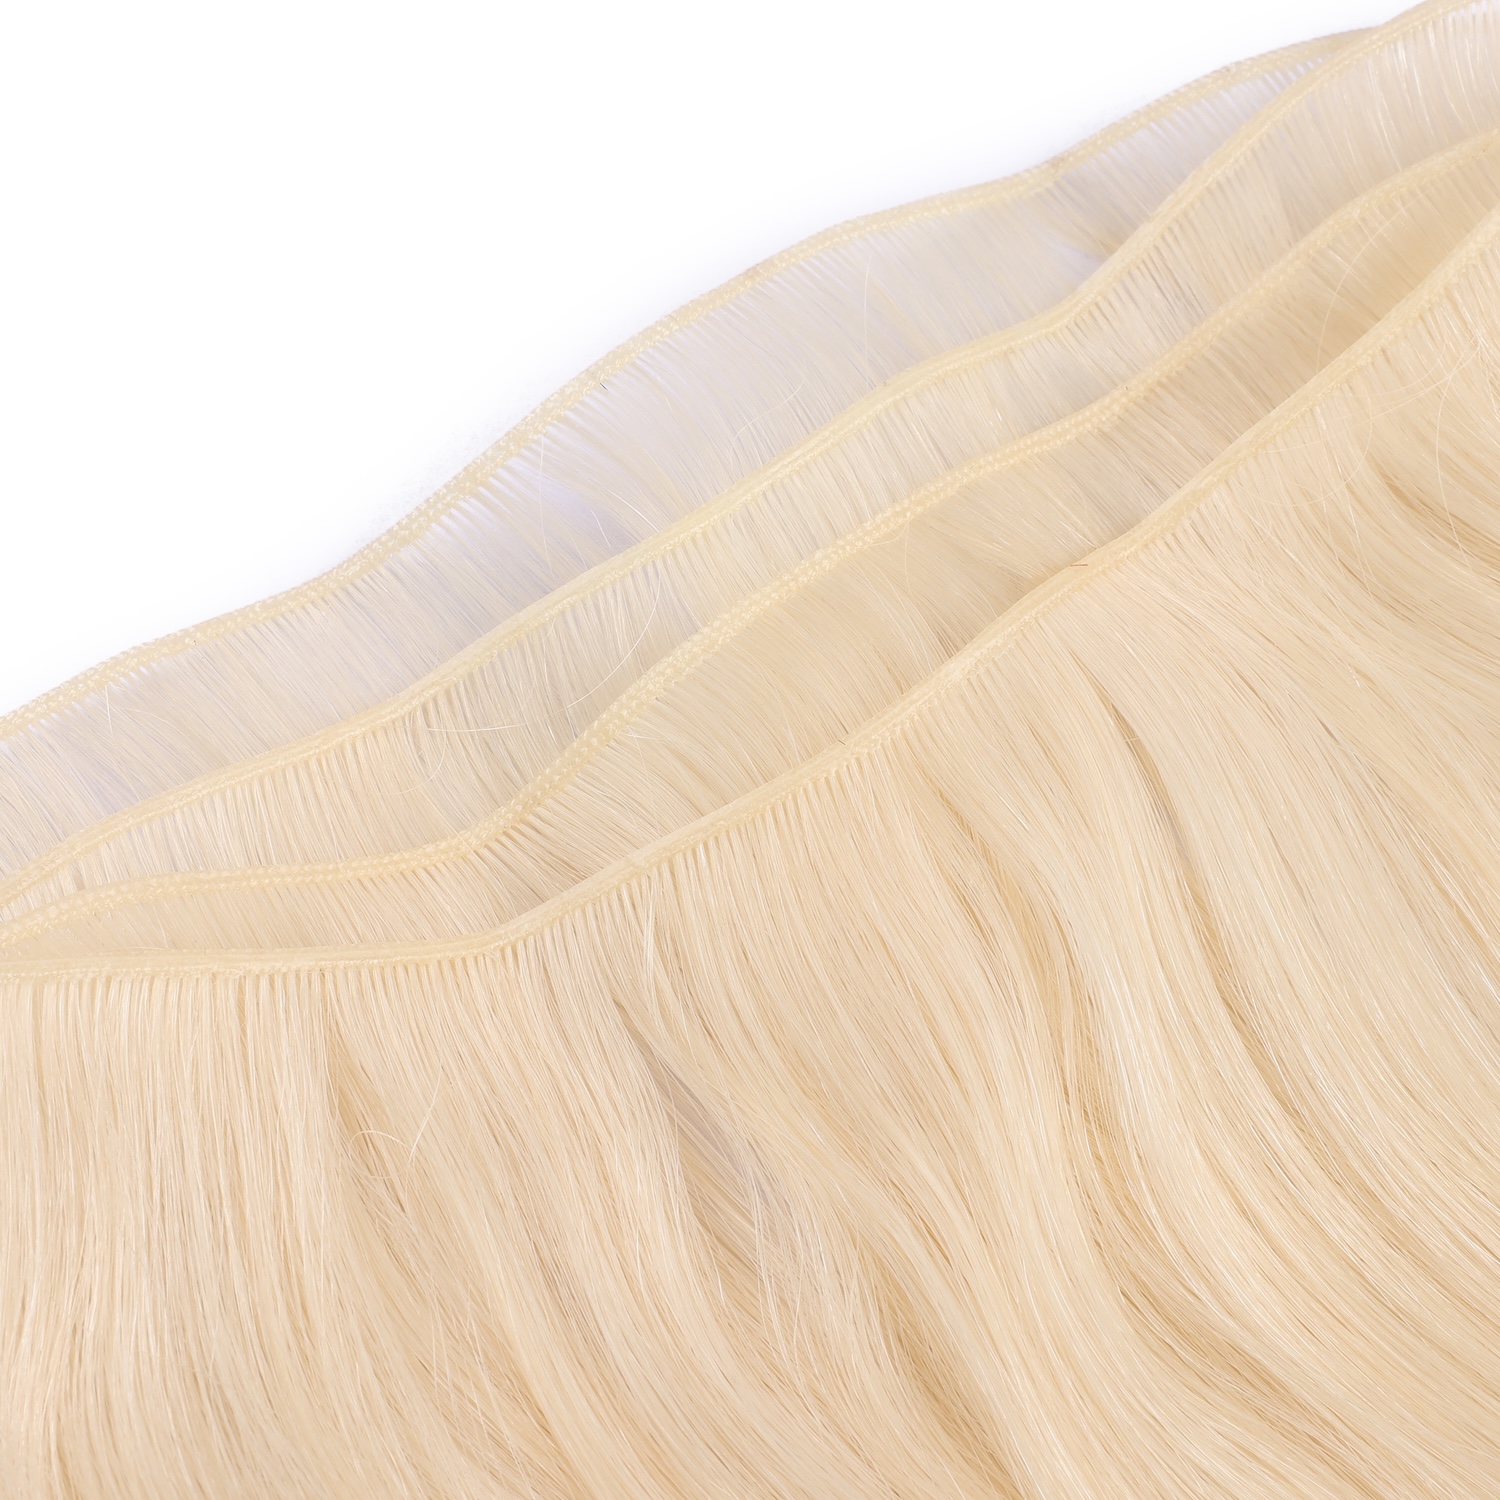
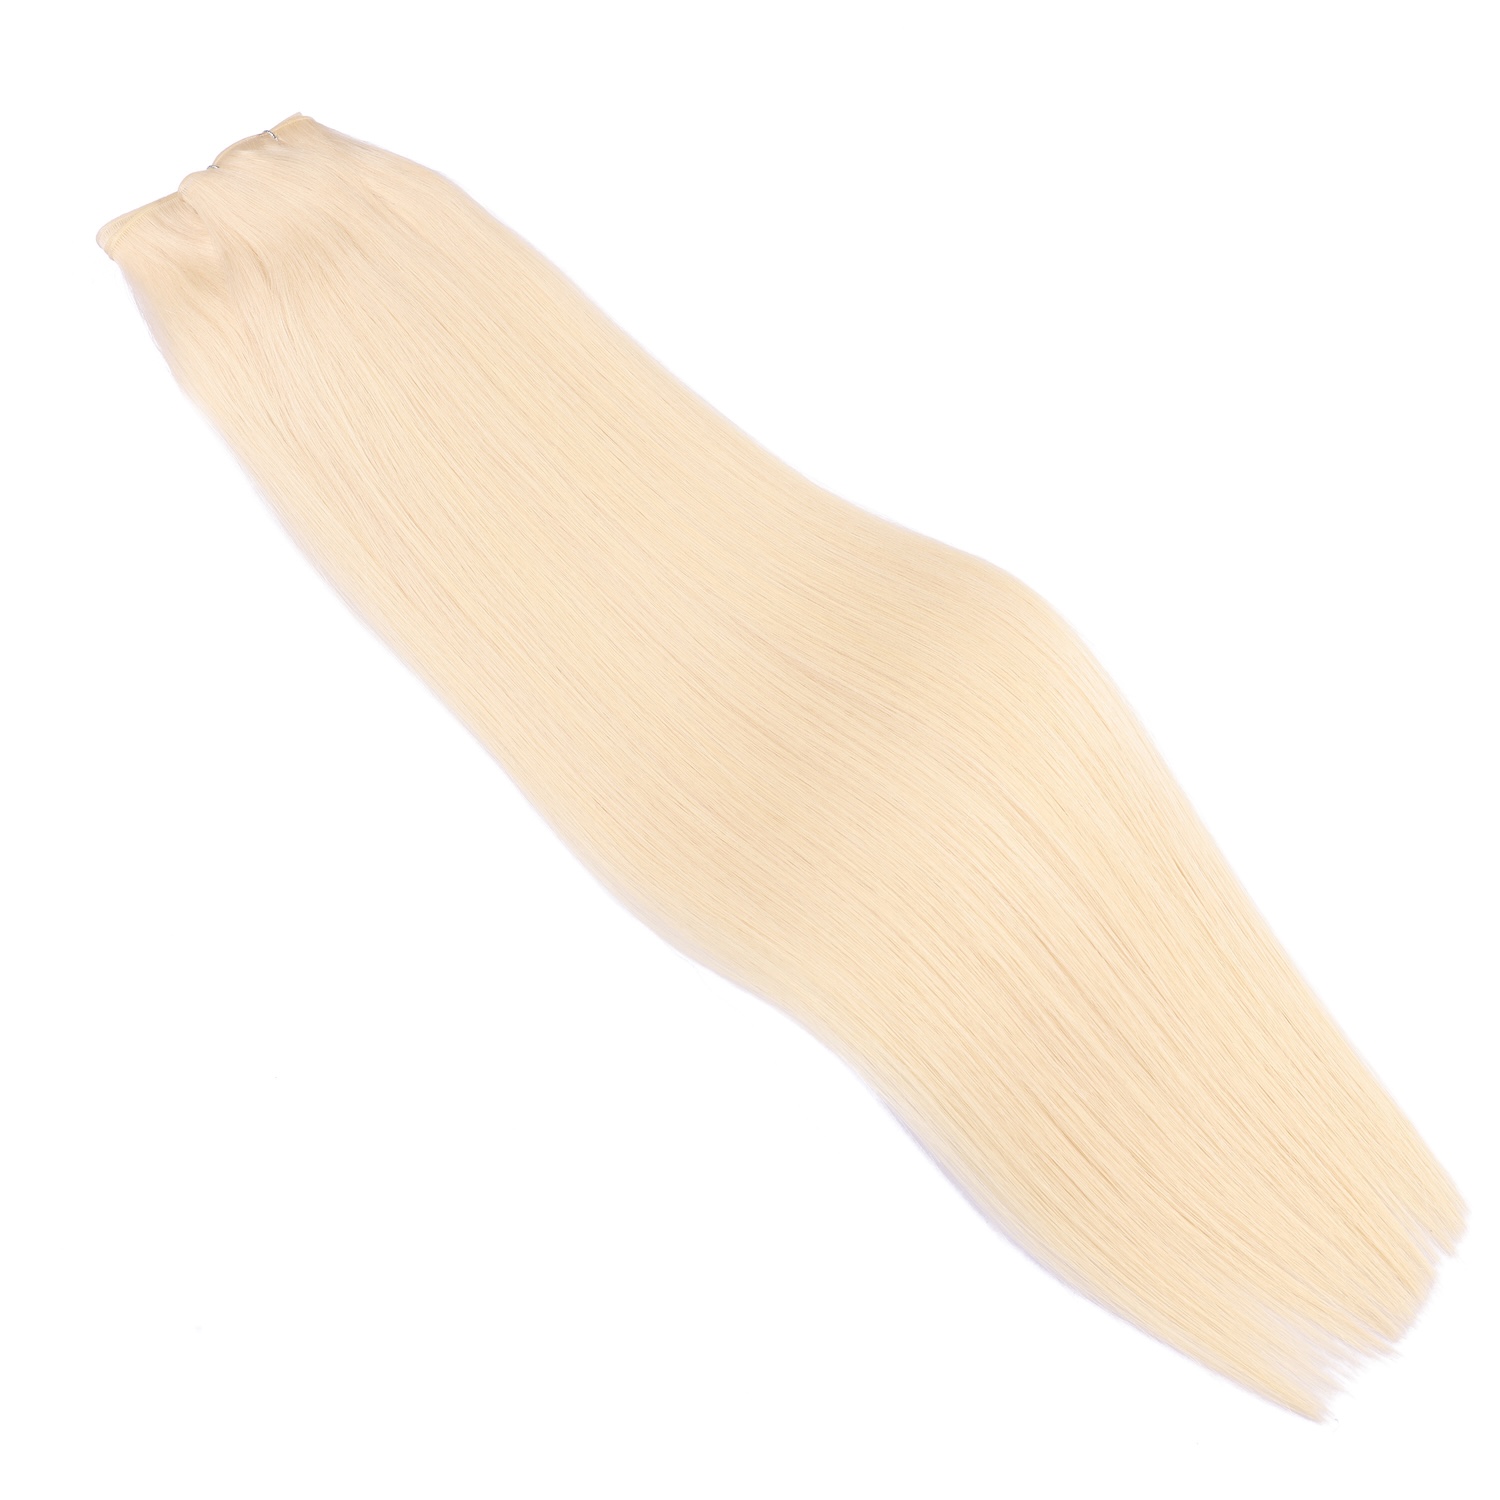
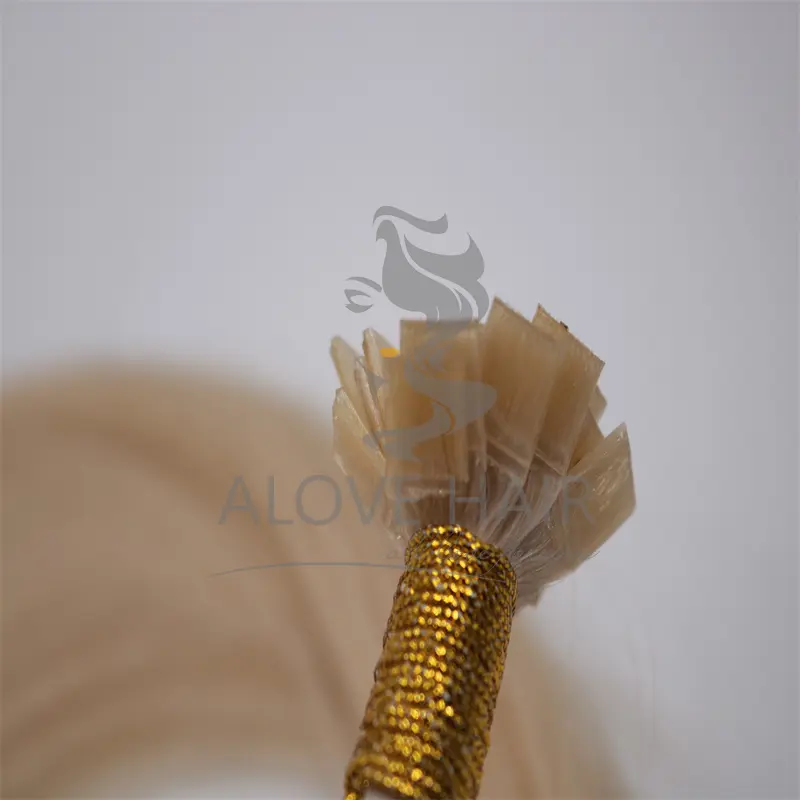
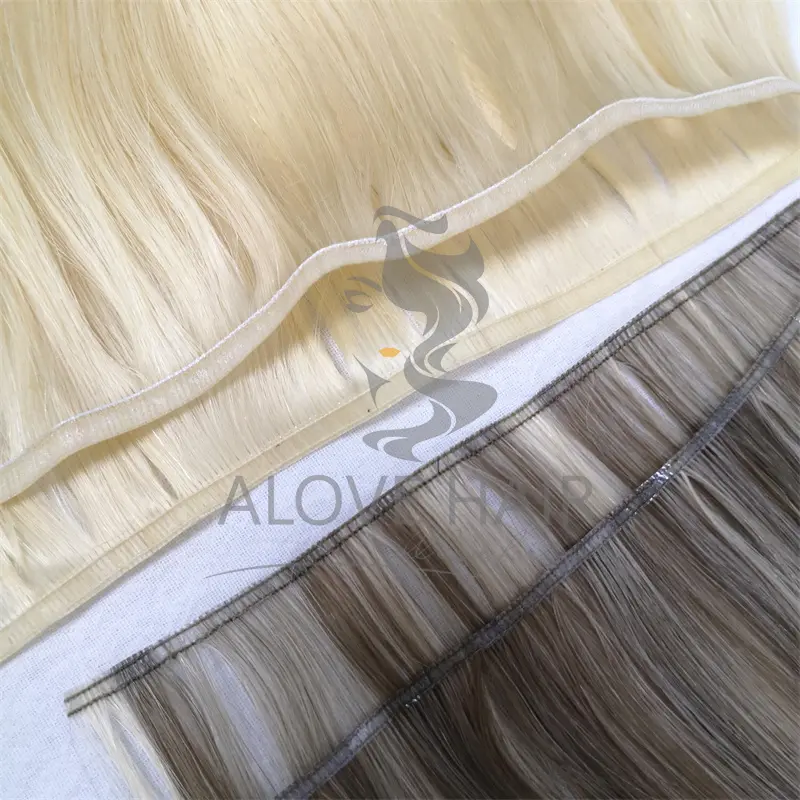
Learning how to apply weft hair extensions with beads involves more than attaching a row of extension hair to small metal rings. A professional beaded weft installation requires careful sectioning, appropriate bead selection, balanced weight distribution, secure attachment, and a maintenance plan that protects the client’s natural hair.
Beaded weft extensions are commonly installed using a silicone-lined bead foundation. The stylist creates a row of small anchor points using the client’s natural hair, then secures the extension weft to that foundation. Depending on the technique, the weft may be sewn onto the beaded row or attached using a different manufacturer-approved bead system.
This method is popular among professional stylists because it does not require adhesive tape or keratin bonding. It can also allow suitable human hair wefts to be reused after professional removal and inspection.
However, a comfortable installation is not simply about choosing good hair. Bead size, section thickness, anchor spacing, extension weight, and stitching tension all affect the final result.
In this guide, we explain how professional stylists apply weft hair extensions with beads, which tools they need, how to choose suitable wefts, what installation mistakes to avoid, and how salons can evaluate extension quality before purchasing.
What Are Beaded Weft Hair Extensions?
Beaded weft hair extensions are hair extensions attached using small beads or micro rings to create an anchor system.
Unlike Tape-In extensions, which use adhesive panels, beaded weft installations rely on mechanical attachment.
A common professional method uses silicone-lined beads to create a foundation along a horizontal section of natural hair. The stylist then sews the weft onto this foundation using a curved needle and suitable extension thread.
The technique is also known as:
- Beaded Row Hair Extensions
- Beaded Weft Extensions
- Beaded Sew-In Extensions
- Micro Bead Weft Extensions
- Beaded Foundation Sew-In
The exact construction varies by installation system and professional training method.
How Does the Beaded Weft System Work?
A typical beaded sew-in installation has three main components:
1. Natural hair sections
Small, controlled sections of the client’s natural hair are selected to create the foundation.
2. Beads or micro rings
Silicone-lined beads hold the selected natural hair sections and create anchor points along the row.
3. Extension weft
The weft is positioned along the foundation and secured using a suitable stitching technique.
The beads distribute the foundation across multiple sections, while the thread helps secure the weft to the row.
It is important to understand that beads do not automatically make an installation damage-free. Incorrect sectioning, excessive tension, or too much extension weight can still cause breakage and discomfort.
For a closer look at the available products, explore ALOVEHAIR Weft Hair Extensions.
Beaded Weft vs. Direct Bead Attachment: Understand the Difference
Before starting, stylists should identify which installation system they are using.
Two approaches are often described loosely as bead-in weft installation, but their attachment structures are different.
| Feature |
Beaded Foundation + Sew-In |
Direct Bead Attachment |
| Foundation |
Beads create an anchor row |
Beads directly secure the extension and selected natural hair |
| Thread |
Normally used |
Not always used |
| Main attachment |
Weft sewn onto the foundation |
Weft held through a bead system designed for direct attachment |
| Tools |
Beads, loop tool, pliers, thread, curved needle |
Compatible beads, loop tool, and pliers |
| Main consideration |
Even stitching and row tension |
Correct bead compatibility and secure clamping |
| Product compatibility |
Depends on weft construction and installation training |
Requires a product specifically suitable for the method |
This guide focuses primarily on the professional beaded foundation and sew-in method because it is commonly used with Hand-Tied, Genius, and other suitable weft products.
Do not assume that every weft can be installed using every bead system. Always check the manufacturer’s instructions.
Tools and Materials Needed for Beaded Weft Installation
Preparing all tools before beginning makes the installation process more organized and reduces unnecessary handling.
A professional stylist should have the following equipment ready.
| Tool or Material |
Main Purpose |
| Silicone-lined micro beads |
Create the foundation or anchor points |
| Loop tool or bead threader |
Pull natural hair through beads |
| Professional extension pliers |
Close and reopen compatible beads |
| Rat-tail comb |
Create precise horizontal partings |
| Sectioning clips |
Keep unused hair separated |
| Curved extension needle |
Sew the weft onto the foundation |
| Extension thread |
Secure the weft |
| Hair weft |
Add length and volume |
| Hair scissors |
Trim and blend the finished hairstyle |
| Extension brush |
Detangle natural and extension hair |
| Measuring tape |
Check row length and weft dimensions |
For professional installations, the bead size and tool should be compatible with the natural hair section and the selected extension system.
ALOVEHAIR provides different products and accessories for professional weft installations, including Hair Beads and Needles for Sew-In Extensions.
How to Choose the Right Beads
Bead selection is not simply a matter of choosing the smallest available ring.
The bead must accommodate the natural hair section correctly and close securely without crushing or excessively compressing the hair.
Common considerations include:
- Inner diameter
- Bead material
- Silicone lining
- Compatibility with the loop tool
- Compatibility with the extension method
- Natural hair density
- Section size
For example, professional bead suppliers offer different sizes, including 2 mm and 3 mm options. Some systems use smaller unlined beads for a discreet profile, while silicone-lined beads provide additional cushioning and grip.
These are product examples, not universal prescriptions. A stylist should follow the bead manufacturer’s sizing guidance and their own method-specific training.
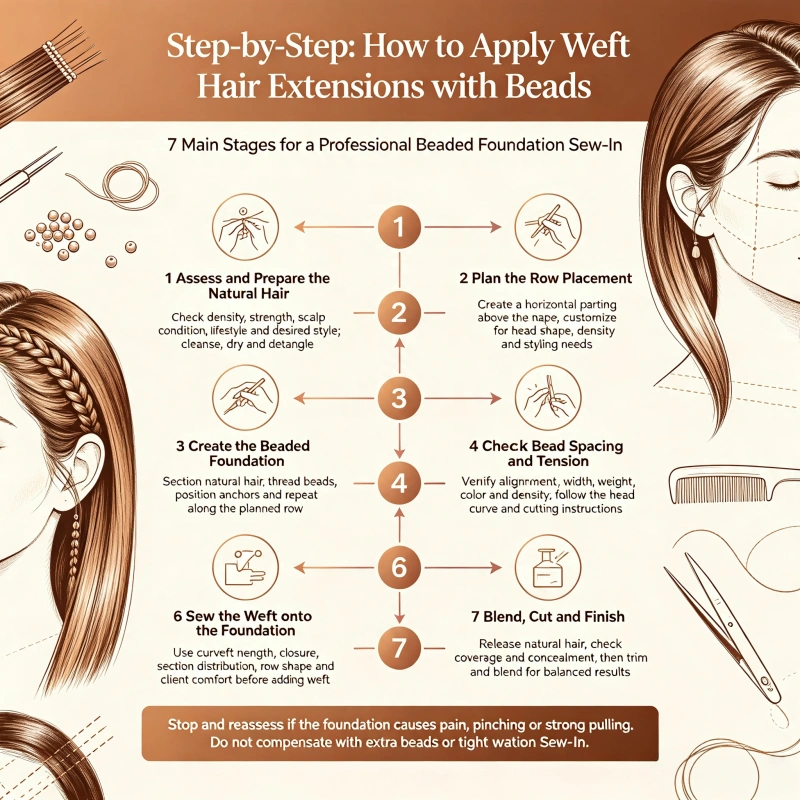
Step-by-Step: How to Apply Weft Hair Extensions with Beads
A professional installation can be divided into seven main stages.
Step 1: Assess and Prepare the Client’s Natural Hair
Start by evaluating the natural hair and scalp before selecting the installation method.
Check:
- Natural hair density
- Strand strength
- Existing breakage
- Scalp sensitivity
- Hair length
- Previous extension damage
- Desired hairstyle and volume
The stylist should also discuss the client’s daily routine, washing habits, exercise schedule, and preferred hairstyles.
This matters because a client who frequently wears high ponytails may need a different row-placement plan from someone who normally wears their hair down.
Hair preparation checklist:
- Wash the hair using a suitable clarifying or cleansing shampoo.
- Follow the manufacturer’s preparation recommendations.
- Avoid heavy oils and product residue around the attachment area.
- Dry the hair completely.
- Detangle from ends to roots.
- Make sure the scalp is in suitable condition for installation.
Do not install extensions over irritated or damaged areas without appropriate professional assessment.
Step 2: Plan the Row Placement
A clean row layout is essential for natural-looking results.
Use a rat-tail comb to create a horizontal parting around the back of the head. The exact position should follow the client’s head shape, hairline, density, and desired styling options.
Many professional installation guides use a starting row approximately 1 inch above the nape, but this is only a reference point. The actual position should be customized.
The stylist should avoid placing attachment points too close to:
- The front hairline
- The temples
- Very short baby hairs
- Fragile or thinning areas
- Areas where the attachment may become visible
The goal is to create a row that can be concealed by the client’s natural hair while allowing comfortable movement.
Step 3: Create the Beaded Foundation
Once the row position is established, the stylist can begin creating the foundation.
The general process is:
- Separate a controlled section of natural hair.
- Thread the compatible bead onto the loop tool.
- Place the selected natural hair section through the loop.
- Pull the hair through the bead.
- Position the bead according to the installation system.
- Repeat along the planned row.
- Check the alignment before securing the foundation.
The natural hair section should be sufficient to support its assigned load without excessive tension.
Professional tip: Do not use the same section size for every client.
A client with fine, delicate hair may require a different foundation design from a client with dense, strong hair.
The amount of extension hair supported by each anchor also matters. Increasing the total extension weight without adjusting the foundation can create uneven tension.
Step 4: Check Bead Spacing and Tension
This is one of the most important stages of the entire installation.
Even if every bead is securely closed, the row may still be uncomfortable if the anchors are unevenly distributed.
Check the following:
| Inspection Point |
What to Look For |
| Bead alignment |
Anchors follow the planned row |
| Bead closure |
No bead is loose or incorrectly closed |
| Natural hair section |
No excessive pulling or pinching |
| Section distribution |
Hair is distributed consistently |
| Row shape |
No unexpected gaps or sharp angles |
| Client comfort |
No pain or concentrated tension |
A useful professional check is to inspect the row from both sides and the center before adding extension hair.
The client should not experience sharp pain, pinching, or strong pulling during the foundation stage.
If the foundation feels uncomfortable, stop and reassess the section size and anchor placement rather than trying to solve the problem by adding more beads.
Step 5: Measure and Position the Weft
After the beaded foundation is ready, measure the extension weft against the prepared row.
Check:
- Required weft length
- Weft width
- Net hair weight
- Seam thickness
- Color match
- Hair density
- Product-specific cutting instructions
Position the weft so that it follows the natural curve of the head and lies flat against the foundation.
Avoid forcing a straight weft around a curved section if doing so causes the seam to buckle or pull.
If the weft needs to be cut, check whether the product is designed for cutting.
For example, ALOVEHAIR’s published Genius Weft and Micro Weft products are described as having cuttable construction for the specified models.
Traditional Hand-Tied Wefts and other products may have different cutting restrictions. Never assume that all wefts can be cut freely.
Step 6: Sew the Weft onto the Beaded Foundation
For a beaded foundation sew-in, the stylist uses an appropriate curved needle and extension thread to secure the weft.
The exact stitch pattern varies between professional education systems and weft constructions.
The general installation principles are:
- Position the weft evenly against the prepared row.
- Maintain consistent alignment.
- Use the stitch pattern specified by the stylist’s training.
- Keep the thread tension controlled.
- Avoid pulling the weft so tightly that it puckers.
- Secure the ends according to the installation method.
- Inspect the completed row before releasing the natural hair.
The weft should remain flat and follow the foundation without creating visible ridges or uneven gaps.
Do not use excessive sewing tension to compensate for a poorly constructed foundation. If the row is uneven, correct the foundation first.
Step 7: Blend, Cut, and Finish
After the weft is secured, release the natural hair and inspect the finished installation.
Check the following:
- Can the natural hair cover the weft?
- Are the attachment points concealed?
- Does the extension hair blend with the natural hair?
- Are there visible gaps between rows?
- Does the client have comfortable movement?
- Can the client wear their preferred hairstyles without exposing the attachment?
The stylist can then trim and blend the extension hair to create a natural transition.
The finished result should look balanced from the back, sides, and front.
For professional examples of different weft constructions, explore ALOVEHAIR Hand-Tied Extensions.
How Many Beads Do You Need for One Weft Row?
There is no fixed bead quantity that works for every client.
The number of beads depends on:
- Head width
- Row length
- Natural hair density
- Bead size
- Anchor spacing
- Total extension weight
- Installation technique
A shorter row will generally require fewer anchors than a longer row, but the quantity should be determined by the chosen professional method.
For illustration, some installation guides use a row with approximately 10–15 anchors in certain layouts. This should not be treated as a universal recommendation.
The more important question is whether the natural hair and anchor spacing can safely support the selected extension weight.
A Practical Planning Table
| Client or Installation Factor |
What the Stylist Should Adjust |
| Fine natural hair |
Evaluate smaller loads and suitable anchor distribution |
| Medium-density hair |
Match the row design to the available natural hair |
| Thick natural hair |
Assess whether additional extension weight is appropriate |
| Short row |
Use the correct anchor pattern for the available width |
| Long row |
Maintain consistent spacing and foundation alignment |
| Heavy extension set |
Reassess the total load before installation |
The goal is not to maximize the number of beads. It is to create a comfortable and stable foundation.
Which Weft Hair Is Best for Beaded Installation?
Different weft constructions offer different advantages.
The best option depends on the installation method, natural hair condition, desired result, and product specifications.
| Weft Type |
Main Characteristics |
Beaded Installation Considerations |
| Genius Weft |
Thin seam and flexible construction |
Suitable for compatible beaded-row sew-in systems |
| Hand-Tied Weft |
Hand-constructed, generally thin seam |
Requires careful handling and product-specific cutting instructions |
| Machine Weft |
Machine-stitched seam |
Check seam thickness and whether cutting requires sealing |
| Flat Weft |
Flat-profile construction |
Check flexibility and compatibility with the row design |
Why Consider Genius Weft?
Genius Weft products are designed with a relatively thin seam and are often selected for professional beaded-row installations.
Depending on the model, potential advantages include:
- Low-profile construction
- Flexible customization
- Cuttable seam design
- Suitable options for different hair lengths and colors
- Compatibility with professional sew-in methods
However, the term Genius Weft does not guarantee identical construction across every manufacturer.
For wholesale buyers, the actual sample should be checked for seam thickness, shedding, cutting stability, and hair distribution.
Explore ALOVEHAIR Genius Weft Hair Extensions for product details.
When Should You Choose Hand-Tied Wefts?
Hand-Tied Wefts are made using a different construction process and are often selected for their thin, flexible profile.
They can be suitable for professional beaded-row installations when the stylist follows the manufacturer’s instructions.
One important difference is cutting flexibility. Some traditional Hand-Tied Wefts should not be cut across the seam because this can compromise the construction.
Before purchasing, ask the supplier for the exact cutting and installation instructions.
See the ALOVEHAIR Hand-Tied Weft Collection for available options.
Common Beaded Weft Installation Mistakes and How to Avoid Them
A professional-looking installation depends on the details. The most common problems often originate in the foundation rather than the extension hair itself.
| Common Mistake |
Possible Result |
Professional Solution |
| Beads placed too close to the scalp |
Pressure and discomfort |
Reassess placement and mobility |
| Uneven bead spacing |
Uneven load distribution |
Follow a consistent anchor pattern |
| Too much natural hair inside a bead |
Difficult or unstable closure |
Match section size to bead specifications |
| Too little natural hair in a bead |
Slippage |
Reassess the anchor section |
| Excessive thread tension |
Puckering and pulling |
Maintain controlled stitching tension |
| Too much extension weight |
Excessive stress on natural hair |
Reduce the load or redesign the installation |
| Poor row placement |
Visible attachments |
Adjust placement to suit the head shape |
| Incorrect weft cutting |
Seam damage or shedding |
Follow manufacturer cutting instructions |
| Cross hairs trapped in the row |
Tangling and discomfort |
Check and separate loose natural hairs |
Mistake 1: Installing Beads Too Close to the Scalp
A bead that sits too close can restrict natural movement and create pressure.
The exact spacing depends on the installation system and client assessment. The goal is to allow natural hair movement without compromising anchor stability.
Mistake 2: Using Too Much Hair Weight
A common mistake is selecting the extension weight based only on the desired finished volume.
For example, a client may request a full, thick hairstyle, but their natural hair may not be suitable for supporting that amount of additional weight.
A better approach is to select the extension quantity according to the client’s natural hair condition and distribute the weight appropriately.
Mistake 3: Ignoring Cross Hairs
Cross hairs occur when loose natural hair becomes trapped or tangled around the attachment row.
If they are not managed, they can contribute to matting and make maintenance more difficult.
The stylist should check the row carefully and ensure that loose hair is separated appropriately.
Mistake 4: Cutting a Weft Without Checking Its Construction
Not every weft is designed to be cut.
Some products have a seam construction that may unravel or shed when cut incorrectly.
Before trimming a weft, confirm the product’s cutting instructions with the manufacturer.
How Long Do Beaded Weft Hair Extensions Last?
There are two different questions:
- How long can the installation remain attached?
- How long can the extension hair itself be reused?
The answers are not the same.
Many salons schedule maintenance around every 4–8 weeks, but the exact interval depends on natural hair growth, shedding, row condition, and the professional installation system.
Some providers recommend shorter intervals. For example, Hadrill Hair’s guidance recommends refitting every 4–6 weeks to account for naturally occurring shedding and the changing condition of the anchor sections.
The correct schedule should be established by the stylist rather than relying on a universal wear-time promise.
Factors That Affect Installation Wear Time
- Natural hair growth
- Hair shedding
- Bead and thread condition
- Initial installation quality
- Extension weight
- Daily brushing habits
- Washing and drying routine
- Scalp condition
How Long Can the Extension Hair Be Reused?
The usable lifespan of the hair depends on its original quality and subsequent care.
Important factors include:
- Hair material
- Cuticle condition
- Chemical processing
- Shedding performance
- Tangling after washing
- Heat styling frequency
- Removal and storage practices
A well-maintained human hair weft may be suitable for more than one installation, but a fixed number of reuse cycles should not be promised without product-specific testing.
For more information, read our guide to How Long Do Hair Extensions Last?.
Beaded Weft Aftercare: What Should Clients Do?
Professional installation is only one part of a successful extension service. Clients also need clear aftercare instructions.
1. Brush Carefully
Use an extension-compatible brush and work from the ends upward.
Support the attachment area with one hand when detangling near the rows.
Avoid aggressive brushing or pulling.
2. Keep the Rows Clean
Product residue, natural oils, and shed hair can accumulate around the foundation.
Clean the scalp and rows using the stylist’s recommended washing method.
Avoid rough scrubbing around the attachments.
3. Dry the Foundation Properly
The roots and attachment area should be dried thoroughly after washing.
Leaving the foundation damp for extended periods can make the hair harder to manage and contribute to tangling.
4. Avoid Excessive Pulling
Avoid hairstyles that place strong tension on the rows.
A loose braid or protective hairstyle may help reduce tangling during sleep.
5. Attend Professional Maintenance Appointments
The stylist should inspect:
- Bead closure
- Anchor stability
- Thread condition
- Row tension
- Natural hair shedding
- Tangling around the foundation
If a client experiences persistent pain, tightness, or unusual breakage, the installation should be professionally assessed rather than left until the next scheduled appointment.
How to Check Beaded Weft Quality Before Wholesale Purchasing
For salon owners, distributors, and private label hair brands, the installation result depends partly on the quality and consistency of the weft itself.
A product may look attractive in a catalog photograph but perform differently during actual installation.
Before placing a bulk order, request samples and evaluate the following specifications.
| Quality Check |
What to Measure or Observe |
Why It Matters |
| Seam thickness |
Actual seam measurement |
Influences profile and bulk |
| Weft width |
Usable width in centimeters or inches |
Affects row coverage |
| Net hair weight |
Actual weight excluding packaging |
Helps calculate installation load |
| Hair distribution |
Density from top to ends |
Affects finished appearance |
| Shedding |
Hair retention during brushing and handling |
Indicates construction quality |
| Tangling |
Condition after washing and drying |
Helps assess hair performance |
| Cutting stability |
Seam condition after approved cutting |
Important for customizable products |
| Color consistency |
Root-to-end and batch comparison |
Reduces salon color-matching problems |
| Length accuracy |
Measured usable hair length |
Helps maintain repeat-order consistency |
A Practical Sample Testing Method
A salon or distributor can compare two or three weft products using consistent test conditions.
For example:
- Select samples of the same length.
- Use the same color or similar processing history.
- Record the net hair weight.
- Photograph the seam before installation.
- Follow the manufacturer’s approved cutting instructions.
- Install the samples using the same professional method where possible.
- Record the installation experience.
- Brush, wash, dry, and inspect the products.
- Document shedding, tangling, and seam condition.
Do not compare a heavily processed blonde sample with an unprocessed dark sample and attribute every difference to the weft construction.
The purpose of the test is to isolate product quality as much as possible.
For a factory or wholesale buyer, the most useful result is a written sample approval sheet that can be used to check future production batches.
Why Professional Salons Choose ALOVEHAIR Weft Extensions
ALOVEHAIR is a China-based human hair extension manufacturer supplying professional salons, wholesalers, distributors, and private label brands.
Its product range includes Genius Wefts, Hand-Tied Wefts, Machine Wefts, Flat Wefts, Tape-In Extensions, and other professional hair extension products.
For beaded-row installations, product selection should focus on the weft’s seam construction, net weight, hair quality, and compatibility with the stylist’s preferred method.
Genius Weft and Micro Weft Options
ALOVEHAIR’s Genius/Micro Weft range is designed around thin seam construction and flexible customization.
For suitable models, the cuttable construction can help stylists customize weft width for different row designs.
Explore the Genius Weft and Micro Weft Collection.
Hand-Tied Weft Options
For salons that prefer traditional hand-constructed wefts, ALOVEHAIR also provides Hand-Tied products.
These products should be selected according to the stylist’s preferred installation system and the manufacturer’s cutting instructions.
View ALOVEHAIR Hand-Tied Extensions.
Beads and Professional Accessories
The quality of the installation also depends on compatible accessories.
ALOVEHAIR offers Hair Beads and Sew-In Needles for professional hair extension applications.

OEM and Private Label Hair Extensions
For salons and brands developing their own extension collections, product specifications can be discussed according to the selected model and order requirements.
Potential customization topics include:
- Hair length
- Net weight
- Color and balayage combinations
- Hair texture
- Weft construction
- Packaging
- Private label branding
- Product consistency for repeat orders
For wholesale inquiries, visit ALOVEHAIR or contact the manufacturing team to discuss samples and product requirements.
Frequently Asked Questions
Can you apply weft hair extensions with beads at home?
Beaded weft extensions are generally best installed by a trained professional.
The process requires correct sectioning, bead placement, weight distribution, and secure attachment. Incorrect installation can cause discomfort, slippage, breakage, or scalp tension.
A consumer tutorial should not replace professional training.
Do you need silicone-lined beads for weft extensions?
Silicone-lined beads are commonly used in professional beaded-row systems because the lining provides cushioning and grip.
However, bead selection depends on the installation method, natural hair, and product specifications. Some professional systems use unlined beads.
Always use compatible products and follow the manufacturer’s guidance.
Can you sew a Genius Weft onto beads?
Yes. Suitable Genius Weft products can be used in professional beaded-row sew-in installations.
The stylist creates the foundation using compatible beads and then sews the weft onto the prepared row.
The exact method should follow the product’s installation instructions.
Are beaded weft extensions better than Tape-In extensions?
Neither method is universally better.
Beaded wefts use mechanical anchors and may be suitable for clients who prefer a row-based installation without adhesive tabs.
Tape-In extensions use adhesive panels and may be appropriate for clients seeking a different attachment profile and appointment process.
The choice depends on natural hair condition, desired volume, styling preferences, and maintenance requirements.
How many beads are needed for one row?
The number depends on row length, natural hair density, bead size, sectioning method, and total extension weight.
There is no universal number. Follow the training system and product instructions rather than using a fixed bead count for every client.
How long does a beaded weft installation take?
Installation time depends on the number of rows, amount of hair, stylist experience, and foundation method.
Some professional guides estimate approximately 45–60 minutes for a single row under a defined setup, but a complete appointment can take considerably longer.
The stylist should provide a realistic appointment estimate after assessing the client.
How often should beaded weft extensions be moved up?
Many salons schedule maintenance approximately every 4–8 weeks, but the correct interval varies.
Natural hair growth, shedding, anchor condition, and the installation method should determine the schedule.
Can beaded weft extensions damage natural hair?
They can cause damage if the installation is too tight, the extension weight is excessive, or maintenance is neglected.
Warning signs include persistent soreness, pulling, bumps, unusual breakage, and matting around the foundation.
A professional should assess these symptoms promptly.
Can you reuse beaded weft hair extensions?
Suitable human hair wefts can often be reused if the hair and seam remain in good condition.
The beads and other attachment components may need replacement during maintenance, depending on the system.
The stylist should inspect the hair before reinstalling it.
Can you cut all weft hair extensions?
No.
Some Genius Weft products are specifically designed for cutting, while traditional Hand-Tied and other wefts may have different cutting restrictions.
Always check the manufacturer’s instructions before cutting.
Final Thoughts: A Good Beaded Weft Installation Starts with the Foundation
Applying weft hair extensions with beads is a professional process that requires more than simply attaching extension hair to a row of micro rings.
The most important steps are selecting suitable products, assessing the natural hair, creating a balanced foundation, maintaining consistent tension, securing the weft correctly, and checking the finished installation.
For stylists, the key lesson is simple: a secure installation should never come at the expense of natural hair comfort.
For salons and wholesale buyers, product quality matters just as much as installation technique. Seam construction, hair weight, shedding performance, cutting stability, and repeat-order consistency should all be checked before choosing a long-term supplier.
ALOVEHAIR offers Genius Weft, Hand-Tied Weft, and other human hair extension products for professional applications.
Explore ALOVEHAIR’s Weft Hair Extensions or contact the team to discuss samples, product specifications, and wholesale requirements.