Posts

How to Apply I Tip Hair Extensions: Complete Step-by-Step Guide for Beginners and Professionals

I tip hair extensions have become one of the most popular semi-permanent hair extension methods in the beauty industry. Known for their natural appearance, flexibility, and reusable design, I tip extensions are widely used by salons, hairstylists, influencers, and everyday users who want longer, fuller, and more voluminous hair without glue or heat.

However, properly applying I tip hair extensions requires more than simply attaching strands to natural hair. Incorrect installation can lead to tangling, discomfort, visible bonds, poor blending, or even hair breakage. A professional-quality installation depends on understanding not only how to apply I tip extensions, but also why each step matters and what mistakes to avoid.

In this detailed guide, we will explain exactly how to apply I tip hair extensions step by step, including preparation, sectioning, bead placement, installation techniques, blending methods, maintenance tips, and common mistakes. Whether you are a beginner learning at home or a professional stylist improving your skills, this guide will help you achieve cleaner, safer, and more natural-looking results.

What Are I Tip Hair Extensions?

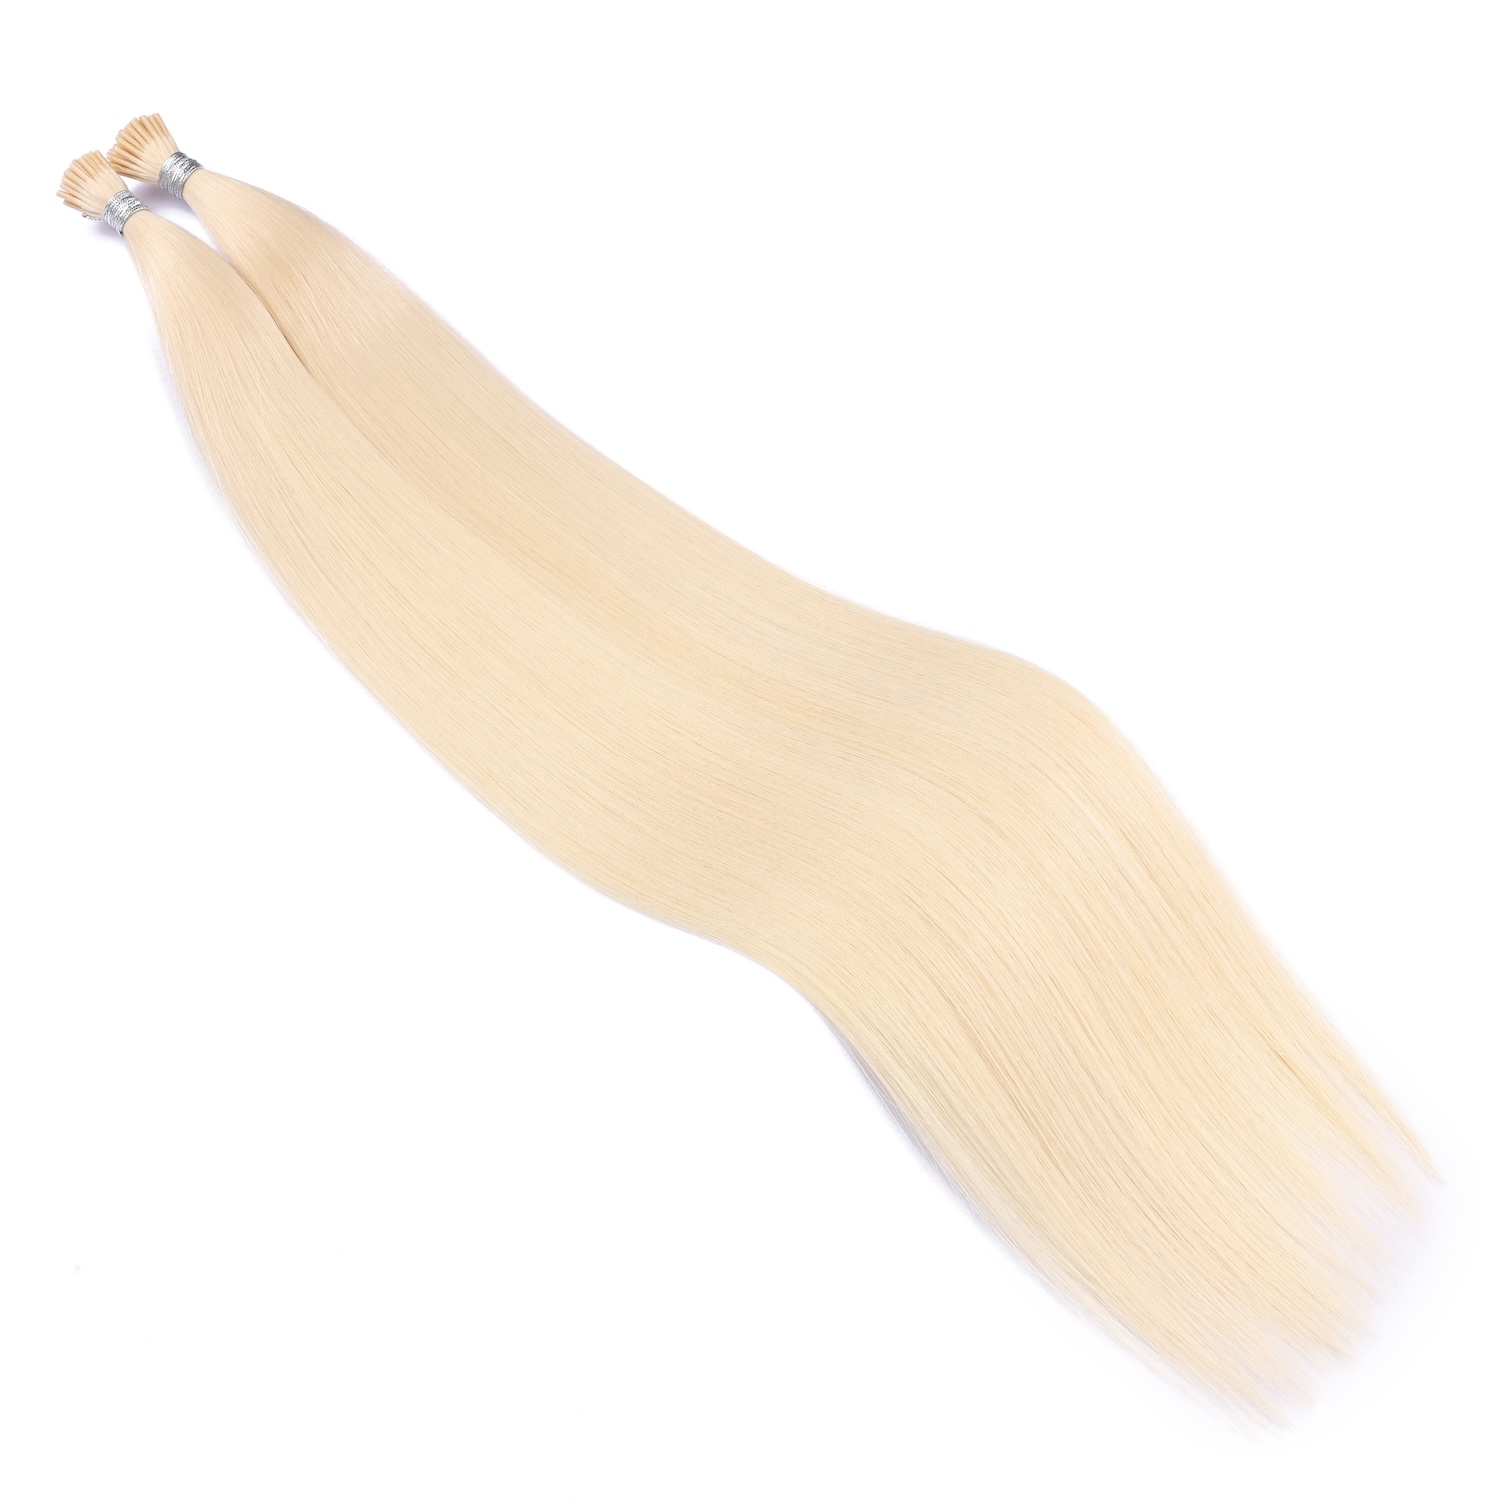
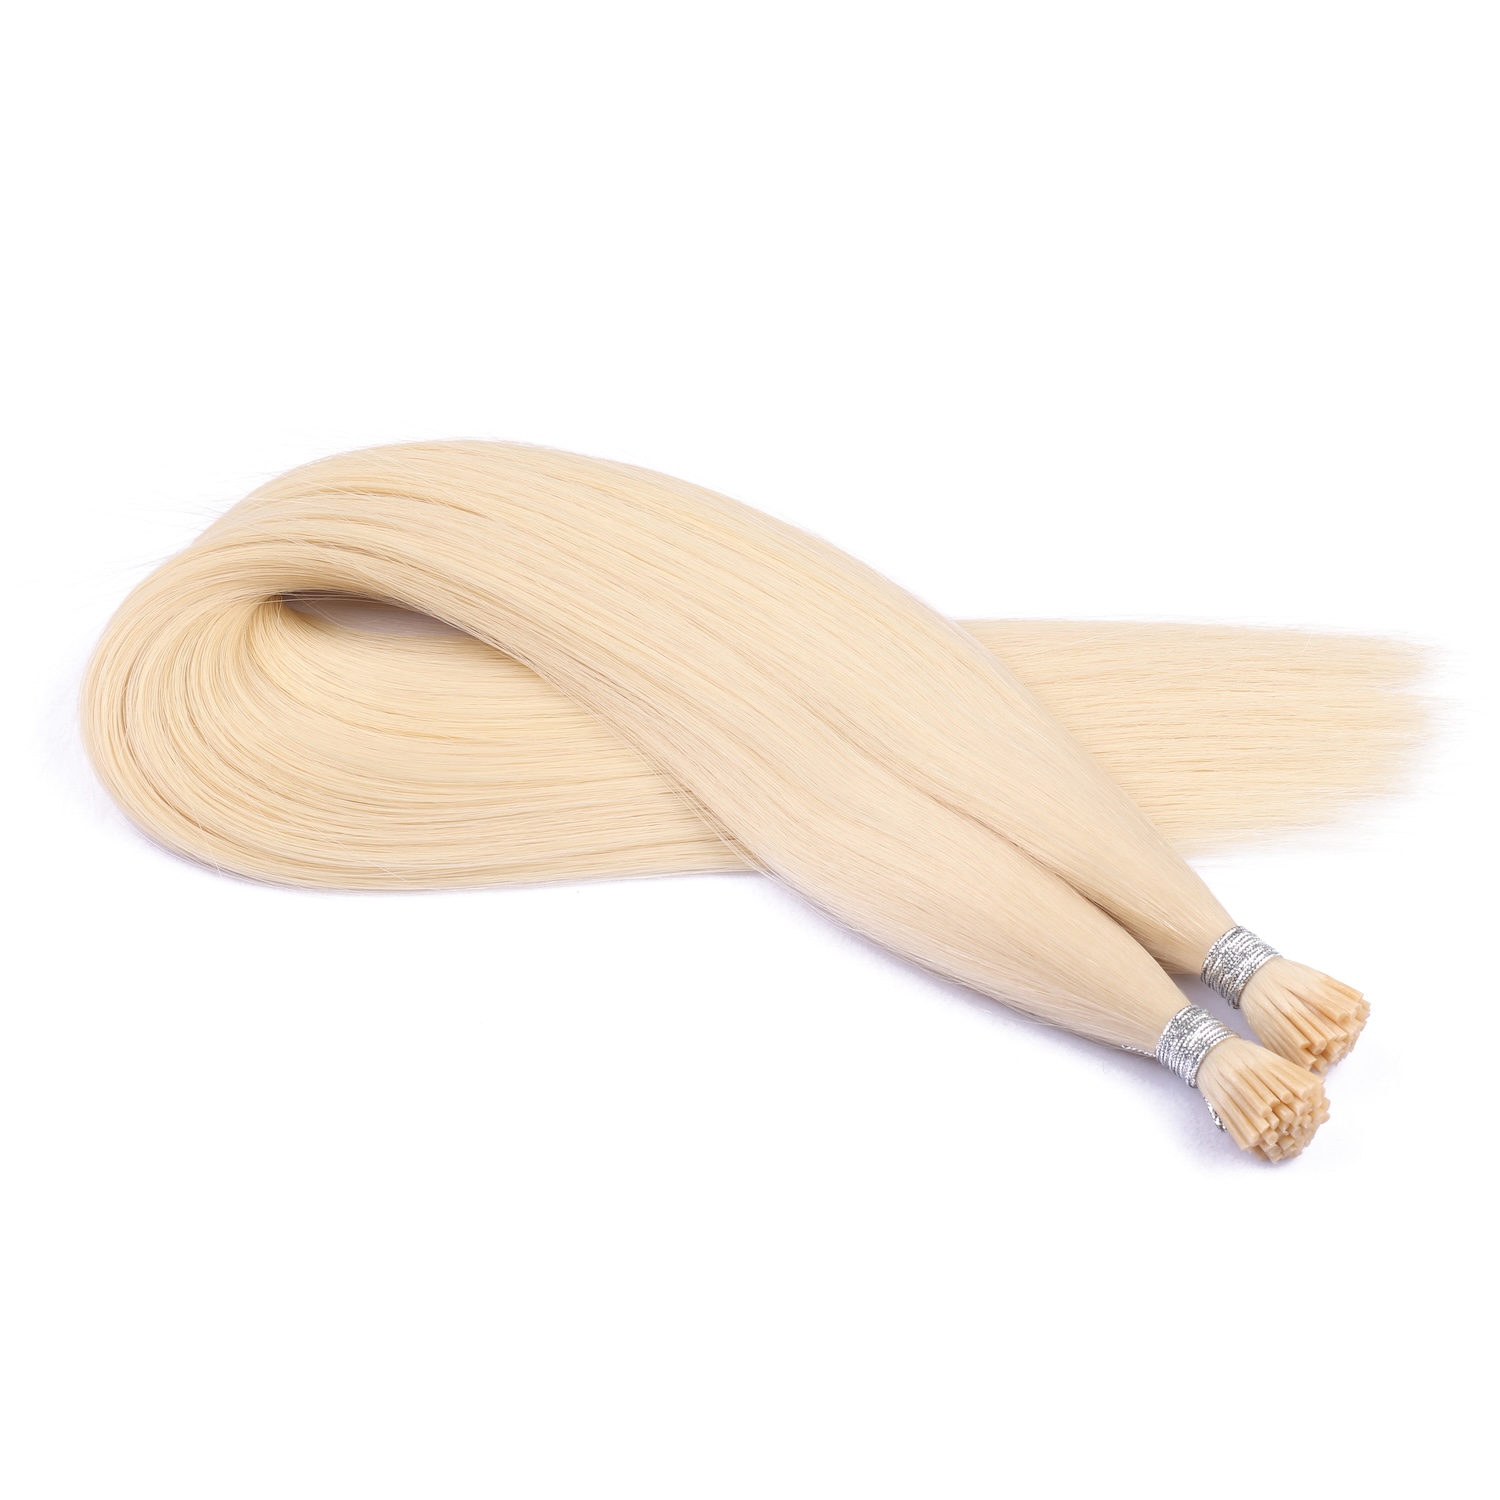
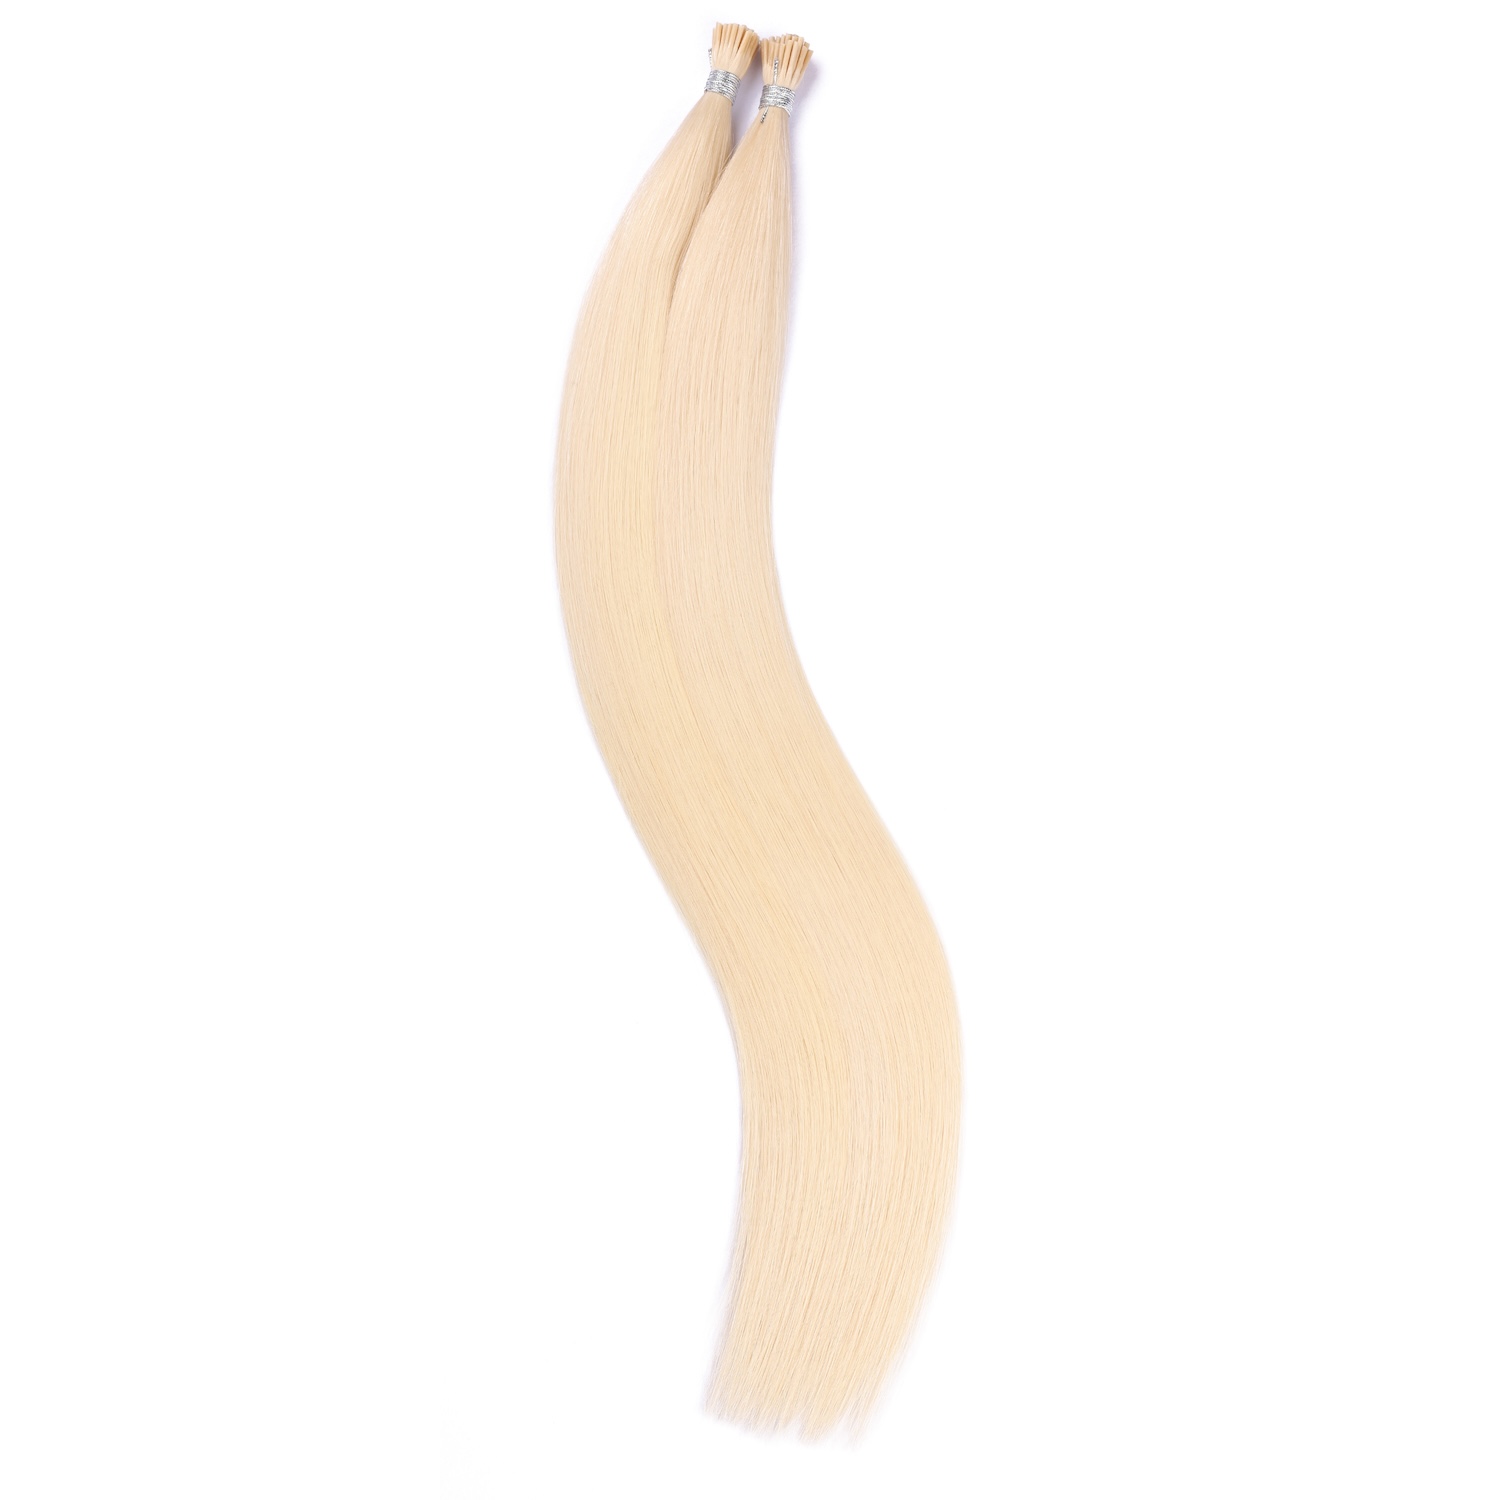
I tip hair extensions, also called micro bead extensions or stick tip extensions, are individual extension strands attached to natural hair using small beads or micro rings.

Unlike keratin fusion extensions:

  • No glue is used
  • No heat is required
  • No chemical adhesive is involved

Each extension strand has a small “I”-shaped tip made from keratin-coated or reinforced material. The extension and natural hair are inserted into a bead, then secured using pliers.

I tip extensions are popular because they offer:

  • Natural movement
  • Reusability
  • Minimal heat damage
  • Flexible styling
  • Long-term wear

They are commonly made from:

  • Remy human hair
  • Virgin human hair
  • Synthetic hair (less common)


Why Proper Application Matters

Correct installation affects:

  • Comfort
  • Hair health
  • Bond durability
  • Styling flexibility
  • Overall appearance

Poorly installed I tip extensions can cause:

  • Tension on the scalp
  • Hair breakage
  • Uneven blending
  • Bead slippage
  • Tangling
  • Visible attachment points

A professional installation distributes weight evenly and protects the natural hair.

Think of it like building a suspension bridge: the structure only works when the tension is balanced properly. Except here, the bridge occasionally needs conditioner and a silk pillowcase.


Tools Needed for I Tip Hair Extension Installation

I Tip Hair Extensions

Choose:

  • Correct color match
  • Desired length
  • Appropriate density

Human Remy hair is strongly recommended for the most natural result.

Micro Beads or Micro Rings

These small rings hold the extension and natural hair together.

Common types include:

  • Silicone-lined beads
  • Aluminum beads
  • Copper beads

Silicone-lined beads are popular because they:

  • Reduce slipping
  • Protect natural hair
  • Improve grip

Loop Tool or Pulling Needle

This tool helps thread natural hair through the micro bead.

Hair Extension Pliers

Special pliers flatten and secure the bead.

Do not use ordinary household pliers.

Sectioning Clips

Used to organize the hair during installation.

Rat Tail Comb

Helps create clean and precise sections.

Mirror and Proper Lighting

Good visibility is extremely important for even placement.


Step-by-Step Guide to Applying I Tip Hair Extensions

Step 1: Wash and Prepare the Hair

Before applying I tip extensions, the natural hair must be completely clean.

Use:

  • Clarifying shampoo
  • No conditioner
  • No oils
  • No leave-in products

Why This Step Matters

Clean hair improves:

  • Bead grip
  • Extension longevity
  • Installation precision

Oily or conditioned hair makes beads slide more easily.

What to Avoid

Do NOT:

  • Use heavy conditioner near roots
  • Apply serums
  • Use oily scalp products

These reduce bead security.


Step 2: Dry the Hair Completely

The hair must be fully dry before installation.

Why This Step Matters

Wet hair can:

  • Expand temporarily
  • Cause inaccurate tension
  • Increase slipping risk later

Dry hair ensures proper bead compression.

What to Avoid

Never install I tip extensions on damp hair.

Moisture trapped inside beads may contribute to:

  • Slippage
  • Scalp irritation
  • Weak attachment

Step 3: Section the Hair Properly

Sectioning is one of the most important steps.

Create horizontal rows beginning at the nape of the neck.

Use sectioning clips to separate layers neatly.

Why Sectioning Matters

Clean sections help:

  • Maintain symmetry
  • Create invisible installation
  • Improve blending
  • Prevent overcrowding

Poor sectioning often creates bulky or uneven results.

Recommended Spacing

Leave enough natural hair between rows to:

  • Hide beads
  • Allow natural movement
  • Prevent scalp stress

Most stylists leave:

  • 1–2 inches between rows

Step 4: Load the Micro Bead Onto the Loop Tool

Slide one bead onto the loop tool before pulling natural hair through.

Why This Step Matters

Preloading the bead speeds up installation and improves workflow efficiency.

Professional stylists often organize multiple beads in advance to save time.


Step 5: Take a Small Section of Natural Hair

Use the rat tail comb to isolate a small, clean section of hair.

The amount of natural hair should approximately match the extension strand thickness.

Why Proper Sizing Matters

If too much hair is used:

  • The bead may not close properly
  • Extensions may slip

If too little hair is used:

  • Excessive tension may occur
  • Breakage risk increases

Balanced weight distribution is critical.

What to Avoid

Avoid taking:

  • Uneven sections
  • Triangular sections
  • Large bulky sections

Clean square or rectangular sections work best.


Step 6: Pull Natural Hair Through the Bead

Insert the natural hair through the loop tool and slide the bead upward onto the hair strand.

Position the bead close to the scalp.

Correct Placement Distance

Leave approximately:

  • 2–5 millimeters from the scalp

Why This Distance Matters

If installed too tightly:

  • Scalp discomfort occurs
  • Tension increases
  • Hair breakage risk rises

If installed too loosely:

  • Extensions twist
  • Beads become visible
  • Slippage increases

The extension should move naturally without pulling.


Step 7: Insert the I Tip Extension Into the Bead

Insert the I tip extension strand upward into the bead alongside the natural hair.

Ensure the extension tip sits securely inside the bead.

Why Proper Insertion Matters

Correct insertion improves:

  • Bond strength
  • Weight balance
  • Longevity

Poor insertion can cause:

  • Uneven attachment
  • Extension shedding
  • Weak grip

Step 8: Clamp the Bead Securely

Use extension pliers to flatten the bead firmly.

Apply controlled pressure.

Why Controlled Pressure Matters

Too much pressure may:

  • Damage hair
  • Crack the bead
  • Create discomfort

Too little pressure may:

  • Cause slippage
  • Reduce durability

The bead should feel secure but not painful.

Proper Bead Direction

Many professionals flatten beads horizontally for:

  • Better comfort
  • Lower visibility
  • Improved flexibility

Step 9: Continue Row by Row

Repeat the process carefully across each row.

Maintain:

  • Even spacing
  • Consistent tension
  • Balanced distribution

Why Balanced Placement Matters

Balanced installation prevents:

  • Uneven weight distribution
  • Hair stress
  • Visible gaps
  • Awkward fullness patterns

Professional installations prioritize symmetry.


Step 10: Blend the Extensions

After completing installation, blend the extensions with the natural hair.

This may include:

  • Trimming
  • Layering
  • Texturizing
  • Curl blending

Why Blending Matters

Even expensive extensions look unnatural without proper blending.

Good blending creates:

  • Seamless transition
  • Natural movement
  • Invisible separation lines

What to Avoid

Avoid blunt cutting straight across the ends unless specifically requested.

Soft layering usually creates more natural results.


How Many I Tip Extensions Are Needed?

The number depends on:

  • Hair thickness
  • Desired volume
  • Length goals

Typical Quantities

Goal Recommended Strands
Volume Only 50–100
Standard Full Head 100–180
Extra Full Glam Look 200–250

Using too many extensions can overload the natural hair.


Best Placement Areas

I tip extensions are usually placed:

  • At the back of the head
  • Around the sides
  • Near the crown carefully

Avoid placing extensions too close to:

  • Hairline
  • Temples
  • Part line

These areas expose beads more easily.


Common Mistakes to Avoid

Installing Too Close to the Scalp

This causes:

  • Pain
  • Restricted movement
  • Hair stress

Extensions should move naturally.

Using Too Much Hair in One Bead

Overloading beads weakens grip and increases slipping.

Poor Color Matching

Incorrect color matching makes extensions obvious.

Professional stylists often blend multiple shades for realism.

Uneven Sectioning

Messy sectioning creates:

  • Visible rows
  • Uneven fullness
  • Difficult styling

Overcrowding the Hair

Too many extensions in one area create:

  • Tension
  • Tangling
  • Bulky appearance

Choosing Low-Quality Hair

Cheap hair often:

  • Tangles quickly
  • Sheds excessively
  • Looks unnatural

High-quality Remy hair produces significantly better results.


How Long Does Installation Take?

Typical installation times:

Experience Level Installation Time
Beginner 4–6 hours
Professional Stylist 2–4 hours

Longer hair and higher density require more time.


How Long Do I Tip Extensions Last?

With proper care, I tip extensions typically last:

  • 8–12 weeks before maintenance
  • 6–12 months for reusable hair

The hair itself can often be reused multiple times.


How to Care for I Tip Extensions

Use Sulfate-Free Shampoo

Harsh shampoos weaken hair quality and dry extensions.

Brush Carefully

Use a loop brush or extension-safe brush.

Always support the root area while brushing.

Avoid Oil Near Beads

Oil weakens bead grip and increases slippage.

Sleep with Braided Hair

Loose braids reduce:

  • Tangling
  • Friction
  • Knotting

Schedule Maintenance Appointments

Extensions should be adjusted as natural hair grows.


Are I Tip Extensions Damaging?

When installed correctly, I tip extensions are considered one of the safer semi-permanent methods.

Advantages include:

  • No glue
  • No heat
  • Reusable design
  • Flexible movement

However, poor installation or neglect can still cause damage.


Who Should Avoid I Tip Extensions?

I tips may not be ideal for:

  • Extremely fine hair
  • Severely damaged hair
  • Excessive hair shedding conditions

A professional consultation is recommended beforehand.


I Tip vs Other Extension Methods

I Tip vs K Tip Extensions

Feature I Tip K Tip
Heat Required No Yes
Reusable Yes Limited
Installation Time Moderate Long
Removal Process Easier More complex

I Tip vs Tape-In Extensions

Feature I Tip Tape-In
Styling Flexibility Excellent Good
Visibility Very low Moderate
Maintenance Frequency Moderate Higher
Reusability Excellent Good

Why Many Professionals Prefer I Tip Extensions

Professional stylists often recommend I tips because they offer:

  • Strong hold
  • Natural movement
  • Long-term reusability
  • Flexible placement
  • Minimal chemical exposure

They are especially popular for luxury salon services.


Future Trends in I Tip Hair Extensions

The extension industry continues evolving rapidly.

Emerging innovations include:

  • Nano I tips
  • Ultra-flat beads
  • Invisible bead technology
  • Lightweight extensions
  • Eco-friendly hair processing
  • Improved silicone bead designs

Manufacturers are focusing on improving:

  • Comfort
  • Durability
  • Faster installation
  • More natural appearance

Conclusion

Learning how to apply I tip hair extensions correctly requires patience, precision, and understanding of proper tension, sectioning, and placement techniques.

Every step matters — from washing the hair properly to spacing beads evenly and blending extensions naturally. Correct installation improves not only appearance, but also comfort, durability, and hair safety.

When applied properly, I tip extensions provide:

  • Natural movement
  • Long-lasting wear
  • Flexible styling
  • Minimal heat exposure
  • Reusable value

Whether you are a beginner practicing at home or a salon professional refining your technique, mastering proper I tip installation can help create beautiful, seamless, and professional-quality hair extension results that look natural and feel comfortable for weeks.

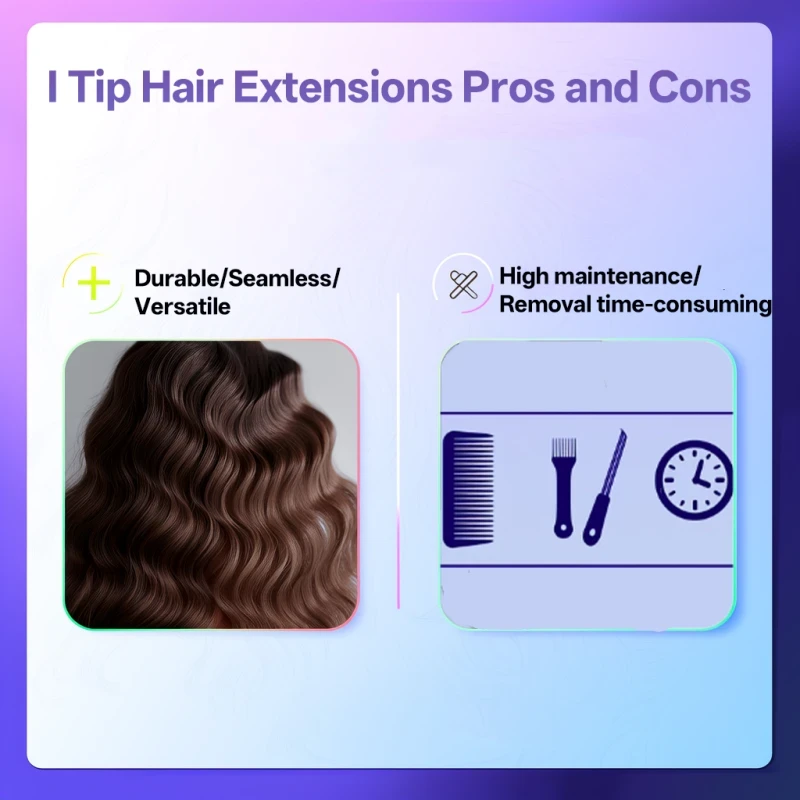
I Tip Hair Extensions Pros and Cons

The world of hair extensions is ever-evolving, but few methods have sparked as much ongoing conversation as I Tip hair extensions. Whether you’re a professional stylist, a salon owner, or someone considering enhancing their look, understanding the nitty-gritty of I Tip extensions is crucial. Today, we unravel the truth—the pros, the cons, and some eyebrow-raising realities you might not have considered.

However, I Tip hair extensions have both pros and cons. They require more installation time than some weft or tape systems, need regular maintenance, and may not be suitable for very fine or fragile hair. The result also depends heavily on the stylist’s technique, extension weight, bead selection, and aftercare.

So, are I Tip extensions worth it?

For clients who want flexible styling, reusable human hair, and a glue-free installation, they can be an excellent choice. For people looking for the fastest installation or those with extremely low-density hair, another method may be more appropriate.

This guide explains the advantages and disadvantages of I Tip hair extensions, how long they last, how often they need maintenance, and how they compare with K Tip, Tape In, and weft extensions.
What Are I Tip Hair Extensions?

I Tip hair extensions are individual strands or small bundles of human hair with a narrow, straight tip. The tip is inserted into a small microbead or micro ring together with a section of the client’s natural hair. The bead is then clamped to secure the extension.

Unlike keratin fusion extensions, the I Tip installation process does not require heat to melt a keratin bond. Unlike tape-in extensions, it does not rely on adhesive tape to attach the extension.

One important terminology point is that I Tip describes the extension strand, while micro ring, microbead, or micro link describes the attachment system. In the marketplace, these terms are often used together because the two components work as one installation system.

A typical I Tip system consists of:

  • 100% human hair or another specified hair material
  • A straight I-shaped tip
  • Microbeads or micro rings
  • Extension pliers
  • A loop or threading tool
  • Professional sectioning and installation

The method is particularly useful when a stylist wants to control placement strand by strand instead of applying a large extension panel.

How Do I Tip Extensions Work?

The installation process is mechanical rather than adhesive-based.

A simplified professional installation generally follows these steps:

  1. The stylist sections the natural hair.
  2. A small section of natural hair is pulled through a microbead.
  3. The I Tip extension is inserted into the bead.
  4. The bead is positioned at an appropriate distance from the scalp.
  5. Extension pliers clamp the bead securely.
  6. Repeat the process according to the desired density and hairstyle.

Because each extension is installed individually, the stylist can control where additional length or volume is placed.

For example, more strands can be positioned toward the back for overall length, while fewer strands can be placed around the face for subtle framing.

Professional sources commonly describe I-Tips as a heat-free and glue-free strand-by-strand system.

The attachment should not be excessively tight. The American Academy of Dermatology warns that repeated pulling from extensions and other tight hairstyles can contribute to traction alopecia, and recommends professional installation and loosening a style if it causes pain or excessive tension.

I Tip vs Micro Ring Extensions

I Tip and micro ring extensions are sometimes treated as two separate products, but they are closely related.

I Tip generally refers to the extension strand with the straight tip.

Micro ring or microbead refers to the small ring used to attach that strand to natural hair.

In other words:

I Tip = extension design; Micro Ring = attachment method.

Some suppliers may use terms such as I-Link, I-Tip, stick tip, micro link, or microbead extension. Product terminology can vary between markets, so B2B buyers should always check the actual construction and specifications rather than relying only on the product name.

I Tip Hair Extensions Pros

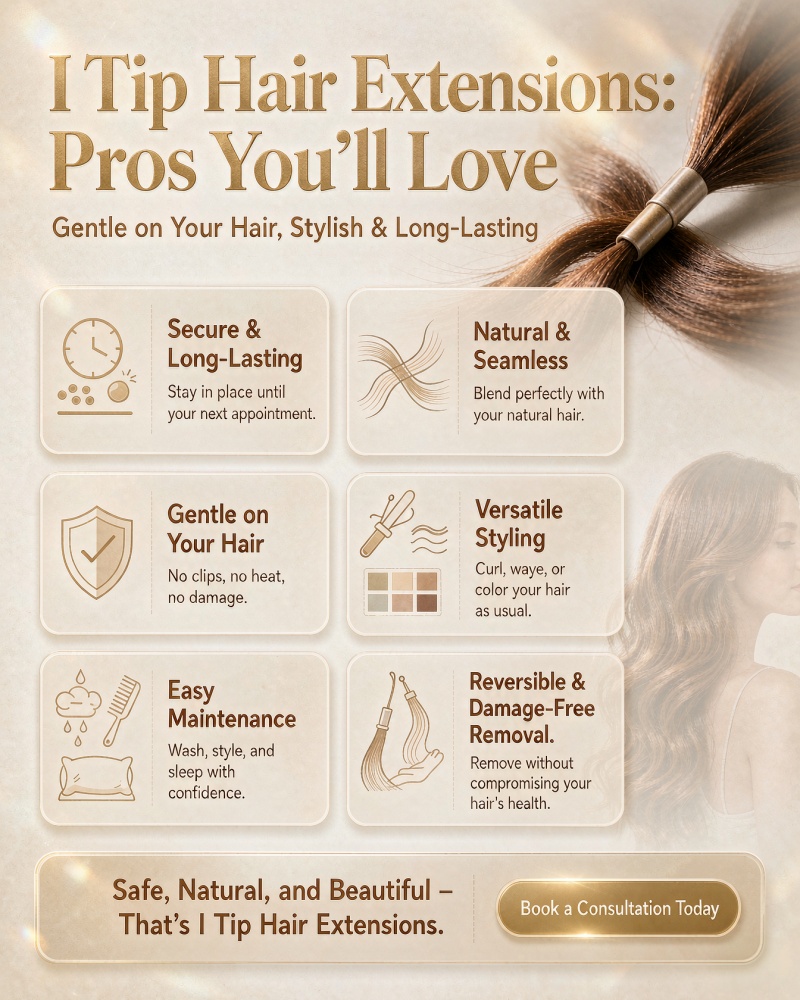
The biggest advantages of I Tip extensions are their glue-free installation, natural movement, reusability, and strand-by-strand customization.

No Heat or Glue

One of the strongest advantages of I Tip hair extensions is that installation does not require hot tools to melt the bond or liquid adhesive to attach the extension.

This makes I Tips attractive to clients who prefer to avoid:

  • Hot fusion
  • Liquid glue
  • Adhesive tape
  • Heat-based bonding

The mechanical bead attachment also makes removal relatively straightforward when performed correctly.

However, “no heat” should not be confused with “no risk.”

Incorrect bead placement, excessive tension, excessive extension weight, or poor removal can still cause natural hair stress. The American Academy of Dermatology specifically notes that extensions can contribute to breakage and hair loss when repeated pulling or excessive tension is involved.

Natural Movement

Because I Tips are installed individually, each strand can move more independently than a large weft.

This can create a natural appearance when the correct color, texture, density, and placement are selected.

The individual installation also allows the stylist to blend the extensions into different areas of the head instead of creating one continuous extension row.

This is particularly useful for:

  • Face-framing
  • Crown volume
  • Side volume
  • Length enhancement
  • Color effects
  • Partial installations

For clients who frequently wear their hair down, this flexible movement can be a major advantage.

Reusable Hair

Another important advantage is reusability.

The extension hair itself may remain suitable for another installation after the original attachment is removed. Depending on hair quality, processing, care, and installation, professional suppliers commonly describe I Tip human hair as reusable through multiple maintenance cycles.

Some industry sources estimate that quality I Tip hair can remain usable for approximately 6–12 months, although actual lifespan varies considerably.

The important distinction is:

The attachment does not last as long as the hair.

As natural hair grows, the bead moves farther away from the scalp. The stylist therefore needs to remove and reposition the extensions even though the human hair itself may still be in good condition.

This makes I Tips attractive to long-term extension users because the same hair can potentially be used through multiple maintenance appointments.

Flexible Styling

I Tip extensions offer considerable styling flexibility because there is no large adhesive panel or continuous weft.

Depending on the installation and natural hair density, clients can typically wear:

  • Straight hairstyles
  • Loose curls
  • Waves
  • Layered styles
  • Low ponytails
  • Some updos
  • Side-part styles
  • Face-framing looks

The stylist can also place different colors or lengths in specific areas.

For example, a salon could use one shade for the main length and a lighter shade around the face to create a subtle dimensional effect.

Customized Volume Placement

This is one of the biggest advantages of I Tips for professional salon work.

With a strand-by-strand method, stylists can control where additional volume goes.

A client might want:

  • More fullness at the back
  • Extra volume around the sides
  • Face-framing highlights
  • Additional length without excessive crown volume
  • A partial installation rather than a full head

This level of customization is harder to achieve with large, fixed extension panels.

For salons, it also means the same I Tip product can be used for different services rather than being limited to one installation style.
{“AIGC”: {“Label”:”1″,”ContentProducer”:”001191440300708461136T1WFUO”,”ProduceID”:”41e7bffe243fd4d6477c55fa77ddc59c-kYbO”,”ReservedCode1″:”{“Type”:” TC260PG”,”Version”:1,”Bindings”:[{“Type”:”soft”,”AlgID”:”sm3″,”Value”:”6561544814951396f8c50080ab101298c5acbf2880f1b95b1963bad303ebbfaf”},{“Type”:”hash”,”AlgID”:”sm3″,”Value”:”2b4e321dc3d6542cc7425224842976f7f9e24c241734aac9471a376076a1c1a4″}],”PubSD”:[{“Type”:”DS”,”AlgID”:”sm2″,”TBSData”:{“Type”:”Binding”,”BType”:”hash”},”Signature”:”3046022100fc9eccaf94f0147687f172c787d605990a9016c540f5cb4afcc03057b8769e37022100d3d391a7625f8b96e5e9bfee2c44d789ffc541e3fae4107a81146202bf069cd2″},{“Type”:”PubKey”,”AlgID”:”sm2″,”KeyValue”:”0407f79b28a17a752b3aae4305c98b48978213832729a2571850b1310b2bc9fe8fee039ccf25ebfeac27502414d9fcef792d777183c98893d226171c2f7a3289a2″}],”Extension”:{“Timestamp”:1788254900,”KeyVersion”:”v1-TxLeOmf7bqU223″}}”,”ContentPropagator”:”001191440300708461136T1WFUO”,”PropagateID”:”41e7bffe243fd4d6477c55fa77ddc59c-kYbO”,”ReservedCode2″:”{“Type”:” TC260PG”,”Version”:1,”Bindings”:[{“Type”:”soft”,”AlgID”:”sm3″,”Value”:”6561544814951396f8c50080ab101298c5acbf2880f1b95b1963bad303ebbfaf”},{“Type”:”hash”,”AlgID”:”sm3″,”Value”:”2b4e321dc3d6542cc7425224842976f7f9e24c241734aac9471a376076a1c1a4″}],”PubSD”:[{“Type”:”DS”,”AlgID”:”sm2″,”TBSData”:{“Type”:”Binding”,”BType”:”hash”},”Signature”:”304502207afddd5d89fa54f147d153c4511d857ce7534d18e529588e1d6585460f331377022100cc0e4c9cb2e7eb605e0f328e1ca0db1969e327bfd25df93b3b70de9a4c798a4c”},{“Type”:”PubKey”,”AlgID”:”sm2″,”KeyValue”:”0407f79b28a17a752b3aae4305c98b48978213832729a2571850b1310b2bc9fe8fee039ccf25ebfeac27502414d9fcef792d777183c98893d226171c2f7a3289a2″}],”Extension”:{“Timestamp”:1788254900,”KeyVersion”:”v1-TxLeOmf7bqU223″}}”}}

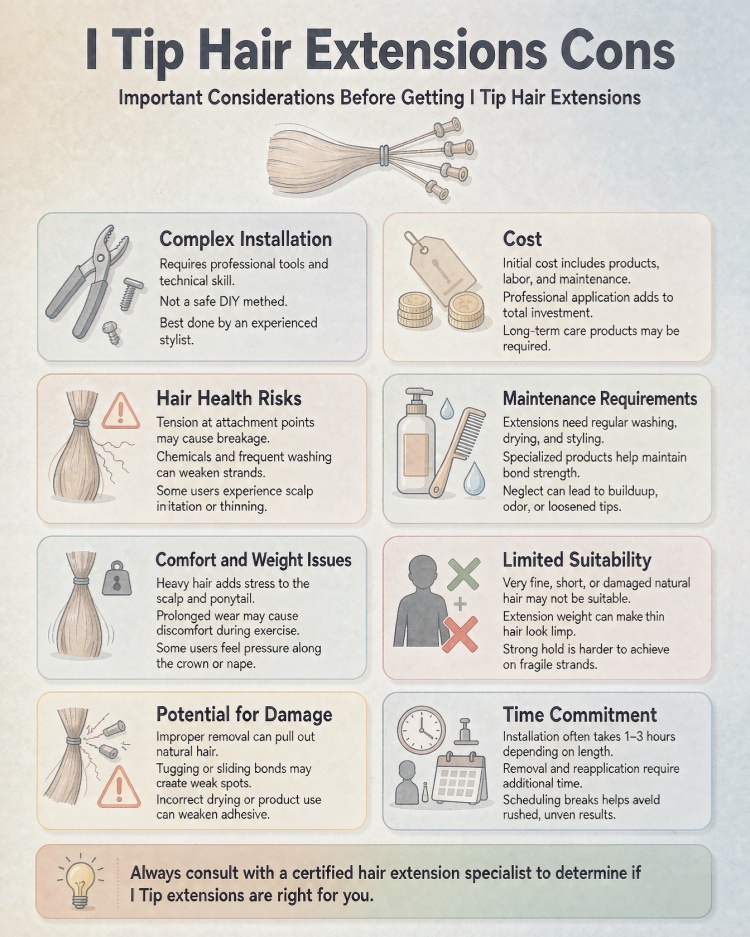
I Tip Hair Extensions Cons

The advantages come with several trade-offs.

Longer Installation Time

I Tip extensions are installed strand by strand, which naturally takes longer than applying larger extension panels.

Industry salon sources commonly report approximately 2–4 hours for a full micro-link/I Tip installation, depending on hair density, number of strands, stylist experience, and desired result.

For comparison, a partial volume installation may take considerably less time.

This means I Tips may not be the best choice for clients who prioritize the fastest possible appointment.

For salons, however, the longer installation time can be balanced by the customization and reusability of the method.

Regular Maintenance

I Tip extensions are not a “fit and forget” product.

Natural hair continues to grow after installation. As it grows, the microbeads move farther away from the scalp.

Professional maintenance is therefore necessary.

A commonly cited maintenance interval is approximately 6–8 weeks, although the actual timing depends on individual hair growth, installation quality, bead movement, and the client’s care routine.

At a maintenance appointment, a stylist may:

  • Check bead security
  • Remove extensions
  • Replace worn beads
  • Move extensions closer to the scalp
  • Remove tangled strands
  • Reinstall suitable hair

Some sources recommend shorter or longer intervals, so the 6–8 week range should be treated as a practical industry benchmark rather than a universal rule.

Bead Slippage

Bead slippage is another common disadvantage.

An I Tip can move or slip if:

  • The bead is not clamped correctly
  • The wrong bead size is selected
  • Too little natural hair is used
  • Too much hair is placed inside the bead
  • Excessive oil reaches the attachment
  • The extension is too heavy for the natural hair
  • The client does not follow proper aftercare

Slippage does not necessarily mean the extension itself is poor quality.

Installation technique is a major factor.

For B2B buyers, this is why sample testing should include not only hair softness but also tip consistency, bead compatibility, weight, and installation performance.

Initial Discomfort

Some clients may notice the beads during the first few days after installation.

A slight awareness of the attachment can occur while the client becomes accustomed to the new extensions.

However, significant pain, persistent scalp discomfort, headaches, or excessive pulling should not be considered normal.

The American Academy of Dermatology recommends paying attention to pain or tightness because repeated tension can damage hair follicles.

A professional stylist should adjust or remove an installation that creates excessive tension.
Not Suitable for Every Hair Type

I Tips are not universally suitable.

Very fine, fragile, or extremely low-density hair requires careful assessment because individual beads concentrate attachment weight on relatively small sections of natural hair.

Some professional extension sources specifically caution against using I Tips on very thin hair.

This does not mean every person with fine hair must avoid I Tips.

There is an important difference between:

Fine hair: individual strands have a small diameter.

Thin hair: overall hair density is low.

A client can have fine strands but relatively high density and may be able to wear appropriately selected I Tips. Conversely, someone with very low density may not have enough natural hair to safely support or conceal the attachments.

I Tip Hair Extensions Pros and Cons at a Glance

Feature Pros Cons
Installation No heat or glue Requires professional technique
Appearance Natural movement Beads may become visible as hair grows
Reusability Hair can be reused Beads may need replacement
Styling Flexible placement Some styles require careful positioning
Maintenance Adjustable system Usually needs maintenance every 6–8 weeks
Installation Time Custom strand placement Often takes 2–4 hours for a full install
Hair Type Good for many medium-density clients Less suitable for very fragile/low-density hair
Long-Term Value Reusable hair can reduce replacement frequency Requires recurring salon appointments

The key takeaway is that I Tips exchange installation speed for customization and reusability.

Do I Tip Hair Extensions Damage Your Hair?

I Tip extensions do not automatically damage natural hair.

The more accurate answer is:

Damage risk depends heavily on extension weight, installation tension, placement, maintenance, and removal.

The absence of heat and glue removes certain sources of stress, but the mechanical attachment can still create tension if the extension is too heavy or installed too tightly.

According to the American Academy of Dermatology, repeated pulling from extensions and other tight hairstyles can contribute to traction alopecia, and prolonged traction can potentially cause permanent hair loss.

To reduce unnecessary stress:

  • Select an appropriate extension weight.
  • Use suitable section sizes.
  • Avoid excessively tight beads.
  • Do not install extensions on weak areas.
  • Have a professional perform installation and removal.
  • Maintain the extensions regularly.
  • Stop and reassess if the client experiences pain.

Therefore, it is more accurate to call I Tips a heat-free and glue-free method, rather than claiming they are completely damage-free.

Are I Tip Extensions Good for Thin Hair?

The answer depends on what “thin hair” means.

For fine but relatively dense hair, lightweight I Tips may be an option when installed correctly.

For very low-density or fragile hair, caution is necessary.

A stylist should assess:

  • Hair density
  • Strand strength
  • Scalp condition
  • Existing breakage
  • Hairline density
  • Desired extension weight
  • Number of strands required

If the natural hair cannot adequately support or conceal the attachment, another extension method may be more appropriate.

For this reason, there is no universal “best I Tip weight for thin hair.”

The correct specification depends on the individual client’s natural hair.

How Long Do I Tip Hair Extensions Last?

There are two different answers to this question.

How Long Does One Installation Last?

The attachment generally needs professional adjustment as natural hair grows.

A practical industry benchmark is approximately 6–8 weeks between maintenance appointments, although some systems and clients may require a different schedule.

How Long Does the Hair Last?

High-quality human hair can potentially remain usable for approximately 6–12 months or longer with proper care, depending on quality and processing.

Heavily bleached or frequently heat-styled hair may have a shorter useful life.

Factors affecting lifespan include:

  • Hair quality
  • Chemical processing
  • Heat styling
  • Washing frequency
  • Brushing
  • Swimming
  • Product buildup
  • Maintenance
  • Removal technique
  • Storage

Therefore, when comparing suppliers, buyers should ask about hair lifespan and maintenance cycle separately.

How Often Do I Tip Extensions Need Maintenance?

For many clients, maintenance is scheduled around every 6–8 weeks.

However, this is not a fixed medical or technical rule.

Faster-growing hair may require earlier adjustment, while slower-growing hair may allow a longer interval.

During maintenance, the stylist checks whether:

  • Beads have slipped
  • Hair has grown significantly
  • Extensions are tangling
  • The natural hair remains healthy
  • The bead needs replacement
  • The extension can be reused

One industry guide reports a 6–8 week maintenance cycle, while other suppliers recommend different intervals. This variation reinforces the importance of assessing the actual installation rather than following one number for every client.

I Tip vs K Tip Hair Extensions

I Tip and K Tip extensions are both popular strand-by-strand methods, but the attachment systems are different.

Feature I Tip K Tip
Attachment Microbead/ring Keratin bond
Heat Required No Usually yes
Glue/Adhesive No Keratin bonding material
Reusability Hair can be reused Usually replaced after removal
Placement Strand by strand Strand by strand
Maintenance Move-up required Replacement required
Flexibility High High
Best For Clients wanting reusable, glue-free installation Clients preferring bonded installation

The biggest advantage of I Tip over K Tip is the absence of heat during installation and the ability to reuse suitable hair.

K Tip, however, can provide a different attachment profile and may be preferred by clients or stylists who are experienced with keratin bonding.

I Tip vs Tape In Hair Extensions

Tape In extensions use adhesive panels, while I Tips use individual strands and beads.

Feature I Tip Tape In
Attachment Microbead Adhesive tape
Installation Strand by strand Panel by panel
Heat No No
Glue No Adhesive
Installation Speed Generally slower Generally faster
Movement Very flexible Flat panel movement
Volume Placement Highly customizable More row-based
Reusability Hair can be reused Requires new tape
Maintenance Move-up Re-taping/move-up

Tape-in extensions can be attractive for clients who want faster application and a flat attachment.

I Tips are often better suited to stylists who prioritize individualized placement and reusable hair.
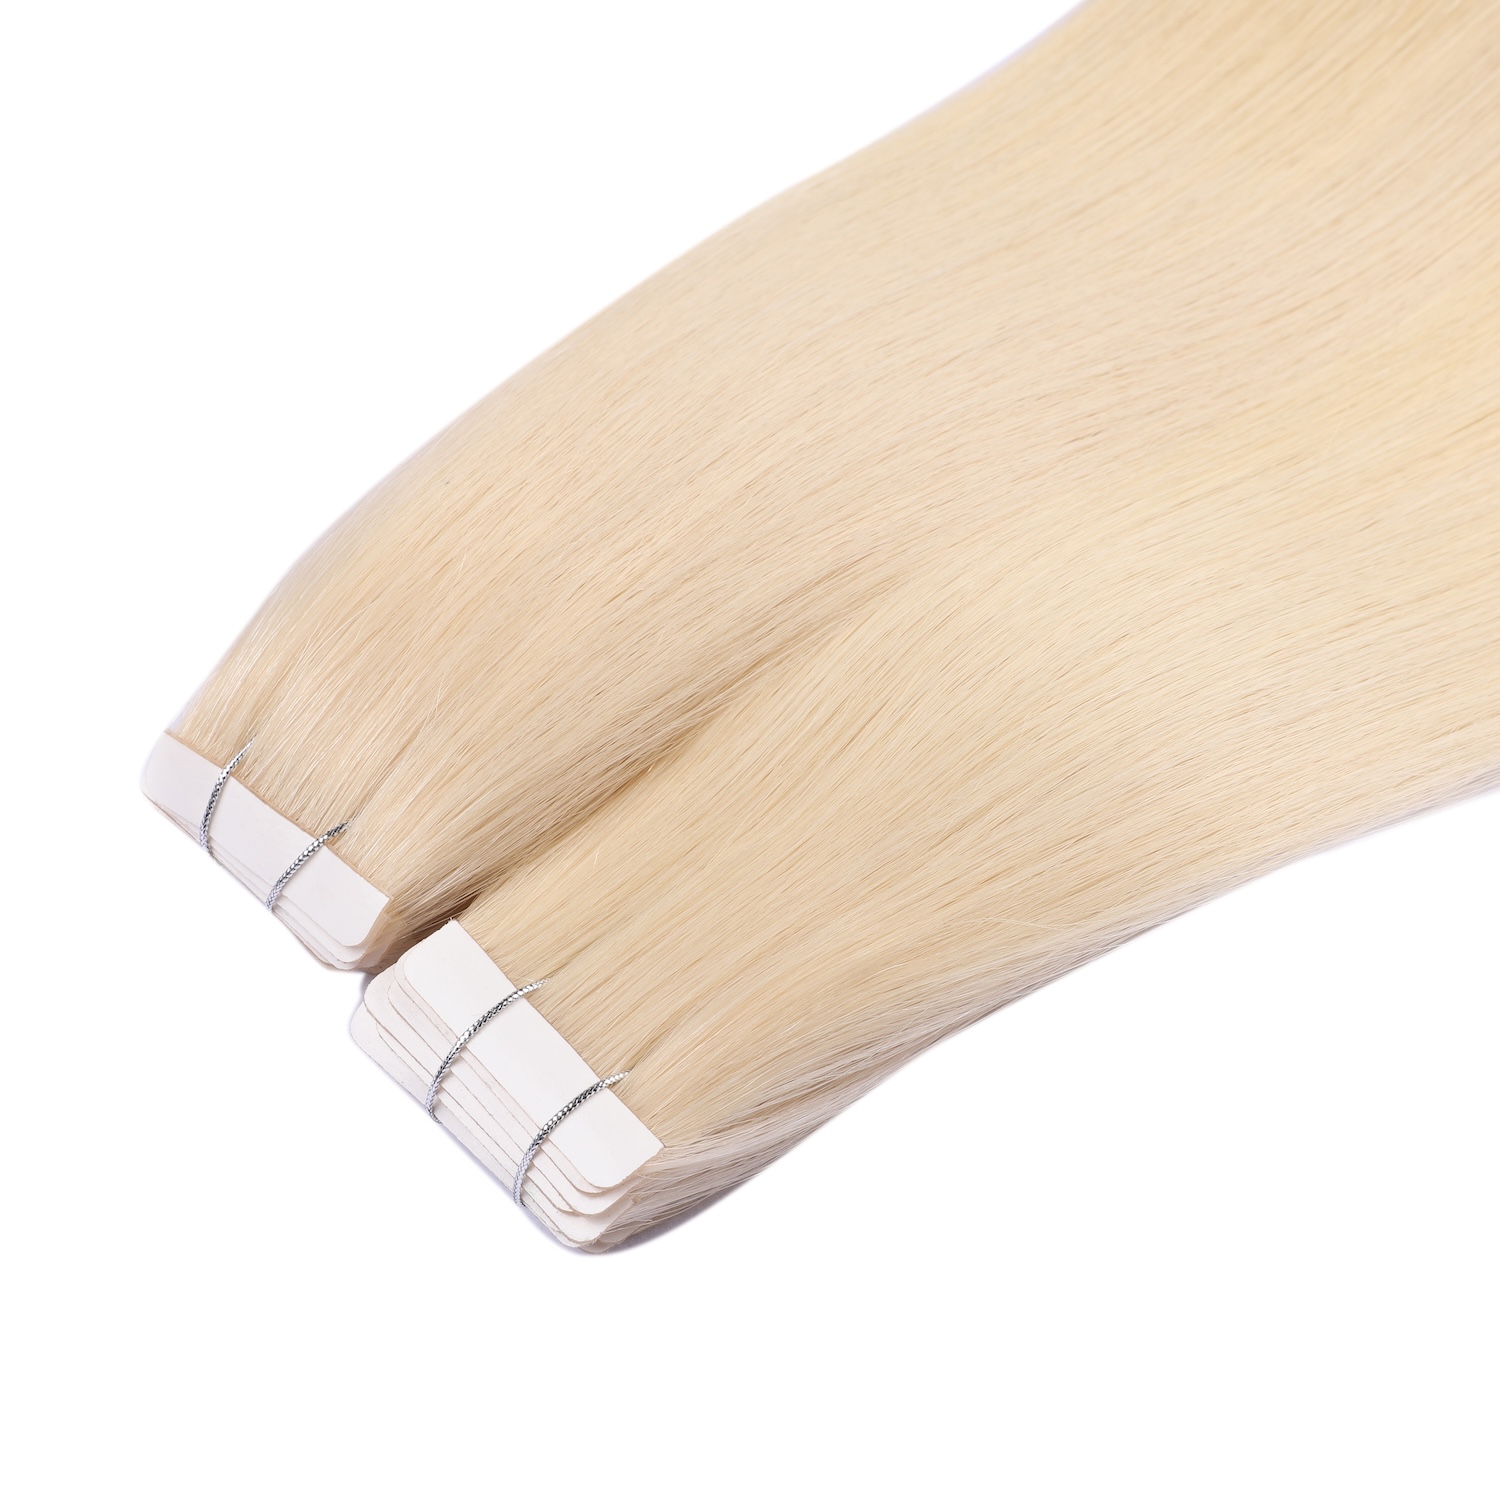
This is tape in hair extensions.

I Tip vs Weft Hair Extensions

Weft extensions contain hair attached to a continuous strip or weft.

I Tips are individual strands.

Feature I Tip Weft
Construction Individual strands Continuous weft
Placement Highly customizable Row-based
Installation Individual bead attachment Sew, bead, or other methods
Movement Very natural Depends on weft method
Installation Time Longer Often faster for large areas
Volume Precise Excellent for broad volume
Maintenance Individual beads Row maintenance

A client who wants targeted volume may prefer I Tips.

A client seeking substantial overall density may prefer a weft system.

The “best” method therefore depends on the desired result rather than the product category alone.

Who Should Choose I Tip Hair Extensions?

I Tips may be a strong option for clients who:

  • Want a glue-free installation
  • Want to avoid heat during attachment
  • Prefer natural strand movement
  • Want targeted volume
  • Want flexible placement
  • Want reusable human hair
  • Are comfortable with regular maintenance
  • Have sufficient natural hair density
  • Prefer professional salon installation

They are also attractive for salons because one product can support multiple service types, including full-head installations, partial volume, color accents, and face-framing.

Who Should Avoid I Tip Hair Extensions?

I Tips may not be the best choice for clients with:

  • Extremely fragile hair
  • Very low hair density
  • Significant active shedding
  • Severe breakage
  • Weak hairline areas
  • Inadequate hair to support the beads
  • An inability to maintain extensions regularly

Clients experiencing unexplained hair loss should address the underlying issue with an appropriate healthcare professional before adding extension-related tension.

The American Academy of Dermatology recommends stopping hairstyles that cause excessive pulling and seeking professional medical advice when traction-related hair loss is suspected.

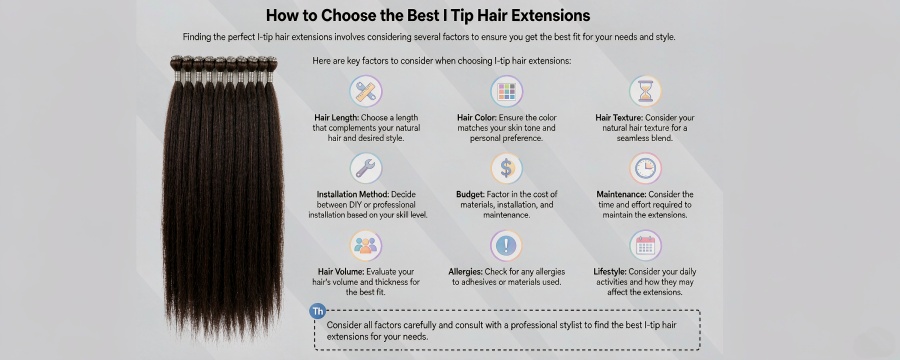
How to Choose the Best I Tip Hair Extensions

For consumers, the most important factors are hair quality, weight, color, attachment quality, and maintenance requirements.

For salons and B2B buyers, the evaluation should be even more detailed.

1. Hair Quality

Ask about:

  • Human hair content
  • Cuticle alignment
  • Hair origin
  • Processing level
  • Shedding
  • Tangling
  • Density consistency

2. Tip Quality

The I Tip should have a consistent, clean, secure tip.

Inconsistent tips can create differences during installation.

3. Weight

The weight per strand matters.

A professional supplier should be able to provide clear specifications instead of simply describing the product as “lightweight.”

4. Color Range

A broad color range helps salons match different clients.

Common categories include:

  • Black
  • Brown
  • Blonde
  • Red
  • Balayage
  • Ombre
  • Highlighted shades
  • Custom colors

5. Bead Compatibility

The I Tip should be compatible with the intended microbead or ring system.

Buyers should test the complete system rather than purchasing hair and beads separately without checking compatibility.

6. Reusability

Ask how many maintenance cycles the supplier expects from the hair under normal salon care.

7. OEM and Private Label

For brands, customization can include:

  • Custom lengths
  • Custom weights
  • Custom colors
  • Custom tips
  • Custom packaging
  • Custom labels
  • Logo printing
  • Private-label production

A manufacturer that can control both hair production and packaging can simplify the B2B supply chain.
Final Thoughts: Are I Tip Extensions Right for You?

Like most beauty enhancements, the decision to choose I Tip extensions boils down to lifestyle, budget, and personal preference. They offer unrivaled natural movement, durability, and a heat-free, glue-free application method—but they demand maintenance, patience, and a quality-first approach.

For stylists, salons, and beauty entrepreneurs, sourcing reliable, premium hair is half the battle. That’s where Qingdao ALOVE HAIR PRODUCTS Co., Ltd. stands apart. With over four decades of expertise, a global market footprint, and a loyal client base, we provide more than just hair—we deliver confidence, creativity, and consistency.

Ready to elevate your hair extension game? Partner with ALOVE today for trusted, premium solutions tailored to your needs.

For example, a salon supply distributor may require a lightweight I Tip collection for fine-to-medium-density hair, while another market may require longer, higher-density extensions.

Instead of forcing every customer into one specification, a professional manufacturer can develop different products around different applications.

Before a bulk order, B2B buyers should request samples and evaluate:

Test Item What to Check
Hair Texture Softness and consistency
Tip Shape and strength
Density Uniformity from root to end
Shedding Loose strands after brushing
Tangling Performance after washing
Color Accuracy and consistency
Weight Actual grams per strand/package
Reusability Condition after removal
Packaging Protection during transportation

This sample-first approach helps buyers verify actual product performance before committing to a large wholesale order.

Frequently Asked Questions

Are I Tip hair extensions worth it?

For clients who want reusable hair, natural movement, and a glue-free, heat-free installation, I Tips can be worth the investment. They require more maintenance and installation time than some alternatives.

What are the main disadvantages of I Tip extensions?

The main disadvantages are longer installation time, regular maintenance, possible bead slippage, and limited suitability for extremely fine or fragile hair.

Are I Tip extensions damaging?

They are not automatically damaging, but incorrect installation, excessive tension, excessive weight, poor maintenance, and improper removal can cause breakage or traction-related problems.

How long do I Tip extensions last?

The human hair may remain usable for approximately 6–12 months or longer with appropriate care, while the installation generally requires adjustment around every 6–8 weeks as the natural hair grows.

Can I Tip hair extensions be reused?

Yes. Suitable human hair can be removed and reinstalled, often with replacement beads or other maintenance components. The number of reuse cycles depends on the hair quality and condition.

Are I Tips good for thin hair?

They can work for some clients with fine but adequately dense hair. Very low-density or fragile hair requires more caution because individual attachments can place concentrated weight on natural hair.

Which is better, I Tip or K Tip?

I Tip is generally more suitable for clients who want heat-free, glue-free installation and reusable hair. K Tip may appeal to clients who prefer a keratin-bonded system.

Which is better, I Tip or Tape In?

I Tip offers more individualized strand placement and reusable hair, while Tape In can provide faster installation and a flat panel attachment. The best choice depends on hair type, desired volume, maintenance preferences, and stylist technique.

How often should I Tip extensions be moved up?

A common professional benchmark is every 6–8 weeks, although the actual schedule should be based on natural hair growth, bead movement, and the condition of the installation.

Can I buy I Tip hair extensions wholesale?

Yes. Professional manufacturers such as Alove Hair can provide wholesale I Tip hair extensions for salons, distributors, wholesalers, and private-label brands. Buyers should request samples and confirm MOQ, hair specifications, customization options, and packaging before placing a bulk order.

Final Verdict: Are I Tip Hair Extensions Worth It?

So, after looking at the I Tip Hair Extensions pros and cons, are they worth choosing?

For the right client, yes.

I Tips are particularly attractive because they combine:

  • No heat
  • No liquid glue
  • Natural strand movement
  • Flexible placement
  • Reusable human hair
  • Customized volume
  • Long-term salon use

The trade-offs are equally important:

  • Installation can take around 2–4 hours for a full application
  • Maintenance is commonly required every 6–8 weeks
  • Beads can slip when installation or aftercare is poor
  • Very fine or fragile hair may not be suitable
  • Professional installation is strongly recommended

The most important factor is therefore not whether I Tips are universally “good” or “bad.”

It is whether the extension weight, hair quality, attachment system, installation technique, and maintenance routine are appropriate for the individual client.

For salons, distributors, and private-label hair brands, product quality is equally important. A consistent I Tip should have reliable hair density, clean tips, stable colors, appropriate weights, and dependable manufacturing quality.

When these factors are controlled, I Tip hair extensions can offer a practical combination of natural appearance, styling flexibility, reusability, and long-term value.

I-Tip Hair Extensions vs Microlinks: Pros, Cons, Cost & Maintenance Compared

Hair extensions have become a mainstream beauty trend, offering an easy way to achieve longer, fuller hair without waiting for natural growth. As styling techniques evolve, more people are seeking methods that provide seamless results without causing damage. Two popular techniques that have gained attention are I-Tip Hair Extensions and Microlink Hair Extensions. These two methods are both designed to add length and volume, but they differ in installation, maintenance, and overall impact on hair health.I-Tip Hair Extensions involve small, individual strands of hair that are secured to your natural hair using a small metal bead or cylinder. The “I” shape refers to the tip of the extension that is inserted into the bead, making the method non-damaging, as it doesn’t rely on heat or chemicals. This technique is best for those looking for a natural look and feel.On the other hand, Microlink Hair Extensions also use beads to secure the extensions, but the application process differs slightly. The hair is pulled through a small ring, and the extension is clamped in place. This technique offers a similar result in terms of length and volume but is often preferred for its quicker application and versatility in adjusting to various hair textures.

This article aims to compare I-Tip Hair Extensions vs Microlinks: Pros, Cons, Cost & Maintenance Compared, giving you a comprehensive look at the advantages and disadvantages of each method. Whether you’re considering hair extensions for the first time or are looking to switch up your current method, understanding the differences in cost, maintenance, and suitability for different hair types will help you make an informed decision. By exploring these factors, you’ll be better equipped to choose the best hair extension technique to meet your needs.

What Are I-Tip Hair Extensions?

I-Tip Hair Extensions are a popular, non-permanent method of adding length and volume to natural hair. This extension technique involves individual strands of hair, which are securely attached to your natural hair using a small metal bead or cylinder. The “I” in I-Tip refers to the shape of the hair extension’s tip, which is inserted into the bead before being clamped down. This method is highly favored for its natural look and damage-free approach, as it doesn’t involve heat or glue, which can harm natural hair.

The extensions used in I-Tip applications are made from high-quality human hair, which can be treated, styled, and colored just like natural hair. The extensions are small, individual pieces that blend seamlessly with your natural hair, giving you a voluminous and more natural look. The “I-Tip” name comes from the tiny, thin tips of the extension strands that are inserted into the bead during installation.

Installation Method: Tools and Process

Installing I-Tip Hair Extensions requires specialized tools and careful application. The process involves the following steps:

  1. Preparation: The natural hair is sectioned into small, manageable parts, allowing the stylist to work one section at a time. This step is crucial for even distribution and blending of the extensions with your natural hair.
  2. Insertion of Extensions: Using a small hook tool or needle, the stylist will pull a small section of your natural hair through a small metal bead. The “I-Tip” hair extension is then placed into the bead.
  3. Securing with Bead: The stylist uses a set of specialized pliers to clamp the bead tightly around the natural hair and extension, securing the two together. This bond is firm yet gentle on the natural hair, preventing unnecessary breakage or damage.
  4. Blending and Finishing: After the extensions are applied, the stylist will blend and style the hair to ensure the extensions mix naturally with your own hair. The process is repeated throughout the head, row by row, until the desired length and volume are achieved.

Unlike other extension methods that may require adhesives or glue, I-Tip extensions are highly versatile, allowing users to maintain their natural hair health while achieving a full, voluminous look. The installation process typically takes 2 to 4 hours, depending on the amount of hair being added.

Who Is Best Suited for I-Tip Hair Extensions?

I-Tip extensions are suitable for a wide variety of individuals, though certain hair types and lifestyle factors may make them an even better choice. Here’s a breakdown of who might benefit most from I-Tip extensions:

  1. People with Fine or Thinning Hair: I-Tip extensions are ideal for those with fine or thinning hair because the small, discreet beads don’t add excessive weight to the hair, reducing the risk of damage. The individual strands of extensions blend seamlessly with natural hair, giving the appearance of thicker, fuller locks without looking bulky or obvious.
  2. Individuals Seeking a Natural Look: If you’re looking for a natural, undetectable result, I-Tip extensions are a great option. The individual strands are lighter and more flexible than tape-in or clip-in extensions, allowing them to move and behave like natural hair.
  3. People Who Want Long-Term Extensions Without Heat or Chemicals: Since I-Tip extensions do not require the use of heat or glue, they are an excellent choice for those who are concerned about heat damage or the long-term effects of adhesive-based extensions. This makes them a gentler alternative compared to other methods.
  4. Those with Medium to Long Hair: While I-Tip extensions can be used on short hair, they are typically better suited for individuals with medium to long hair, as the extensions can blend more naturally with longer natural hair.
  5. Active Lifestyles: If you lead an active lifestyle and prefer a secure, long-lasting hair extension method, I-Tip extensions are a good choice. They are durable and stay in place without needing constant adjustments. However, regular maintenance is required to ensure the beads remain securely in place.

I-Tip extensions are a fantastic choice for those looking to enhance their hair without compromising its health. The application is simple, the result is natural, and the extensions can last several months with proper care and maintenance.

What Are Microlink Hair Extensions?

Microlink Hair Extensions are a popular method of adding length and volume to natural hair without the need for heat, glue, or tape. These extensions are attached using small metal beads or rings that secure individual strands of hair to the natural hair. The process involves threading a small section of natural hair through the bead, then attaching a microlink extension and clamping the bead tightly to hold everything in place. This technique is praised for its natural, seamless look and long-lasting results.

Microlink extensions are typically made from high-quality human hair, ensuring that they can be styled, colored, and treated just like natural hair. The individual strands of hair used for microlinks are smaller and more discreet compared to other methods, which helps create a smooth, natural blend with the natural hair.

Installation Method: Tools and Process

The installation of Microlink Hair Extensions involves a few simple steps and requires some specialized tools:

  1. Sectioning the Hair: The natural hair is sectioned into small, manageable parts to make the process easier and more precise. This is important to ensure that the extensions are evenly distributed throughout the scalp.
  2. Inserting the Beads: Using a special loop tool, a small section of natural hair is pulled through a small metal bead. The bead is typically very tiny, about the size of a grain of rice, allowing it to stay discreet and close to the scalp.
  3. Attaching the Extensions: A microlink extension is then threaded into the bead along with the natural hair. Once the extension is in place, the stylist uses specialized pliers to clamp the bead tightly, securing the extension to the natural hair. The bead ensures the extension stays in place without slipping or shifting.
  4. Blending and Styling: After the extensions are installed, the stylist will blend and style the hair to make sure the extensions mix naturally with the natural hair. This may include trimming and shaping the hair to ensure a seamless, cohesive look.

The process typically takes about 2 to 3 hours, depending on the amount of hair being added. It’s a great option for those who want a longer-lasting, more natural-looking hair extension solution.

Who Is Best Suited for Microlink Hair Extensions?

Microlink hair extensions are suitable for a variety of hair types and personal preferences. Here’s a breakdown of who might benefit most from this method:

  1. People with Medium to Thick Hair: Microlinks work best on medium to thick hair, as the method requires a bit more hair volume to secure the beads properly. People with very fine or thin hair may still be able to use microlinks, but it’s essential to ensure that the extensions don’t put too much strain on the natural hair.
  2. Individuals Seeking Versatility: Microlink extensions are highly versatile because they can be removed, adjusted, and reinstalled. This makes them a great option for people who may want to change their hair length, volume, or style over time.
  3. Those Avoiding Heat or Glue: Microlink extensions are perfect for individuals who want to avoid the damaging effects of heat, chemicals, or adhesives. Since microlinks use beads to secure the extensions, they are a gentler alternative to methods like glue-in or tape-in extensions.
  4. Active Lifestyles: If you lead an active lifestyle and are concerned about your extensions slipping or becoming loose, microlinks are a durable choice. Once the beads are clamped, they stay securely in place, even during physical activities. However, regular maintenance is required to ensure they stay intact.
  5. People Seeking a Natural Look: For those who want a subtle, natural look, microlinks are ideal. The individual beads are small and discreet, so the extensions blend seamlessly with the natural hair, offering a more invisible result compared to bulkier extension methods.

Microlink Hair Extensions are an excellent choice for individuals looking for a long-term, natural-looking solution to enhance the length and volume of their hair without the need for glue, tape, or heat.

I-Tip vs Microlinks: Pros & Cons

When it comes to enhancing your natural hair with extensions, I-Tip and Microlink hair extensions are two of the most popular and non-damaging methods. Each technique offers its own unique benefits and some potential drawbacks, making it important to weigh the pros and cons before deciding which method is right for you. Below, we will compare the advantages and disadvantages of I-Tip Hair Extensions and Microlink Hair Extensions to help you make an informed choice.

A. I-Tip Hair Extensions

Pros:

  1. No Heat or Chemicals Used – Less Damage:
    One of the biggest advantages of I-Tip Hair Extensions is that they don’t require the use of heat, glue, or chemicals during the installation process. Unlike methods such as fusion or tape-in extensions, which may cause damage over time due to adhesives or heat application, I-Tip extensions rely on small metal beads to secure the hair. This makes the process gentler on your natural strands, reducing the risk of breakage and maintaining the health of your hair.
  2. Reusable and Eco-Friendly:
    I-Tip extensions can be reused multiple times, which is a major plus for both your wallet and the environment. Since the beads are simply clamped onto the natural hair, they can be removed and reinstalled without causing any harm to the extensions or your hair. This sustainability factor makes I-Tip extensions a great long-term investment, as they last much longer than some other extension methods.
  3. Perfect for Fine or Thin Hair – Natural Appearance:
    I-Tip extensions are especially suitable for those with fine or thin hair. The individual strands blend seamlessly with your natural hair, making them almost invisible. The lightness of the extensions ensures that they don’t add bulk, offering a very natural look. If you’re looking to add volume without sacrificing the authenticity of your hairstyle, I-Tip extensions are a great choice.

Cons:

  1. Installation Process Takes Longer:
    One downside of I-Tip extensions is that the installation process can be time-consuming. Depending on how much hair is being added, the process typically takes 2 to 4 hours to complete. This is longer than other methods like clip-ins or tape-ins, so it might not be ideal for someone who is looking for a quick solution.
  2. Regular Adjustments May Be Necessary:
    I-Tip extensions need to be adjusted every few weeks as the natural hair grows out. The beads that hold the extensions in place gradually move away from the scalp as hair growth occurs. This means that regular touch-ups or maintenance visits are required to ensure that the extensions stay secure and look natural. For those with a busy lifestyle, this might be a downside.
  3. Not Ideal for Extremely Short or Damaged Hair:
    I-Tip extensions are not recommended for individuals with very short or damaged hair. The small beads used to secure the extensions need enough natural hair to hold onto. If your hair is too short or weakened by damage, the beads may not be able to securely fasten the extensions, making the method less effective.

B. Microlink Hair Extensions

Pros:

  1. Works for All Hair Types, Especially Thick Hair:
    One of the most significant advantages of Microlink Hair Extensions is their versatility in accommodating all hair types. They work particularly well for those with thick or coarse hair, as the method can hold up well against the weight of thicker hair textures. Whether you have straight, wavy, or curly hair, microlinks can be customized to fit your needs. For people with naturally thicker hair, microlinks provide a secure and lasting solution.
  2. Faster Installation Time:
    Compared to I-Tip extensions, the installation process for Microlink Hair Extensions is typically faster. Microlinks require less time to install because the beads are slightly larger, and the application process is streamlined. The method typically takes 1 to 2 hours, making it a faster choice for those looking for quicker results. This makes it ideal for people who need extensions but are pressed for time.
  3. No Heat Tools or Chemicals Required:
    Like I-Tip extensions, Microlink Hair Extensions do not rely on any heat or chemicals for installation. The extensions are secured using small beads, so they are considered a safer alternative to methods that require heat fusion or adhesive. This makes microlinks a gentle and non-damaging option for anyone looking to enhance their hair without compromising its health.

Cons:

  1. Regular Maintenance is Required:
    While Microlink Extensions are known for being durable, they still require regular maintenance. As with any extension method, the beads may loosen over time as natural hair grows out. This means the beads need to be tightened, and adjustments may be necessary every 6 to 8 weeks. For people who want a low-maintenance option, this could be a disadvantage.
  2. Metal Beads May Cause Discomfort:
    The small metal beads used to secure the extensions may cause some discomfort, particularly in the early days after installation. As the beads sit close to the scalp, some people might experience mild irritation or tightness. Though this sensation usually subsides after a few days, those with sensitive scalps might find the initial discomfort uncomfortable.
  3. Long-Term Use May Cause Hair Breakage:
    Over time, the constant pressure exerted by the metal beads on the natural hair can lead to hair breakage, especially if the beads are too tight or improperly maintained. For individuals with fine or weak hair, this could be a concern. It’s important to ensure that the beads are properly fitted and that regular adjustments are made to avoid any damage.

Both I-Tip Hair Extensions and Microlink Hair Extensions offer unique benefits and some potential drawbacks, depending on your hair type, lifestyle, and preferences.

  • If you’re looking for a natural look, less damage, and long-term sustainability, I-Tip extensions might be the ideal choice, particularly for those with fine or thin hair. However, the process takes longer and may require more frequent maintenance.
  • On the other hand, Microlinks provide faster application, work well for thicker hair, and also avoid heat or chemicals. They might require regular maintenance and could cause discomfort due to the metal beads, but they are a great option for those seeking a quicker and versatile extension method.

Ultimately, the best choice depends on your hair type, how much time you can dedicate to maintenance, and your desired outcome.

Cost Comparison: I-Tip vs Microlinks

When considering hair extensions, the cost is an essential factor. Both I-Tip and Microlink extensions come with their initial installation costs, along with long-term maintenance expenses. Understanding these costs will help you make an informed decision based on your budget and the longevity of the extensions. Let’s break down the pricing for both methods.

I-Tip Hair Extensions Costs

Initial Costs: Materials and Installation Fee

The initial cost of I-Tip extensions includes both the price of the extensions themselves and the installation fee.

  1. Extension Costs:
    The price of I-Tip hair extensions typically ranges from $200 to $500 or more, depending on the length, quality, and volume of the extensions. High-quality 100% human hair extensions, which are more durable and blend naturally with your natural hair, will generally cost on the higher end. The longer and thicker the hair, the more expensive the extensions will be.
  2. Installation Fees:
    The installation of I-Tip extensions requires a skilled stylist to apply each individual strand of hair to your natural hair using metal beads. This process can take 2 to 4 hours, and installation fees generally range from $150 to $400 depending on the stylist’s experience, location, and the amount of hair being applied. The process is labor-intensive, which can lead to higher installation costs.

Regular Maintenance Costs

Although I-Tip extensions don’t require much upkeep, they do need to be maintained every 6 to 8 weeks to keep them looking fresh. Maintenance involves repositioning the beads as your natural hair grows, which may require removing and reinstalling the extensions.

  • The maintenance fee can range from $100 to $250 depending on how much hair needs to be moved and the stylist’s rates.
  • Since I-Tip extensions are reusable, this maintenance cost is much lower than the initial installation fee.

Microlink Hair Extensions Costs

Initial Costs: Price and Installation Fee

The initial cost for Microlink extensions includes both the price of the hair and the installation service.

  1. Extension Costs:
    Microlink extensions are generally priced similarly to I-Tip extensions, with high-quality human hair extensions costing between $200 to $500 or more, depending on the length, thickness, and quality of the hair. Because Microlinks use individual strands of hair like I-Tip extensions, the cost can vary based on the volume and desired look.
  2. Installation Fees:
    The installation of Microlink extensions typically takes 1 to 2 hours, making it a quicker process than I-Tip extensions. Installation fees are generally in the range of $150 to $300, depending on the stylist and how much hair is being added.

While Microlinks may have slightly lower installation fees due to the faster application time, the difference in cost is not vast when compared to I-Tip extensions.

Regular Adjustment Costs

Like I-Tip extensions, Microlinks need regular adjustments as your natural hair grows. This typically involves tightening the beads to keep the extensions secure and repositioning them.

  • The adjustment cost for Microlinks is usually $100 to $200 per session.
  • Since the extensions need to be adjusted every 6 to 8 weeks, the long-term cost for Microlinks is similar to I-Tip extensions in terms of maintenance.

Long-Term Costs: Comparing I-Tip vs Microlinks

The long-term costs for both I-Tip and Microlink extensions are influenced by the reusability of the extensions, the maintenance schedule, and the type of hair used. Both methods offer reusable hair, which reduces the need to purchase new extensions for each maintenance session. However, both still require regular upkeep, such as repositioning beads and ensuring the extensions stay in place.

  1. I-Tip Hair Extensions Long-Term Costs:Estimated Long-Term Cost (over 12 months):
    • Extensions: $200 – $500
    • Maintenance: $100 – $250 every 6-8 weeks (3-6 maintenance sessions in a year)
    • Total Estimated Yearly Cost: $500 – $1,500
    • Initial Installation: $200 – $500 (depending on hair quality and length)
    • Maintenance: $100 – $250 every 6-8 weeks
    • Reusability: Since I-Tip extensions can last 6-12 months or longer, depending on how well they are maintained, you can continue to use the same hair during this period. This makes I-Tip extensions more cost-effective over time compared to methods that require frequent replacement.
  2. Microlink Hair Extensions Long-Term Costs:Estimated Long-Term Cost (over 12 months):
    • Extensions: $200 – $500
    • Maintenance: $100 – $200 every 6-8 weeks (3-6 maintenance sessions in a year)
    • Total Estimated Yearly Cost: $500 – $1,500
    • Initial Installation: $200 – $500
    • Maintenance: $100 – $200 every 6-8 weeks
    • Reusability: Like I-Tip extensions, Microlink hair extensions can last anywhere from 6 months to a year, depending on how well they are cared for. Reusing the same hair helps lower costs, but the beads may need to be replaced if they become loose or damaged.

Both I-Tip and Microlink hair extensions come with similar initial costs and long-term maintenance expenses. The primary differences lie in the installation process and the duration between maintenance visits.

  • I-Tip extensions may be a bit more costly due to the longer installation time, but they can last longer, making them a good investment for those looking for a more sustainable option.
  • Microlink extensions, on the other hand, are typically quicker to install and may be more suitable for people with thicker hair, though they require similar maintenance and adjustment costs.

The long-term cost for both methods will depend on the quality of the hair, how often you maintain them, and the maintenance required to keep your extensions looking fresh. Both offer a range of costs that can be tailored to fit your budget and desired look.

Maintenance: How to Care for I-Tip and Microlink Extensions

Proper care and maintenance are crucial for keeping I-Tip and Microlink extensions looking fresh and long-lasting. Both methods require specific attention to ensure the extensions remain secure, healthy, and blend seamlessly with natural hair. Below, we’ll discuss how to properly care for each type of extension, including essential maintenance tips.

A. Maintenance for I-Tip Extensions

1. Hair Care and Washing Tips

Proper washing and conditioning techniques are essential for maintaining I-Tip extensions. Here’s how to care for your hair when wearing I-Tip extensions:

  • Gentle Shampooing: Use a sulfate-free shampoo to avoid stripping the hair of its natural oils. When washing, focus on cleaning your scalp rather than scrubbing the extensions directly. This helps prevent tangling and ensures the extensions stay in place.
  • Conditioning: Apply conditioner to the ends of your hair, avoiding the beads where the extensions are attached. Heavy conditioners or oils near the bead area can cause slippage or loosen the extensions.
  • Drying: After washing, pat your hair dry with a towel and avoid rubbing the extensions. Let the hair air-dry or use a blow dryer on a low heat setting. Avoid using high heat on the extension beads as it can cause them to weaken or loosen.
  • Combing: Always use a wide-tooth comb or a brush with soft bristles to detangle the hair, starting from the ends and working your way up. This helps prevent unnecessary pressure on the extensions and reduces the risk of breakage.

2. Tips for Maintaining I-Tip Extension Stability

To ensure the stability of your I-Tip extensions, follow these tips:

  • Avoid Excessive Heat: I-Tip extensions can withstand heat styling, but it’s essential to avoid using high-heat tools directly on the beads or roots of your hair. Always apply a heat protectant before using any styling tools to reduce the risk of damage.
  • Sleeping Care: Tie your hair loosely in a braid or ponytail before bed to prevent tangling or breakage. You may also consider using a silk or satin pillowcase to reduce friction and protect both your natural hair and extensions.
  • Be Gentle with Hair: When brushing or styling, be gentle near the roots where the beads are attached. Pulling or tugging at the beads can cause them to loosen or the natural hair to break.

3. Regular Checks and Adjustments

I-Tip extensions require regular checks to ensure they remain secure and properly positioned. As your natural hair grows, the beads may gradually shift away from the scalp. It’s important to have your stylist check your extensions every 6-8 weeks to ensure they are not too loose. They may need to be repositioned or adjusted to prevent any slippage or discomfort.

Regular adjustments and maintenance appointments are key to keeping your extensions looking their best and maintaining their longevity.

B. Maintenance for Microlink Extensions

1. Avoiding Bead Slippage or Damage

One of the primary concerns with Microlink extensions is ensuring that the metal beads remain secure and do not cause discomfort. To prevent slippage or damage:

  • Avoid Over-tightening: While it’s important that the beads are clamped tightly enough to secure the extensions, over-tightening can cause discomfort and even damage to your natural hair. Make sure the beads are snug, but not too tight.
  • Avoid Excessive Pulling: Just like with I-Tip extensions, avoid pulling or tugging on the hair, as this can loosen the beads or cause them to shift. Be mindful when brushing or styling your hair, and always be gentle near the bead area.
  • Use the Right Products: Certain hair products like oils or serums can cause the beads to slip if applied near the roots. Use lightweight products that don’t build up at the scalp and avoid applying heavy products directly to the bead area.

2. Cleaning and Hair Care Recommendations

Caring for your natural hair and extensions is essential for longevity:

  • Gentle Shampooing: Use a sulfate-free shampoo to cleanse both your natural hair and extensions. Make sure to focus on the scalp and roots where the beads are attached, but avoid massaging or rubbing the bead area directly, as it could weaken or loosen the beads.
  • Conditioning: Apply conditioner to the mid-lengths and ends of your hair, avoiding the bead area to prevent product buildup. You can also use a leave-in conditioner to maintain moisture and shine. Be careful not to use too much conditioner, as it may weigh down the extensions or cause slipping.
  • Drying: After washing, gently towel-dry your hair. Use a blow dryer on a low heat setting to dry your hair, or allow it to air dry. Avoid applying excessive heat directly to the beads, as it may weaken them over time.
  • Brushing: Detangle your hair using a wide-tooth comb or a brush designed for extensions. Start at the ends and work your way upward, being cautious around the bead area to prevent damage.

3. Regular Maintenance Frequency

Like I-Tip extensions, Microlink extensions require regular maintenance to keep them looking their best.

  • It’s recommended that you visit your stylist every 6-8 weeks for a maintenance appointment. This will allow the stylist to check the beads, adjust any loose extensions, and ensure that the natural hair is not experiencing any breakage or stress.
  • During maintenance, the beads will often need to be adjusted or tightened as your natural hair grows. This is a routine part of keeping the extensions secure and ensuring that they remain comfortable.

Proper care and maintenance are essential for the longevity and comfort of both I-Tip and Microlink extensions. Here are the key takeaways:

  • I-Tip extensions require gentle hair care techniques, especially when washing, conditioning, and detangling. Regular adjustments are necessary every 6-8 weeks to maintain the integrity of the beads.
  • Microlink extensions require careful attention to avoid bead slippage and product buildup. Regular visits every 6-8 weeks will help ensure that the beads are secure and the extensions stay comfortable.

By following these maintenance tips and scheduling regular check-ups with your stylist, you can enjoy long-lasting, beautiful extensions that keep your hair looking flawless.

Which One is Right for You?

When deciding between I-Tip and Microlink hair extensions, it’s important to consider your specific needs, hair type, and the results you’re hoping to achieve. Below is a breakdown of which type of extension is best suited for different individuals based on their preferences and lifestyle.

I-Tip Hair Extensions: Best for Those Who Want a Natural Look and Long-Lasting Results

I-Tip extensions are ideal for individuals who are looking to enhance their natural hair with a more subtle and seamless look. This method is especially suitable for:

  • People with Fine or Thin Hair: I-Tip extensions blend well with finer hair textures, as the individual strands are lightweight and can add volume without looking bulky. The result is a natural, fuller appearance that doesn’t weigh down the hair.
  • Those Seeking a Natural Look: If you prefer extensions that blend seamlessly into your natural hair without being too noticeable, I-Tip extensions are the way to go. The beads are discreet, and the application process results in a very natural finish.
  • Those Who Don’t Mind Regular Maintenance: I-Tip extensions require regular adjustments every 6-8 weeks to keep them in place as your natural hair grows. If you don’t mind committing to regular salon visits, this method can provide long-term, stunning results.
  • People Looking for Long-Lasting Extensions: I-Tip extensions are known for their durability. They can be reused and last up to 12 months with proper care, making them a good investment for those who want long-term extensions.

Microlink Hair Extensions: Ideal for Those Seeking a Quicker Solution and Less Frequent Maintenance

Microlink extensions are perfect for individuals who are looking for a faster application process and those who prefer a little less upkeep in terms of maintenance. This method works well for:

  • People with Thicker Hair: Microlinks are versatile and work well with all hair types, especially thicker or coarser hair. The beads are strong enough to hold up against heavier textures, and they blend easily.
  • Those Seeking Quick Length: If you want to add length quickly without the longer installation process, Microlink extensions are a great choice. The installation is faster than I-Tip, typically taking only 1 to 2 hours.
  • Those Who Prefer Less Frequent Maintenance: Microlink extensions may require maintenance every 6-8 weeks, but the installation process tends to be quicker, so you won’t need to spend as much time in the salon. If you want a low-maintenance option that still delivers beautiful results, Microlinks are a good fit.
  • People Seeking Versatility: Microlinks offer more flexibility when it comes to styling, and they can be a better option for those who like to experiment with different looks while maintaining a natural feel.

The choice between I-Tip and Microlink extensions comes down to your specific goals and lifestyle:

  • Choose I-Tip extensions if you want a more natural, seamless look with long-lasting results, and if you’re willing to commit to regular salon visits for maintenance.
  • Opt for Microlink extensions if you’re looking for a quicker, less frequent maintenance solution that works well for thicker hair and offers versatile styling options.

By considering your hair type, maintenance preferences, and desired look, you can determine which extension method will best suit your needs.

Conclusion

Both I-Tip and Microlink extensions offer distinct advantages and are ideal for different types of individuals.

I-Tip extensions are known for their natural, seamless look and are perfect for individuals with fine or thin hair. They are durable and reusable, providing a long-term solution, but require regular maintenance every 6-8 weeks. The process of installing I-Tip extensions can take longer, and while they are environmentally friendly, they may require a higher initial investment.

On the other hand, Microlink extensions are faster to install, making them suitable for people looking for quick length and volume. They are versatile and can be used on all hair types, especially thicker hair. However, they require periodic maintenance to ensure the beads stay in place. The installation process is shorter than I-Tip, and the cost of maintenance is similar.

Choosing the Right Option

  • Budget: If you’re on a tight budget, Microlinks may be a more affordable option due to their quicker installation time, while I-Tips may have a higher initial cost but are a longer-term investment.
  • Hair Type & Desired Look: Consider your natural hair texture and the kind of result you want. I-Tip extensions offer a more natural, long-lasting appearance, while Microlinks offer quick length and volume.
  • Maintenance Time: If you have limited time for regular maintenance, Microlinks may be a better fit due to the less frequent adjustments.

Ultimately, your choice will depend on your personal needs, budget, and hair goals.