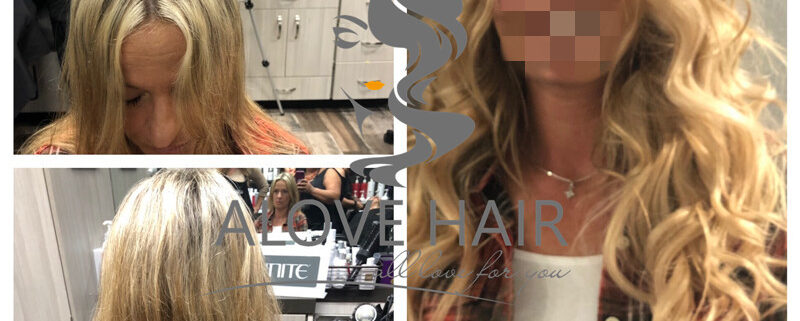
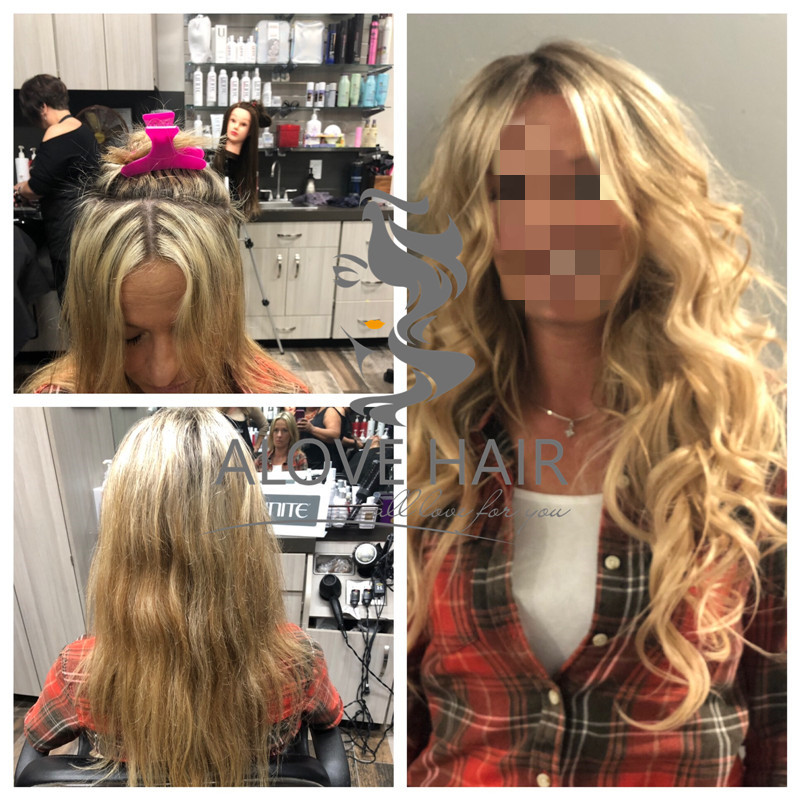
Hand Tied Weft Extensions Before and After
If you’ve ever looked at those dramatic “before and after” hair transformations and wondered how they go from thin, flat, or uneven hair to full, flowing, glossy perfection—there’s a good chance hand tied weft extensions are behind the magic.
But here’s the truth: the difference between a flawless transformation and a noticeable, uncomfortable one isn’t just the extensions—it’s the method, placement, care routine, and customization.
This guide breaks everything down in detail: what hand tied weft extensions are, what realistic “before and after” results look like, the full installation process, maintenance steps, and how to achieve salon-quality results at home (or at least understand what your stylist should be doing).
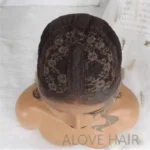
What Are Hand Tied Weft Extensions?
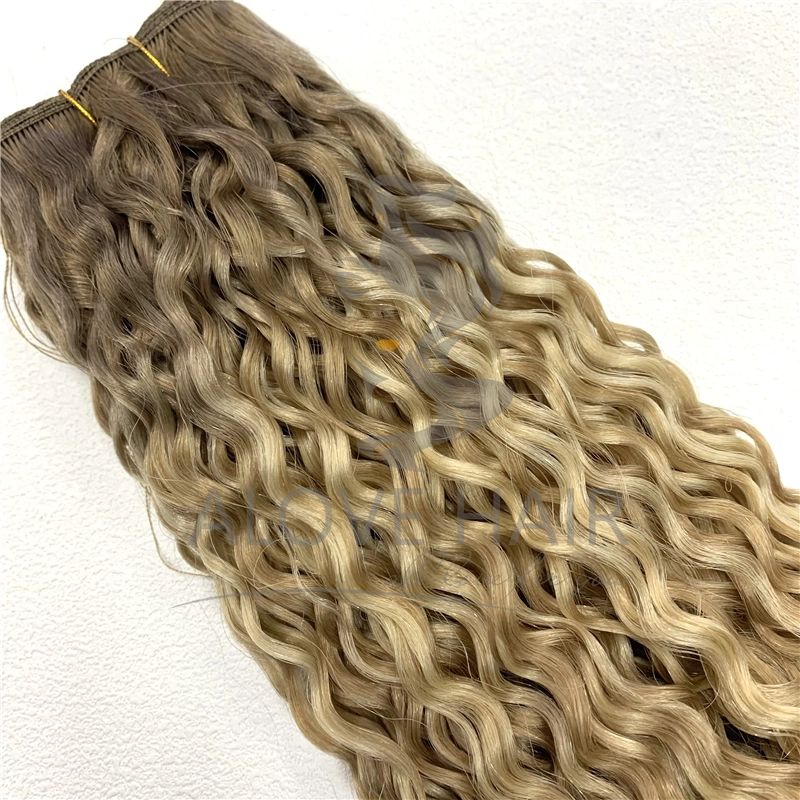
Hand tied weft extensions are thin, flexible hair wefts that are carefully sewn by hand into a fine, flat strip. Unlike machine wefts, they’re lightweight, lie closer to the scalp, and are designed to blend seamlessly with natural hair.
They are typically installed using a bead-and-sew method:
- Small silicone-lined beads are placed along a row
- A track is created using your natural hair
- The wefts are then sewn onto this base
The result? A natural, flat, comfortable finish that doesn’t scream “extensions.”
Before and After: What Changes Can You Expect?
Let’s get realistic—this isn’t a magic spell, but it can feel close.
Before: Common Hair Concerns
- Thin or fine hair lacking volume
- Uneven lengths from previous cuts
- Hair breakage or damage
- Slow hair growth frustration
- Flat, lifeless appearance
After: Typical Results
- Instantly fuller, thicker hair
- Increased length (often 4–10+ inches)
- Better shape and layering
- Improved styling versatility
- Enhanced overall confidence
The transformation is not just visual—it changes how your hair behaves. Styling becomes easier, and volume holds longer.
Why Choose Hand Tied Wefts Over Other Extensions?
There are plenty of extension types out there—tape-ins, clip-ins, fusion bonds—but hand tied wefts stand out for a few key reasons.
Key Advantages
1. Natural Look
The wefts are ultra-thin, making them nearly invisible when installed correctly.
2. Lightweight Feel
You won’t feel like you’re carrying extra weight on your head all day.
3. Less Damage (When Done Properly)
No glue, no heat—just beads and thread.
4. Long-Term Wear
Typically lasts 6–8 weeks before needing adjustment.
5. Reusable Hair
High-quality wefts can be reused multiple times.
Step-by-Step: How Hand Tied Weft Extensions Are Installed
Here’s where things get technical—but understanding this helps you get better results.
Step 1: Consultation and Hair Matching
Before anything touches your hair:
- Match color precisely (including highlights/lowlights)
- Determine length and volume needed
- Evaluate hair density and scalp condition
Skipping this step is like ordering clothes without checking size—possible, but risky.
Step 2: Sectioning the Hair
Hair is divided into clean horizontal sections:
- Usually 1–3 rows depending on desired volume
- Lower rows = length
- Upper rows = volume and blending
Precision here ensures the extensions remain hidden.
Step 3: Creating the Beaded Foundation
- Small beads are attached to sections of your natural hair
- Beads are aligned in a row along the scalp
- Spacing must be even to distribute weight
This creates a “track” that supports the wefts.
Step 4: Sewing the Wefts
- The hand tied wefts are placed along the bead row
- A thread is used to sew the weft securely onto the beads
- Multiple wefts can be layered for more volume
The key here is tension—too tight causes discomfort, too loose leads to slipping.
Step 5: Blending and Cutting
After installation:
- Hair is trimmed and layered
- Extensions are blended with natural hair
- Face-framing pieces are customized
This step is what separates “nice extensions” from “wow, is that all your hair?”
Step 6: Styling the Final Look
The stylist typically:
- Blow-dries
- Curls or straightens
- Shows the final transformation
This is your “after” moment—and yes, it’s usually very satisfying.

Before and After Timeline: What Happens Over Time?
The transformation isn’t just instant—it evolves.
Immediately After Installation
- Hair looks fuller and longer
- Slight tightness may be felt (normal for 1–2 days)
After 1–2 Weeks
- Hair settles naturally
- Styling becomes easier
After 4–6 Weeks
- Natural hair growth loosens the beads
- Extensions may feel lower
After 6–8 Weeks
- Time for maintenance (move-up appointment)
How to Care for Hand Tied Weft Extensions at Home
If you want your “after” to stay looking like day one, maintenance is everything.
Washing Routine
Frequency: 2–3 times per week
Steps:
- Brush before washing
- Use sulfate-free shampoo
- Wash gently (no aggressive scrubbing)
- Condition mid-lengths to ends
- Rinse thoroughly
Drying Tips
- Pat dry with a towel (no rubbing)
- Air dry when possible
- If blow-drying, use heat protectant
Never sleep with wet extensions—it can cause tangling and tension damage.
Brushing Technique
- Use a loop brush or extension-friendly brush
- Hold the roots while brushing to avoid pulling
- Start from ends → move upward
Sleeping Care
- Tie hair in a loose braid or ponytail
- Use a silk or satin pillowcase
This reduces friction and tangling overnight.
Styling Tips
- Limit high heat
- Avoid oils near the bead area
- Use lightweight products
Heavy products can cause buildup and slipping.
Common Mistakes That Ruin Before-and-After Results
Let’s avoid the extension horror stories.
1. Poor Installation
- Uneven beads
- Visible wefts
- Incorrect tension
2. Wrong Hair Match
- Color mismatch
- Texture mismatch
3. Skipping Maintenance
- Leads to tangling and matting
4. Overloading with Too Many Wefts
- Causes strain on natural hair
5. Improper Home Care
- Product buildup
- Excessive heat damage
Who Are Hand Tied Weft Extensions Best For?
They’re ideal if you have:
- Fine to medium hair
- Medium to long natural hair
- Desire for natural-looking volume and length
They may not be ideal if:
- Hair is extremely short
- Scalp is very sensitive
- Severe hair loss is present
Cost vs Value: Are They Worth It?
Let’s talk numbers (rough estimates):
- Installation: $200–$800
- Hair: $300–$1000+
- Maintenance: $100–$300 every 6–8 weeks
Yes, it’s an investment. But compared to daily frustration with thin or uneven hair, many people find it worth every dollar.
Realistic Before and After Expectations
A quick reality check:
- Extensions don’t fix damaged natural hair—they enhance appearance
- Maintenance is required
- Results depend heavily on the stylist’s skill
That said, when done correctly, the transformation is one of the most natural-looking in the extension world.
Final Thoughts
Hand tied weft extensions are one of the most effective ways to achieve a natural, seamless hair transformation. The “before and after” results can be dramatic—but they’re built on technique, proper installation, and consistent care.
If you:
- Choose the right hair
- Work with a skilled stylist
- Follow a solid maintenance routine
You’ll get results that look effortless—even though there’s quite a bit going on behind the scenes.
And honestly, that’s the goal: hair that looks so good people assume you just “woke up like this”… even if your morning routine tells a slightly different story.
Alove Hair is a professional Chinese manufacturer of premium 100% Remy human hair extensions, wigs, and hair systems. Established in 2014, the company specializes in supplying global salons and distributors with high-quality, cuticle-intact hair products and offers comprehensive OEM/ODM private label services.