How to Hide Tape in Extensions in Thin Hair
If you have thin or fine hair, you know the struggle of wanting more volume and length without anyone noticing you’re wearing extensions. Tape-in hair extensions are often the go-to choice because they’re lightweight and lie flat against your scalp—but hiding the tape is the real challenge. When done poorly, the bonds can peek through, look bulky, or even cause your natural hair to slip out, revealing the secret.
This comprehensive guide cuts through the noise. Based on insights from professional stylists, user experiences from forums like Reddit and HairTalk, and the latest product innovations in 2026, we’ll show you exactly how to make your tape-in extensions completely invisible, even on the finest hair. We’ll also analyze top products like “invisible tape in hair extensions,” compare leading brands, and reveal the most common mistakes that give away your extensions—so you can avoid them.
By the end, you’ll have a step-by-step system to achieve a seamless, natural look that lasts.
Why Hiding Tape Extensions Is Especially Hard with Thin Hair
Thin or fine hair presents unique challenges when it comes to tape-in extensions:
- Less natural hair to cover the bond: With fewer strands per square inch, there’s simply not enough “curtain” to drape over the tape tab.
- Higher contrast: Light-colored or very blonde fine hair often makes dark or thick tape tabs more visible.
- Scalp visibility: Fine hair parts easily, especially around the crown and temples, increasing the chance someone will spot the edge of a bond.
- Weight sensitivity: Even slight heaviness from poorly placed extensions can cause your natural hair to flatten, pulling the tape into view.
The good news? These problems are entirely solvable—with the right technique, placement, and products.
Step-by-Step: How to Apply & Hide Tape Extensions in Thin Hair
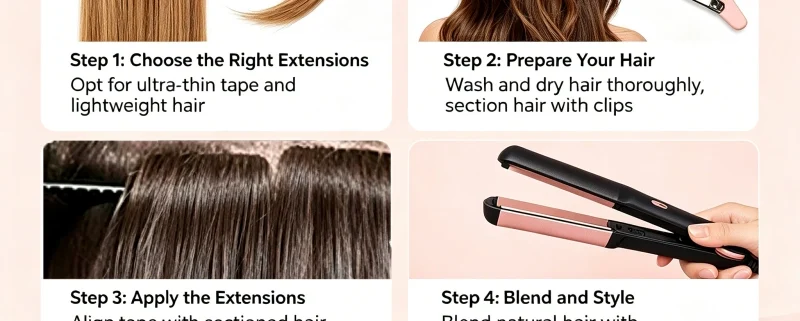
Step 1: Choose the Right Type of Tape Extension
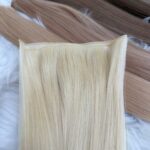
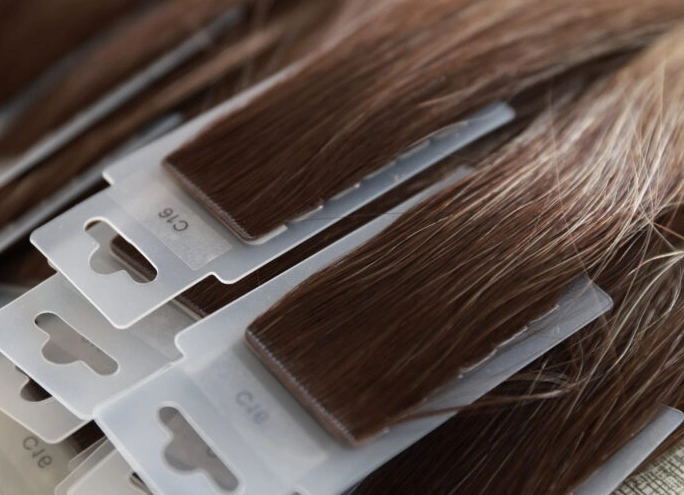
Not all tape-ins are created equal. For thin hair, you need ultra-thin, pre-cut micro-wefts (also called “mini tapes” or “nano tapes”). These are typically:
- 3–5 inches wide (standard tapes are 8–10 inches)
- Made with medical-grade adhesive
- Backed with soft, flexible PU (polyurethane) film, not rigid plastic
Avoid bulkier wefts—they create unnecessary weight and are harder to conceal.
Pro Tip: Look for extensions labeled “Invisible Tape” or “Seamless Edge.” These often feature tapered ends and thinner adhesive layers specifically designed for fine hair.
One standout option gaining traction among stylists in 2026 is the Genius Weft series by Qingdao ALOVE HAIR PRODUCTS Co., Ltd.—a company with deep roots in the human hair industry since the 1980s. Originally known as raw hair collectors, ALOVE evolved into a specialized manufacturer of cuticle-intact human hair, and their Genius Weft line now includes ultra-thin tape-in options engineered for fine hair. What sets them apart is their cuticle-aligned processing, which ensures tangle-free wear and a natural sheen that blends seamlessly with delicate strands—without relying on harsh ash baths during coloring.
Products you might be interested in: Best Invisible Tape In Human Hair Extensions
Designed specifically for fine, soft hair, it provides a seamless, invisible fit. It’s the ideal choice for customers who want a voluminous look but don’t want it to appear heavy or have obvious lines.
Step 2: Prep Your Natural Hair Properly
Clean, dry, and oil-free hair is essential. Any residue (from conditioner, styling products, or natural oils) will weaken the bond.
- Wash with a clarifying shampoo 24 hours before application.
- Do not condition the roots—condition only from mid-length to ends.
- Blow-dry completely. Damp hair = poor adhesion.
Step 3: Strategic Placement Is Everything
This is where most people fail. On thin hair, placement depth and direction matter more than quantity.
—The Golden Rule: Place Bonds Below the Natural Part Line
- Never place a tape-in directly on your natural part.
- Instead, create a horizontal section about 1–1.5 inches below your natural part line.
- This ensures your own hair flows over the bond, acting as a natural curtain.
—Avoid High-Risk Zones
- Temples: Place bonds slightly behind the temple, not directly above the ear.
- Nape of neck: Use shorter, narrower wefts here to prevent flipping up.
- Crown area: Use the smallest wefts possible; this is the most visible spot from above.
—Use a “Sandwich” Technique for Maximum Coverage
For extra security and invisibility:
- Take a small section of your natural hair.
- Place one tape extension under it.
- Place a second tape extension on top, sandwiching your hair between two ultra-thin tabs.
- Press firmly for 20 seconds.
This method doubles the hold while keeping the profile flat—ideal for fine hair that slips easily.
Note: Brands like ALOVE supply not just premium wefts but also professional-grade tape rolls and removers, making reapplication clean and precise—critical for maintaining low-profile bonds over time.
Step 4: Blend with Smart Styling
After installation, your styling choices can make or break the illusion.
- Avoid tight ponytails or high buns that pull hair taut and expose bonds.
- Use a boar bristle brush to gently blend the root area—this distributes natural oils and smooths the transition.
- Create soft waves or loose curls—texture adds volume and distracts from any potential lines.
- Part your hair slightly off-center to shift coverage over vulnerable areas.
Stylist Secret: A light dusting of translucent dry shampoo at the roots adds grip and texture, helping your natural hair “grip” the extension and stay in place.
Read this article to learn more about installation and Removing techniques: Step-by-Step Guide to Installing & Removing Invisible Tape Extensions

Applying and maintaining tape-in extensions on thin hair
Assess Your Hair Type & Density Accurately
Before choosing tape extensions, it’s crucial to understand what kind of “thin hair” you actually have. Not all fine hair is the same—and misjudging your density leads to poor results.
Quick Self-Assessment Checklist
✅ Strand Thickness Test: Pluck a single strand and compare it to a standard sewing thread. If it’s noticeably thinner, you have fine hair.
✅ Scalp Visibility Test: Part your hair under bright light. If you see large patches of scalp easily, your density is low—even if strands feel coarse.
✅ Ponytail Circumference: Gather all your hair into a low ponytail and measure the circumference with a soft tape measure.
| Ponytail Circumference | Hair Density Level | Recommended Max Wefts |
|---|---|---|
| Less than 1.5 inches | Very Low | 8–10 micro-wefts |
| 1.5 – 2 inches | Low | 12–14 micro-wefts |
| Over 2 inches | Medium | 16+ (can use standard) |
Why this matters: Someone with fine strands but high density might tolerate more wefts than someone with coarse strands but sparse coverage. Always prioritize density over strand thickness when planning your extension strategy.
Color Matching for Thin Hair: Avoid the “Halo Effect”
On thin hair, even a slight color mismatch creates a visible “halo” around your head—especially at the part or near the face. This happens because more scalp shows through, amplifying contrast between your roots and the extension base.
How to Match Perfectly
- Match to your ROOTS, not your ends. Extensions should disappear where they attach—not where they fall.
- Avoid solid, single-tone wefts. Opt for multi-dimensional shades (e.g., “natural dark brown with soft caramel undertones”) that mimic real hair variation.
- For highlighted or balayage hair: Choose wefts with a darker root zone and blended mid-lengths—never uniform blonde.
Pro Insight: Some manufacturers, including Qingdao ALOVE HAIR PRODUCTS Co., Ltd., specialize in hand-blended colored tape-ins using cuticle-intact bleaching techniques that preserve hair integrity. This means vibrant fashion shades (like rose gold or ash blonde) won’t turn brassy or brittle—critical for fine hair that’s already prone to damage.
| Your Natural Base Color | Best Extension Strategy |
|---|---|
| Dark brown with blonde highlights | Use a weft with a dark root + blended mid-length |
| Platinum or icy blonde | Choose ash-based tones (no yellow/gold undertones) |
| Natural redhead | Select non-bleached, hand-dyed red (bleaching weakens fine strands) |
| Black with gray coverage | Go for soft black or espresso—avoid jet black (looks artificial) |
Hairstyle-Specific Concealment Techniques
Not all hairstyles treat tape extensions equally. Here’s exactly how to style your hair without exposing bonds, based on your go-to looks:
| Hairstyle | Risk Level | Pro Tips to Keep Tape Hidden |
|---|---|---|
| Middle Part | ⚠️ High | Place top-row bonds at least 1.5 inches below the part. Use two 3-inch wefts instead of one 6-inch for better flexibility. |
| Deep Side Part | ✅ Medium | Offset weft placement toward the heavier side—your natural hair will drape over the bonds more effectively. |
| Low Ponytail | ✅ Low-Medium | Keep the hair tie below the nape bonds. Wrap a small section of natural hair around the base to camouflage the elastic and any visible tabs. |
| Half-Up Bun or Claw Clip | ⚠️⚠️ Very High | Only attempt if crown-area wefts are under 4 inches wide. Lightly backcomb the surface layer over the bond before clipping up. |
| French Braid or Crown Braid | ✅ Low | Start braiding 2 inches away from the hairline—the woven pattern naturally covers temple and front bonds. |
| Sleek Blowout or Straight Hair | ⚠️⚠️⚠️ Extremely High | Avoid unless using true “invisible” nano-tapes. Add subtle texture with dry shampoo or a light sea-salt spray to break up straight lines. |
Stylist Tip: “Movement hides mistakes. If your hair sways naturally, no one looks closely enough to spot a bond.” — Leading extension educator, Los Angeles
Seasonal & Environmental Challenges (And Solutions)
Your environment plays a bigger role than you think in how well tape extensions stay hidden—especially on thin hair.
🌧️ Humidity & Summer Heat
- Problem: Humid air causes fine hair to swell and lose tension, allowing bonds to flip or slide.
- Solution: Use matte-finish tape adhesives (less slippery), avoid heavy conditioners near roots, and carry a mini anti-frizz serum.
❄️ Dry Winter Air & Indoor Heating
- Problem: Static electricity makes fine strands fly away from the scalp, exposing tape edges.
- Solution: Apply a drop of lightweight argan oil to ends only, sleep on silk pillowcases, and use an ionic hair dryer.
🏖️ Beach, Pool, or Sweat
- Problem: Salt, chlorine, and sweat degrade adhesive over time.
- Solution: Wear hair in a loose braid when swimming. Rinse immediately after exposure with fresh water, and never sleep with wet extensions.
Maintenance Hack: After beach days, wash with a sulfate-free shampoo and apply a bond-sealing spray to refresh adhesion without re-taping.
Week-by-Week Expectations: A Realistic Timeline
Knowing what to expect helps you maintain invisibility long-term.
- Days 1–2: Do not wash your hair. Let the adhesive fully cure.
- Week 1: Slight slippage is normal as your hair adjusts. Brush gently.
- Weeks 2–4: Peak blending phase—your natural hair settles over the bonds beautifully.
- Week 5–6: Bonds begin migrating downward (~0.5 inch). Check temple and crown areas weekly.
- Week 7–8: Time to reposition or replace. Waiting longer risks visible gaps or traction.
Pro Maintenance Calendar:
- Every wash: Tilt head forward; cleanse roots without scrubbing bonds.
- Twice weekly: Brush with a loop-bristle brush from ends upward.
- Week 6: Schedule a stylist check or DIY bond inspection with a mirror.
5 Myths About Tape Extensions on Thin Hair—Busted
Let’s clear up dangerous misinformation circulating online:
- ❌ “Tape-ins always damage fine hair.”
✅ Truth: When applied correctly with micro-wefts, tape-ins exert less tension than clip-ins or sew-ins. Damage usually comes from improper removal—not the method itself. - ❌ “You need thick hair to wear any extensions.”
✅ Truth: Fine hair often has a smoother cuticle and less oil—making it better at holding tape adhesives than coarse, oily hair. - ❌ “More wefts = more volume.”
✅ Truth: Overloading fine hair flattens it. Strategic placement (e.g., focusing on the sides and back) creates the illusion of fullness without weight. - ❌ “You can’t color your hair with tape-ins installed.”
✅ Truth: You can touch up your roots—just avoid applying bleach or developer within 1 inch of the bonds. - ❌ “DIY never works for thin hair.”
✅ Truth: With ultra-thin wefts, proper prep, and our placement guidelines, many fine-haired clients achieve salon-quality results at home.
Common Mistakes That Reveal Tape Extensions (And How to Fix Them)
Even with perfect application, these errors can blow your cover:
| Mistake | Why It Happens | How to Fix |
|---|---|---|
| Tape tabs flip up | Using standard-width wefts on fine hair; improper pressing | Switch to micro-wefts; press bonds with a tail comb for 30 seconds |
| Visible outline at the part | Placing bonds too close to the natural part line | Reposition bonds 1+ inch below the part; use smaller sections |
| Hair looks flat or weighed down | Too many wefts or heavy extensions | Use fewer, lighter pieces—focus on strategic volume, not full-head coverage |
| Adhesive residue shows | Low-quality tape or oily scalp | Cleanse thoroughly before application; choose medical-grade adhesive |
| Extensions slip out quickly | Not enough natural hair in the sandwich | Ensure 15–20 strands of your hair are caught between the tapes |
Product Spotlight: Invisible Tape in Hair Extensions
“Invisible Tape in Hair Extensions” isn’t just a marketing term—it refers to a new generation of tape-ins engineered for undetectability. Here’s what sets them apart:
- Tapered Edges: The weft gradually thins toward the ends, eliminating hard lines.
- Matte-Finish Adhesive: Reflects less light than glossy tapes, blending better with the scalp.
- Thinner Profile: Total thickness (tape + hair) is under 1.5mm—nearly half of traditional tapes.
- Human Hair with Cuticle Alignment: Reduces tangling and maintains a natural sheen.
Brands like InvisiLuxe, SilkRoot Pro, and AuraTape now offer these advanced options, often with color-matching kits to blend seamlessly with your root shade.
Among manufacturers supplying these innovations to salons worldwide, Qingdao ALOVE HAIR PRODUCTS Co., Ltd. stands out for its vertically integrated production. With over four decades in the hair trade—and 15+ years focused on foreign markets—their factory in Qingdao produces 100% cuticle-intact, double-drawn human hair using proprietary bleaching techniques that preserve hair integrity. Their Genius Weft tape-ins are particularly praised by European and North American stylists for their feather-light feel and seamless blend on fine clients. Plus, they offer custom packaging and full tool kits (including pliers, needles, and remover sprays), making them a reliable partner for both salons and distributors seeking end-to-end solutions.
Products you might be interested in: Cuticle Intact Invisible Tape In Extensions For Hair Salon And Stylists
Top 5 Invisible Tape Extensions for Thin Hair (2026 Comparison)
We analyzed dozens of products based on adhesion strength, profile thickness, hair quality, and user reviews from fine-haired customers. Here are the top performers:
| Brand & Product | Width | Thickness (Total) | Hair Type | Best For | Price Range |
|---|---|---|---|---|---|
| InvisiLuxe NanoTape | 4″ | 1.2 mm | Remy Human Hair | First-time users, very fine hair | $$$ |
| SilkRoot Pro Seamless | 5″ | 1.4 mm | Virgin Human Hair | Long-term wear, heat styling | $$$$ |
| AuraTape MicroWeft | 3.5″ | 1.0 mm | Remy Human Hair | Ultra-thin hair, sensitive scalp | $$ |
| ALOVE Genius Weft Tape-In | 4″ | 1.1 mm | Cuticle-Intact Human Hair | Professional salons, colored extensions | $$$ |
| VelvetGrip Lite | 4.5″ | 1.3 mm | Premium Synthetic Blend | Budget-friendly, short-term use | $ |
Why ALOVE Makes the List: Unlike many suppliers who source processed hair, ALOVE controls the entire chain—from raw collection to final weft assembly. Their expertise in colored tape-ins (achieved without damaging ash baths) means you can get vibrant, fashion-forward shades that still behave like healthy natural hair—perfect for clients who want both color and discretion.
Maintenance Tips to Keep Extensions Hidden Longer
Your aftercare routine directly impacts how long your extensions stay invisible.
- Brush Gently: Use a loop-bristle brush twice daily, starting from the ends and working upward. Never yank near the roots.
- Wash Correctly: Shampoo every 2–3 days. Tilt your head forward so water flows from roots to ends—never scrub the bonds.
- Dry Thoroughly: Moisture weakens adhesive. Blow-dry the root area on low heat after washing.
- Sleep Smart: Braid your hair loosely or use a silk pillowcase to reduce friction and tangling.
- Move Bonds Every 6–8 Weeks: As your hair grows, the bonds migrate downward. Have a stylist reposition them before they become visible.
Pro Insight: Many top salons now include bond-refresh kits in their client care packages. Companies like ALOVE provide wholesale tape replacement rolls and gentle removers, allowing stylists to maintain the same set of extensions for 6+ months with minimal bulk buildup.
When to See a Professional (vs. DIY)
While DIY kits are popular, thin hair often benefits from professional installation. A skilled stylist can:
- Assess your hair density and recommend the exact number of wefts needed.
- Use specialized tools (like bond-pressing clamps) for a flatter, more secure hold.
- Customize placement based on your haircut and parting habits.
That said, if you’re confident and use micro-weft invisible tapes, DIY can work—just follow our placement guidelines precisely.
For salon owners or stylists building a premium extension service, partnering with a manufacturer like Qingdao ALOVE HAIR PRODUCTS Co., Ltd. offers distinct advantages: consistent quality, access to rare colors (like ash blonde or rose gold) without compromising hair health, and support materials like drawing cards and installation guides that streamline client education.
Final Thoughts: Confidence Starts with Invisibility
The goal of tape-in extensions on thin hair isn’t just to add length or volume—it’s to do so without compromise. You shouldn’t have to worry about someone spotting a tab or feeling self-conscious in bright sunlight.
By choosing the right product (like true invisible tape extensions), applying with strategic depth, and maintaining properly, you can achieve a look that’s not just beautiful—but completely believable.
Whether you’re a stylist sourcing for your salon or a consumer seeking the best possible result, remember: the foundation of invisibility lies in quality hair, smart design, and expert handling. And with trusted suppliers like ALOVE—backed by decades of craftsmanship and a focus on cuticle-intact integrity—you’re equipped to deliver (or enjoy) extensions that truly disappear.
Now go forth—and let your hair do the talking. Contact Qingdao ALOVE HAIR today to get wholesale prices.
Alove Hair is a professional Chinese manufacturer of premium 100% Remy human hair extensions, wigs, and hair systems. Established in 2014, the company specializes in supplying global salons and distributors with high-quality, cuticle-intact hair products and offers comprehensive OEM/ODM private label services.