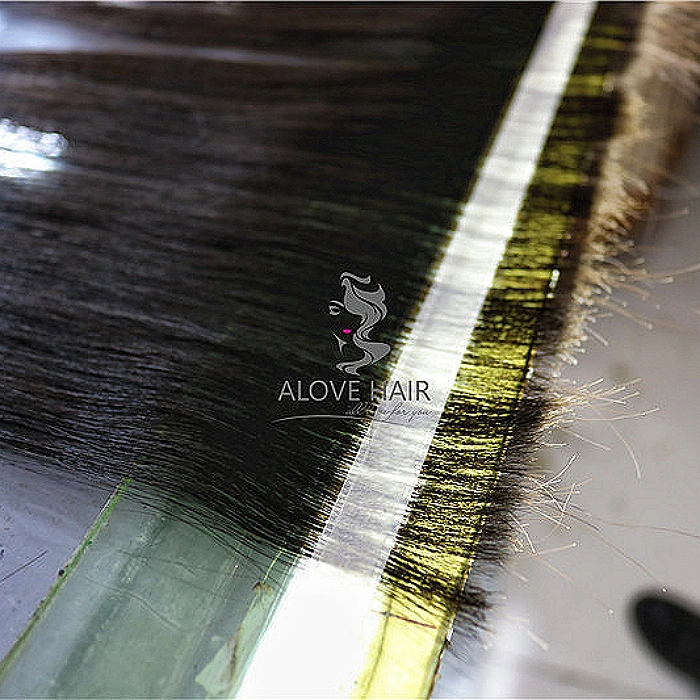
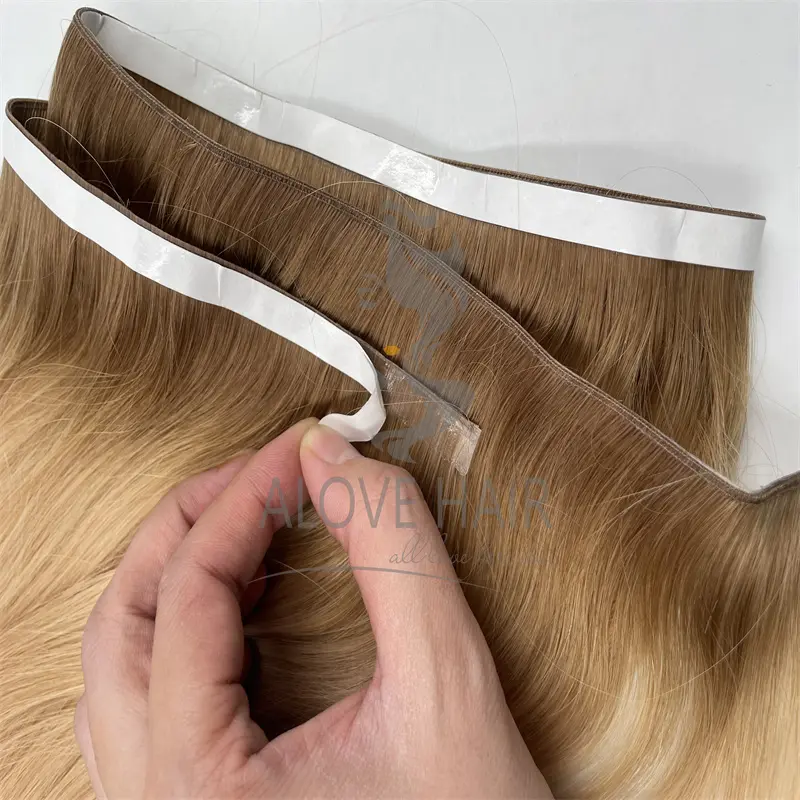
Genius Weft Hair Extensions are the latest innovation in the world of hair extensions, offering a flawless blend of durability, versatility, and ultra-natural results. Unlike traditional wefts such as machine wefts or hand-tied wefts, genius wefts are incredibly thin, flat, and flexible—making them virtually undetectable when installed correctly. What sets them apart is their ability to be cut anywhere along the weft track without unraveling, allowing for full customization to suit any head shape or hair density.
Compared to hand-tied wefts, which cannot be cut and may feel bulky in certain areas, genius wefts offer a more seamless and adaptable solution. Unlike tape-in extensions that use adhesive and often require more frequent maintenance, genius wefts are typically sewn or beaded into the natural hair, making them a longer-lasting, damage-minimizing alternative. They also outperform machine wefts in terms of comfort and natural movement due to their thinner design.
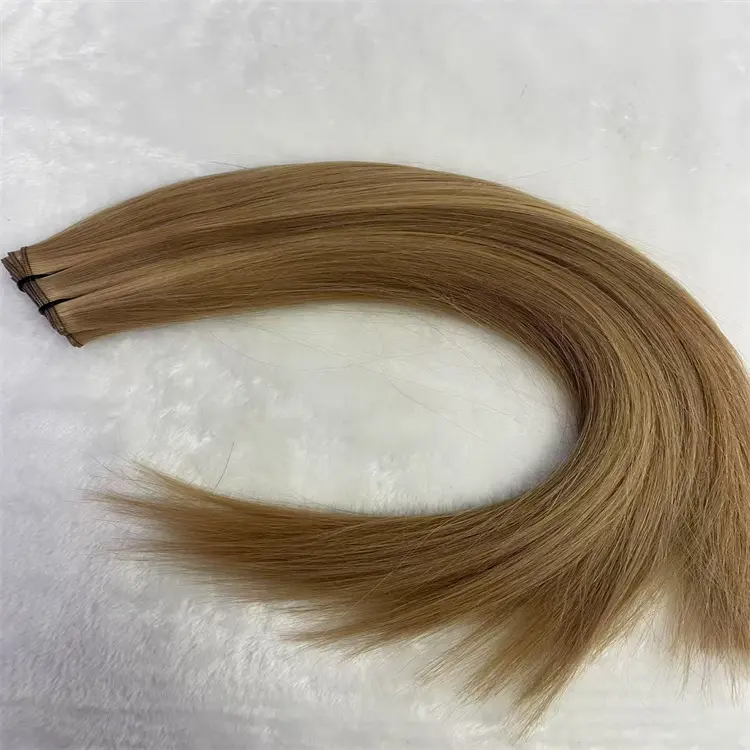
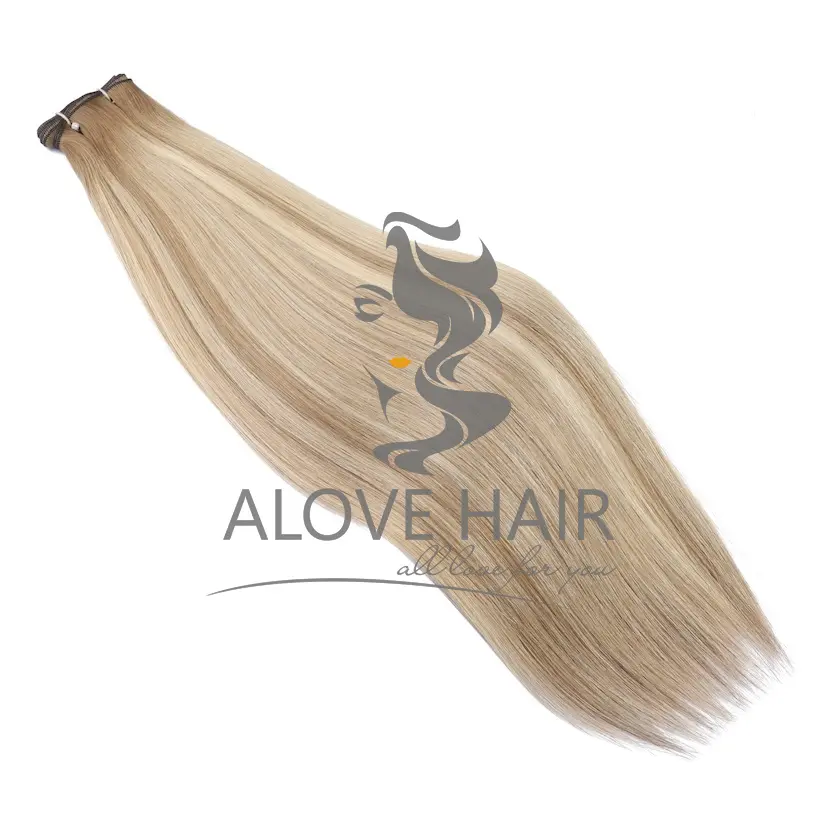
Genius wefts are ideal for a wide range of hair types, especially those with fine to medium hair. Because they lay flat against the scalp and distribute weight evenly, they minimize tension and discomfort, even with extended wear. Their lightweight structure makes them perfect for clients seeking volume and length without compromising hair health or scalp comfort. Whether you're aiming for a fuller look, added length, or just want a low-maintenance yet luxurious extension option, genius wefts provide a professional finish with maximum styling flexibility and minimal visibility.
What You'll Need
Before you begin installing your Genius Weft Hair Extensions, make sure you have all the essential tools and materials ready. A well-prepared setup ensures a smoother process and more professional-looking results.
Genius Weft Hair Extensions – We recommend using Alove Hair genius wefts for their premium quality and softness. These extensions are ultra-thin, flexible, and can be cut anywhere along the weft track without unraveling—ideal for a customized and seamless fit.

Alove Hair Genius Weft – thin, flexible, and cuttable without fraying
Sectioning Clips – These help divide the hair into clean, manageable sections during installation. They keep the hair neatly out of the way so you can work with precision.
Rat-Tail Comb – This fine-tooth comb with a pointed end is essential for parting the hair and achieving sharp, even sections.
Thread and Curved Needle – If you're using the sew-in method, you'll need a strong weaving thread that matches your hair color and a curved needle to securely stitch the wefts into place.
Beads and Pliers – For the beaded method, you'll need silicone-lined microbeads and pliers to clamp them. This method doesn’t require braids and is often quicker and more comfortable.
Scissors – Used for trimming the wefts to the desired length or shape. A sharp pair of salon-quality scissors will help you avoid fraying and ensure clean cuts.
Heat Protectant – If you plan to use styling tools like a flat iron or curling wand, a heat protectant spray is essential to prevent damage to both your natural hair and the extensions.
Optional: Pulling Hook & Extra Microbeads – A pulling hook simplifies the process of threading natural hair through microbeads, especially useful for beginners. Extra beads are handy in case you drop or damage a few during the process.

Having everything prepared beforehand will help make your installation smooth, efficient, and salon-worthy from the start.
Pre-Installation Prep
Proper preparation is key to achieving a seamless and long-lasting installation of Genius Weft Hair Extensions. Before starting the process, follow these essential steps to ensure a clean base and precise sectioning.
Start by thoroughly washing the natural hair using a clarifying shampoo to remove any product buildup, oils, or residue. Avoid using conditioner at this stage, as it can leave a slippery coating on the hair strands that may affect the grip of the weft or beads. Once the hair is clean, blow-dry it completely. Installing wefts on damp or oily hair can lead to slippage and reduced durability.
After drying, brush through the hair carefully using a detangling brush or wide-tooth comb. It’s important that the hair is completely tangle-free, especially at the roots, where the extensions will be installed. Any knots or matting can interfere with clean sectioning and lead to discomfort during wear.
The next and most critical step is sectioning the hair. This should be done according to the client's head shape, density, and desired final look. Use a rat-tail comb to create horizontal partings across the back of the head, starting from the nape and working upward. Typically, the first row of wefts is installed about an inch above the nape to allow for natural movement and to prevent the extensions from being visible when the hair is worn up. Leave enough hair at the top and sides to completely cover the wefts and blend with the extensions.
Precision during sectioning will ensure the wefts lay flat, feel comfortable, and remain invisible for a flawless finish. Take your time with this step—it sets the foundation for the entire install.

Installation Methods
There are several effective ways to install Genius Weft Hair Extensions depending on the client’s hair type, desired longevity, and personal comfort. Below are three of the most common and recommended methods: the Beaded Weft Method, the Sew-In Method, and the Hybrid Method. Each has its unique approach and benefits.
1. Beaded Weft Method (Most Common)
The beaded weft method is a popular, non-invasive technique that provides a secure hold without the need for braiding or glue. It’s ideal for those looking for a flexible, lightweight install.
Begin by parting a clean, horizontal section of hair across the back of the head. The section should be about an inch thick, starting from the nape and working your way up layer by layer.
Using a pulling hook, grab a small section of natural hair and slide it through a silicone-lined microbead.
Place the Genius Weft against the bead, aligning the weft track with the bead’s position.
Use pliers to clamp the bead shut, securing both the weft and the natural hair in place.
Repeat this process across the full row and continue sectioning upward until the desired coverage is achieved.
This method is low-tension, reusable, and easy to maintain. It also allows for repositioning every 6–8 weeks as the natural hair grows.
2. Sew-In Method
The sew-in method is a more traditional technique that provides a very secure and long-lasting attachment. It works best on clients with medium to thick hair that can support braiding.
Start by creating cornrow braids (tight horizontal braids) across the back of the head where the wefts will be attached. These braids act as the anchor foundation for stitching.
Thread a curved needle with strong weaving thread that matches the client's hair color.
Carefully sew the Genius Weft into the braids by looping the needle under the braid and through the weft track, pulling the thread tight each time for a firm attachment.
Secure the ends with a knot and trim excess thread as needed.
This method is excellent for clients who want their extensions to last 8+ weeks without frequent adjustment. However, it’s slightly more time-intensive and requires precise braiding and stitching skills.

3. Hybrid Method (Bead + Stitch)
The hybrid method combines the strengths of both the beaded and sew-in techniques, offering a balance between flexibility and durability. It’s especially beneficial for clients with fine or slippery hair, where wefts are more prone to slipping.
Begin by applying microbeads along a clean, horizontal section of hair using the beaded method described above.
Once the beads are in place and holding the weft, take a curved needle and thread, and stitch the weft through and around each bead for added support.
This method adds extra reinforcement and minimizes the chances of the weft shifting or slipping over time.
It also distributes tension more evenly, reducing strain on individual strands and making the install more comfortable.
The hybrid method is a favorite among stylists who want the customizability of beaded installs with the security of a sewn attachment. It works well for active clients or those who style their hair frequently.
No matter which installation method you choose, the key to a flawless finish lies in clean sectioning, tension control, and strategic placement. Always consider the client’s lifestyle, hair condition, and styling habits when selecting the most suitable method.
Blending & Styling
Once your Genius Weft Hair Extensions are installed, the next step is blending and styling to create a seamless, natural look. Proper finishing techniques ensure that the extensions integrate perfectly with your natural hair for effortless beauty.
Start by trimming the extensions to match the length and layers of your natural hair. This step is crucial, especially if the extensions are longer or thicker than your own hair. Use sharp hair-cutting scissors and trim vertically with a point-cutting technique to soften the ends and avoid a blunt, unnatural line. For best results, style the hair first before trimming so you can see how it naturally falls and blends.
Next, use a flat iron or curling wand to style the hair. Since Genius Wefts are made from high-quality human hair (like those from Alove Hair), they can be heat styled just like your own. Always apply a heat protectant before using any hot tools to maintain the integrity of both your natural hair and the extensions. Whether you’re going for sleek and straight or soft waves, styling helps the extensions move and flow more naturally with your own hair.
To conceal the weft seam, use the top layer of your natural hair to cover the attachment points. Leave enough hair out during the sectioning phase to ensure full coverage. Light teasing at the roots or using a bit of volumizing spray can also help lift the top layer and add extra camouflage.
Blending is where the magic happens—take your time, style thoughtfully, and the wefts will be virtually undetectable.

Aftercare Tips
Taking care of your Genius Weft Hair Extensions properly will significantly extend their lifespan and keep them looking fresh and natural. Here are some essential aftercare tips to maintain the health and appearance of both your natural hair and the extensions.
1. Use Sulfate-Free Shampoo and Conditioner
Always choose sulfate-free and alcohol-free hair products. Harsh chemicals in traditional shampoos can strip moisture from the extensions and weaken the weft bond, causing dryness, tangling, and even premature shedding. Gently cleanse your scalp and hair with lukewarm water, and avoid scrubbing too aggressively. Apply conditioner from mid-length to ends, never directly at the roots or weft attachment points.
2. Prevent Tangling with Smart Night Care
To reduce friction and tangling while you sleep, loosely braid your hair at night or wear it in a low ponytail. Better yet, switch to a silk or satin pillowcase, which is much gentler on your hair than cotton. These small changes prevent unnecessary pulling, matting, and frizz.
3. Schedule Maintenance Every 6–8 Weeks
Even the best-installed wefts will require adjustments as your natural hair grows. Plan to visit your stylist every 6 to 8 weeks for maintenance, which may include re-positioning, tightening, or replacing beads. Ignoring maintenance can lead to visible tracks or strain on your natural hair.
4. Avoid Tension, Overheating, and Pulling
Excessive heat styling, tight ponytails, or tugging at the extensions can cause breakage or damage to the wefts and your own hair. Always use a heat protectant when styling, and limit the use of flat irons or curling wands to a few times per week. When brushing, use a soft-bristle or loop brush, starting at the ends and working your way up to avoid pulling on the wefts.
By following these aftercare tips consistently, you can enjoy your Genius Weft Hair Extensions for longer—often up to several months with proper maintenance—and keep your hair looking salon-fresh every day.
Troubleshooting & Common Mistakes
Even with careful installation and maintenance, issues can sometimes arise when wearing Genius Weft Hair Extensions. Recognizing common mistakes and knowing how to address them can help preserve your style and protect your natural hair.
1. Weft Slipping or Falling Out
If a weft begins to slip or completely falls out, it’s usually due to improper application or product buildup on the scalp and strands. Natural oils, conditioner, or styling products can weaken the grip of beads or thread.
What to do:
Reinstall the weft using clean, dry hair and ensure that the bead or stitching is placed securely.
Avoid heavy leave-in conditioners or oil-based products near the roots.
Make sure the microbeads are properly clamped and the hair section inside the bead is thick enough to hold weight.
If this continues to happen, consult your stylist to evaluate whether your hair type needs a different method (e.g., Hybrid instead of Beaded).
2. Tight Installation Causing Scalp Pain
If you feel discomfort, soreness, or tension on your scalp within hours or days after installation, the wefts may have been installed too tightly. This can cause hair breakage, inflammation, or even traction alopecia over time.
What to do:
Inform your stylist immediately—extensions should never hurt.
Loosen or reinstall the wefts to reduce tension.
Avoid tying the hair up or pulling it back tightly, especially in the first few days.
Discomfort is not normal and should always be addressed as soon as possible.
3. Visible Weft or Poor Blending
Sometimes, incorrect sectioning or insufficient top-layer coverage can cause wefts to show, especially when styling the hair up or back.
What to do:
Make sure enough natural hair is left out on the crown and sides to fully cover the weft.
Use texturizing or thinning shears to blend layers if the weft appears bulky.
Consider styling tricks like teasing, light curling, or using volumizing powder to help blend and conceal attachment points.
Proper sectioning and strategic placement during install are key to avoiding visibility issues.
Conclusion
Genius Weft Hair Extensions offer a discreet, lightweight, and long-lasting solution for anyone looking to enhance their natural hair. With their ultra-thin, customizable design, Genius wefts lay flat against the scalp and blend effortlessly—making them one of the most undetectable extension options available today.
Whether you choose to install them yourself at home or visit a professional stylist, it’s important to understand the technique and tools involved. While DIY installation is possible with the right tools, knowledge, and patience, we always recommend seeking out a certified stylist for the best results—especially if you’re new to weft extensions. A professional can assess your hair type, ensure correct placement, and tailor the blending for a flawless finish.
Once installed, the key to long-lasting wear is regular maintenance and proper aftercare. From using sulfate-free shampoos to protecting your hair while you sleep, these small habits make a big difference in how your extensions look and feel over time. Repositioning every 6–8 weeks helps prevent damage to your natural hair and keeps the wefts sitting securely and invisibly.
In short, Genius Weft extensions are a smart investment in both beauty and confidence. With thoughtful installation and ongoing care, they can elevate your everyday look while remaining virtually undetectable. Whether you're adding volume, length, or simply looking to switch up your style, Genius Wefts provide the perfect balance of subtlety and strength.